
Managing Raspberry Pi Device
To manage the Raspberry Pi Device, do the following:
- Log into the eG admin interface.
- Follow the Components -> Add/Modify menu sequence in the Infrastructure tile of the Admin menu.
-
In the Add Components page that appears next, select Raspberry PI Device as the Component type. Then, click the Add New Component button. This will invoke Figure 1.
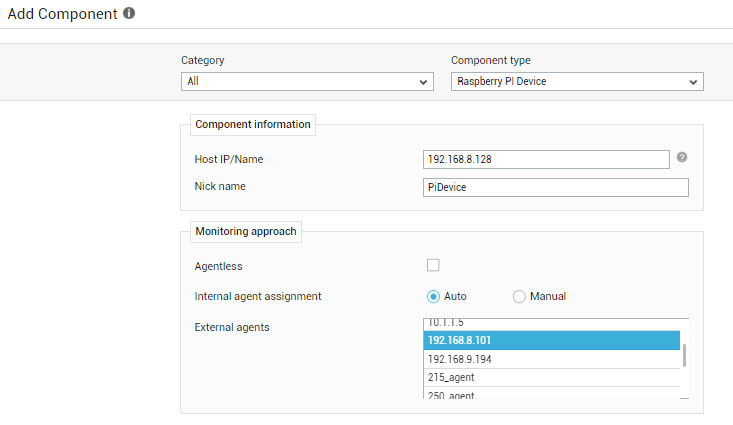
- Specify the Host Name and Nick name for the Raspberry Pi Device.
- Select the Internal Agent Assignment type as 'Auto' or 'Manual'.
- Next, assign a External Agent to the component.
- Finally, click the Add button to add the Raspberry Pi Device to the eG Enterprise system. Components manually added will be automatically managed by eG Enterprise.
Configuring Tests
Once the Raspberry Pi Device is managed, try to do the following:
- Follow the Components -> Add/Modify menu sequence in the Infrastructure tile of the Admin menu.
-
Select the Show managed component types only check box and then select the Raspberry PI Device component under Component Type list box. Then, the record appears in the grid as shown in Figure 2.

-
Select the Configure Tests icon as shown in Figure 2 in the grid to configure the tests mapped for the component. This will invoke Figure 3 listing all the configured tests for the Raspberry Pi System.
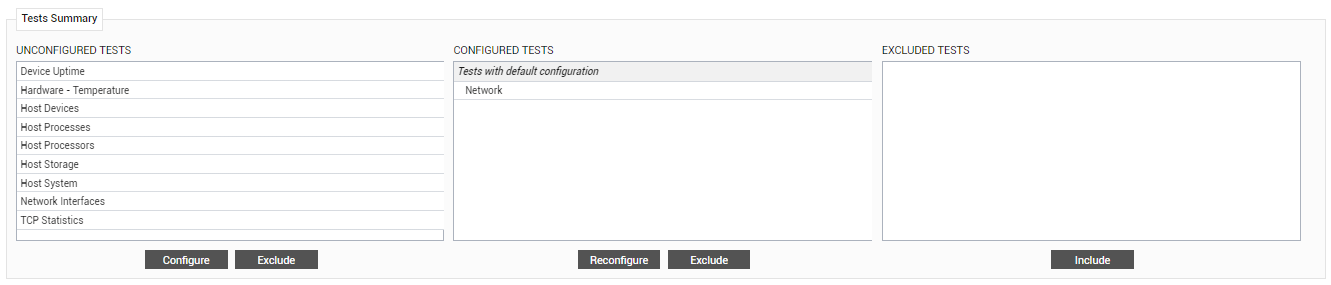
Figure 3 : The list of unconfigured tests for the Raspberry Pi Device
Click on any test to configure it and sign out of the eG admin interface.
Since the tests mapped to the Raspberry Pi Device component are discussed in Monitoring Unix and Windows Servers document, they will not be discussed again here.
