Installing the Microsoft Graph App On Microsoft Azure Active Directory
To achieve this, follow the steps detailed below:
-
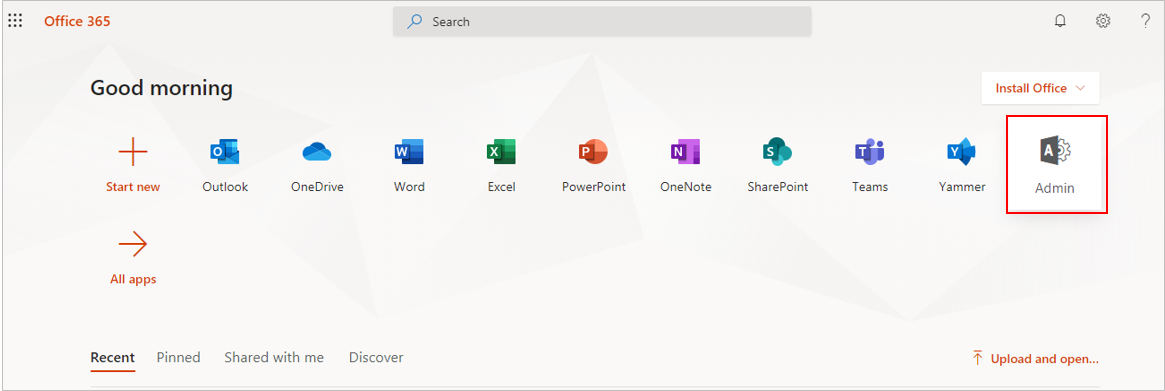
Login to the Office 365 portal as a Global Administrator and click on the Admin option within (see Figure 264).
-
When Figure 265 appears, browse the left panel of Figure 265 for the Admin Centers node. Expand the node and select the Azure Active Directory sub-node within.
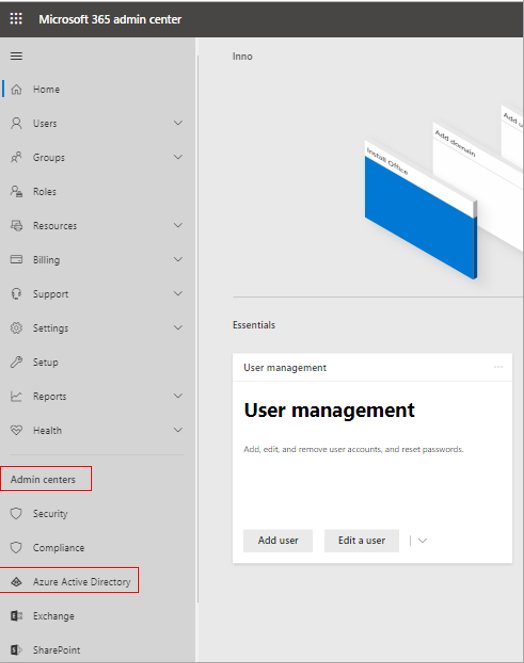
Figure 265 : Clicking on Azure Active Directory under Admin Centers
-
Figure 266 then appears. Select Azure Active Directory from the list of FAVORITES in the left-most panel of Figure 266. Then, from the App Registrations list for Azure Active Directory, select App registrations to register the Microsoft Graph app.
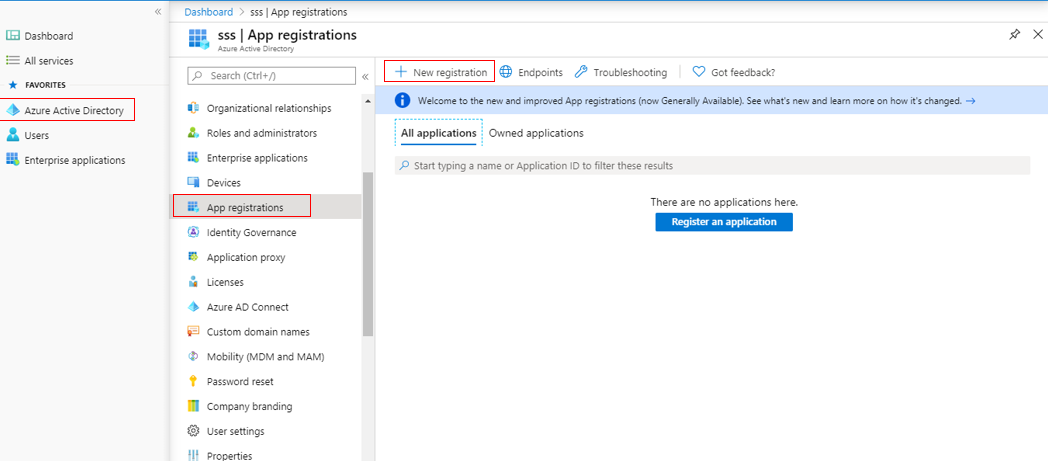
Figure 266 : Selecting the App registrations option to register a new app on Azure AD
-
Figure 267 then appears, using which you can register the Microsoft Graph app. In the Name text box, specify the display name of the app you intend to register. Make sure you copy this name to notepad. Then, from the drop-down in the Redirect URI section, select Web. In the text box adjacent to the drop-down, specify the URL to which the authentication response needs to be returned after successfully authenticating users to the new app. Make sure that this URI ends with 'my-sharepoint' - eg., https://myapp.com/my-sharepoint. Finally, click the Register button in Figure 267 to register Microsoft Graph on Azure AD.
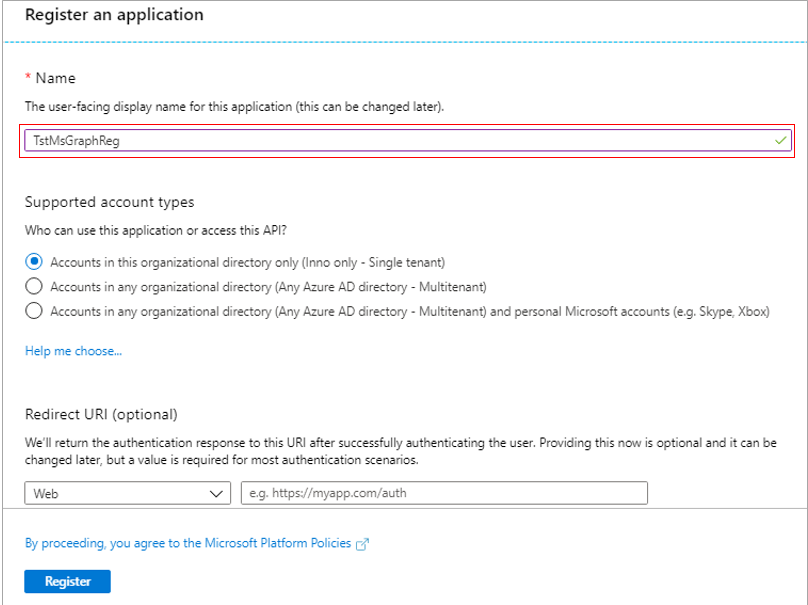
Figure 267 : Registering the Microsoft Graph app on Azure AD
-
Upon successful app registration, Figure 268 will appear displaying a message to that effect. Additionally, Figure 268 will display the Application (client) ID that is auto-generated and auto-assigned to the Microsoft Graph app. Make sure you copy this ID also to notepad.
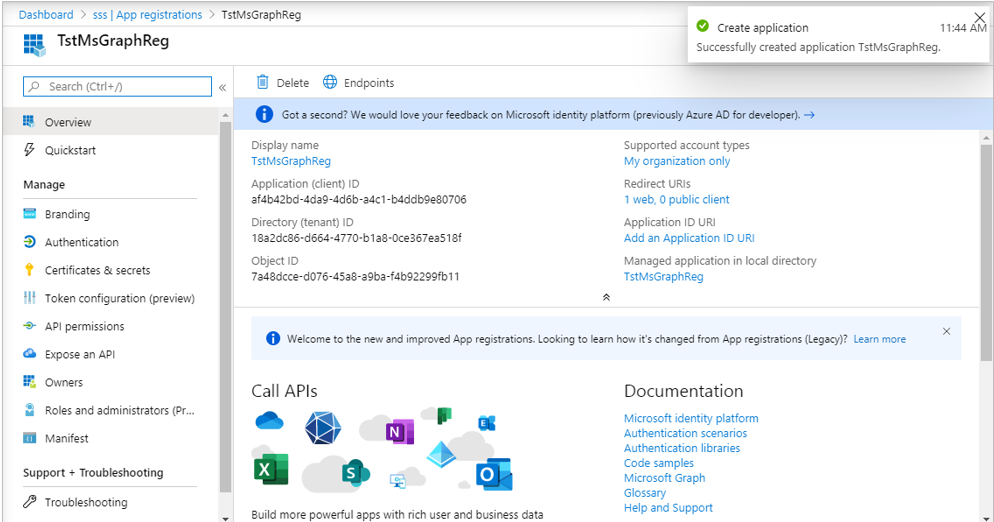
Figure 268 : Viewing and making a note of the Application ID of the Microsoft Graph app
-
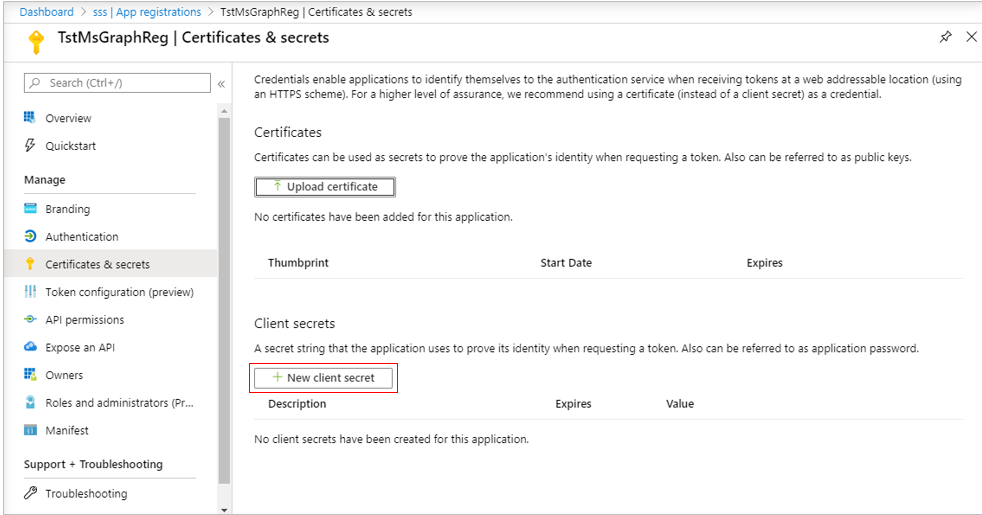
Next, proceed to create a secret for the new app. To achieve this, click on the Certificates & Secrets option under Manage in the left panel of Figure 268. Figure 269 will then appear. Now, click on the New client secret button in the Client Secrets section in the right panel of Figure 269.
-
When Figure 270 appears, provide a Description for the new secret, set it to Never expire, and click the Add button to add the new secret.
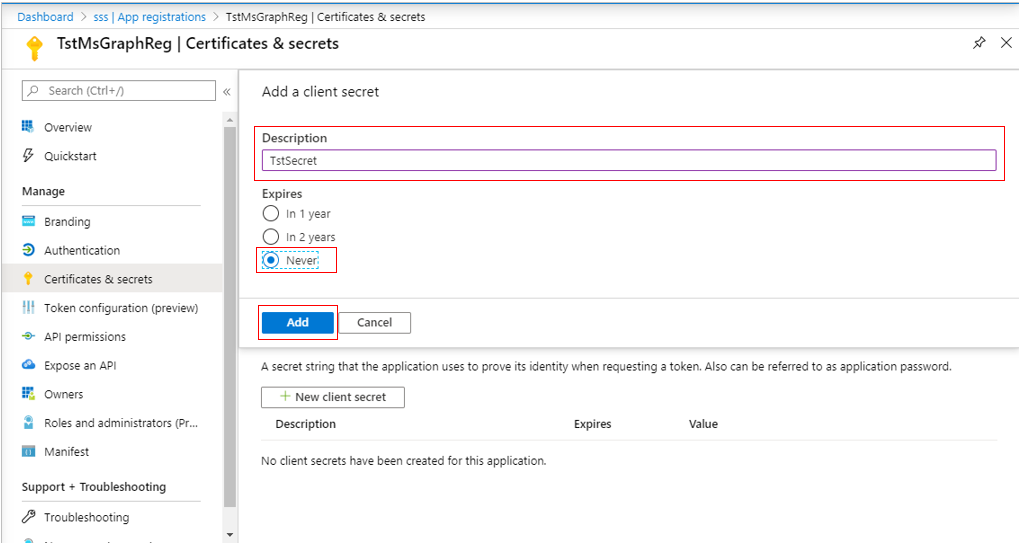
Figure 270 : Creating a new secret for the Microsoft Graph App
-
Once the new secret is successfully created, a key will be generated for it, as depicted by Figure 271. Make a note of this key in notepad.
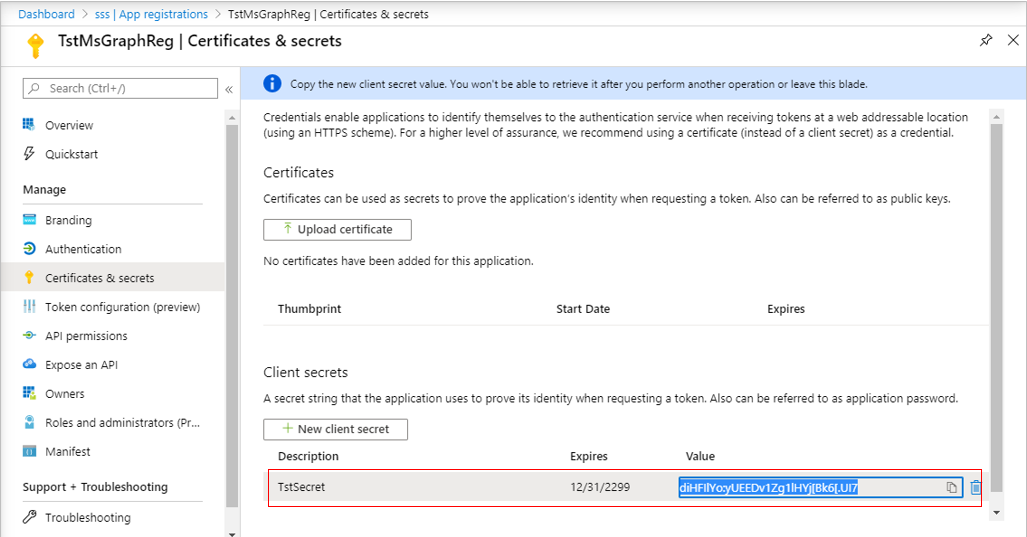
Figure 271 : The key that is generated and assigned to the client secret of the Microsoft Graph app
-
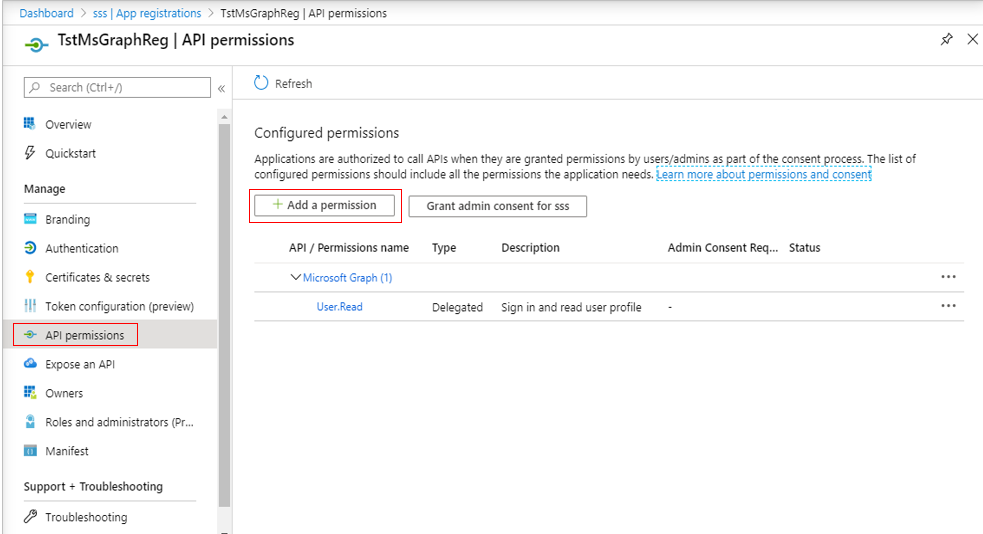
Next, proceed to grant permissions to the Microsoft Graph app, so it can pull the desired metrics. For this, click on the API permissions option under Manage in the left panel of Figure 271. This will invoke Figure 272. In the right panel of Figure 272, click on the Add a permission button.
-
Then, click on Office 365 Management APIs in the Request API Permissions window that appears (see Figure 273).

Figure 273 : Selecting the Office 365 Management APIs option
-
When Figure 274 appears, click on Application permissions. Then, when the Permission tree appears below, expand the ServiceHealth node and select the ServiceHealth.Read option to assign that permission to the Microsoft Graph app. This will allow the Microsoft Graph app to read the service health information for your organization. Finally, click on Add permissions to add the chosen permission.
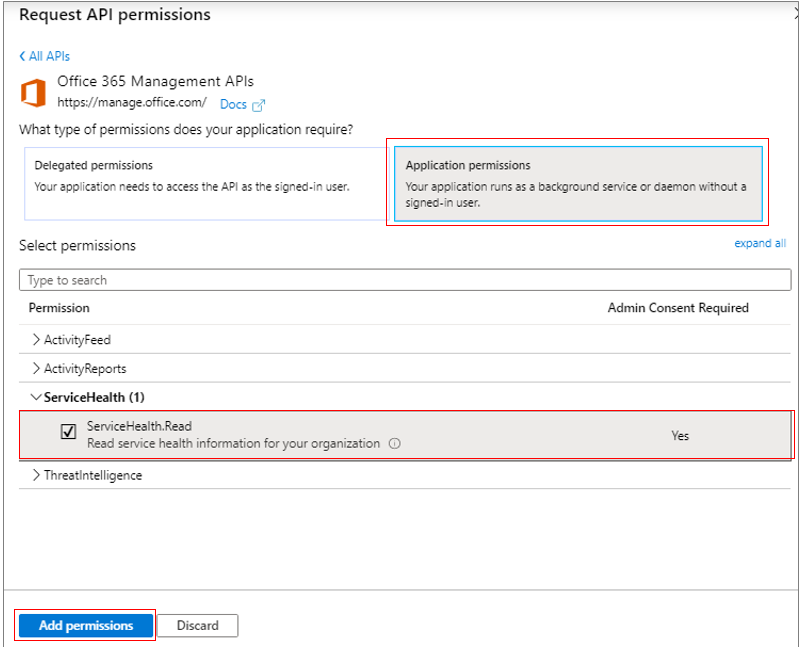
Figure 274 : Granting permission to the Microsoft Graph app to read service health
-
When Figure 275 appears, click on the Add a permission button again.
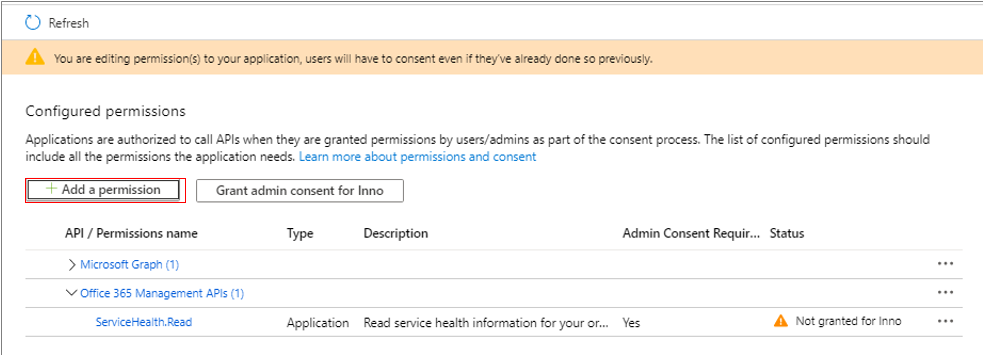
Figure 275 : Clicking on the Add a permission button again to add permission to read from and write to user files
-
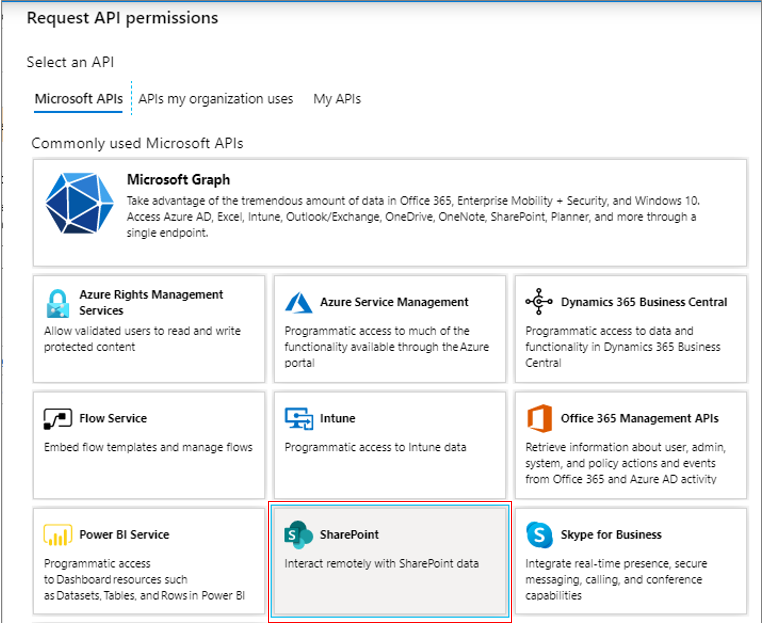
From Figure 276 that then appears, select the SharePoint option.
-
Then, select the Delegated permissions option from Figure 277, expand the MyFiles node in the Permission tree, and check the MyFiles.Read and MyFiles.Write check boxes within. Doing so will allow the Microsoft Graph app to read from and write to user files. As before, click the Add permissions button to add the chosen permissions to the Microsoft Graph app.
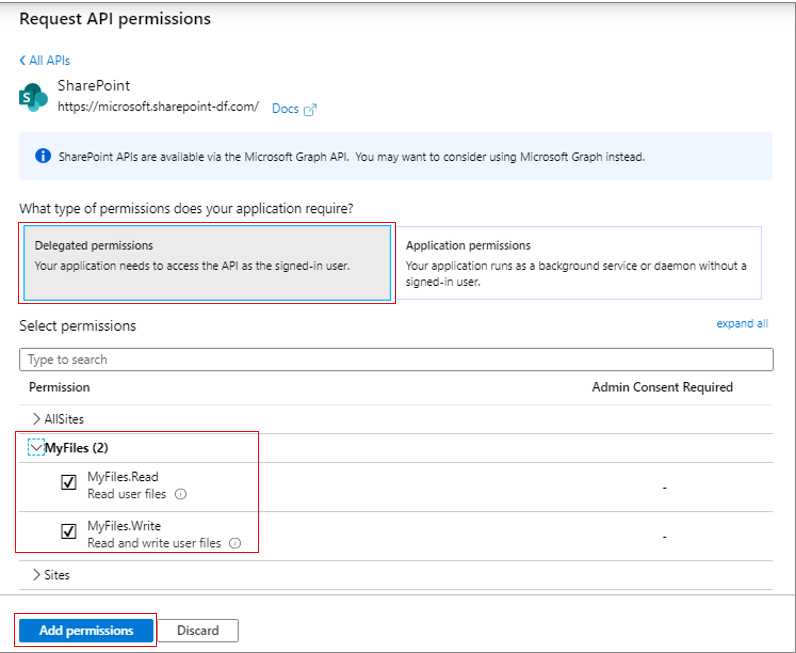
Figure 277 : Granting permission to Microsoft Graph app to read from and write to user files
-
You will now return to Figure 275. Once again, click on the Add a permission button therein to grant another permission to Microsoft Graph. When Figure 276 appears, select the SharePoint option yet again. Next, as depicted by Figure 278, select Application permissions, expand the Sites node in the Permission tree, and select the Sites.Read.All check box. Doing so will allow the Microsoft Graph app to read items in all site collections. Click on Add permissions in Figure 278 to add the chosen permission to Microsoft Graph app.
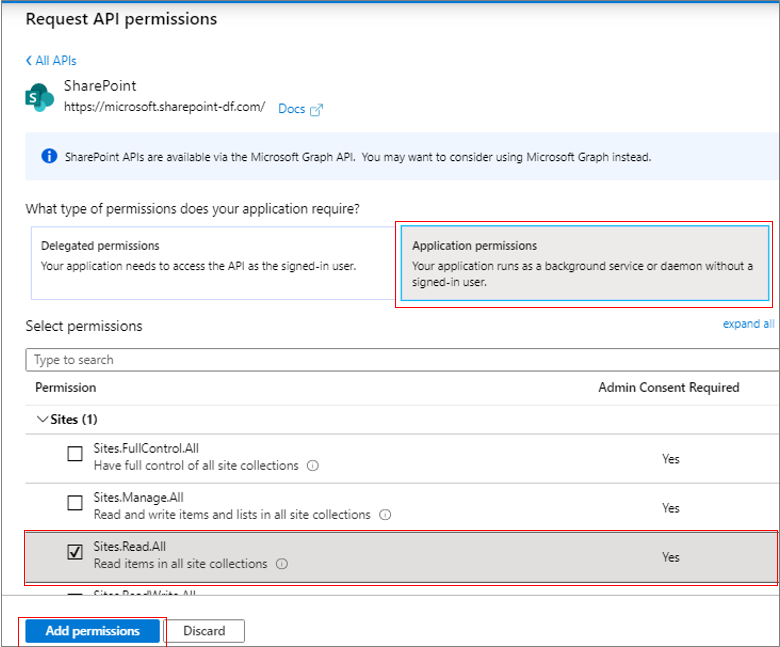
Figure 278 : Granting permission to Microsoft Graph app to read items in all site collections
-
You will once again return to Figure 275. Click on the Add a permission button therein. When Figure 279 appears, select the Azure Active Directory Graph option.
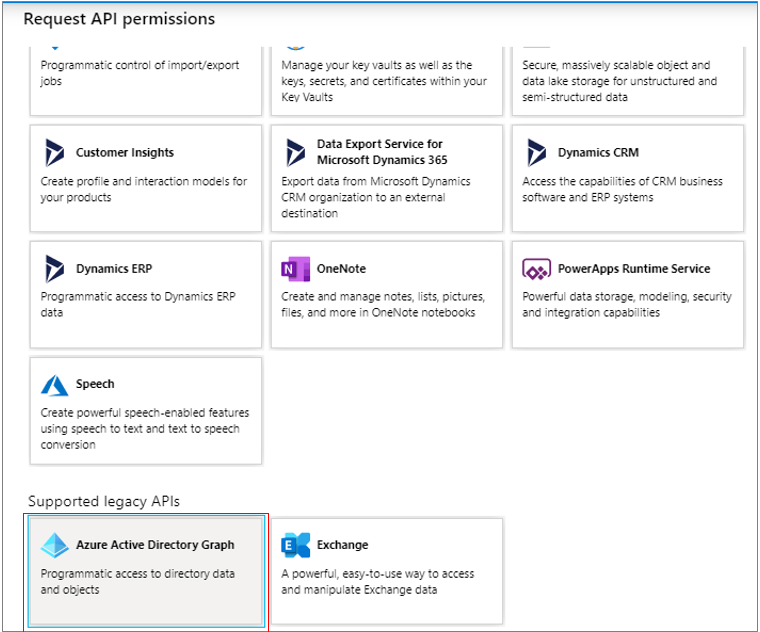
Figure 279 : Selecting the Azure Active Directory Graph option
-
From Figure 280, select Delegated Permissions. Then, expand the User node in the Permission tree, and select the User.Read check box. This will allow the Microsoft Graph app to sign in and read the user profile. As before, click the Add permissions button to grant the chosen permission to the Microsoft Graph app.
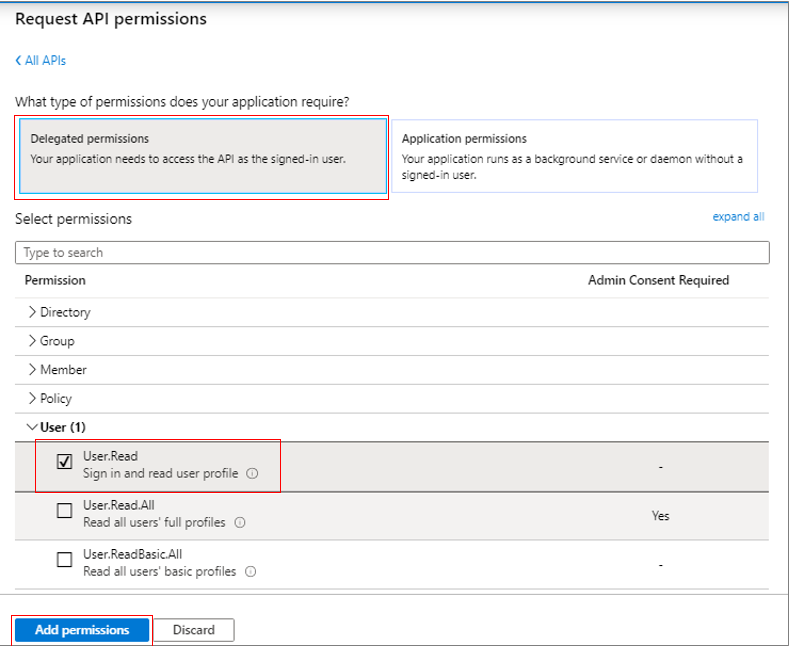
Figure 280 : Granting the Microsoft Graph app permission to sign in and read user profile
-
As soon as you return to Figure 275, click the Add a permission button yet again. This time, click on the APIs my organization uses tab page in the Request API permissions window of Figure 276. Scroll down the list of APIs that appears until the Microsoft Graph API comes into view. Choose this API.
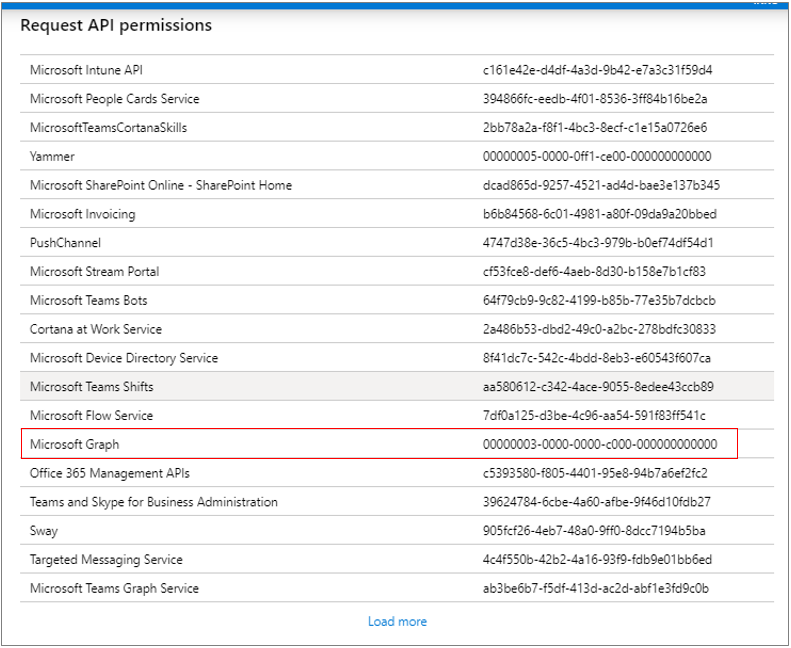
Figure 281 : Choosing the Microsoft Graph API
-
Next, expand the Group node in the Permission tree, and select the Group.Read.All check box within. This will allow the Microsoft Graph app to read all groups.
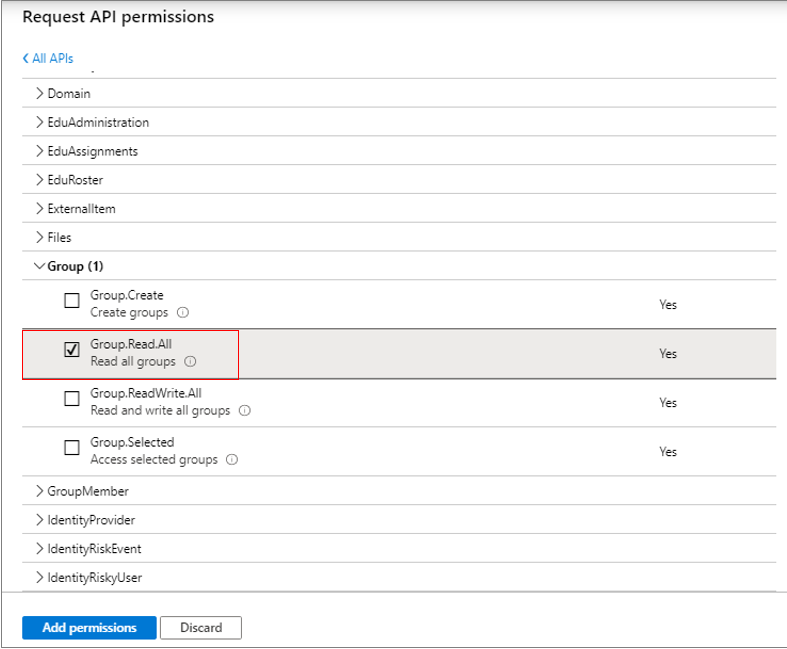
Figure 282 : Granting the Microsoft Graph app permission to read all groups
-
Next, expand the User node in the Permission tree, and select the User.Read.All check box within. This will enable the Microsoft Graph app to read the full profile of all users.
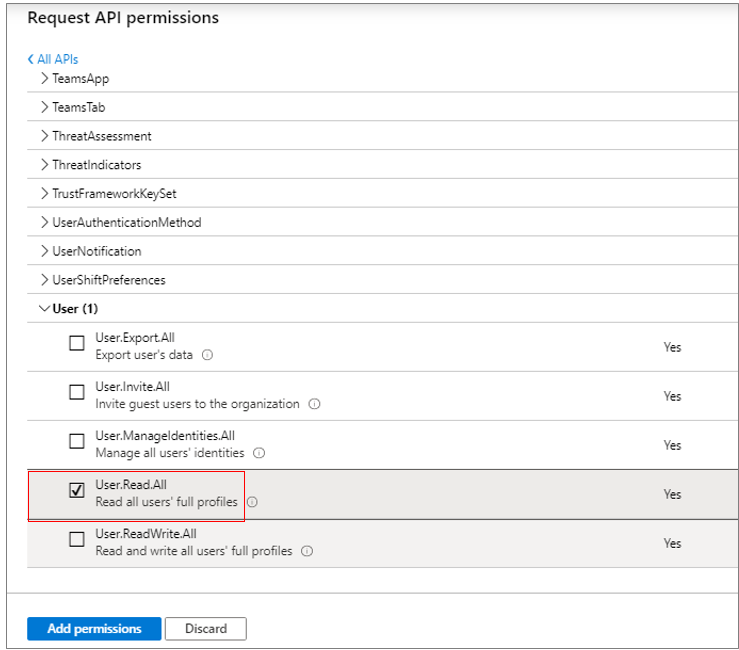
Figure 283 : Granting the Microsoft Graph app permission to read full profile of all users
-
Next, expand the Reports node in the Permission tree, and select the Reports.Read.All check box within. This will permit the Microsoft Graph app to read all usage reports.
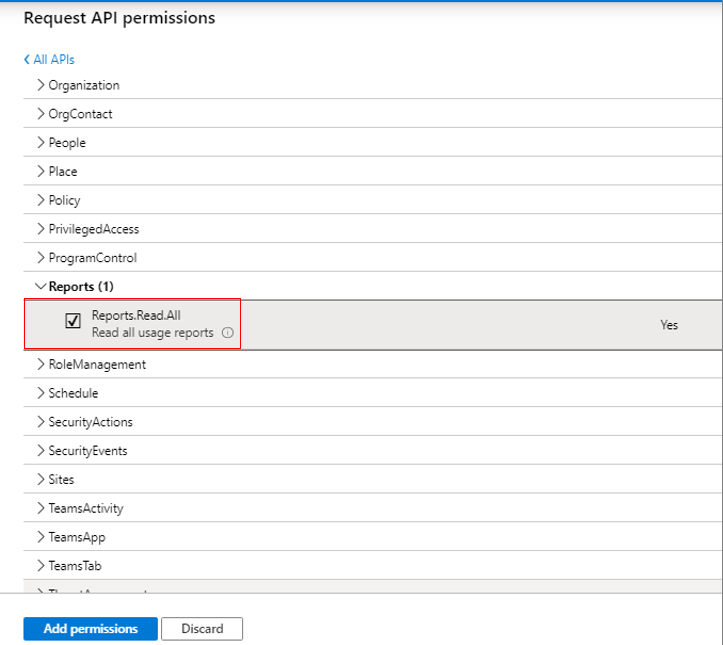
Figure 284 : Granting permission to the Microsoft Graph app to read all usage reports
-
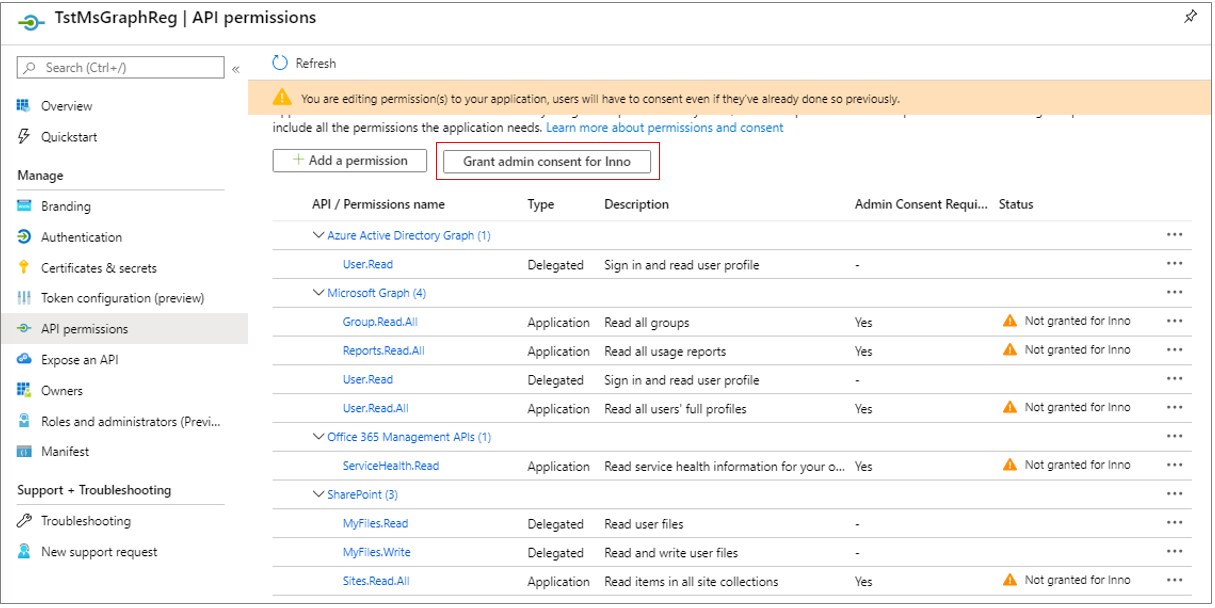
Finally, click the Add permissions button in Figure 284 to add all the chosen permissions to the Microsoft Graph app. When Figure 285 appears, click the Grant admin consent for <user> button therein to grant admin consent for the user.
-
Next, proceed to create a .dat file to which the details of the Microsoft Graph app - i.e., the app name, its client ID, and client secret - will be written. At run time, the eG agent reads the .dat file to know which app should be used for pulling metrics from Office 365. To create the .dat file, first, login to the eG agent host, Then, using Powershell ISE, execute the CreateGraphDat.ps1 command from the <EG_INSTALL_DIR>\lib\O365 directory. Upon successful command execution, the dialog box depicted by Figure 286 will appear.
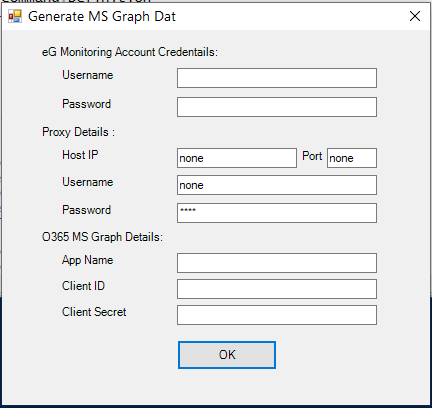
- In Figure 286, specify the Username and Password of the global administrator. If the eG agent will be communicating with Office 365 via a Proxy server, then configure the Host IP and Port number of the Proxy server. If the Proxy server requires authentication, then provide a valid Username and Password for the Proxy user. Then, in the O365 MS Graph Details section, mention the App name. This should be the same name you gave the app in step 4 above. Then, specify the Client ID and Client secret for the app. The Client ID should be the Application (client) ID you made a note of in step 5 above (see Figure 268). The Client secret should be the key that is generated and assigned to the client secret in step 8 above (see Figure 271). Finally, click the OK button.
- If the MS Graph Dat file is created successfully, a message to that effect will appear.