Building a Script File
To build the script file, do the following:
-
The first step towards building a script is to open a session using which the transactions can be recorded. To open a session, follow the menu sequence: Programs - >Itexis -> Session
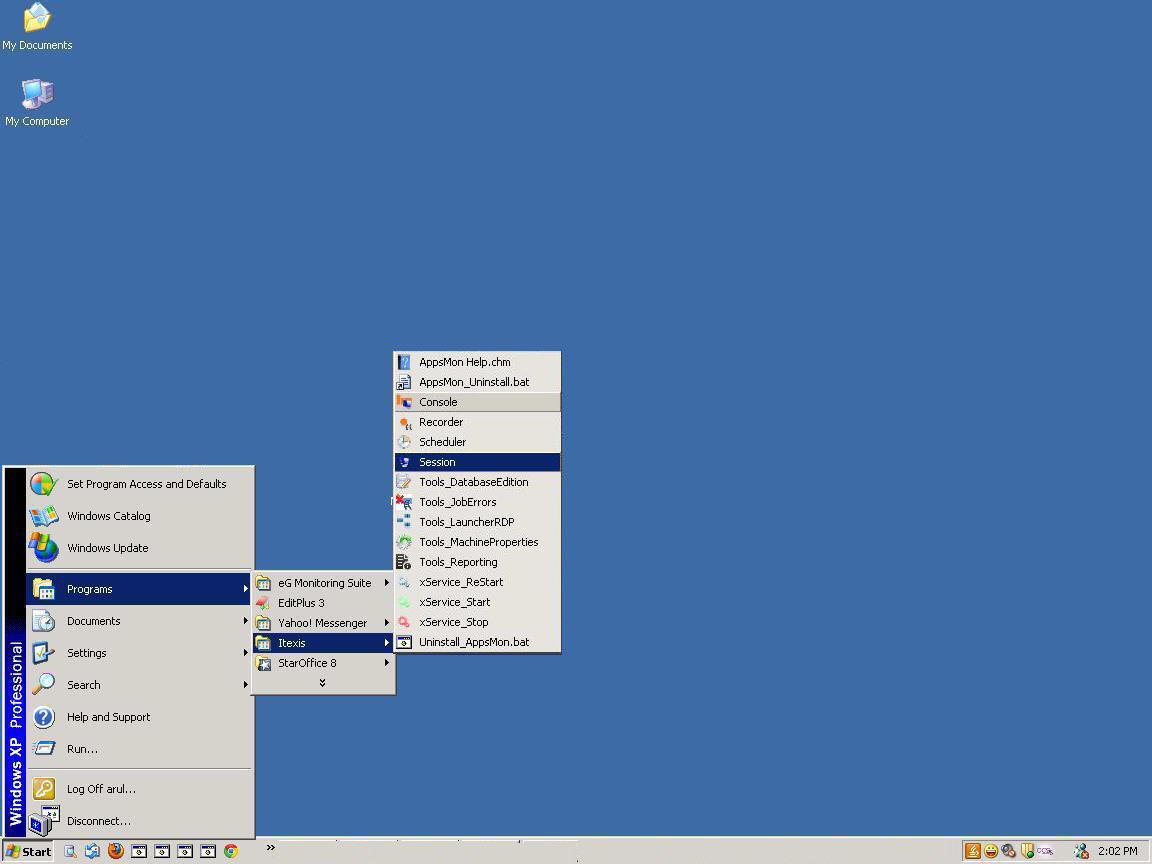
Figure 1 : Opening the Session
-
Once the Session window is opened, an
 icon appears on the system tray with a callout message stating Session Locked. In order to unlock this session, provide the credentials of a valid User and Password in the UnLock Session section (see Figure 2).
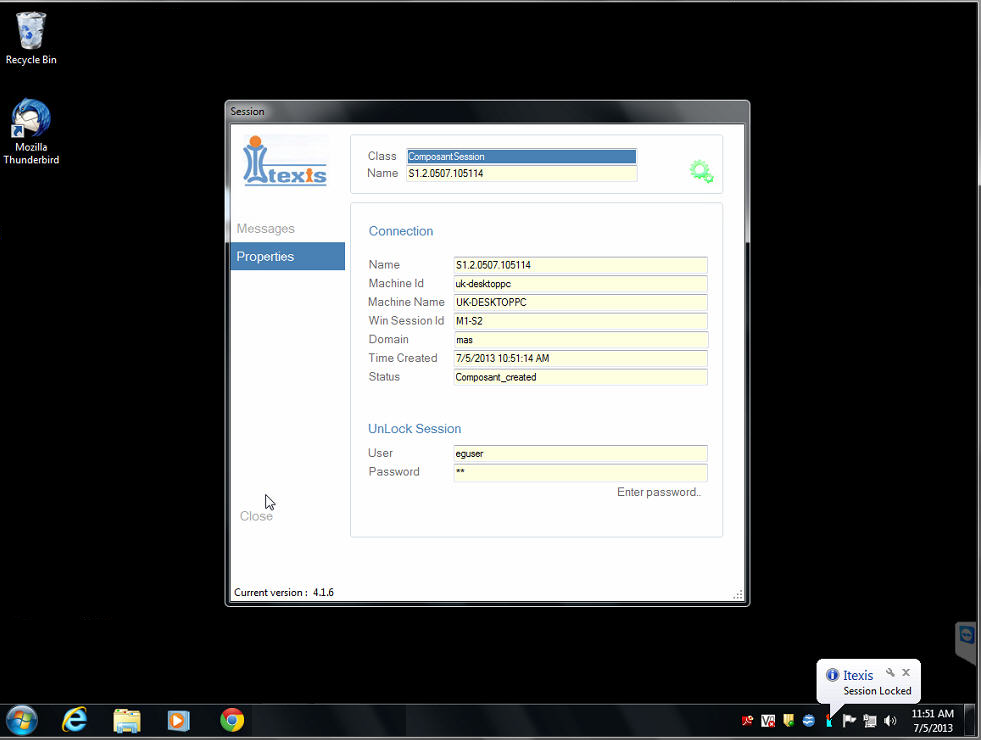
-
The Session window will then disappear and the callout message stating Session Unlocked will appear above the
icon.Note:
Initially, when the Session window is opened, you will be allowed to key in the user credentials alone. All other activities such as moving your mouse, clicking on the Start button, opening a browser etc, will not be allowed.
-
The second step towards building a script is to start the recording. To do so, right click on the
icon and select the Show Recorder option as shown in Figure 3.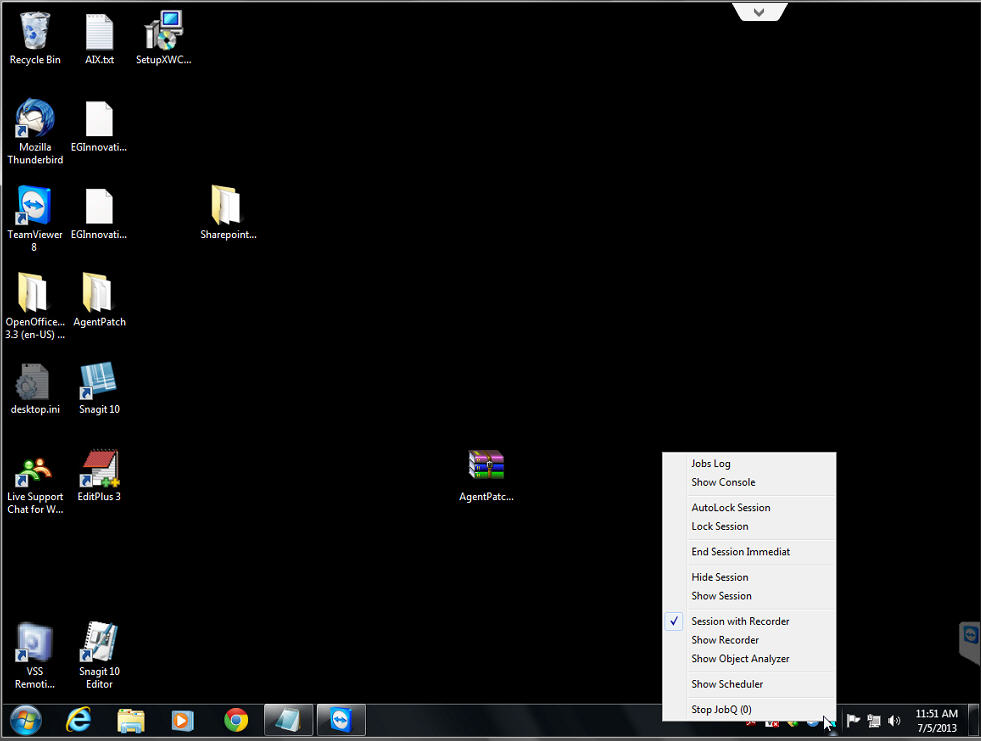
-
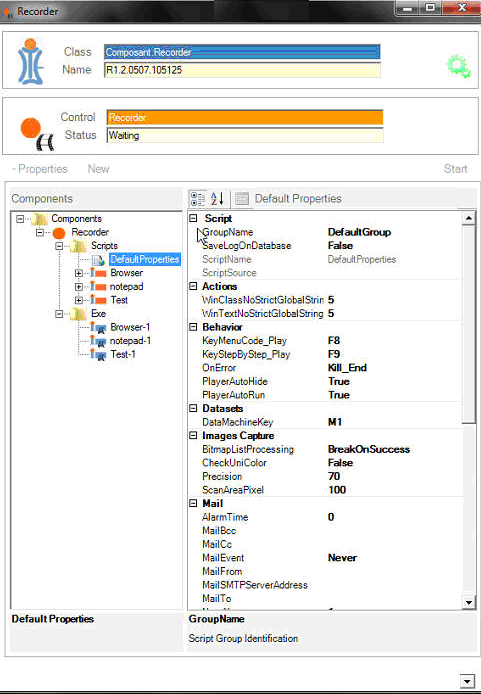
The Recorder window will then appear as shown in Figure 4. By default, the Recorder window consists of two sections - a Components section at the left and a context sensitive section at the right which by default, displays the Default Properties of the Scripts.
- To create a new script, either click the New option by right clicking the Scripts tree in the Components section or click New in the Recorder window as shown in Figure 4.
-
A New Script pop up window will then appear as shown in Figure 5. Here, enter the name of the Script that needs to be built and click OK.

-
The script thus created will be listed automatically under the Scripts folder of the Components section as shown in Figure 6.
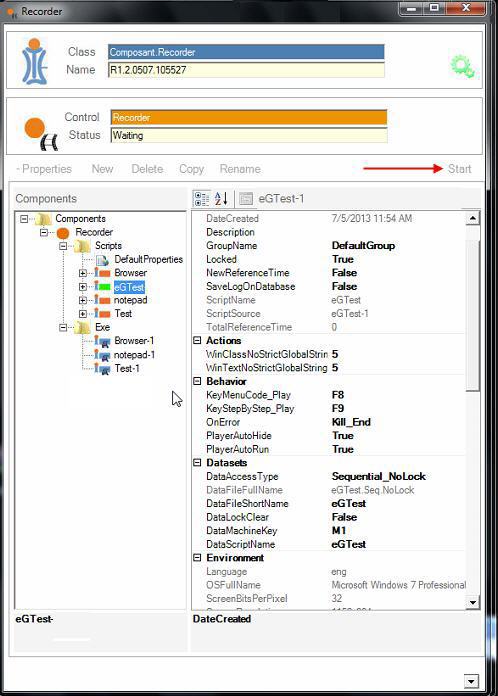
Figure 6 : Viewing the created Script
The next step towards building the script is to start the recording. The primary purpose of the recording is to start capturing the user transactions (as images or as text) that are to be emulated. Before commencing image capturing, it would help if you prepare a list of broad steps that need to be followed to access the application to be monitored. Before proceeding to the recording, let us be familiar with the keys that are commonly used during the recording process.
Key Control A valid key for e.g., F8
To access the Menu pop up window while recording(see Figure 9)
Tab
To navigate through the Bitmaps, OCR, Anchors..page
Enter
To validate the chosen option in the Menu pop up window
Escape
To unlock the current session
Arrow keys
To navigate across the options in the Menu pop up window
Note:
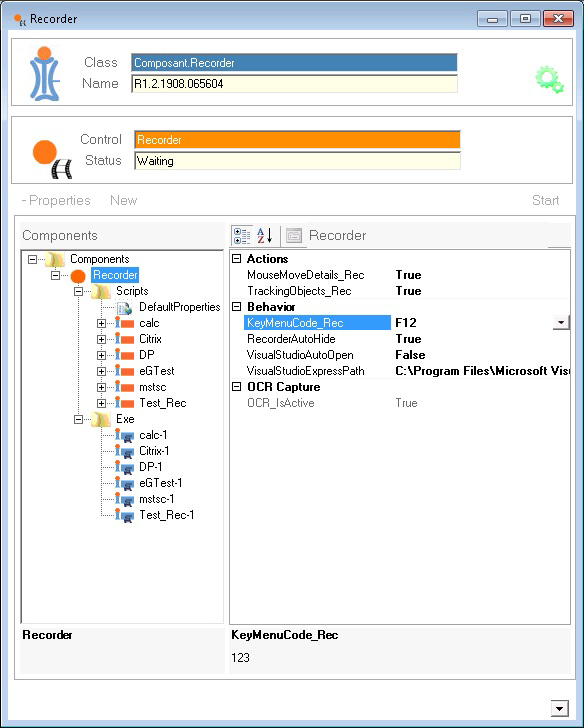
By default, the key used to access the Menu pop up window is configurable. To change the key as per your wish, do the following:
- Click on the Recorder option in the Components section of Figure 7.
- Edit the KeyMenuCode_Rec field with the key of your choice, say for example F12 in the context sensitive right section as shown in Figure 7.
- If the Microsoft SharePoint designer 2007 is successfully installed, then the OCR_Is Active field is by default, set to True as shown in Figure 7. This ensures you that the AppsMon for Windows is ready for capturing the transactions.
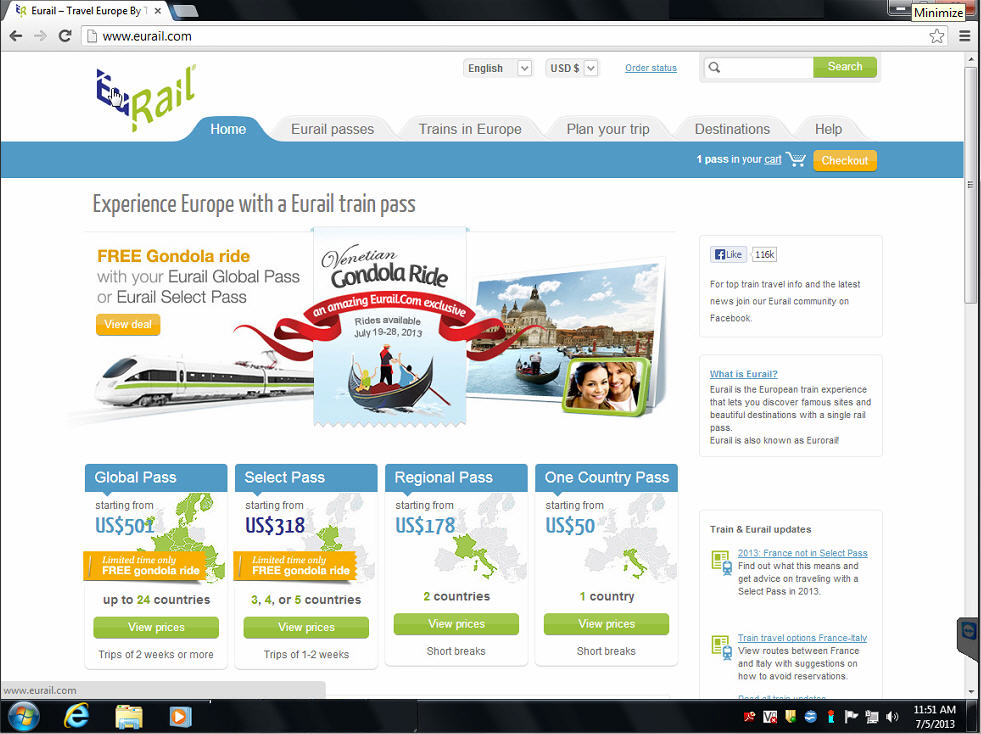
- Now, let us begin the recording by clicking the Start button in Figure 6. Since our example involves accessing the website: http://www.eurail.com/ (Europe Railways), the first step would be to open a browser through which the homepage of this website can be accessed.
- The Eurail home page will now be loaded successfully as shown in Figure 8.
-
Merely placing the mouse cursor on the EuRail logo will help you to capture the first transaction (see Figure 8).
-
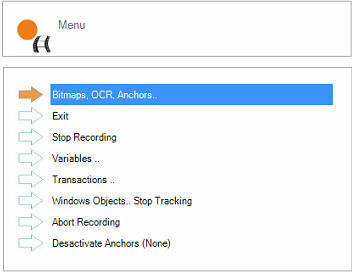
To save the transaction, access the Menu pop up window by pressing the F8 key. Figure 9 will appear.
-
By default, the Bitmaps, OCR, Anchors. option will be selected in the Menu pop up window (see Figure 9). Pressing the Enter key will lead you to the Capture Bitmap/OCR/Transactions page as shown in Figure 10.

- Figure 10 allows you to save the captured EuRail logo as a transaction. By default, the EuRail logo that is captured will appear in the Capture Bitmap section. This capture will be associated with the Shape option of the Capture Type section and the MouseMoveImage option of the Mouse Action section, by default. Typically, when you select the Shape option, the AppsMon for Windows recognizes the capture as an image and saves the capture in BMP format. Likewise, you can choose any of the option from Mouse Action section depending on your requirements to record a transaction.
- Alternately, if you select the OCR option from the Capture Type section, the AppsMon for Windows recognizes the capture as a text and automatically displays the captured text in the Value text box of the OCR section. Suppose if the capture is not successful, then instead of the captured text, Empty will be displayed in the Value text box. This way, you can identify that your capture was not successful and you can either capture the text once again or adjust the coordinates of the capture – i.e., in our case the EuRail logo by moving the ‘+’ or ‘-‘ keys in the Capture Bitmap section (see Figure 10).
- To save the captured EuRail logo as a transaction, enter the name of the transaction in the New Transaction Name text box of the Transactions section and press the Enter key.
-
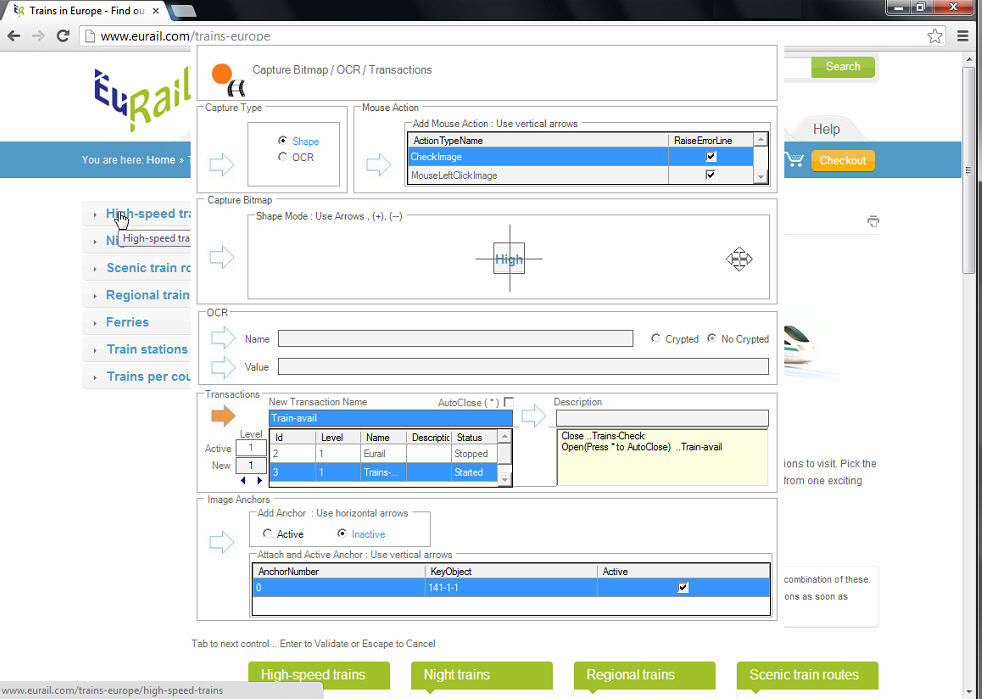
Next, capture the Trains in Europe link (see Figure 8) as your next transaction. Follow the steps 13 to 16 to save the captured transaction.
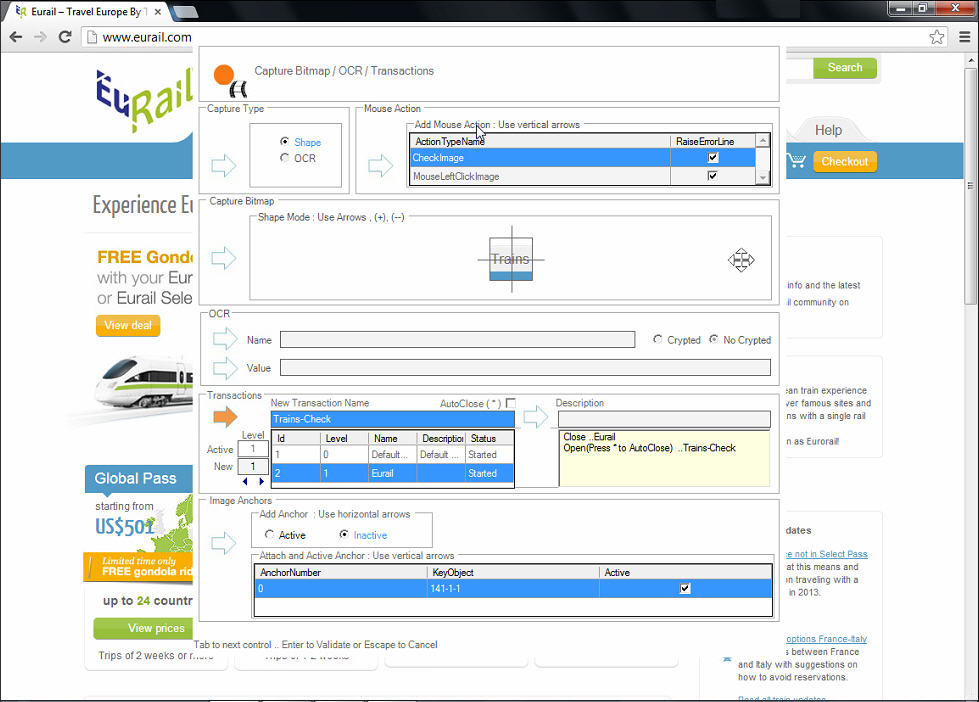
Figure 11 : Capturing the Trains in Europe link
-
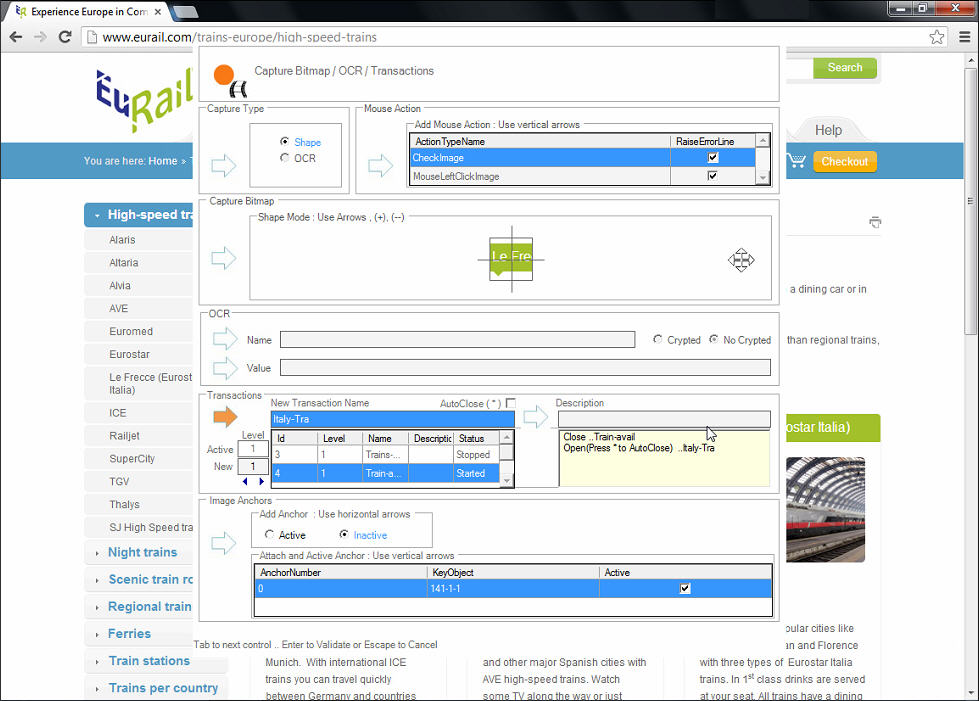
Next, try capturing the High-speed trains link as a transaction. To do so, follow the steps 13-16 described above (see Figure 12).
-
To find the high speed trains that operate in Italy, click on the Le Freece (Eurostar Italia) link. To capture this as your next transaction, follow the steps 13-16 above (see Figure 13).
-
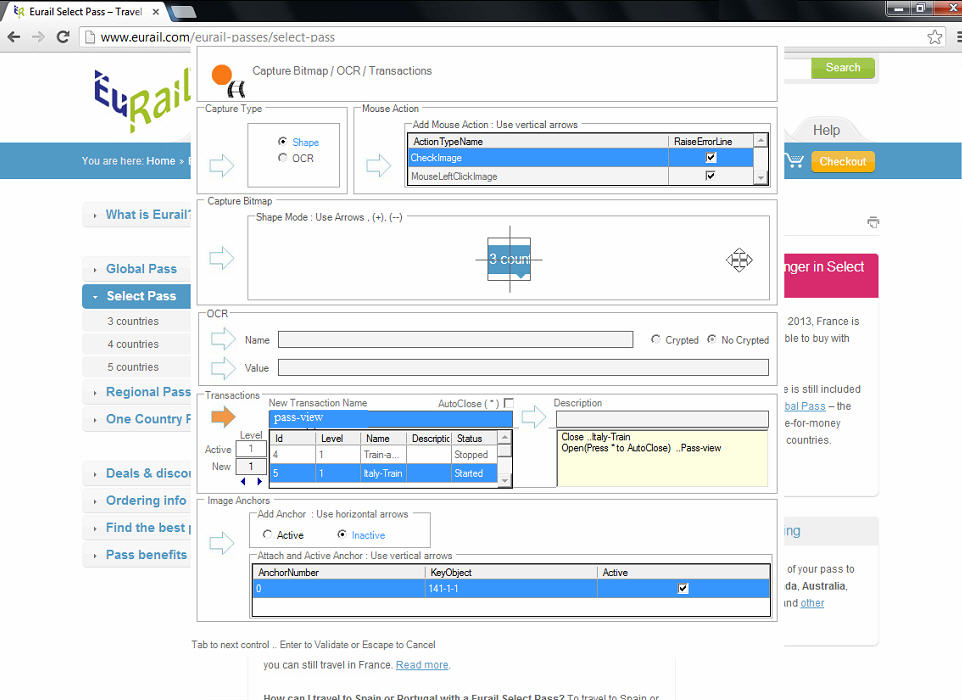
Now to view the pass price for travel, click on the Select Pass. To know the pass price for three different countries, click on the 3 countries link. To capture this as your next transaction, follow the steps 13 - 16 described above (see Figure 14).
- Finally, to know the deals and discounts available for travel to 3 countries, click on the Deals and discounts link. To capture this as your final transaction, follow the steps 13-16 described above and then close the browser (see Figure 15).
- Suppose if you wish to stop tracking certain delicate Windows objects like login credentials, passwords etc, during recording a transaction, you can do so by selecting the Windows Objects.. Stop Tracking option from the Menu pop up window (see Figure 9). Say for example, you are trying to log into a remote system whose credentials are strictly confidential. In such a case, provide the credentials and then invoke the Menu pop up window, select the Windows Objects.. Stop Tracking option and then try validating the credentials. Once the login is successfully validated, you can select the Windows Objects.. Start Tracking option from the Menu pop up window.
-
Once you have saved all the required transactions, you can stop the recording by selecting the Stop Recording option from the Menu pop up window that appears when you press the F8 key (see Figure 16).
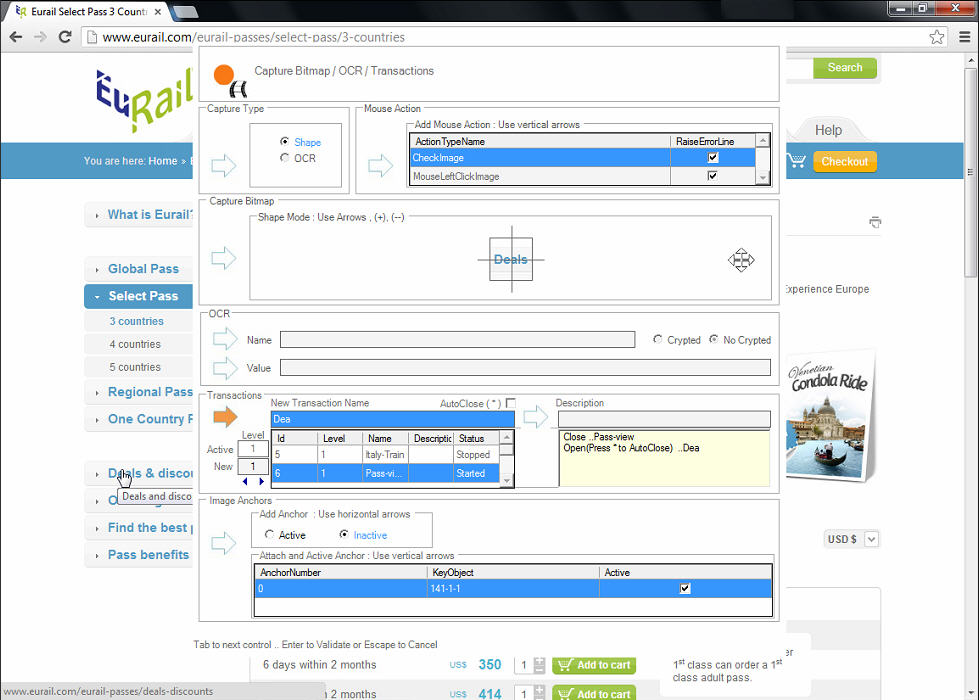
Figure 15 : Capturing the Deals and Discounts link

Figure 16 : Stopping the Recording
Once the recording is stopped, a callout message stating Session Hooked will appear above the
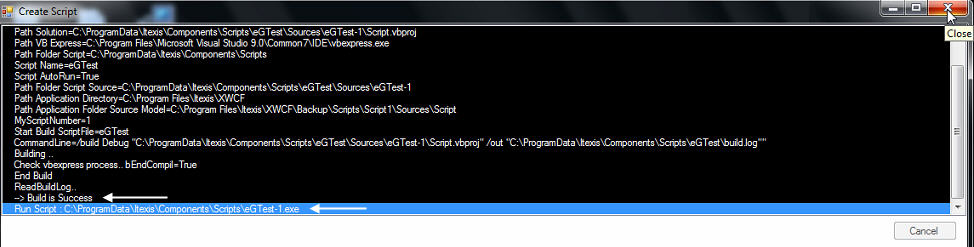
icon. A Create Script window will now appear which will start compiling the script automatically. Once the script has been built successfully, a message stating Build is Success will appear (see Figure 17) and an executable of the script will be created - in our example this will be eGTest-1.exe (see Figure 17).The script that is recorded will be stored in the following location:C:\Documents and Settings\All Users\Application Data\Itexis\Components\Scripts
- Now, the script will load automatically to open its corresponding Player window. Close the Player window and open the Recorder window by clicking the Show Recorder option (usually done by right clicking the icon).
-
The Exe tree available in the Components section will now list the executable that was just created i.e., eGTest- 1 as shown in Figure 18.

- Clicking on the executable eGTest-1 will load the script and lead you to the Player window. Click the Start button (see Figure 18) to start playing the recorded script.
-
During playback, if any of the transactions could not be completed due to reasons like say for e.g., the image captured is disoriented from its original location or removed, the script will abort and stop immediately. An error message as shown in Figure 19 will then appear.
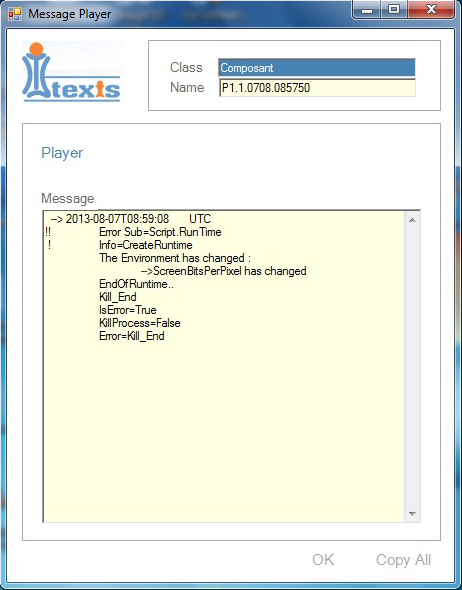
Figure 19 : The error message displayed in the Player window
-
Once the script is successfully played back, a dialog box displaying the reference time or the total time taken to emulate the transactions will appear. Save the reference time for the script (see Figure 20) by clicking the Yes button and close the player window.
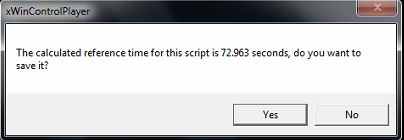
Figure 20 : The calculated reference time for the script
-
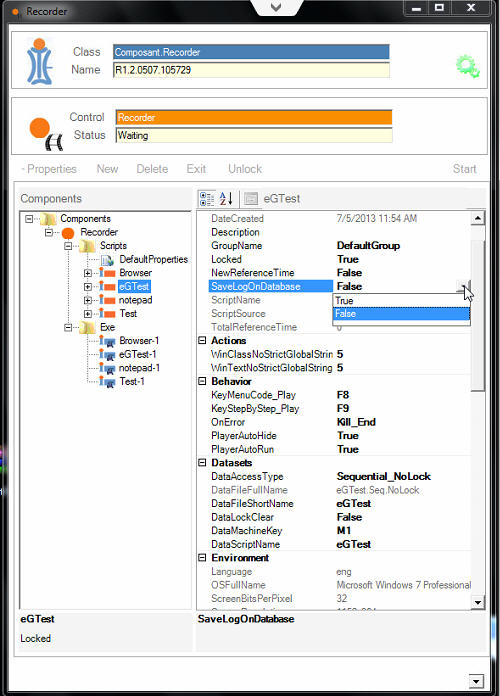
By default, the logs created while emulating the transactions will not be stored in the database. To save the logs in a particular location of the database, say for e.g., XWCF_Logs, then set the Savelogondatabase for the chosen script to False as depicted in Figure 21. The logs will now be successfully stored in the following location of the database: C:\Documents and Settings\All Users\Application Data\Itexis\JobQ\M1\XWCF_Logs
Note:
The logs will not be stored in your desired location immediately after the Savelogondatabase option is set to False. Instead, the script should be played back once successfully and from the next execution of the script, the logs will be stored in the chosen location which could then be used for client emulation.
- The script that is generated using the AppsMon for Windows, will be integrated with the eG client emulation tool using the path of the Log and Script files. The eG client emulation tool checks the response time and availability of the component and reports to the client.