Applying an Atlassian Plugin to RUM-Enable Confluence
If, for some reason, the RUM code snippet cannot be directly inserted into the Velocity template file, then, use the broad steps outlined below to RUM-enable Atlassian Confluence:
- Download the egrum.jar and include it in the classpath of Atlassian Confluence.
- Upload the specialized plugin for Atlassian that eG Enterprise provides. This plugin includes a reference key/pointer to the egrum.jar .
- Edit the Velocity template file, so that this reference key/pointer can be added to the Confluence velocity context. Once this is done, the Velocity template file will reference the egrum.jar using the key in the Atlassian plugin, dynamically generate the RUM script, and inject the script into the HTML pages.
The detailed procedure is provided below:
- First, download the egrum.jar file to system hosting Atlassian Confluence. For this, login to the Confluence host. Then, connect to the eG manager using a browser, and login to the eG administrative interface. Next, add the Confluence site to be monitored as a Real User Monitor component (Infrastructure -> Components -> Add/Modify).
-
Once the component is added, click the egrum.jar link in Figure 1 that appears, to download the jar file to any location on the local host.
.png)
- Then, copy the egrum.jar to the <CONFLUENCE_INSTALL_DIR>\Atlassian\Confluence\lib directory.
- Next, open the catalina.bat file in the <CONFLUENCE_INSTALL_DIR>\Atlassian\Confluence\bin directory, using an editor.
-
Look for the following code block in the file:
%_EXECJAVA% -classpath "%CATALINA_HOME%\lib\catalina.jar" org.apache.catalina.util.ServerInfo
-
To add the egrum.jar to the classpath, you need to replace the above code block with the following:
%_EXECJAVA% -classpath "%CATALINA_HOME%\lib\catalina.jar" "%CATALINA_HOME%\lib\egrum.jar" org.apache.catalina.util.ServerInfo
- Save the file, and then restart Atlassian Confluence.
-
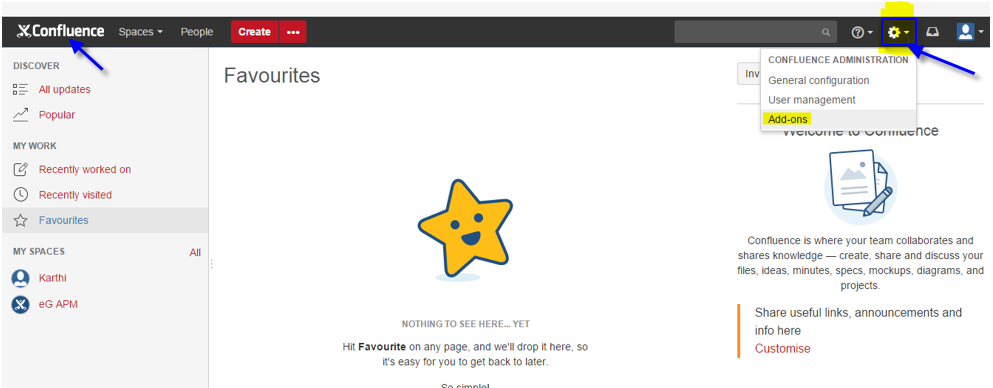
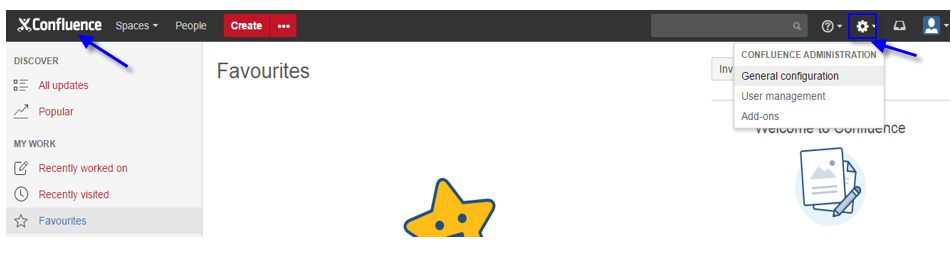
Next, proceed to upload the Atlassian plugin that has been bundled into the eG manager to Confluence, as an add-on. For this, first, login to Atlassian Confluence. When Figure 2 appears, click on the Confluence logo at the left, top corner of the window to view the toolbar. Then, click on the Gear icon on the toolbar and pick the Add-ons option.
-
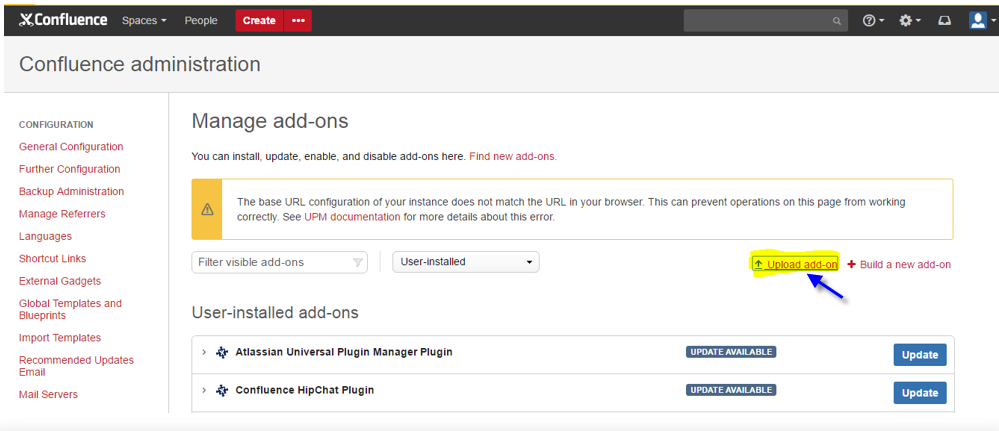
Figure 3 then appears. Click on the Upload add-on link in Figure 3.
-
Figure 4 will then appear. Click the Choose File button therein to browse for the add-on named, egrum-atlassian-plugin.jar, and specify its location. This add-on will be available in the <EG_MANAGER_INSTALL_DIR>\lib\rum directory.
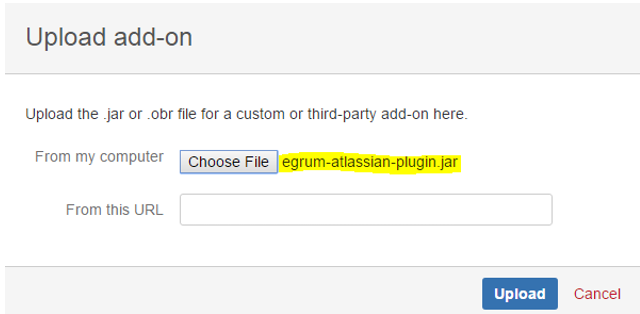
- Click the Upload button in Figure 4 to upload the add-on.
-
Once the upload is successful, Figure 5 will appear informing you of the successful upload.
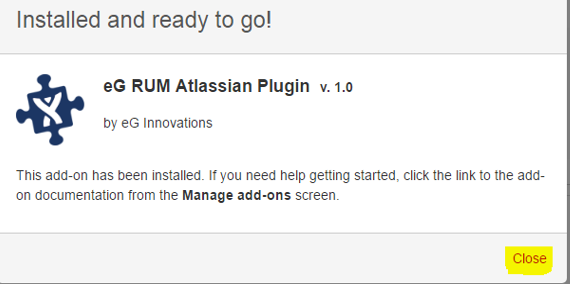
- Click the Close button in Figure 5 and log out of Confluence.
- Next, proceed to edit the Velocity template file. For that, open the <CONFLUENCE_INSTALL_DIR>\Atlassian\Confluence\confluence\decorators\includes\header.vm file in an editor.
-
Insert the following line in the header.vm file, after the meta tags, as indicated below:
#set($eGRumScriptAsHtml = $eGRum.getHeader())$eGRumScriptAsHtml
- Save the file.
- Next, proceed to flush all page caches. For this, first, login to Atlassian Confluence.
-
When Figure 6 appears, click on the Confluence logo at the left, top corner of the window to view the toolbar. Then, click on the Gear icon on the toolbar and pick the General configuration option.
-
When Figure 7 appears, click on the Cache Management option in the left panel.

-
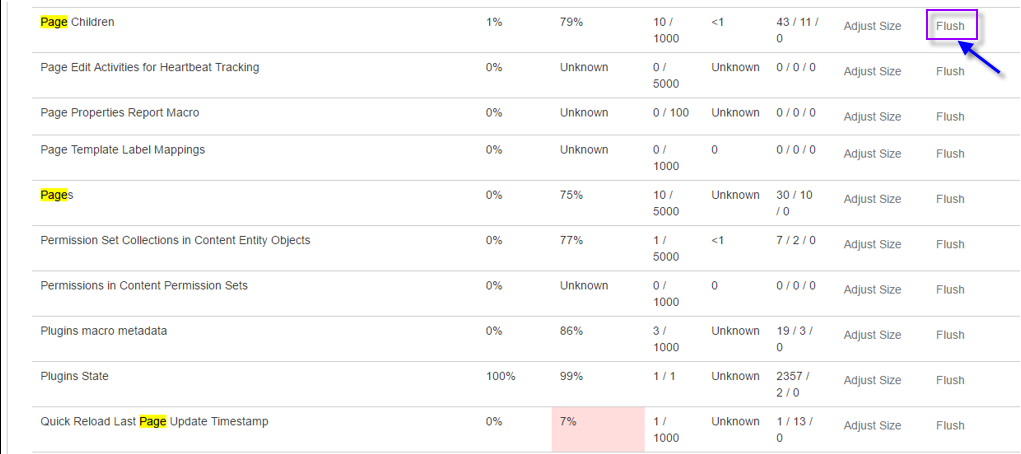
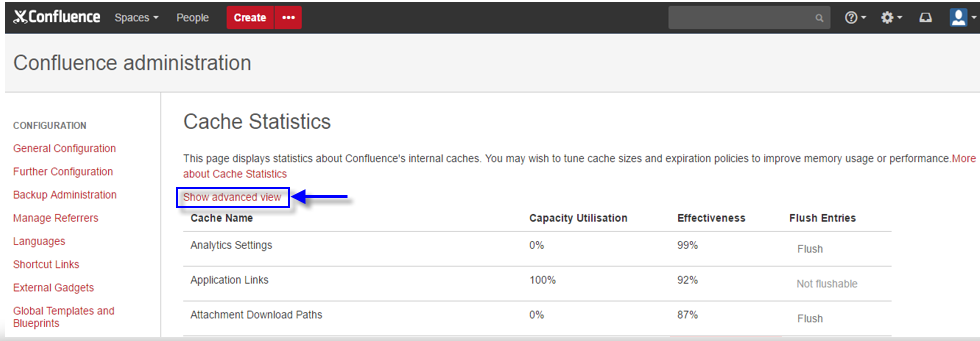
Then, click on the Show advanced view option in the Cache Statistics page that appears in the right panel (see Figure 8).
-
To flush the page caches, click the Flush links that correspond to all page-related caches (see Figure 9).