Editing the Velocity Template to RUM-Enable Confluence
Velocity is a server-side template language used by Confluence to render page content. Velocity allows Java objects to be called alongside standard HTML.
To RUM-enable the Confluence pages, you should modify the velocity template, so that it includes the RUM code snippet. The template will then automatically inject the code snippet is every page it renders.
The detailed procedure for this is as follows:
- The first step is to copy the RUM script to be injected. For this, login to the eG administrative interface and add a Real User Monitor component using the Add/Modify page (Infrastructure -> Components -> Add/Modify).
-
Once the component is added, the RUM script that should be included in the responses will be displayed. Copy this script to a text file. Note that this code snippet is case-sensitive. It is therefore recommended that you copy the code as is to the text file, instead of manually retyping it.
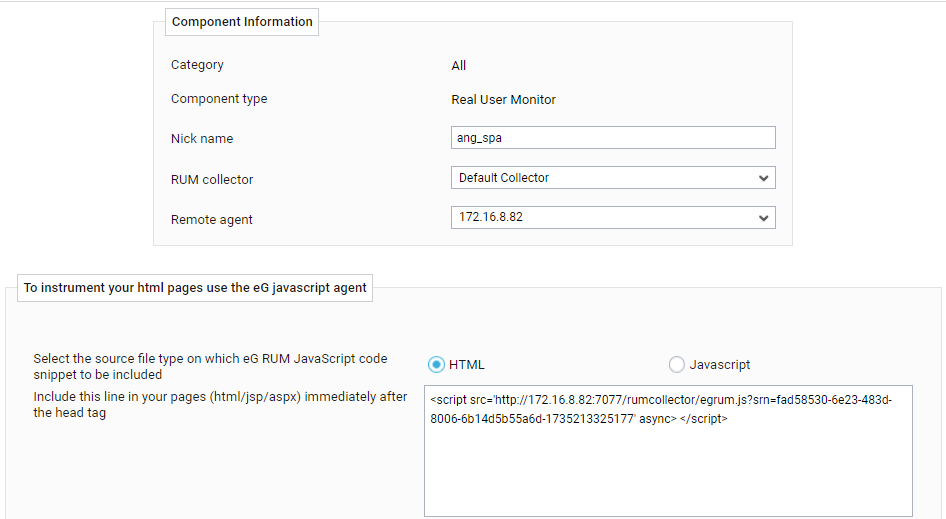
Figure 1 : The RUM script that is to be injected into the HTTP responses
- Edit the <CONFLUENCE_INSTALL_DIR>\Atlassian\Confluence\confluence\decorators\includes\header.vm file.
-
Insert the RUM code snippet in the text file to the header.vm file, after the meta tags.
- Save the file.
- Next, proceed to flush all page caches. For this, first, login to Atlassian Confluence.
-
When Figure 2 appears, click on the Confluence logo at the left, top corner of the window to view the toolbar. Then, click on the Gear icon on the toolbar and pick the General configuration option.
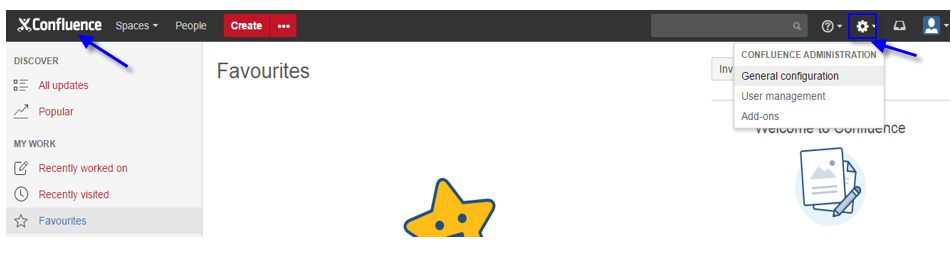
Figure 2 : Selecting the General Configuration option
-
When Figure 3 appears, click on the Cache Management option in the left panel.

-
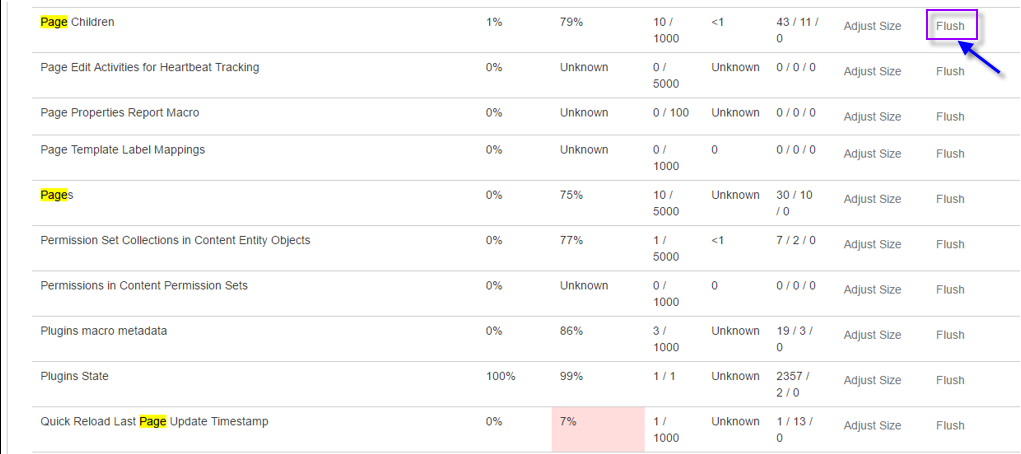
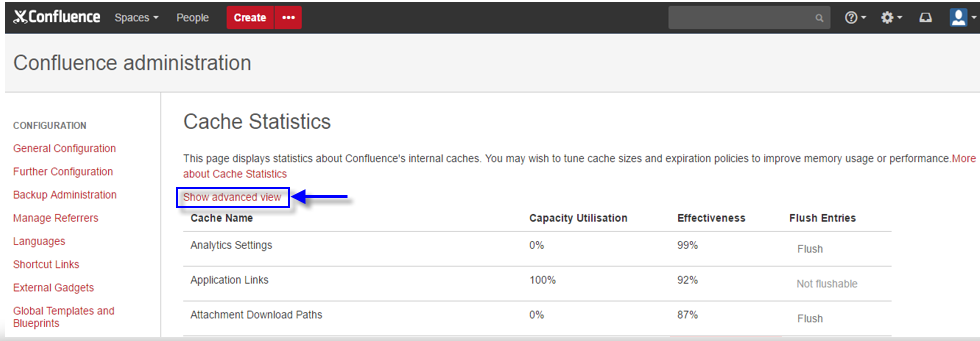
Then, click on the Show advanced view option in the Cache Statistics page that appears in the right panel (see Figure 4).
-
To flush the page caches, click the Flush links that correspond to all page-related caches (see Figure 5).