Installing the eG RUM Collector
You can install the eG RUM Collector using one of the following methodologies:
- Using the eGRUM executable;
- Using the rumcollector.war file;
- As a cloud-based application on a cloud platform
All these methodologies are described in the sub-sections below.
Installing Using the eG RUM Executable
The eG RUM collector is provided as a self-extracting, 64-bit program named eGRUM. This program can be executed only on a Windows 2012 (64-bit) host. This means that with the help of the eGRUM executable, you can install the RUM collector on a Windows 2012 (64-bit) host only.
To begin the installation, first double-click on eGRUM on the target Windows host. The resulting installation wizard will guide you through the setup process.
-
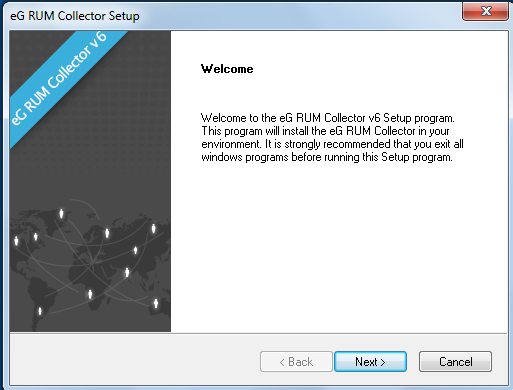
The Welcome screen appears first (see Figure 1).
-
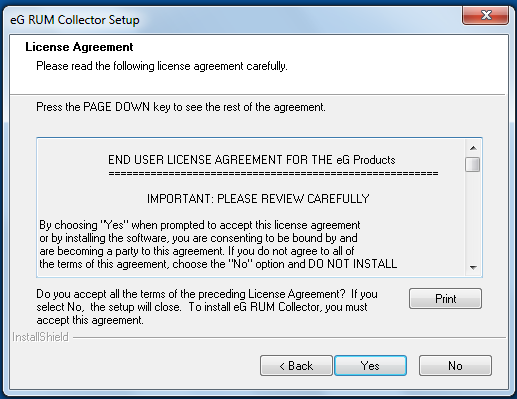
Click Next in Figure 1 to continue with the installation. Figure 2 will then appear.
-
Click the Yes button in Figure 2 to accept the terms of the license agreement. This will invoke Figure 3.
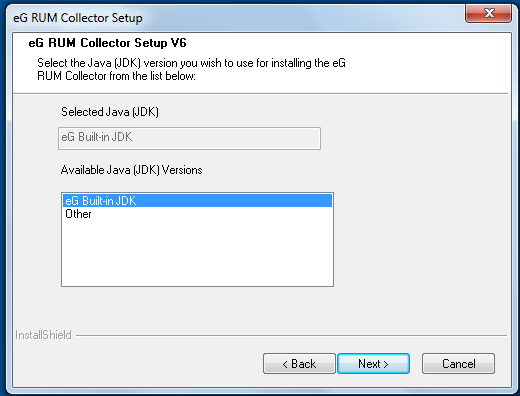
Figure 3 : Selecting a JDK version to use for collector installation
-
Setup then automatically discovers all the versions of JDK available on the target host, and lists them as depicted by Figure 3. The user will have to simply select the JDK version he/she wants to use for their collector installation from the displayed list. It is recommended that you use JDK 1.7 (or its variants) for installing the eG RUM collector.
-
Upon selecting a JDK version, eG Enterprise automatically determines the location of the JDK-related files on the target host, and uses them to configure the eG user’s Java execution environment to execute Java programs to proceed with the installation. Clicking on the Next button in Figure 3.8 will then lead the user straight to step 8 of the setup process.
-
On the other hand, if the JDK version the user wishes to use is not listed in Figure 3 for some reason, he/she can pick the Other option from Figure 3. Figure 4 then appears, where the user is prompted to specify if his/her environment contains the required JDK. It is recommended that you use JDK 1.6 (or its variants) for installing the eG RUM collector.
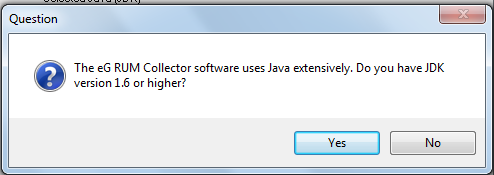
Figure 4 : Setup enquiring the availability of JDK in the environment
-
If JDK is already available in the environment, specify the Java home directory to enable the setup process to configure the eG user’s execution environment to execute Java programs as in Figure 5. The user can also use the Browse button to select the location of the Java home directory.
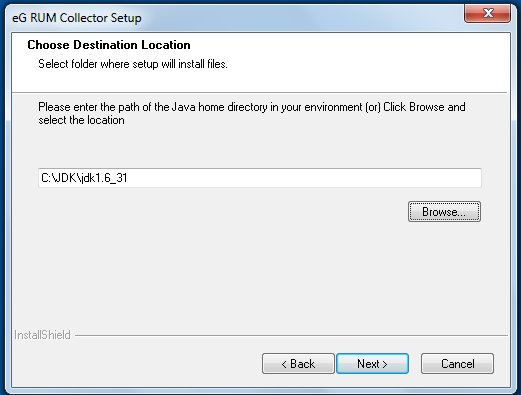
Figure 5 : Specifying the location of the Java home directory for installing the eG RUM collector
-
The setup process now requires the hostname and port number of the host on which the eG RUM collector is being configured (see Figure 6). By default, setup auto-discovers the host name and the IP address(es) of the eG RUM collector, and makes it available for selection in Figure 6. You can pick the host name or any of the IP addresses listed therein to take the installation forward. If the IP address/host name that you want to use for your collector is not discovered for some reason, then, you can choose the Other option in Figure 6. This will invoke Figure 7 where you can manually specifiy the IP address/host name of the eG RUM collector. If the domain name service is used in the target environment, use the full hostname. Otherwise, specify the IP address. However, 7080 is the default port. You can change this port if you so need.
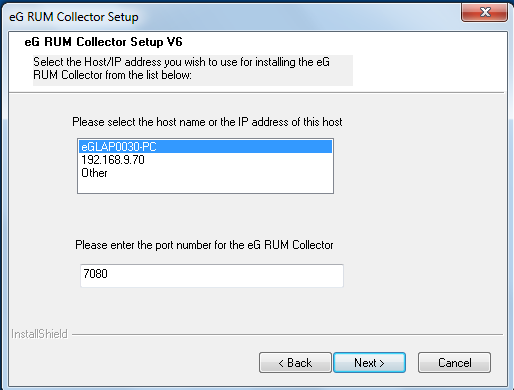
Figure 6 : Selecting the IP address/host name of the collector
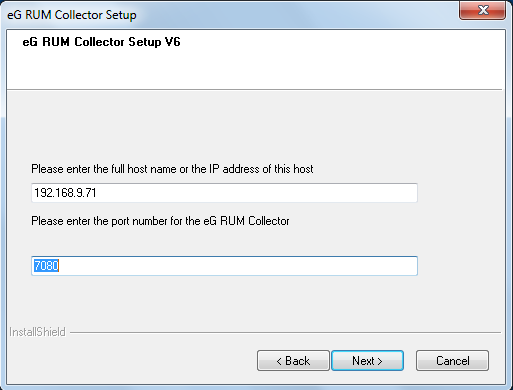
Figure 7 : Manually specifying the IP address/host name of the collector host
Note:
-
While specifying the host name (and not the IP address) of the collector, please take care of the following aspects:
- Use this name (and not the IP address) when configuring the eG RUM collector in the eG administrative interface.
- Make sure that forward and reverse lookups for this name are enabled via the DNS service in the target environment.
-
When providing an IP address for the eG RUM collector, note that only an IPv4 address can be provided. To configure the eG collector on a host that has an IPv6 address, you will have to provide the fully-qualified host name of that host or an alias name, in Figure 3.12.
-
-
Setup then prompts you to indicate if the eG RUM collector is to be SSL-enabled. If so, click Yes in Figure 8. If not, click No.
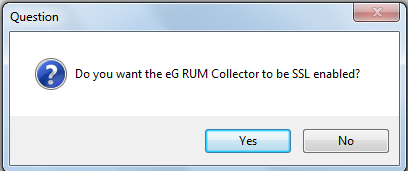
Figure 8 : Indicating whether/not to SSL-enable the eG RUM collector
-
Next, use the Browse button in Figure 9 that appears to specify where the eG RUM collector is to be installed. Then, click Next to proceed.
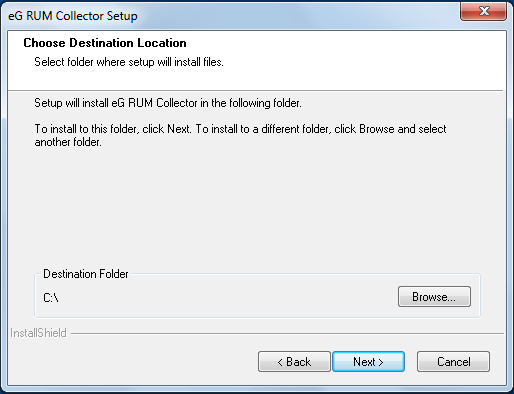
Figure 9 : Specifying the install directory of the eG RUM collector
-
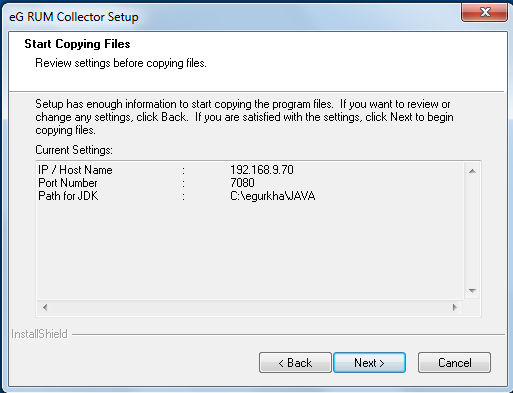
Then, view a quick summary of the specifications and click Next in Figure 10 to proceed.
-
If the configuration process succeeds, the following screen will be displayed (see Figure 11). The Setup requires the user to restart the system. This can be done immediately or at a later point of time. Clicking on the Finish button will exit the Setup.
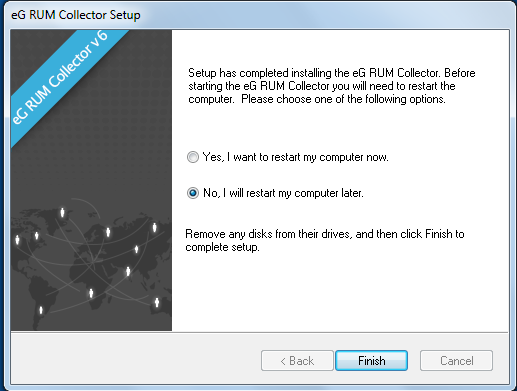
Figure 11 : Setup program indicating the completion of the eG RUM collector installation
Since the eG RUM collector is a Tomcat-based application, the eGRUM executable is bundled with Apache Tomcat v6. An Apache Tomcat server therefore, gets automatically installed on the target Windows host when deploying the collector.
Installing Using the WAR File
The eG RUM collector is also available as a war file named rumcollector.war in the /opt/egurkha/manager/tomcat/webapps (on Unix; on Windows, this will be the <EG_INSTALL_DIR>\manager\tomcat\webapps) folder of the eG manager. This war file can either be installed on an Apache Tomcat server v6 (or above) or on an Oracle WebLogic server v10.x/11.x/12.x.
To deploy the war file on a Tomcat server, follow the steps below:
- Copy the rumcollector.war file from the eG manager host to any location on the target RUM collector host.
- Stop the Tomcat on the server where the RUM collector is to be installed.
- Open the shell prompt on the target host, and switch to the <TOMCAT_HOME>/webapps directory on the host.
-
Run the following command to copy the rumcollector.war file available in a temporary location on the host to the <TOMCAT_HOME>/webapps:
cp /tmp/rumcollector.war .
Here /tmp/rumcollector.war refers to the temporary location of the rumcollector.war.
-
Next, start the Tomcat server by running the following command from the <TOMCAT_HOME>/bin directory:
catalina.sh run
-
Starting the Tomcat server will automatically start the rumcollector application deployed within. In the startup messages, look for the following line to confirm deployment:
INFO: Deploying web application archive rumcollector.war
-
Once Tomcat starts, switch to the <TOMCAT_HOME>/webapps folder from the shell prompt, and run the following command to view the contents of the folder:
ls -alt
- Look for the rumcollector application file in the folder. If you find it, it is the first indication that the RUM collector has been successfully deployed on the target.
-
Next, from a remote host in the environment, launch a browser and connect to the following URL:
http://<Tomcat_IP>:<Tomcat_connector_port>/rumcollector/Welcome.jsp
- If this URL returns a page with the text Welcome! , it indicates the successful deployment of the RUM collector.
To deploy the rumcollector.war file on a WebLogic server, do the following:
- Login to the target WebLogic server.
- Copy the rumcollector.war file from the eG manager host to any location on the WebLogic server.
- Launch a browser and then connect to the WebLogic console.
- Login to the console as a WebLogic administrator.
-
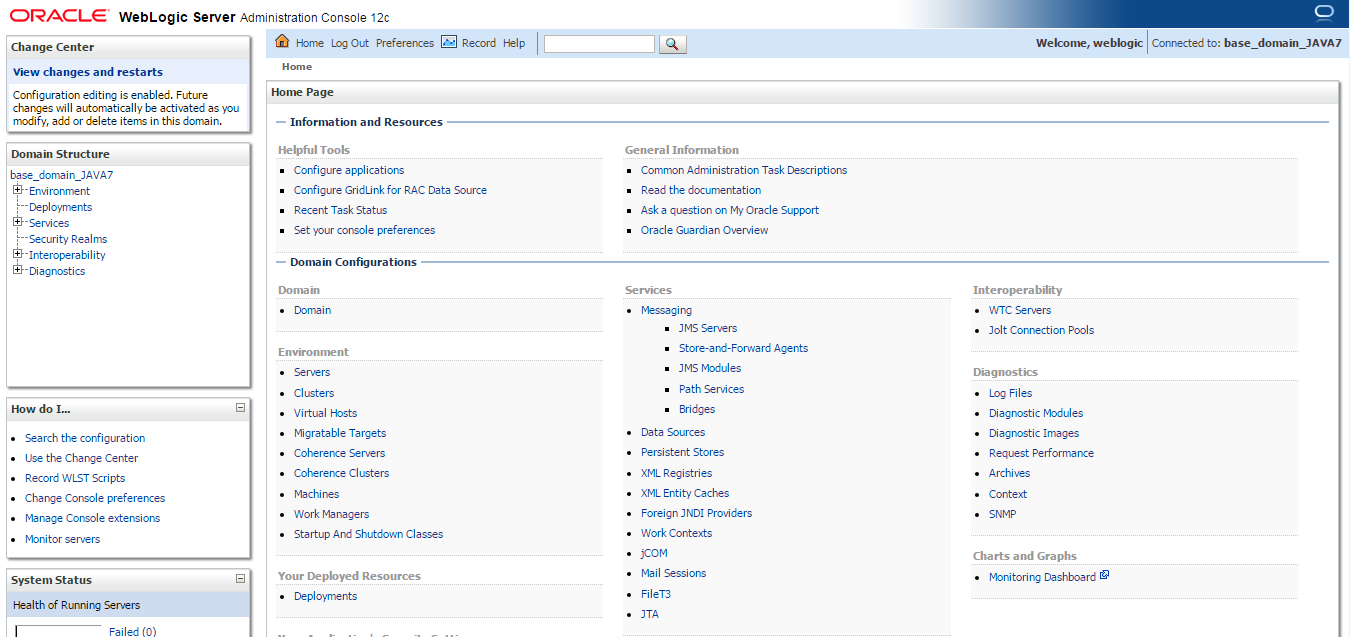
Figure 12 will then appear.
-
Click on the Deployments node in the Domain Structure tree in the left panel of Figure 12. Figure 13 will then appear.
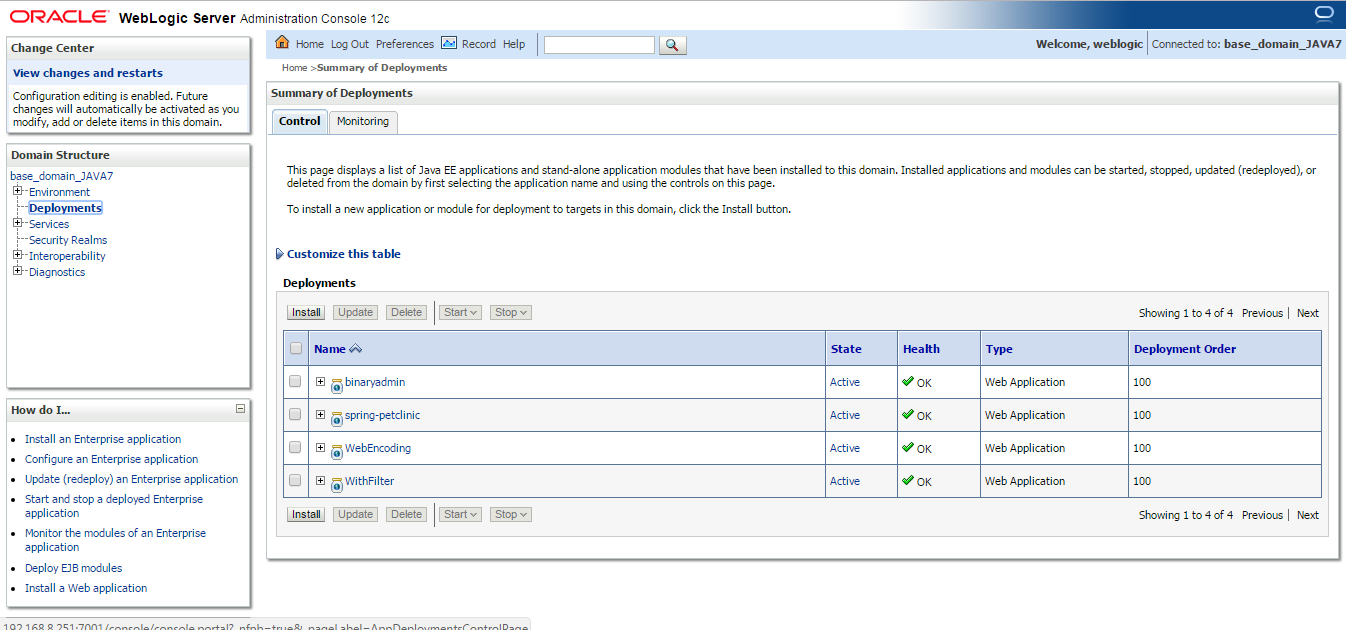
-
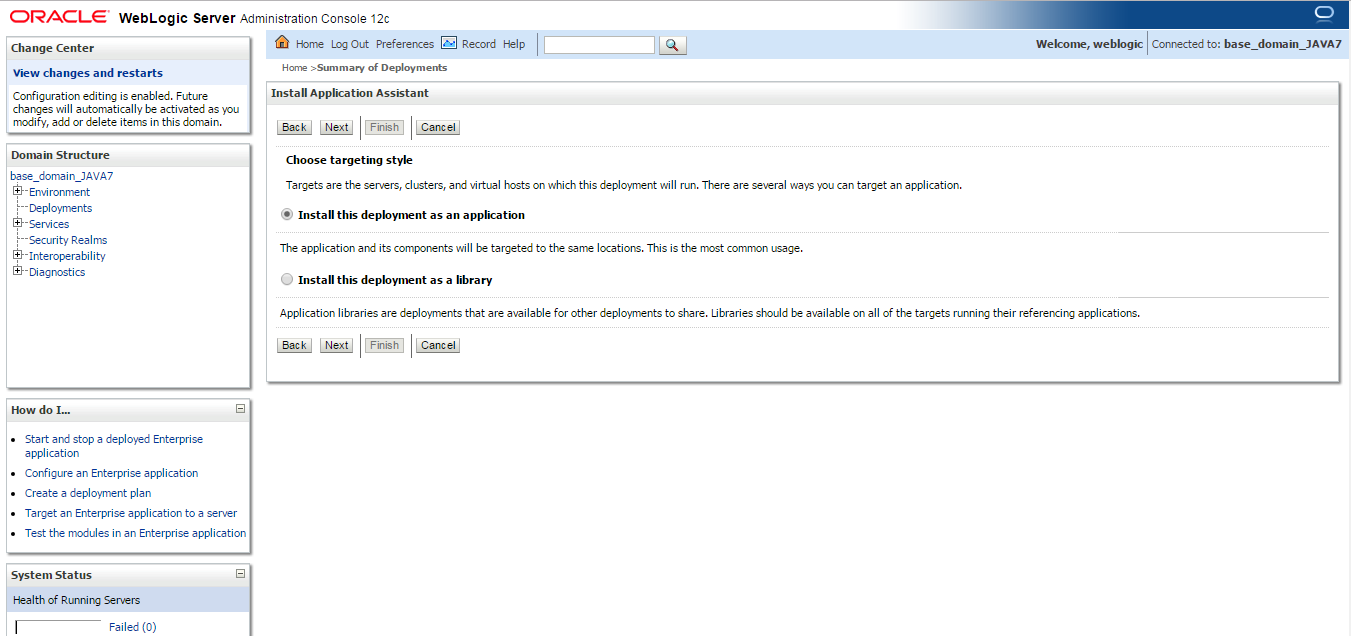
To install the eG RUM Collector web application, click on the Install button in the right panel of Figure 13. This will open Figure 14.
-
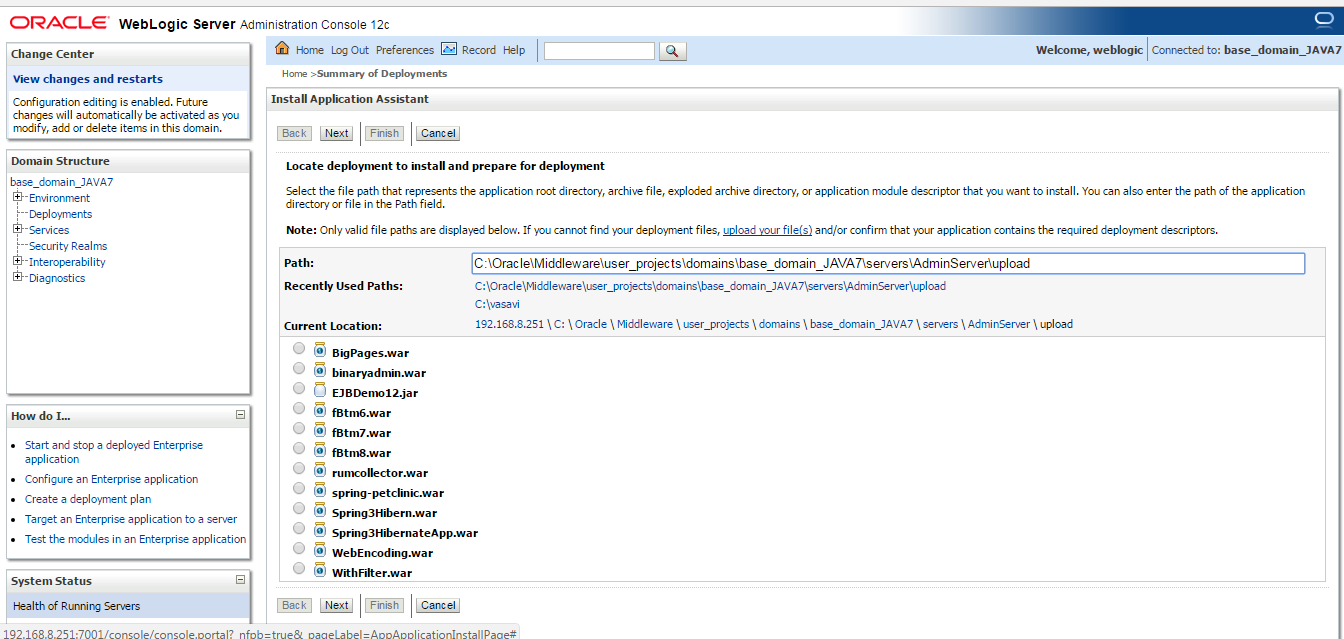
Click on the upload your file(s) link against Note: in the right panel of Figure 14. Figure 15 will then appear, where you have to choose the rumcollector.war file that you wish to upload. For that, use the button Choose in Figure 15.
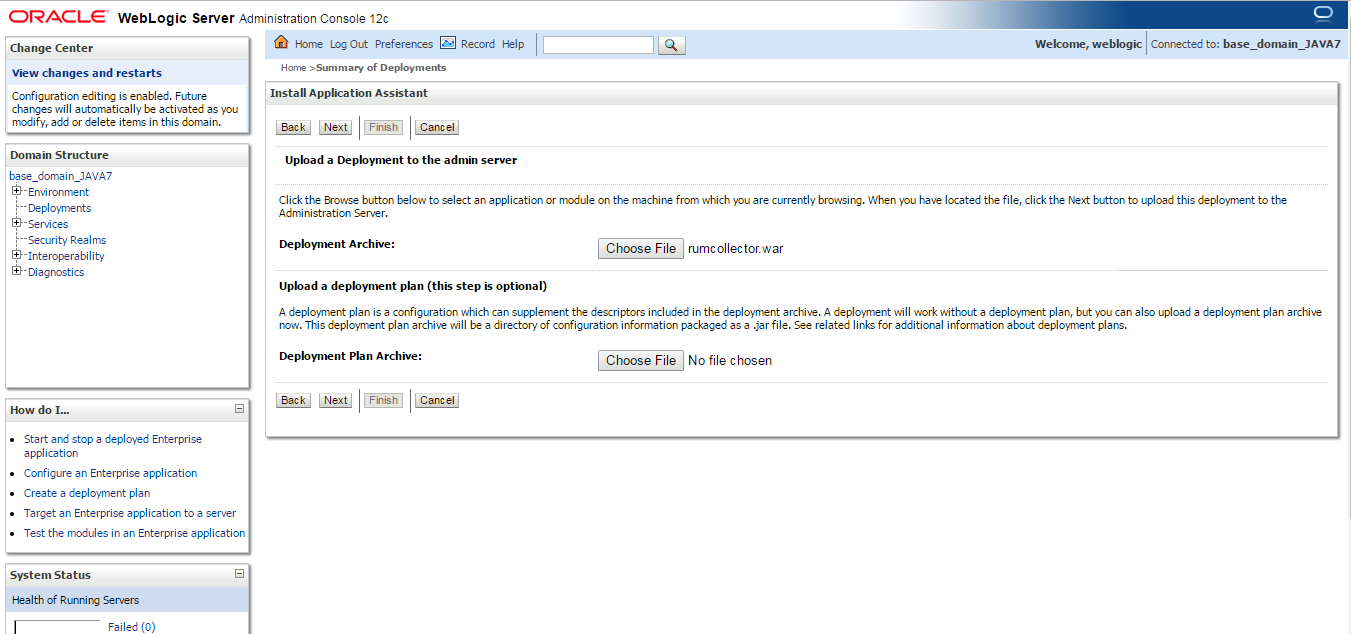
Figure 15 : Choosing the rumcollector.war file to be uploaded
-
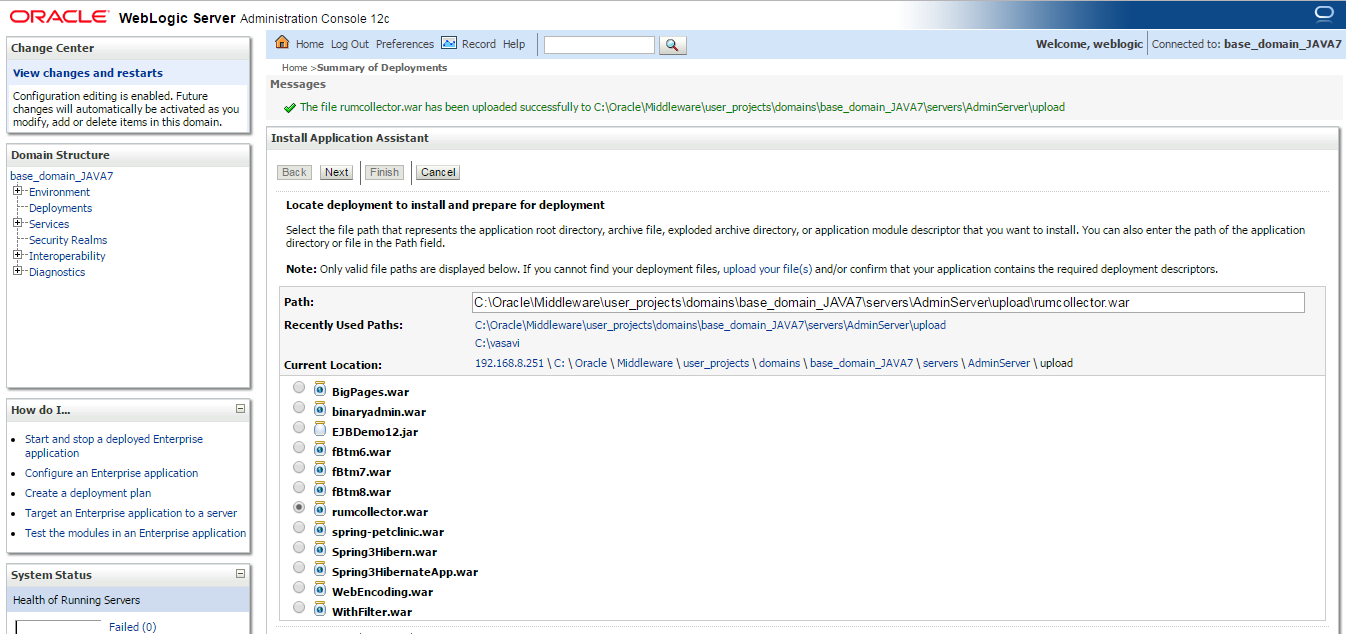
Then, click the Next button in Figure 15 to proceed. If the upload is successful, Figure 16 that appears next will display a message to that effect. Click Next in Figure 16 to proceed.
-
When Figure 17 appears, click the Next button again.
-
Click the Finish button in Figure 18 to end the war file installation.
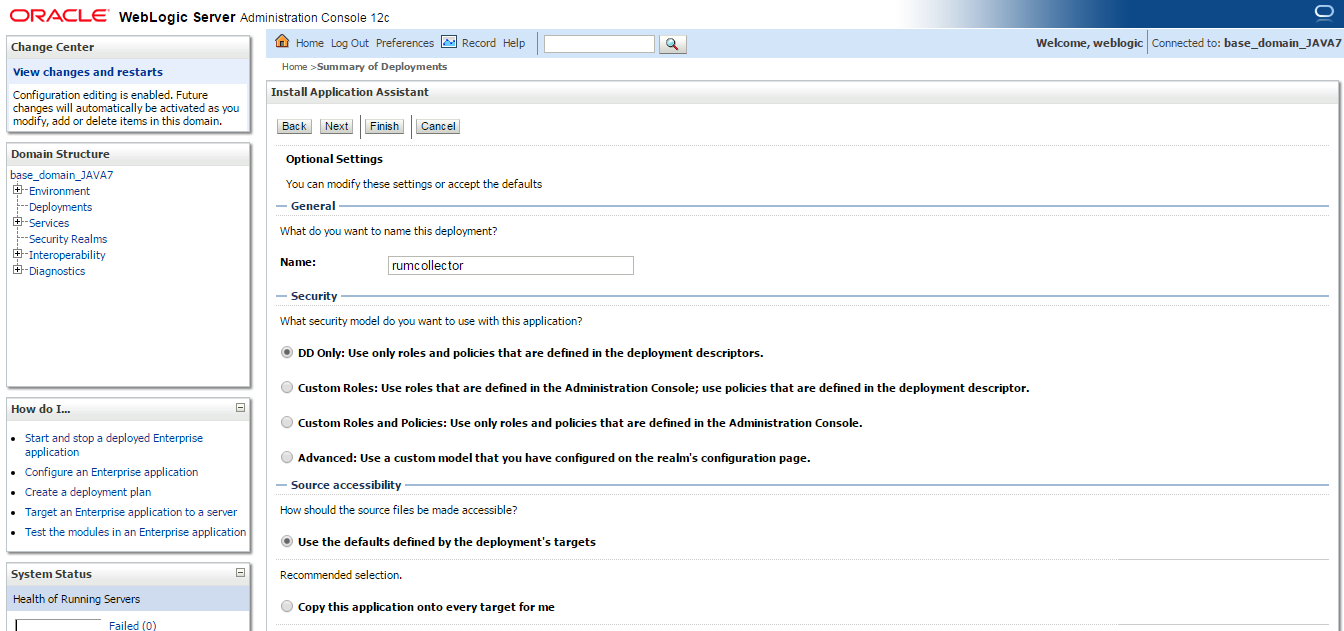
Figure 18 : Clicking Finish to end the war file installation
-
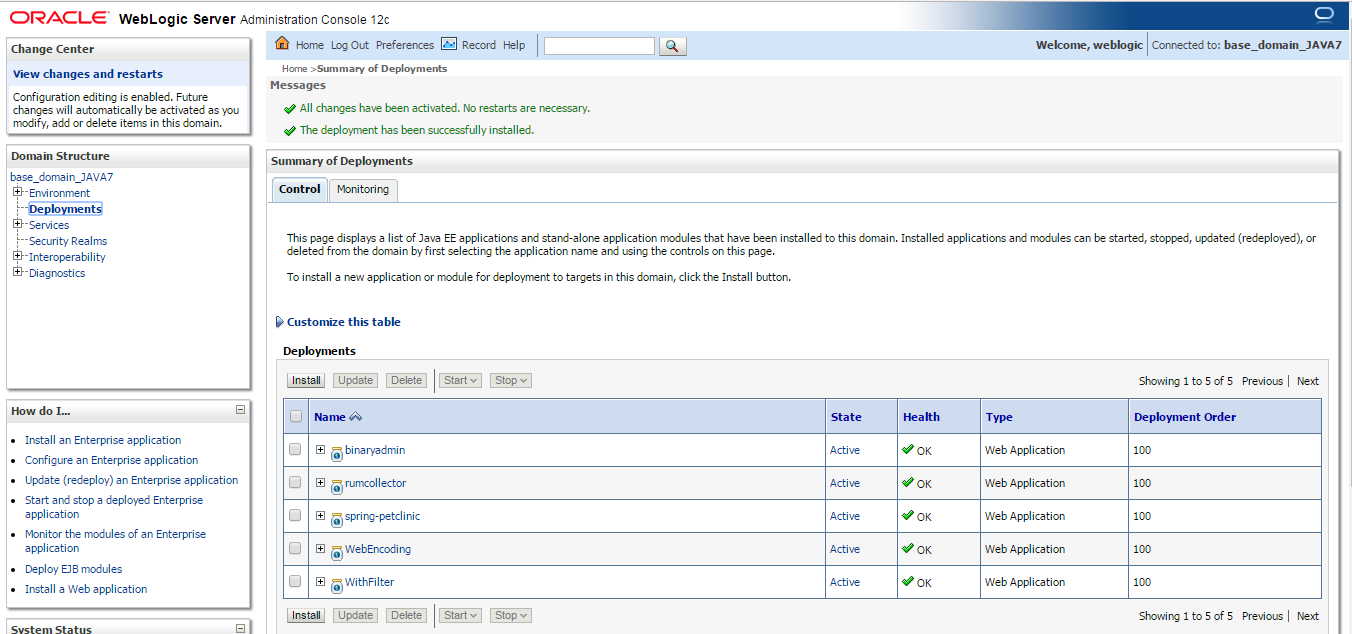
Figure 19 then appears. If the rumcollector.war has been deployed successfully, then, in the Deployments list of Figure 19, you should be able to find an entry for the rumcollector, with State as Active and Health as OK. If you find such an entry, you can confirm the successful installation of the eG RUM Collector.
- Finally, log out of the WebLogic console.
Installing As a Cloud-based Application
To save costs, conserve space, and ensure the high availability of the eG RUM Collector (using cloud features such as auto-scaling), you can install the eG RUM Collector as a web app service on any cloud platform. For instance, you can deploy the collector as a containerized web application on the Azure cloud using Azure App Services. The steps for achieving this are detailed below:
-
Login to portal.azure.com.
-
Click on the App Services option as indicated by Figure 20.
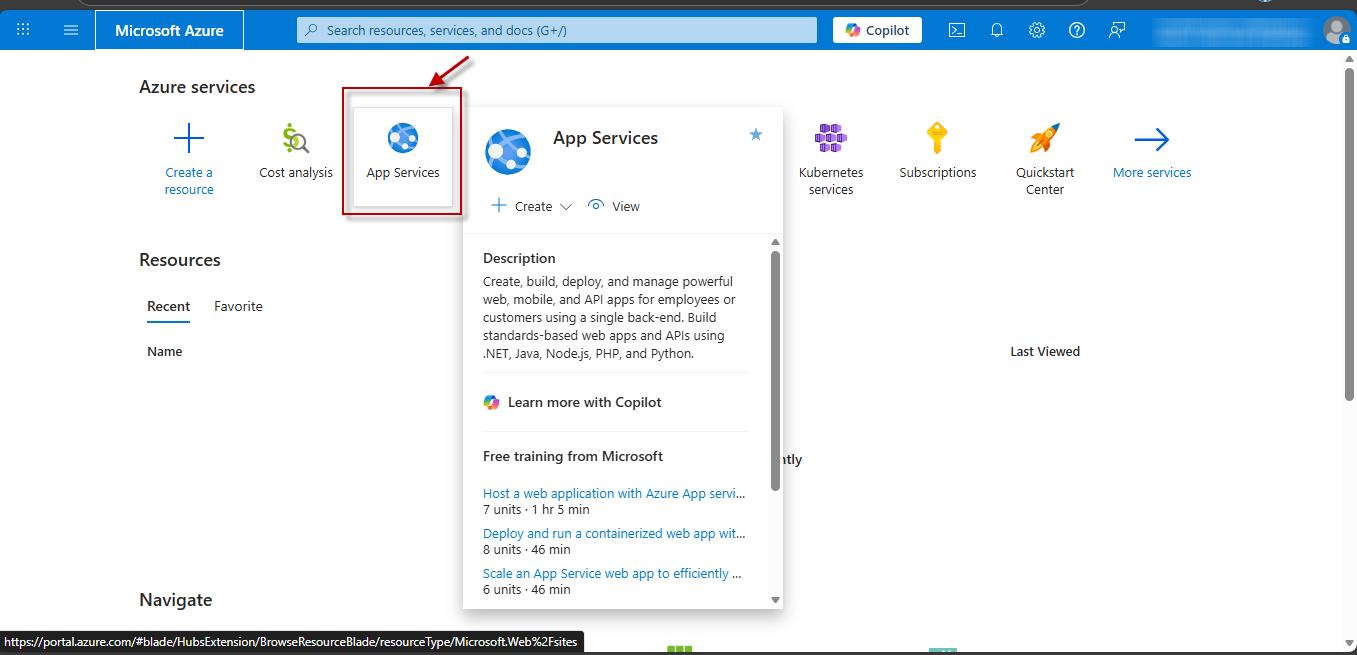
Figure 20 : Selecting the App Services option in the Azure portal
-
When Figure 21 appears, click on the Create drop-down and pick the Web App option within, to begin creating a new web application.
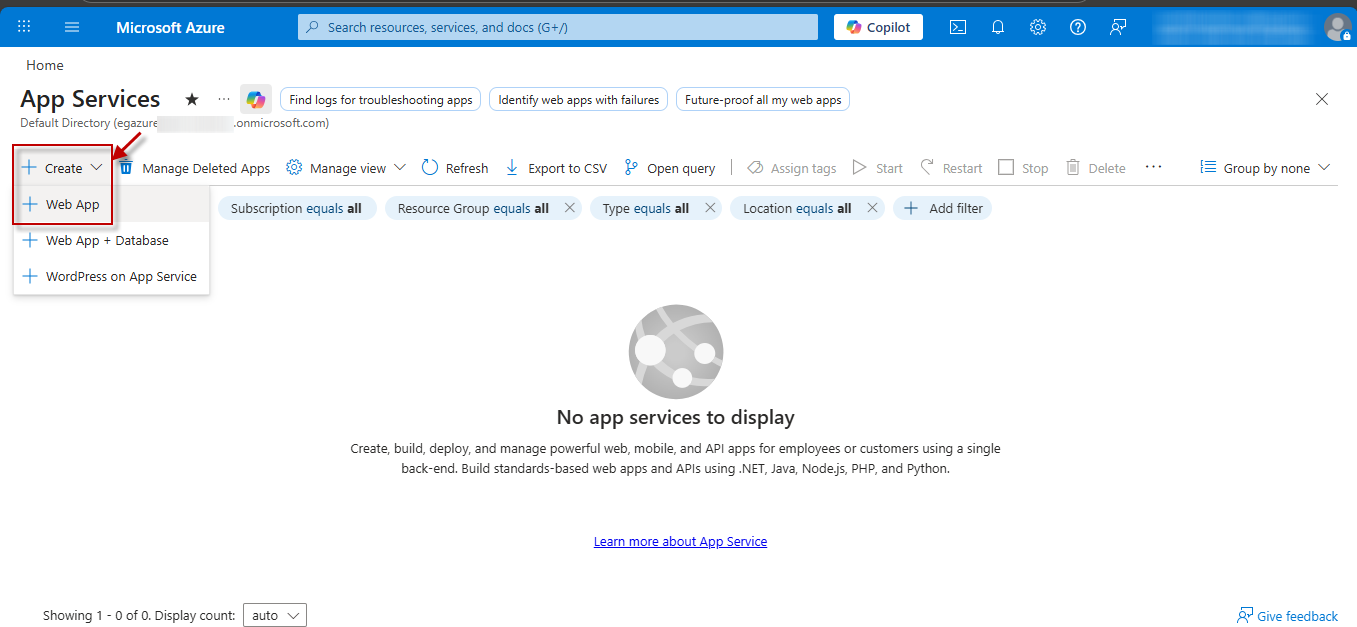
Figure 21 : Clicking on Create -> Web App to create a new web application
-
This will invoke Figure 22. In the Basics tab page that appears by default (see Figure 22), select the Subscription and Resource Group where the web application has to be created.

Figure 22 : Indicating the subscription and resource group where the web application is to be created
-
Then, in the Instance Details section (depicted clearly by Figure 23) that follows the Project Details section, specify the following:
-
Specify the Name of the web application instance that you are creating for the eG RUM Collector.
-
Since the RUM collector should be published on the cloud as a Docker container, set the Publish flag to Container.
-
Set the Operating System as Linux.
-
Pick the Region where the container is to be published.
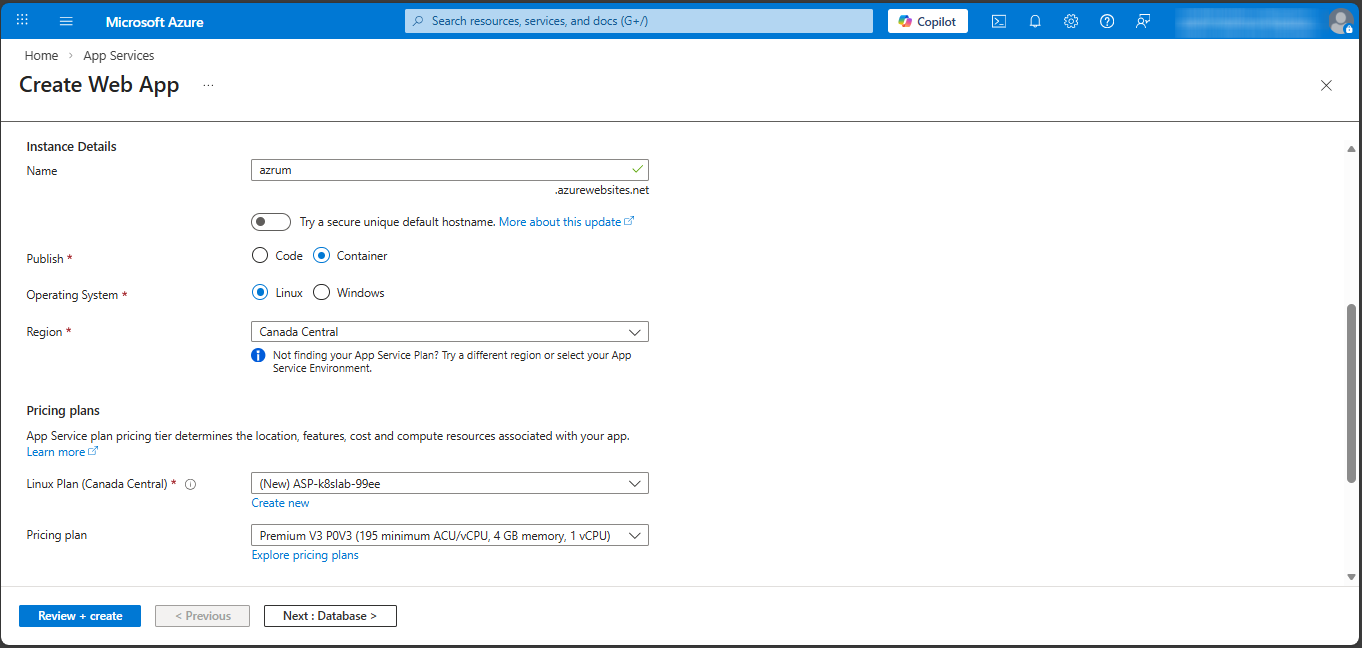
Figure 23 : Specifying the details of the eG RUM collector instance being created
-
-
Then, choose an app service plan that suits your requirement, and a Pricing plan that is right for you. Then, click the Next button in Figure 23 to proceed. When the Database tab page of Figure 24 opens, click the Next button to move on.
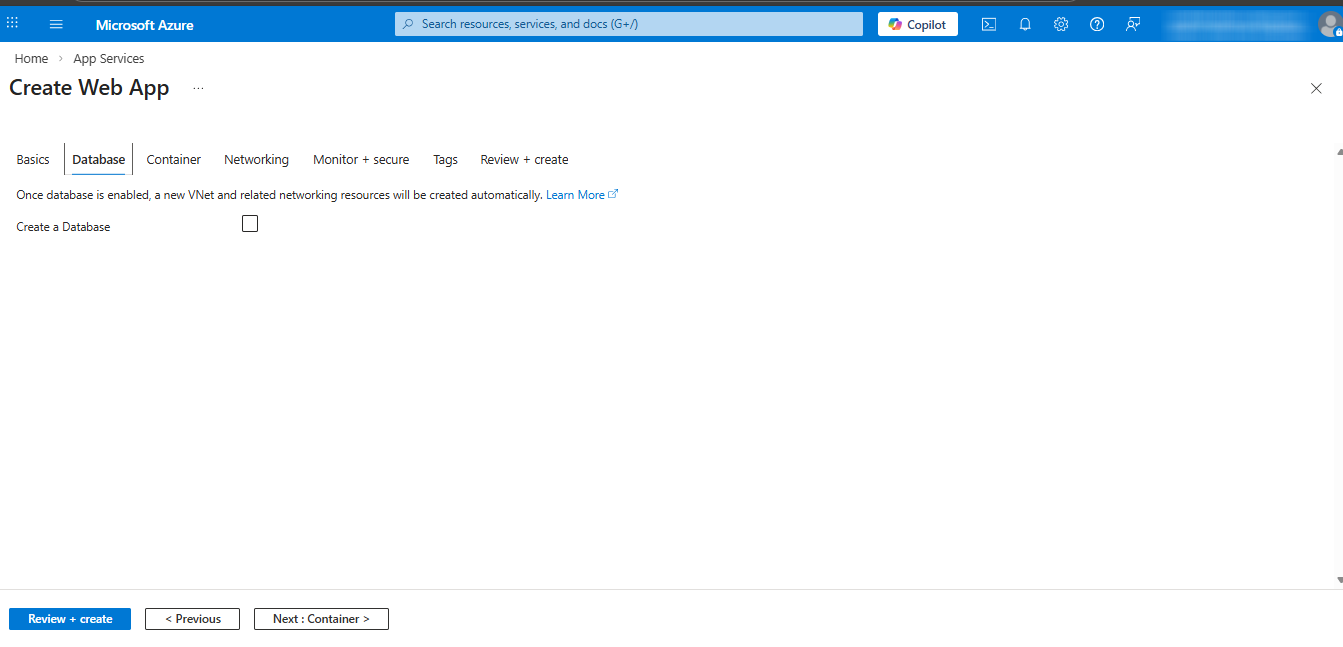
Figure 24 : Clicking the Next button in the Database tab page
-
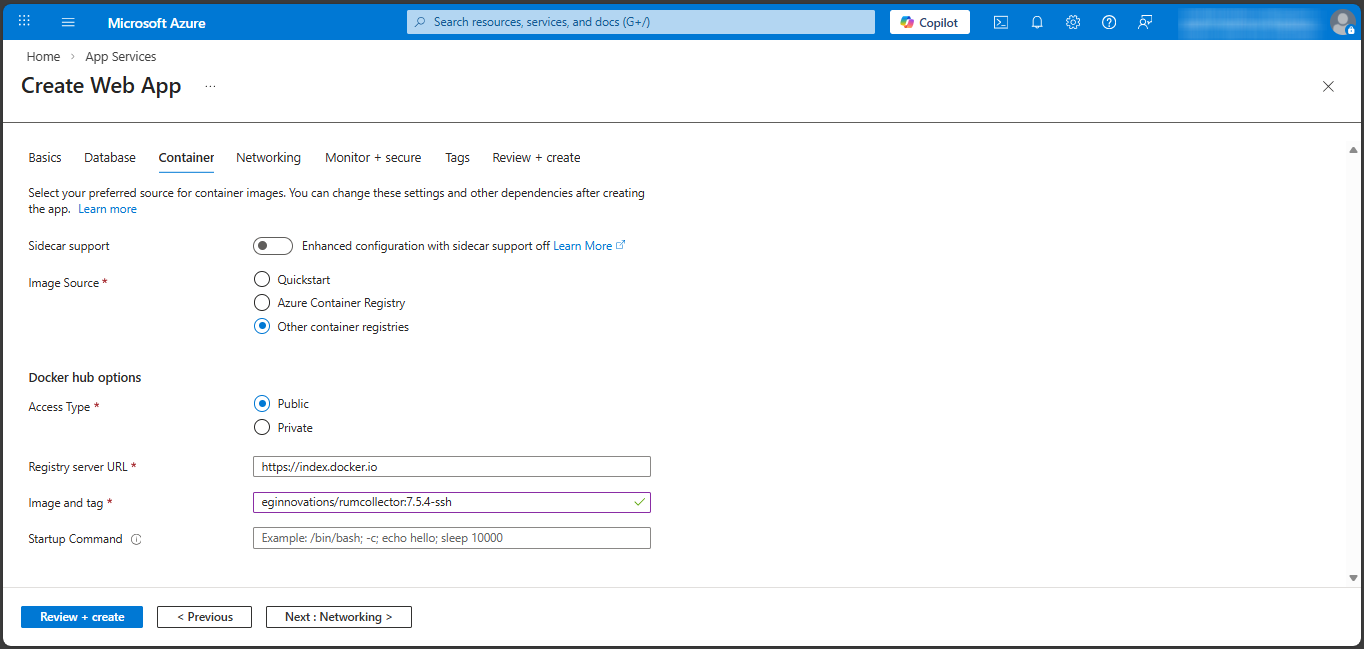
Figure 25 will then appear. Here, you need to provide the details of the Container image. For this, do as follows:
-
Sidecar support: Azure App Services for Linux supports the sidecar pattern for both custom container and code-based web apps. This feature, if enabled, allows you to deploy auxiliary containers alongside your main application container to handle supporting tasks like monitoring, logging, or caching. Since no auxillary container needs to run alongside our main RUM collector container, you can disable this feature by pushing the slider to the left.
-
Image Source: Se Other container registries as the the source of the RUM collector image.
-
Access type: When creating a containerized web app in Azure App Service, the primary access types for pulling the container image from a registry are public access (e.g., Docker Hub) and private access (e.g., Azure Container Registry). As the eG RUM collector's container image needs to be pulled from the Docker hub, pick the Public option here.
-
Registry server URL: If Public is chosen as the Access type, then the Registry server URL automatically defaults to the URL of Docker hub. This is because, the default registry server for public images in Azure App Service is the Docker hub.
-
Image and tag: Provide the image name of the eG RUM collector, along with tag, as indicated below:
eginnovations/rumcollector:<version_name>-ssh
-
Then, click the Next button in Figure 25 to move on.
-
-
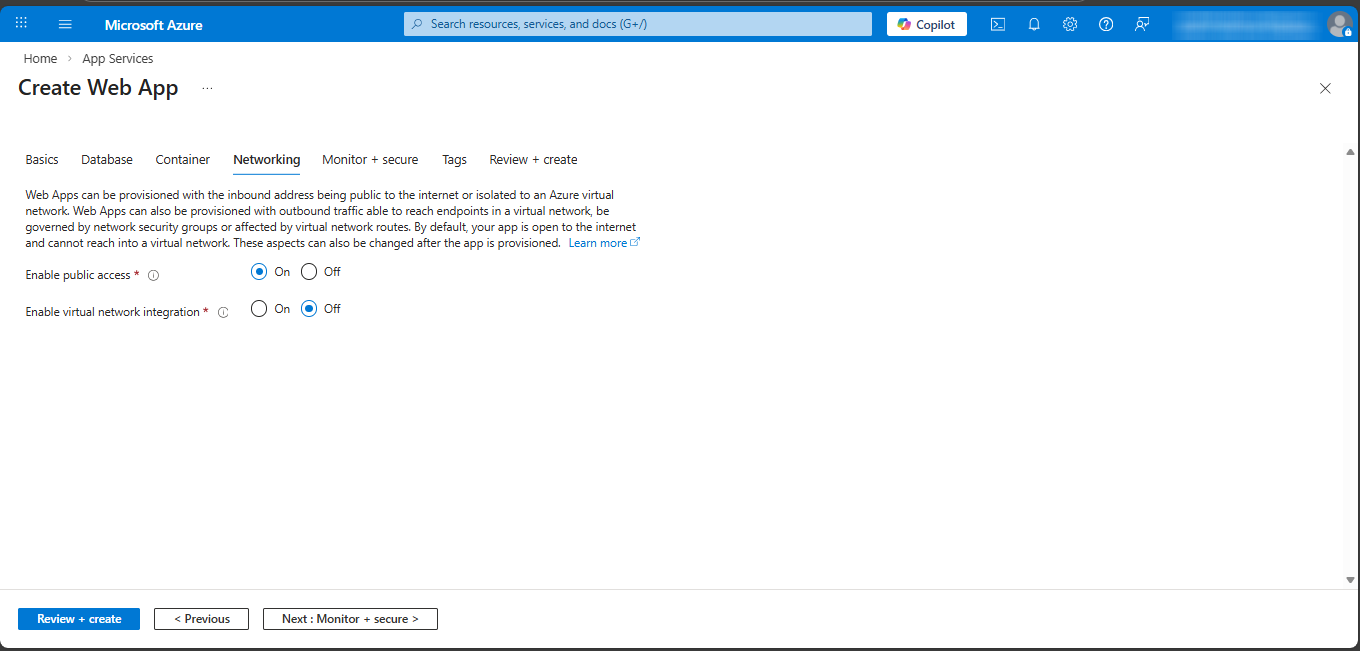
Figure 26 will then appear. Let the default Networking settings remain, and proceed to click the Next button.
-
When appears, make sure that application insights are disabled. Azure Monitor Application Insights is an OpenTelemetry feature of Azure Monitor that offers application performance monitoring (APM) for live web applications. To disable this feature, set the Enable Application Insights flag in Figure 27 to No. Then, click Next to continue.
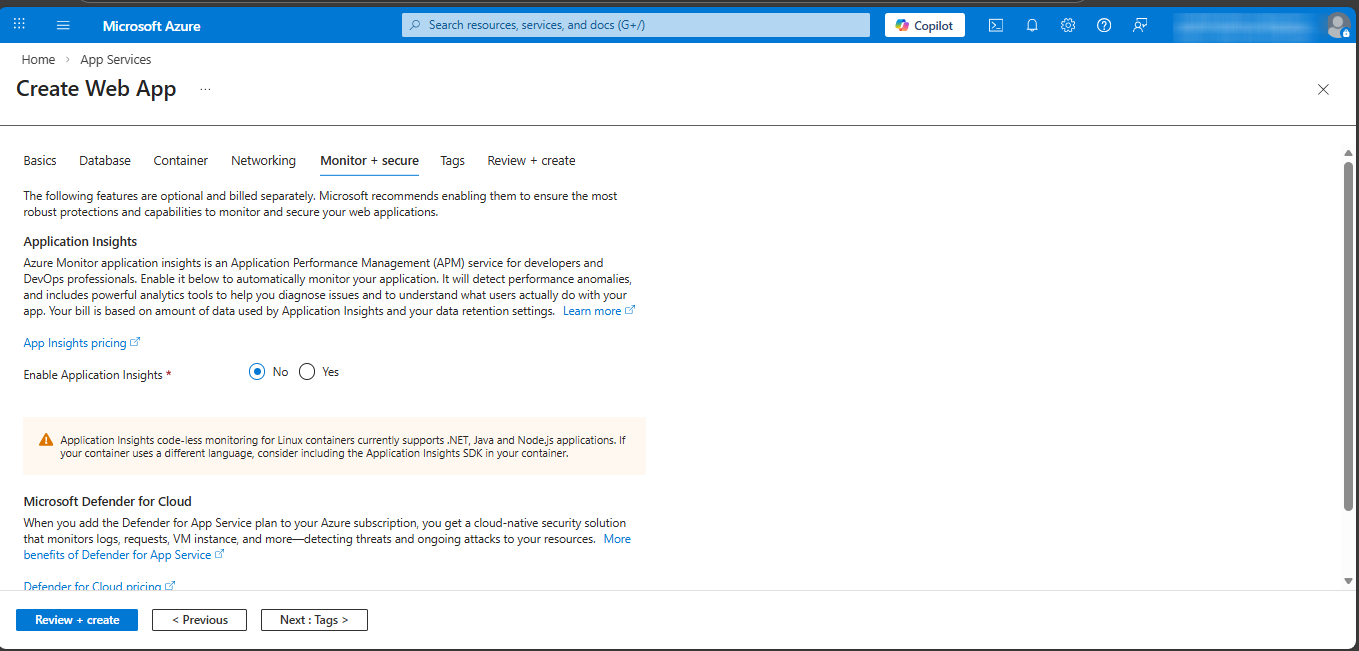
Figure 27 : Disabling Application Insights
-
In Figure 28 that then appears, enter the Name and Value of Tags, if required. If not, click Next to continue.
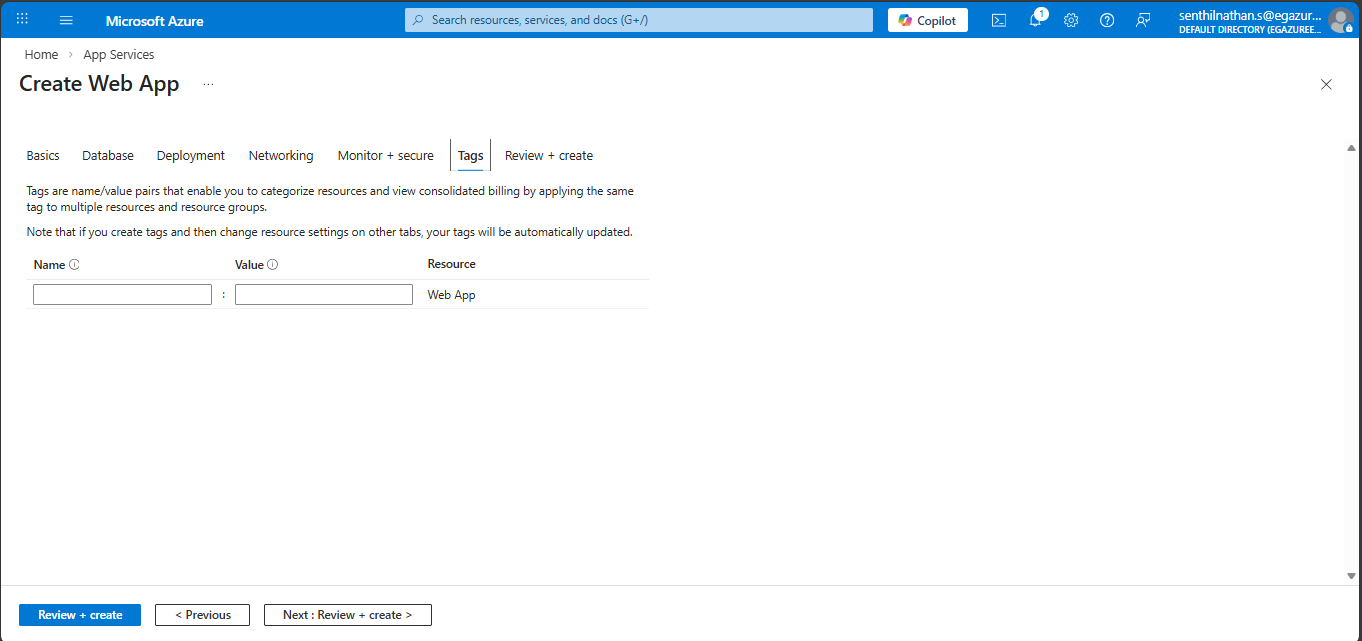
Figure 28 : Configuring Tags
-
This will open Figure 29. Quickly review the specifications of the new application. If everything is in order, click the Create button in Figure 29 to create the new application.
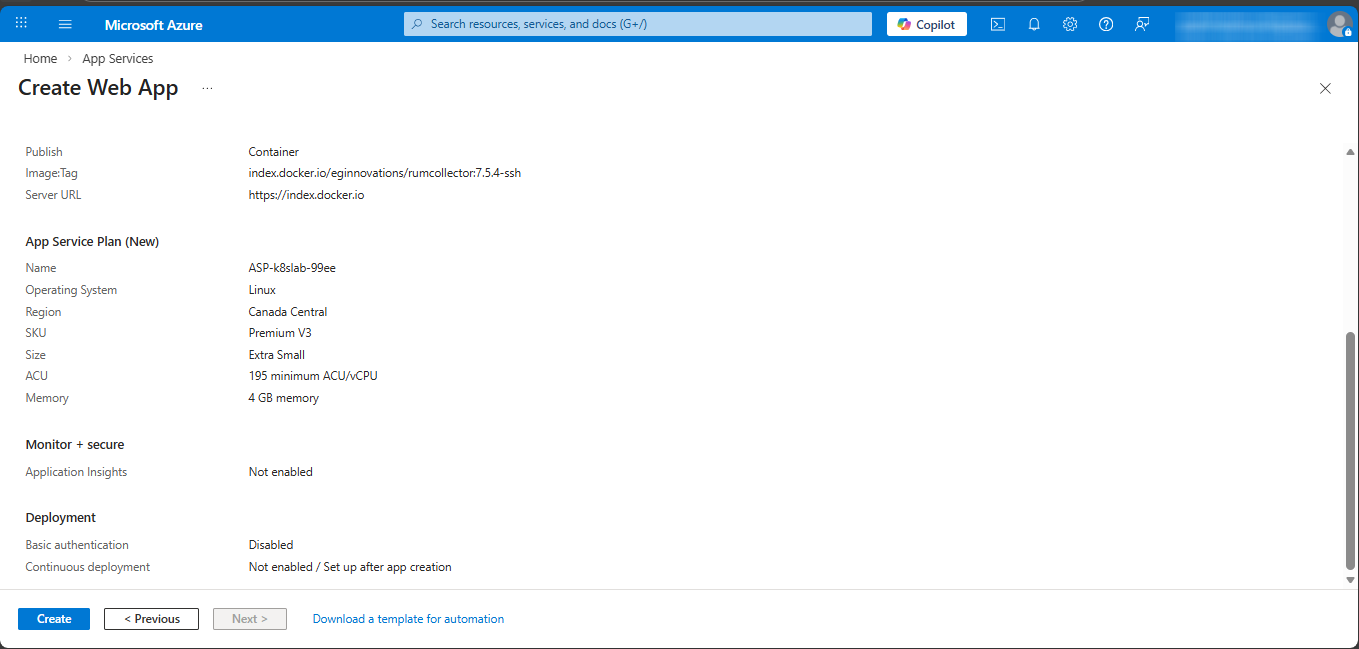
Figure 29 : Reviewing the specifications of the new application
-
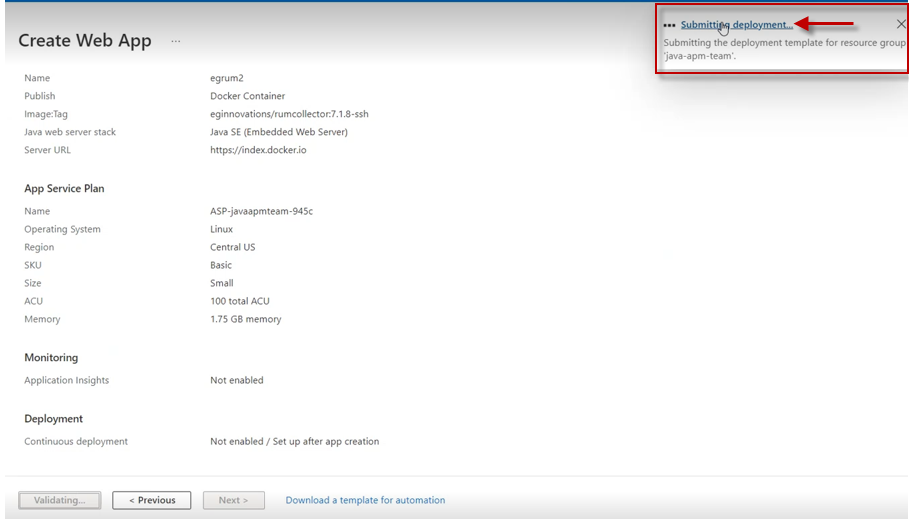
Figure 30 will then come into view. Click on the Submitting deployment link (indicated by Figure 30) to view the status of the application deployment.
-
Figure 31 will then appear. If deployment is in progress, then Figure 31 will indicate the same.
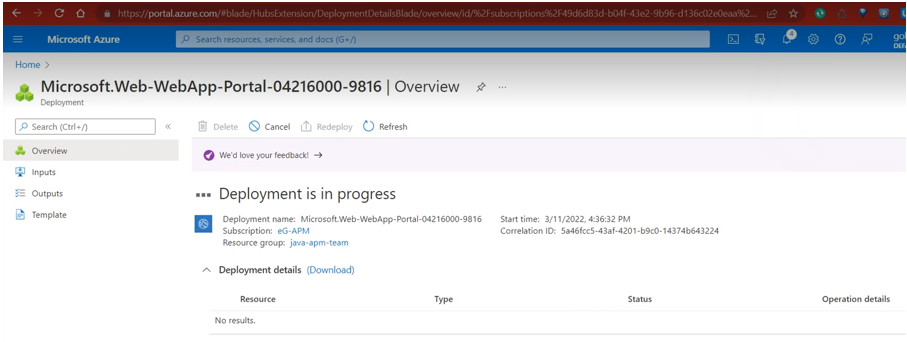
Figure 31 : A page indicating that application deployment is in progress
-
Once deployment completes successfully, a message to that effect will be displayed (see Figure 32). Once you see the message, click on the Go to resource button indicated by Figure 32.
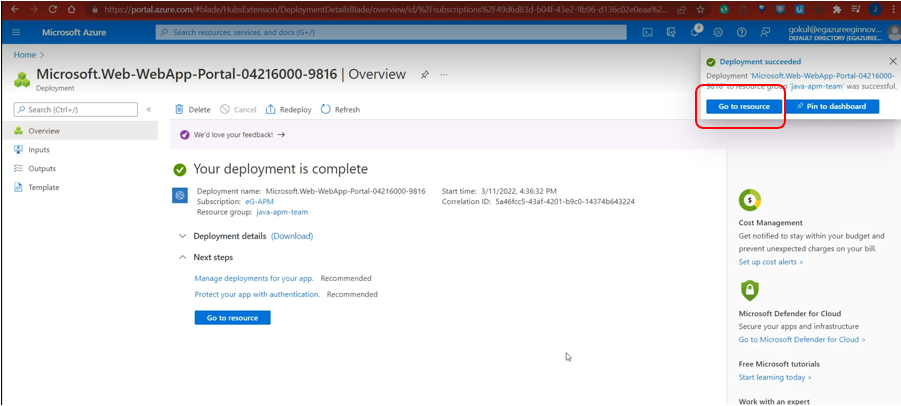
Figure 32 : Clicking on Go to resource upon successful application deployment
-
This will invoke Figure 33. Click on Browse in Figure 33 to load the application page.
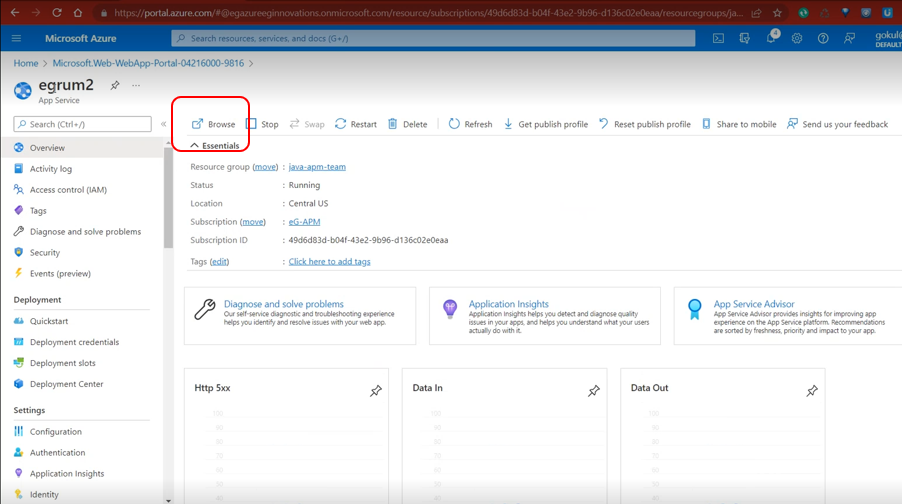
Figure 33 : Clicking on Browse to load the application home page
-
When loading is in progress, change the URL in the address bar of the browser as indicated below:
https://<AppName>.azurewebsites.net/rumcollector/Welcome.jsp
-
If the URL loads successfully, then you will see the message indicated by Figure 34.

Troubleshooting Tips:
By default, Azure automatically starts the eG RUM collector container as soon as it is deployed. If, for some reason, the container does not start automatically, then do the following to troubleshoot the same:
-
Login to the Azure portal.
-
Then, access the Azure App Services (as described in step 1 of the procedure above).
-
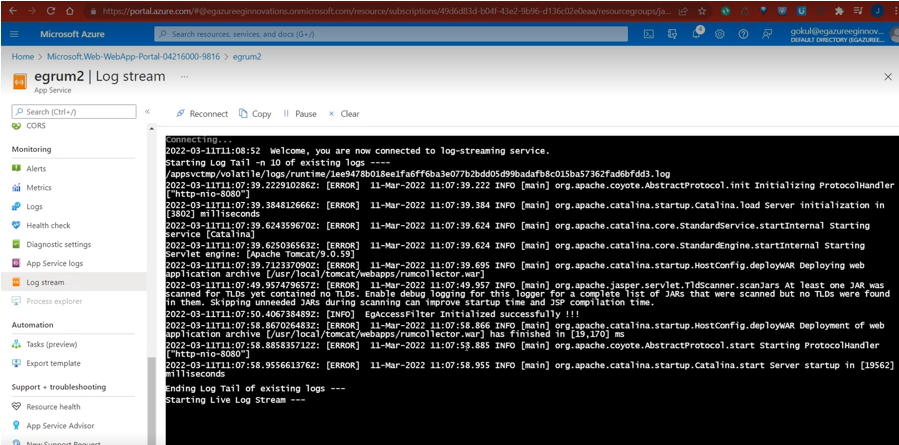
Open the web application you created for the eG RUM Collector. When Figure 35 appears, click on Log stream in the left panel of Figure 35 to view the deployment logs. By studying the logs, you can easily troubleshoot why the container failed to start.
To troubleshoot any issue with the eG RUM Collector that is deployed on Azure, do the following:
-
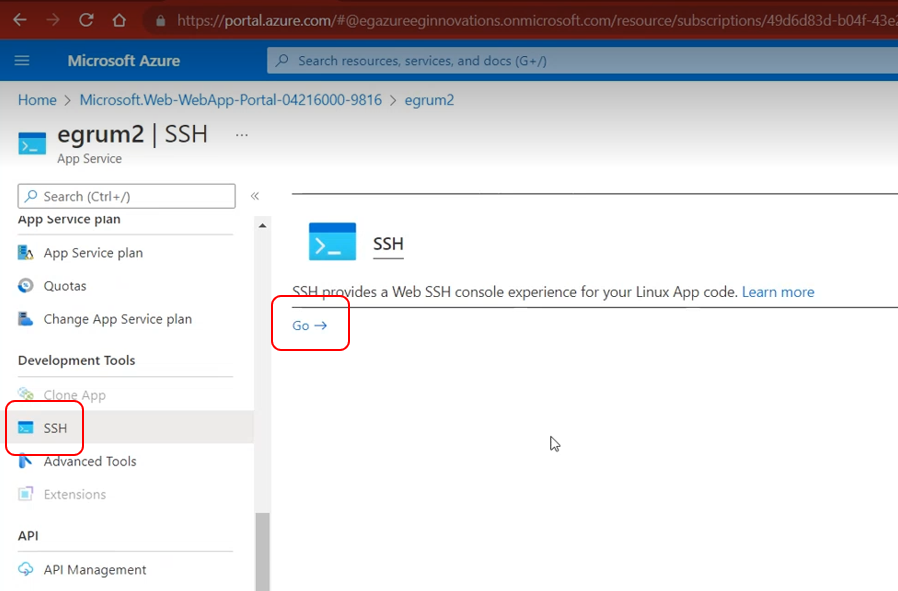
First, verify whether the collector is running in the container. For this, login to the Azure portal, access Azure App Services, and open the application you created for the eG RUM Collector. When Figure 36 appears, click on the SSH option under Development Tools in the left panel. Then, click on the Go link in the right panel to connect to the container via SSH.
-
The SSH console will then load (see Figure 37). In the console, issue the following command at the prompt:
ps -aef | grep "tomcat"
This will list the processes running within the container. If you see a process named egrum listed therein (see Figure 37), it implies that the eG RUM Collector is running in the container.

Figure 37 : The command output listing the processes running in the container
-
Next, proceed to check if the eG RUM Collector application is properly installed in the container. For this, at the Shell prompt in the SSH console, issue the command to switch to the /usr/local/tomcat/webapps directory. Then, with that directory open, issue the ls command at the prompt. This command will list all files and folders that are in the webapps directory (see Figure 38). Typically, during the deployment process, the files related to the eG RUM collector application will be automatically extracted into a rumcollector sub-directory in the webapps directory. If you see a directory named rumcollector listed in the output of the ls command (see Figure 38), then you can conclude that the eG RUM collector application has been successfully deployed in the container.
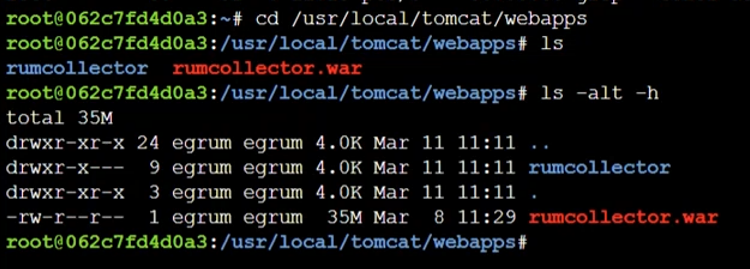
Figure 38 : Commands for verifying the successful deployment of the eG RUM collector in the container
-
If steps 1-3 above do not reveal any problems, but issues with the collector persist, then, you can use the collector logs to perform advanced troubleshooting . These log files are automatically created and stored in the /usr/local/tomcat/webapps/rumcollector directory.