Instrumenting a Web Application Using an F5 BIG-IP Load Balancer
Where requests to a web application are load balanced using an F5 BIG-IP load balancer, you can use the broad steps outlined below to RUM-enable that web application:
- Copy the RUM code snippet to a text file.
- Create an HTML Rule on the F5 BIG-IP system
- Create an HTML Profile and associate the HTML Rule with it
-
Enable the HTML Profile on the virtual server that processes HTTP traffic to the target web application
Each of these steps have been elaborated below:
- The first step is to copy the RUM script to be injected. For this, login to the eG administrative interface and add a Real User Monitor component using the Add/Modify page (Infrastructure -> Components -> Add/Modify).
-
Once the component is added, the RUM script that should be included in the responses will be displayed. Copy this script to a text file. Note that this code snippet is case-sensitive. It is therefore recommended that you copy the code as is to the text file, instead of manually retyping it.
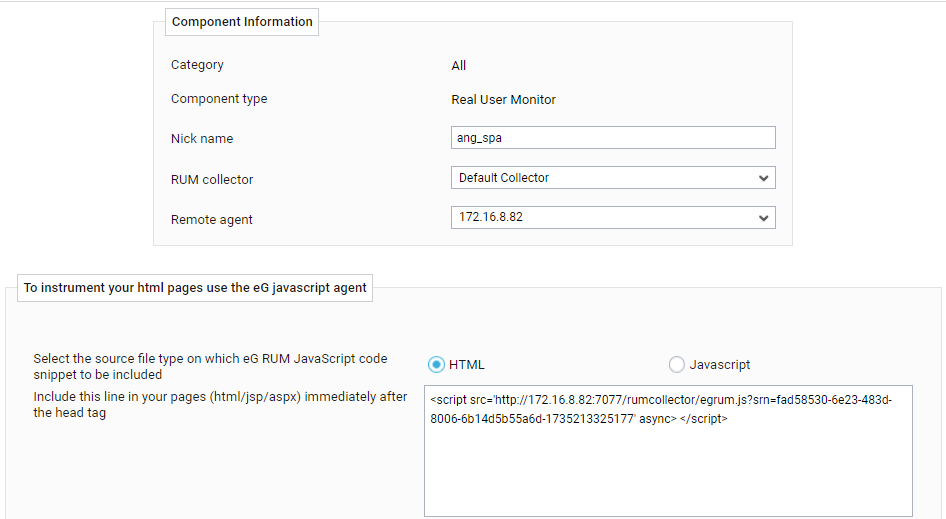
Figure 1 : The RUM script that is to be injected into the HTTP responses
-
Next, create an HTML Rule on the load balancer. An HTML rule defines the specific actions that you want the BIG-IP system to perform on a specified type of HTML content. For RUM-enabling a web application, you should create an HTML rule that searches for the /head tag in the HTML responses sent out by the F5 BIG-IP system and automatically inserts the RUM code snippet (that was copied to a text file at step 2 above) just before the /head tag in each of the responses. To create such an HTML rule, do the following:
-
Login to the F5 console. Figure 2 will then appear.
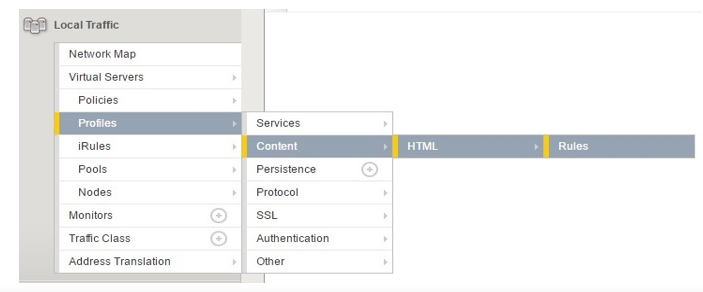
Figure 2 : Selecting the HTML -> Rules option in the F5 console
-
In the Local Traffic menu of Figure 2, follow the menu sequence, Profiles -> Content -> HTML -> Rules. Figure 3 will then appear.
-
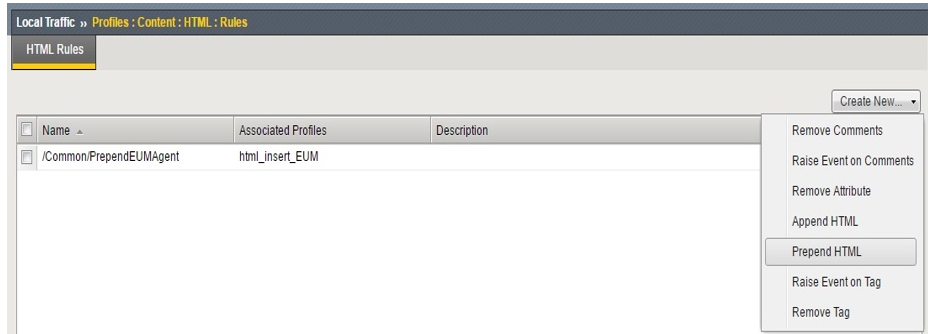
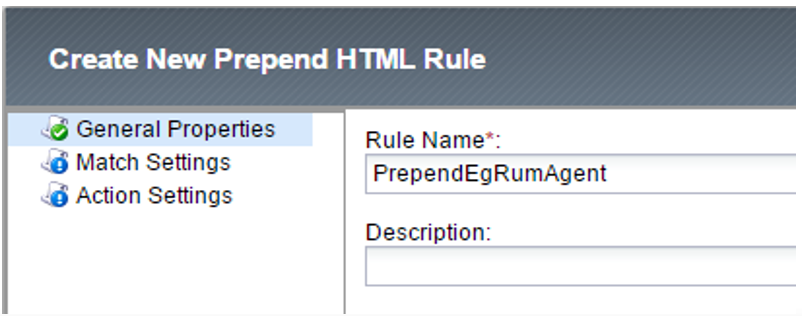
Using Figure 3, create a Prepend HTML Rule. Such a rule typically matches on the specified tag name, attribute name, and attribute value, and then prepends the specified HTML content to the tag delimiter. Click on the Create New drop-down in the HTML Rules page of Figure 3 and select the Prepend HTML option. This will invoke Figure 4, where you will have to specify the Rule Name.
-
Then, click the Match Settings option from the left panel of Figure 4. To instruct the rule to look for a match for the /head tag, specify /head against Match Tag Name in the right panel of Figure 5.
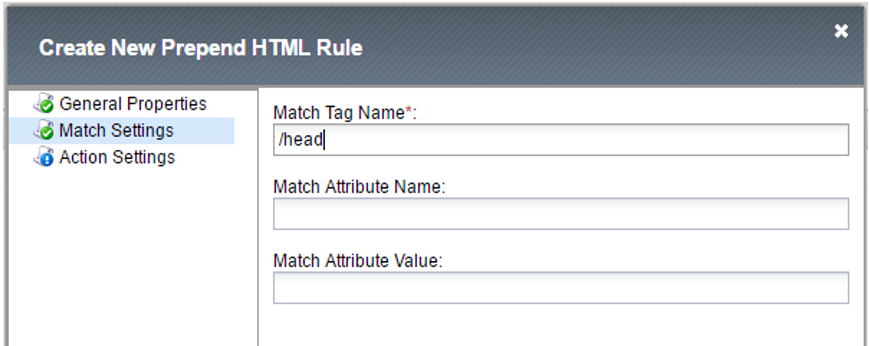
-
Next, choose the Action Settings option from the left panel of Figure 5. Doing so will display the HTML to Prepend text area in the right panel. Copy the RUM code snippet from the text file you created at step 2 above and paste it in this text area (see Figure 6).
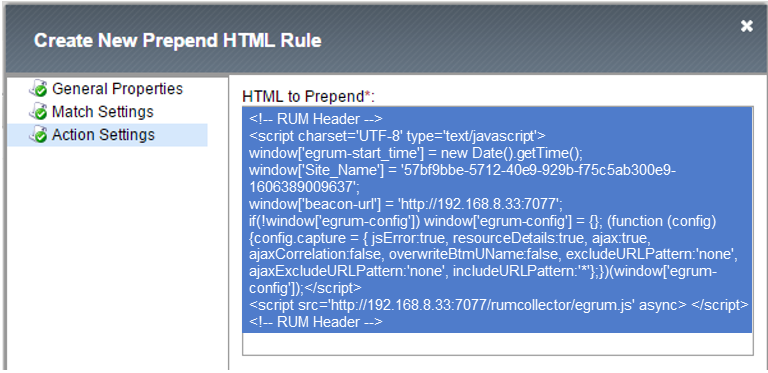
Figure 6 : Copying the RUM code snippet to the HTML to Prepend text area
-
Finally, click the OK button (not shown in Figure 6) to save the changes.
-
-
The next step is to create an HTML profile and associate the rule you created at step 3 with the profile. When you configure an HTML profile on the BIG-IP system, the system can modify HTML content that passes through the system, according to your specifications. For this, do the following:
-
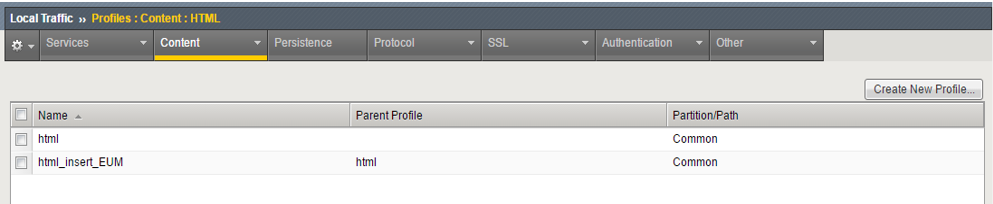
In the F5 console, invoke the Local Traffic menu once again. This time, follow the menu sequence, Profiles -> Content -> HTML. When Figure 7 appears, click on the Create New Profile button in Figure 7 to create a new HTML Profile.
-
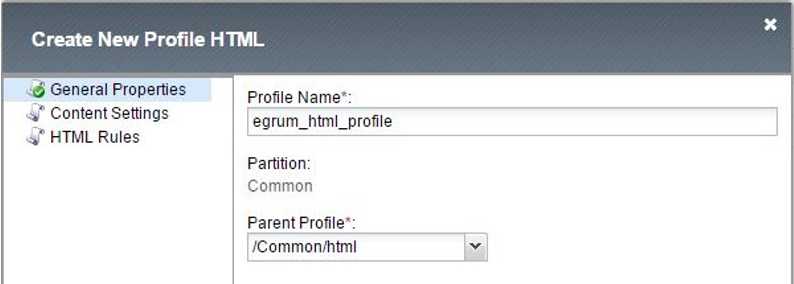
Figure 8 will then appear. Provide a unique name for the new profile in the Profile Name text box of Figure 8. Also, from the Parent Profile drop-down, select /Common/html (seeFigure 8).
-
Then, click the HTML Rules option in the left panel of Figure 8. The right panel will then change as depicted by Figure 9. From the Available Rules list in the right panel (see Figure 9), select the HTML rule you created at step 3 above. To select, simply click on the check box alongside the rule name. Then, click the < button to transfer the selection to the Selected Rules list. This will associate the rule with the HTML profile being created.
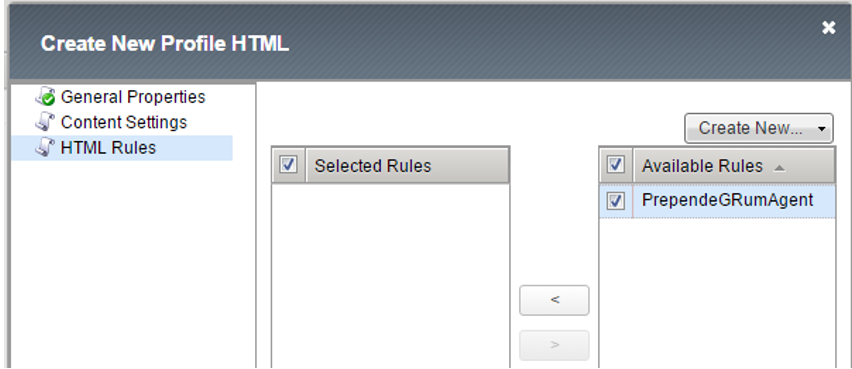
- Then, click on the OK button (not shown in Figure 9) to save the changes to the new profile.
-
-
The final step is to enable the HTML profile you created at step 4 for the Virtual server that will be processing the HTML traffic to and from the target web application. For this, follow the steps below:
-
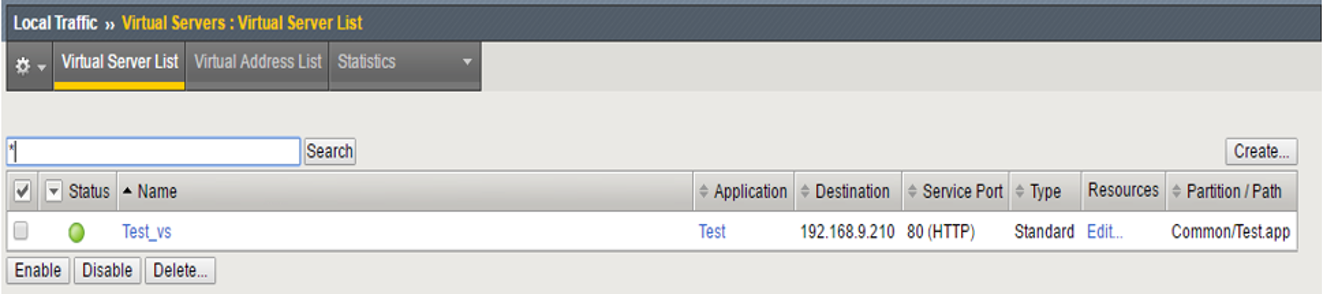
In the F5 console, invoke the Local Traffic menu, and then follow the menu sequence, Virtual Servers -> Virtual Server List. Figure 10 will then appear.
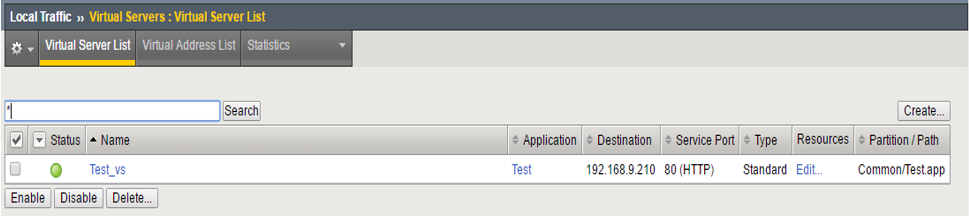
-
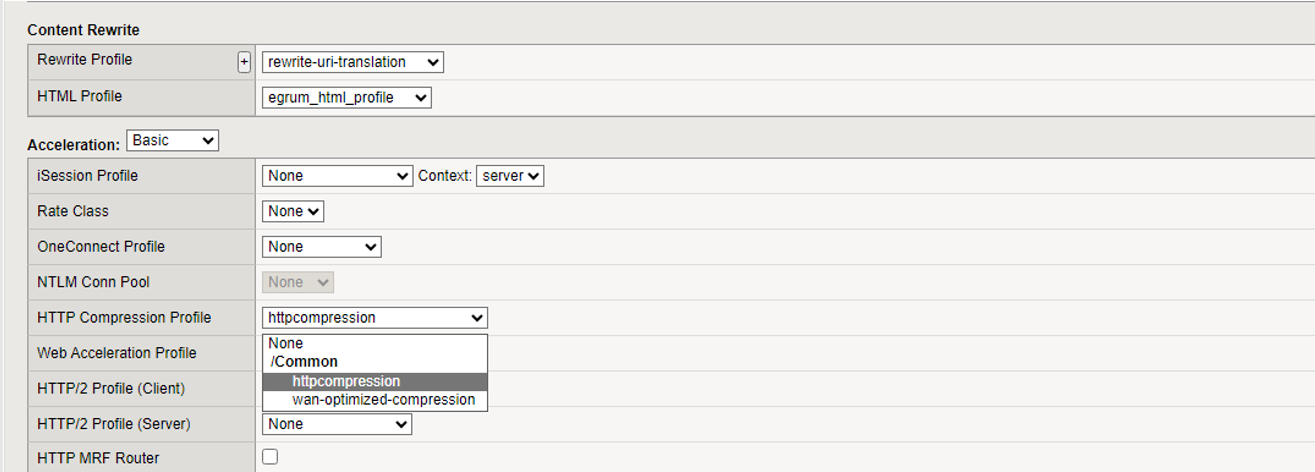
A list of virtual servers will be displayed in Figure 10. Click on that virtual server on which you want the HTML profile to be enabled. This will open Figure 11. From the HTML Profile drop-down of the Content Rewrite section in Figure 11, select the profile you created at step 4 above.
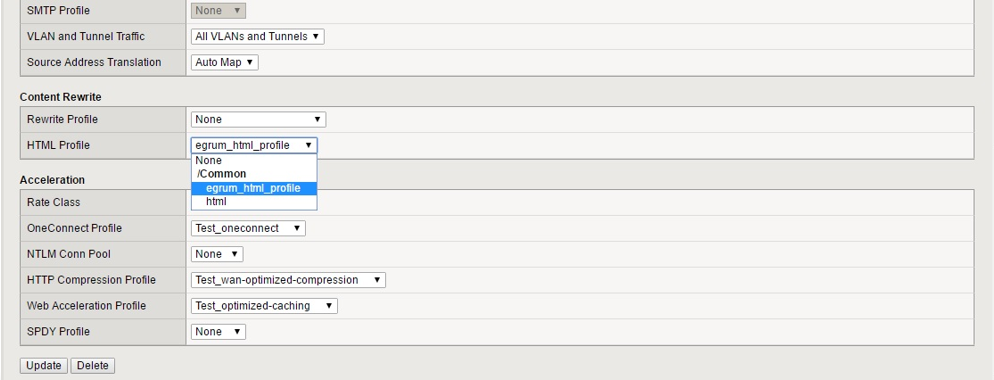
Figure 11 : Selecting the HTML profile to be enabled on the Virtual server
- Finally, click the Update button in Figure 11 to save the changes.
-
Note:
Sometimes, when updating the virtual server details by clicking the Update button in Figure 11, the following error may occur:

Figure 12 : Error that appears when attempting to update the virtual server details
Such an error occurs if the application service associated with the virtual server object has Strict Updates enabled. If this setting is enabled, then users can control only objects that are exposed through the templates that are used by that application service.
To resolve this error, you first need to disable Strict Updates for the application service associated with the virtual server object. The steps to achieve this are as follows:
- Login to the F5 console.
- Follow the iApps -> Application Services menu sequence.
- Click on the Application Service for which you want Strict Updates disabled.
-
Then, click on the Properties tab page. In this tab page, choose Advanced against Application Service, deselect the Strict Updates check box, and click on the Update button (see Figure 13).
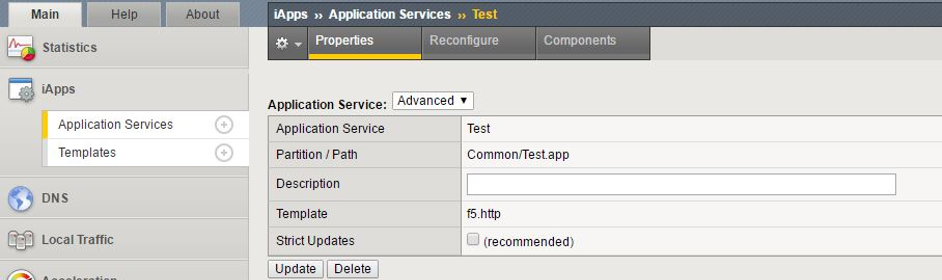
Figure 13 : Disabling Strict Updates for an Application Service
Once this is done, proceed to associate the HTML profile with the virtual server using the procedure detailed at step 5 above.
Troubleshooting RUM Script Injection via F5 BIG-IP Load Balancer
As described in the previous section, the RUM script can be injected into the target application's code using the F5 BIG-IP load balancer's rewrite profile. However, when using the rewrite profile, the F5 BIG-IP load balancer, by default, automatically decompresses the compressed content sent by the web server. To know more about this default behavior, refer to the URL: https://my.f5.com/manage/s/article/K16194938
When the load balancer serves this content to the browser, the browser will naturally take a long time to load the content, as it is decompressed. This in turn will adversely impact the user experience with the web application.
To avoid this, you can opt for any of the following workarounds:
-
Explicitly configure the F5 BIG-IP load balancer to compress the decompressed content before sending it to the browser; refer to
-
Enable RUM script injection at the web server end, instead of at the load balancer end; for more details, refer to
-
Instrument the target web application by manually adding JavaScript code to common header/footer/include section; for more details, refer to
Configuring the HTML Compression Profile in an F5 BIG-IP Load Balancer
To achieve this, follow the steps below:
-
In the F5 console, invoke the Local Traffic menu, and then follow the menu sequence, Virtual Servers -> Virtual Server List. A list of virtual servers will then be displayed (seeFigure 14).
-
FromFigure 14, select the virtual server for which you want compression to be enabled, by clicking on that server. Figure 15 will then appear. From the HTTP Compression Profile drop-down in the Acceleration section of Figure 15, select the compression profile that you want to configure.
-
Next, to enable content compression, select the content type that you want to compress. For that, specify the type of content in the Content Type text box of Figure 16, and click the Include button below. Multiple content types can be so included for compression.

-
Finally, click Save to save changes to the profile.