Specific Reports
In many cases, an administrator may want to specify a different set of metrics for each component being managed. For example, the reports for the Oracle Database server running on the production server could be different from that running on the staging server. Such reports that are specific to a particular component/application/site are known as Specific Reports. To configure specific reports, select the Specific option from the Reporter sub-menu of the Settings tile in the eG administrative interface. Like Default Reports, Specific Reports can also be categorized as Network, System, Application and Site.
Network Reports

Figure 1 : The eG Specific Reports page
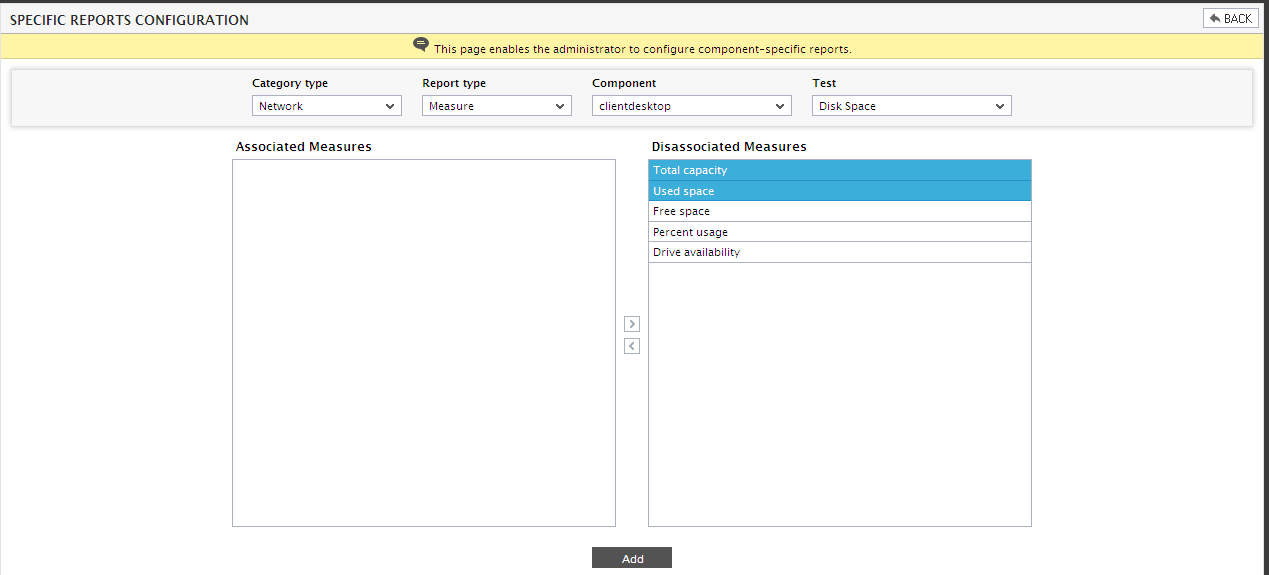
Then, clicking the Add New button in Figure 1 will lead you to Figure 2. From Figure 2, configure the following:
- For configuring reports belonging to the Network category, choose the Network option from Figure 2.
- Select a Report type from the list box (see Figure 2).
- Then, from the Component list box that lists all the managed components in the environment, select the Component for which reports are to be generated (see Figure 2).
- Once a Component is selected, all the measures that were previously associated (if any) with the given combination of Category type, Report type, and Component, will be displayed.
- Next, to select the measures for which a report of the selected type is to be generated, first, choose the Test that generates the measures. The Test list box will list all those tests that are applicable to the selected Component (see Figure 2).
-
Upon selection of a test, all the measures associated with the selected test, but which are not yet associated with the given Category type, Report type, and Component combination, will appear in the Disassociated Measures list (see Figure 2).
-
Now, from the Disassociated Measures list, select the measures for which reports of the selected type are to be generated. Next, click on the < button to transfer the selected measures to the Associated Measures list (see Figure 3).
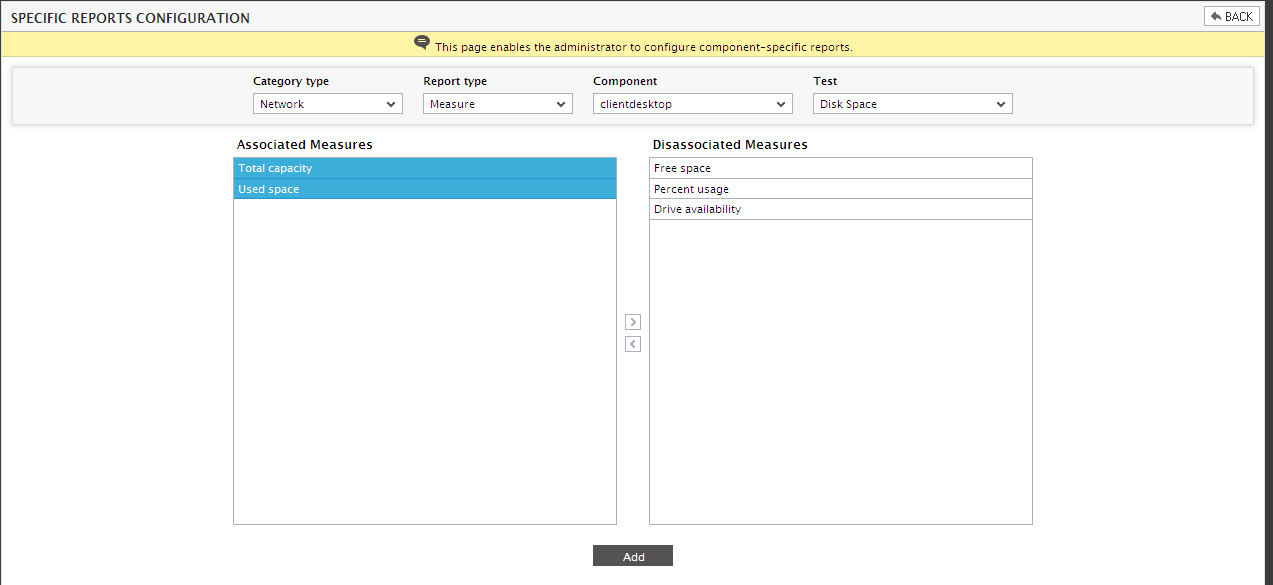
Figure 3 : Associating the Measures for configuring the Network Specific reports
- This ensures that Network Reports of the selected Report type for the chosen Component are generated for each of the measures present in the Associated Measures lists. In the example illustrated by Figure 3, all the measures associated with the Network test have been chosen for generating network reports for the component Client Desktop. If summary reports are to be generated for the same set of measures, then click on the Add to Summary button.
- Settings so updated can be deleted using the
 button.
 - Now, to disassociate the measures, select them from the Associated Measures list, click on the > button, and finally, click on the Add button.
System Reports
For configuring reports of the System category, select the System option and proceed in the same manner as discussed above. Figure 4 depicts this process.
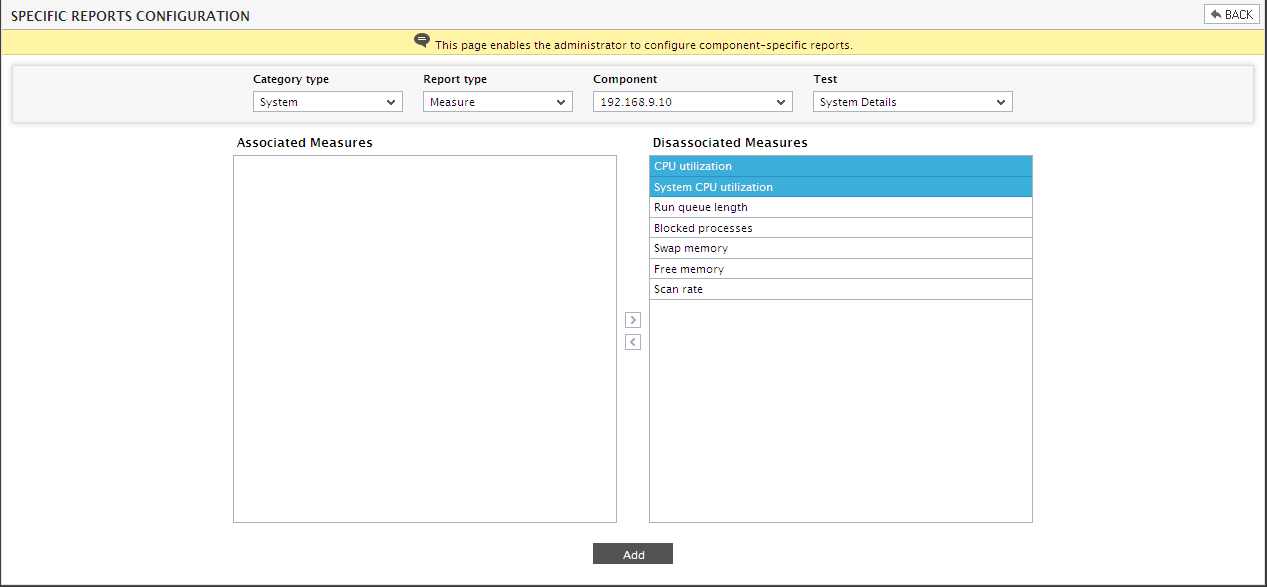
Figure 4 : Configuring specific system reports
According to Figure 4, the CPU utilization and System CPU utilization measures of the System Details test have been chosen for generating specific System-Measure reports for the component 192.168.9.10. If summary reports are to be generated for the same set of measures, then click on the Add to Summary button.
Application Reports
For configuring reports belonging to the Application category, select the Application option (see Figure 5). Then, proceed as follows:
- Select a Report type (Measure/Summary) from the list box (see Figure 5).
- Then, for generating reports for measures associated with a particular component type, select a Component type (see Figure 5).
- Then, from the Component list box that lists all the managed components of the selected Component type, select the Component for which reports are to be generated (see Figure 5).
- Once this is done, all the measures that have already been associated (if any) with the given combination of Category type, Report type, Component type, and Component, will be displayed.
- Also, the Test list box will be populated with all the tests associated with the Component. From this list box, select the test that generates the measures for which reports are required (see Figure 5).
- Once a test is selected, all the measures associated with the selected test will appear in the Disassociated Measures list.
- Now, from the Disassociated Measures list, select the measures for which reports of the selected type are to be generated. Next, click on the < button to transfer the selected measures to the Associated Measures list (see Figure 5).
-
Similarly, measures associated to multiple tests can be configured for a single report (see Figure 5).
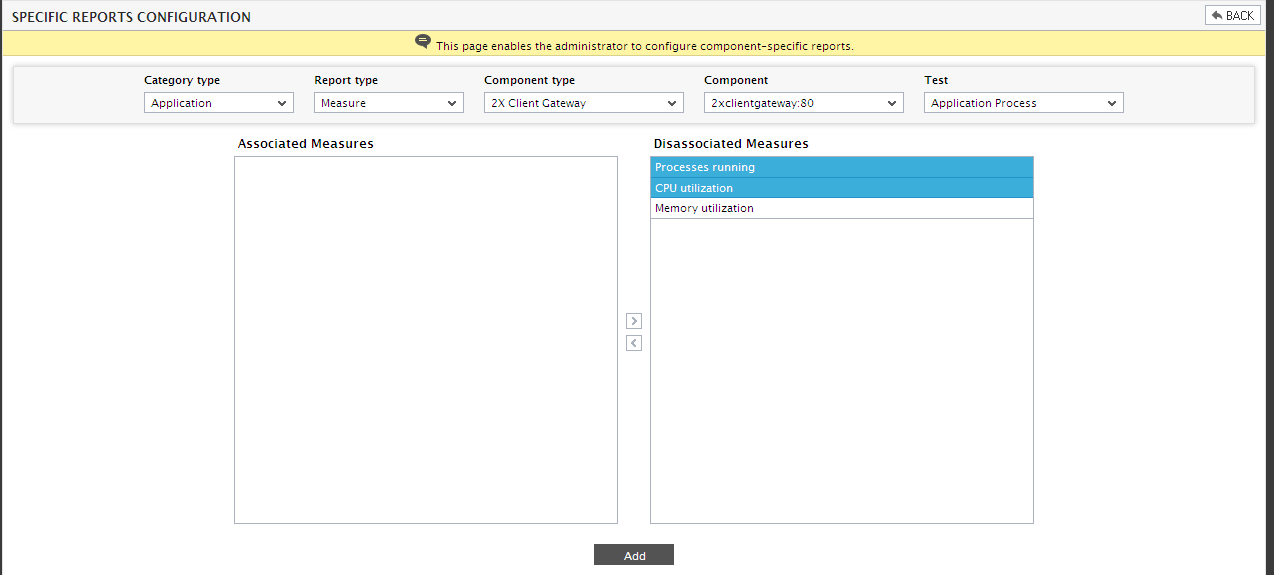
Figure 5 : Associating the measures of the Application Process test
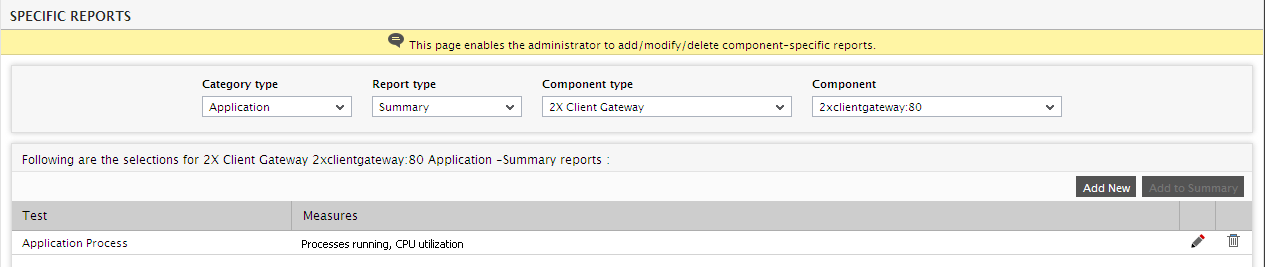
Figure 6 : Associating the measures of the Application Processes test
- This ensures that Application Reports of the selected Report Type for the chosen Component are generated for each of the measures picked from the Associated Measures list. In the example illustrated by Figure 5 and Figure 6, note that the Processes running anf CPU utilization have been chosen for generating specific Application-Measure reports. If summary reports are to be generated for the same set of measures, then click on the Add to Summary button in Figure 6.
- Settings so updated can be deleted using the button.
- Now, to disassociate the measures, select them from the Associated Measures list, click on the > button, and finally, click on the Add button.
Site Reports
For configuring reports belonging to the Site category, select the Site option (see Figure 7). Then, proceed as follows:
- Select a Report type (Measure/Summary) from the list box (see Figure 7).
- Then, for generating reports for measures associated with a particular site, select a site from the Sites list box (see Figure 7).
- Once this is done, all the measures that have already been associated (if any) with the given combination of Category type, Report type, and Site, will be displayed.
- Also, the Test list box will be populated with all the tests associated with the site. From this list box, select the test that generates the measures for which reports are required (Figure 7).
- Once a test is selected, all the measures associated with the selected test will appear in the Disassociated Measures list.
- Now, from the Disassociated Measures list, select the measures for which reports of the selected type are to be generated. Next, click on the < button to transfer the selected measures to the Associated Measures (see Figure 7) list.
-
Finally, click on the Update button.
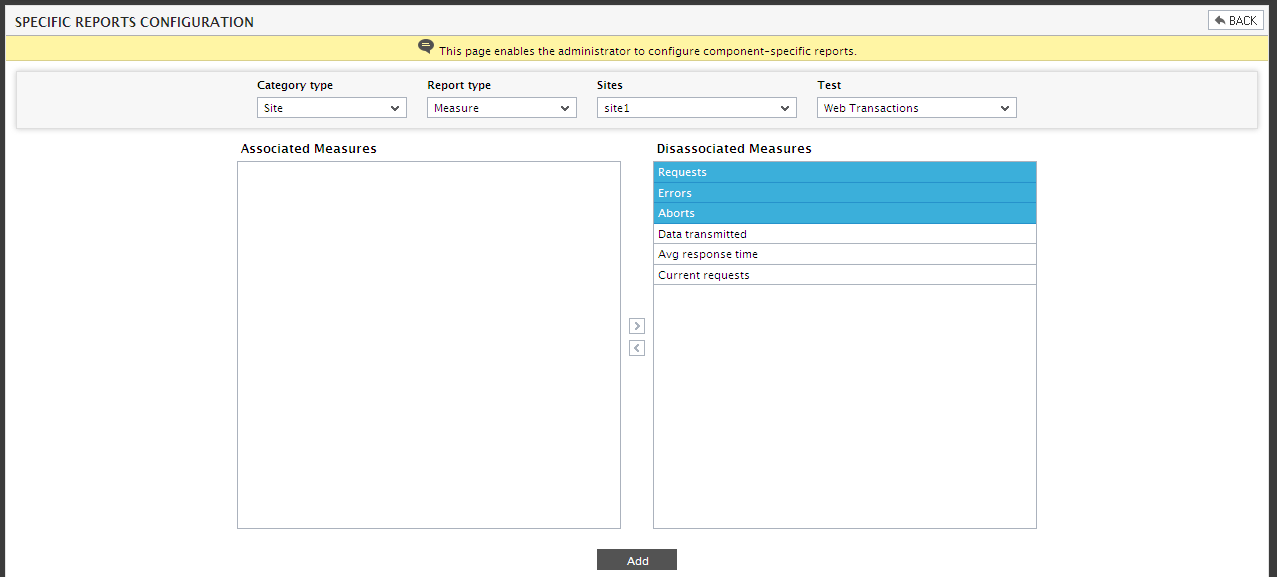
- This ensures that Site Reports of the selected Report type for the chosen site are generated for each of the measures available in the Associated Measures list (see Figure 7). According to Figure 7, the Errors, Requests and Aborts measures associated with the Web Transactions test has been chosen for generating specific Site-Measure reports for the site1. If summary reports are to be generated for the same set of measures, then click on the Add to Summary button.
- Settings so updated can be deleted using the button.
- Now, to disassociate the measures, select them from the Associated Measures list, click on the > button, and finally, click on the Add button.