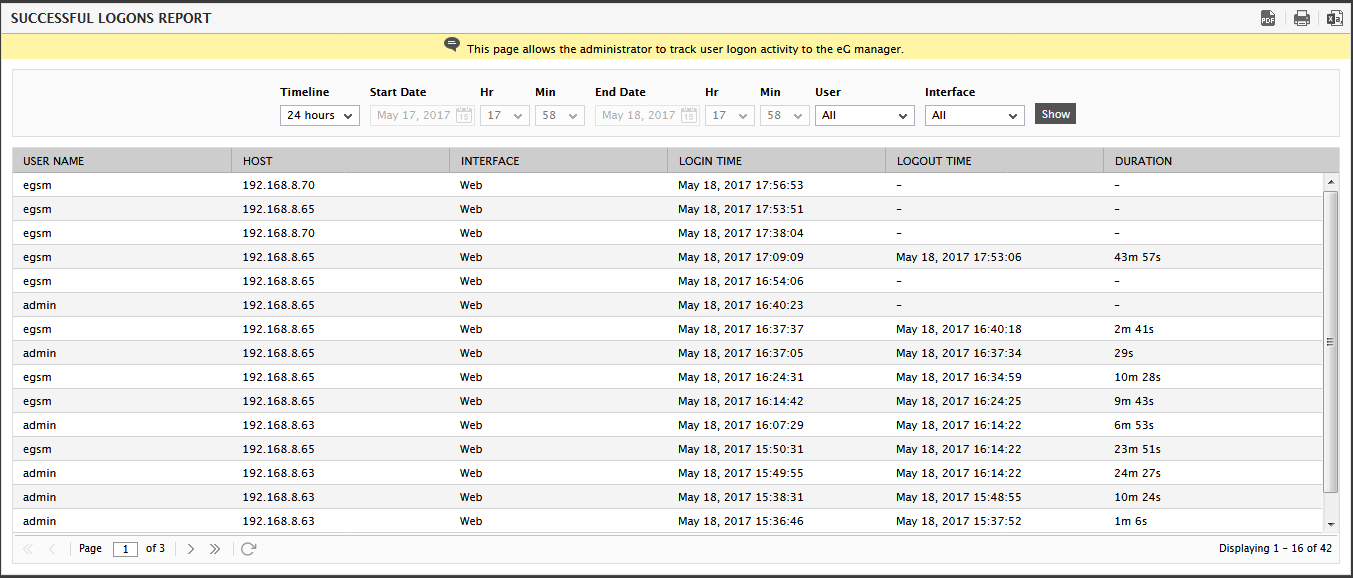
Auditing Successful User Logons
To view the details of a chosen user's sessions with the eG SuperManager system, use the SUCCESSFUL LOGON REPORTS. This report enables administrators to determine which user(s) was actively using the eG SuperManager system during periods when the target environment was experiencing performance issues or exhibiting a strange behavior. Unauthorized accesses and rogue users can thus be identified quickly. Moreover, these reports embed a special drill-down feature, which allows you a quick look at the actions performed by a particular user during the period of his/her access. This sheds light on changes effected by the user, which could have caused problems.
To access the SUCCESSFUL LOGON REPORTS page, follow the menu sequence: Audits -> Successful Logons. Figure 1 then appears.
To generate a report on successful logons using this page, do the following:
- Select a Timeline for the report. The default Timeline for the report is 24 hours. You can choose any other fixed period from the Timeline list, or select the Any option from this list. Choosing the Any timeline, allows you to provide a Start Date and End Date date and time for report generation. You can even choose the exact time using the Hr and Min lists.
- Next, select the User whose accesses you want to audit. By default, the All option is displayed here, indicating that the report provides the details of the sessions of all users to the eG SuperManager system. However, if only one user has successfully logged into the eG SuperManager system till date, then, by default, that user's name is displayed in the User list.
- By default, the report displays a maximum of 15 records per page. You can override this default setting, by specifying a different value against the Row_multiplier parameter in the [AUDIT_LOG_SETTINGS] section of the eg_ui.ini file (in the {EG_INSTALL_DIR}\manager\config directory). For instance, if 10 is specified against Row_multiplier, then this report displays 10 records per page.
-
Finally, click the Show button to generate the report.
The resulting report provides details of every successful login made by the chosen user(s). These details include:
- the name of the user
- the IP address of the host from which the user accessed the eG SuperManager
- the exact time of login
- the accurate time of logout
- the duration of the user access
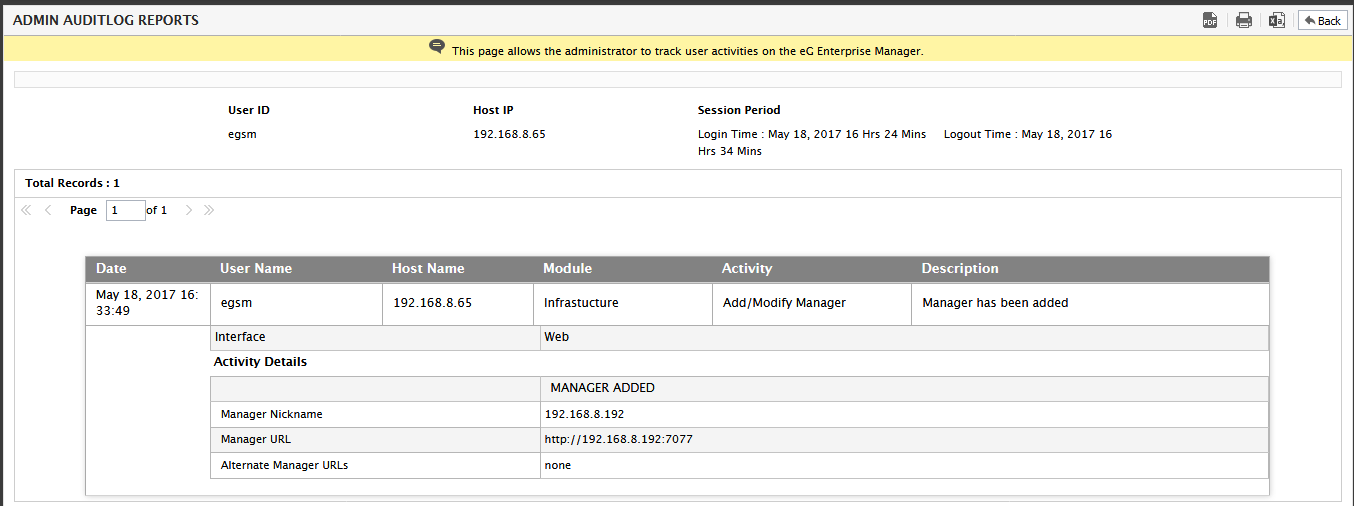
- Clicking on a user name in this page leads you to the details of what configuration changes were made by that user during the period of his/her access.
- If the report runs across pages, then the Page box and the >, >>, <, and << links at the bottom of the page will aid navigation.
- You can print the report by clicking on the
 icon in Figure 1, or save the report as a PDF file by clicking on the
  icon. You can even save the report as a CSV file by clicking on the
  icon in Figure 1
 -
Clicking on a user name in Figure 1 leads you to Figure 2, which reveals what configuration changes were made by that user during the period of his/her access.