Configuring the Individual eG Managers to Work with the eG SuperManager
To configure the eG Managers to work with the eG SuperManager, administrators can do either of the following:
-
Explicitly add the SuperManager in each of the managers configured for the SuperManager or
-
Enable automatic registration of eG SuperManager in each of the eG managers
Enabling Automatic Registration of eG SuperManager in the eG Manager
To enable automatic registration of the eG SuperManager in the G manager, do the following:
-
Login to eG administrative interface as admin with password admin.
-
Navigate to the Settings -> Manager option and click the SuperManager Settings node under the MANAGER SETTINGS tree. Figure 1 will then appear.
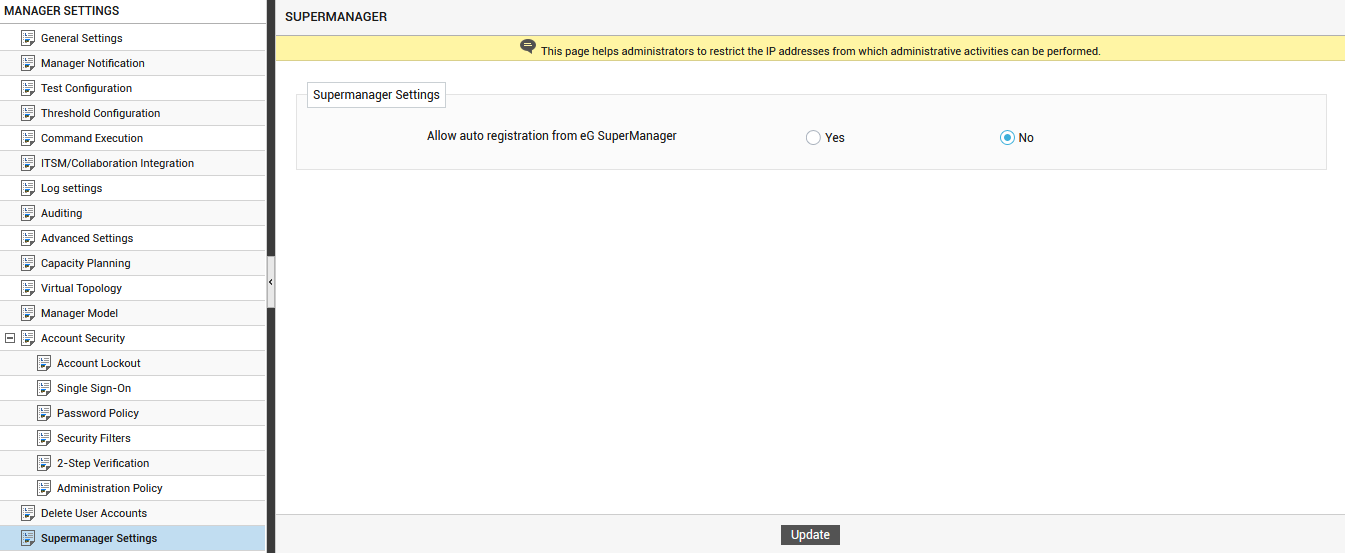
Figure 1 : Enabling automatic registration of SuperManager in eG manager
-
In Figure 1 that appears, set the Allow auto registration from eG SuperManager flag to Yes. By doing so, the eG SuperManager will be automatically registered with the configured eG manager. The details of the eG SuperManager will then be automatically populated in the SuperManager ADD/DELETE page (see Figure 3)
Explicitly Adding the eG SuperManager to the eG Manager
To explicitly add the SuperManager to each of the managers configured for the SuperManager, do the following:
- Login to the eG administrative interface as admin with password admin.
-
Follow the menu sequence: Admin -> Miscellaneous -> SuperManager Settings. Figure 2 will then appear.

-
To add the SuperManager, click the Add SuperManager button in Figure 2. Figure 3 then appears.
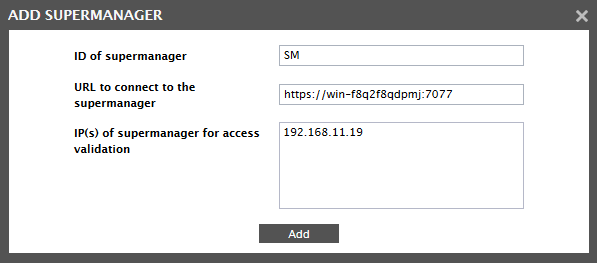
Figure 3 : Adding a SuperManager to which this manager should report
-
In Figure 3, specify the following:
- ID of supermanager - Specify the name of the SuperManager or the IP address of the SuperManager to which the eG manager should report to.
-
URL to connect to the SuperManager - Specify the URL of the SuperManager which would be used by the eG manager to communicate with the SuperManager.
- IP(s) of supermanager for access validation - If the eG SuperManager and the eG manager reside in the same local environment but on different host, then the eG manager would be able to communicate with the SuperManager using an intranet IP. In such cases, provide the alternate IP of the SuperManager in the SuperManager Alternate IP(s) text box.
-
Clicking the Add button would add the SuperManager to the manager as shown in Figure 4.

Figure 4 : The list of SuperManagers to which an eG manager is to report to
Note:
The eG manager is capable of communicating with multiple SuperManagers simultaneously. Therefore, you can add multiple SuperManagers from an eG manager using Figure 3.
- You can even modify the SuperManager settings by clicking the
 button.
 - You can even delete a SuperManager specification, by clicking the
 button against the eG SuperManager in Figure 4, that you wish to delete. If you wish to delete all the SuperManagers, then, select the check box against the ID OF SUPERMANAGER label and click the
  button.