Auto-configuring the Windows Services to be Monitored
To save the time and effort involved in manual service specification, eG Enterprise offers an easy-to-use auto-configure option in the form of a ![]() icon that is available next to the servicename text box.
icon that is available next to the servicename text box.
To auto-configure the services to be monitored, do the following:
-
Click on the
 icon next to the servicename text area in the Windows Services test configuration page (see Figure 113).
Figure 113 : Configuring the WindowsServices test
Note:
The
icon will appear only if the following conditions are fulfilled: -
The Windows Services test must be executed in an agent-based manner.
-
In case the eG manager in question is part of a redundant manager setup, then the agent executing the test must be reporting metrics to the primary manager only.
-
-
When the
button is clicked, a services page will appear (see Figure 114).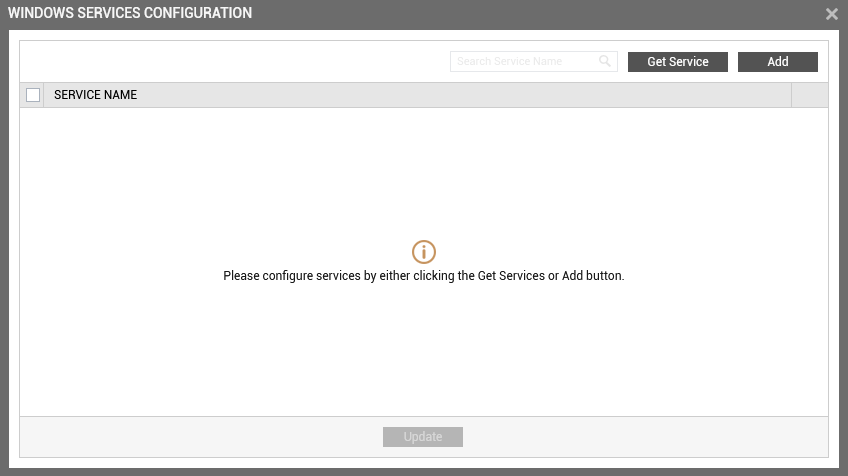
-
Upon clicking the Get Service button in the windows services configuration page, a pop up window with a list of services that are running on the host will be displayed (see Figure 115).
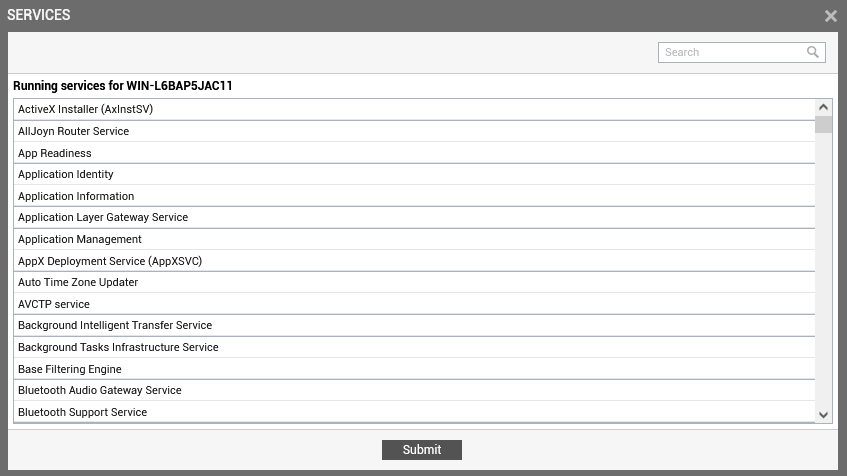
Figure 115 : List of auto-discovered services
Note:
The services that have already been configured for monitoring will not be listed in Figure 115.
-
From the pop-up, select the services that require monitoring and click the Submit button.
-
Clicking the Submit button in the pop-up will automatically populate the Windows service name text box available in the windows services configuration page, with the name of the chosen service (see Figure 116).
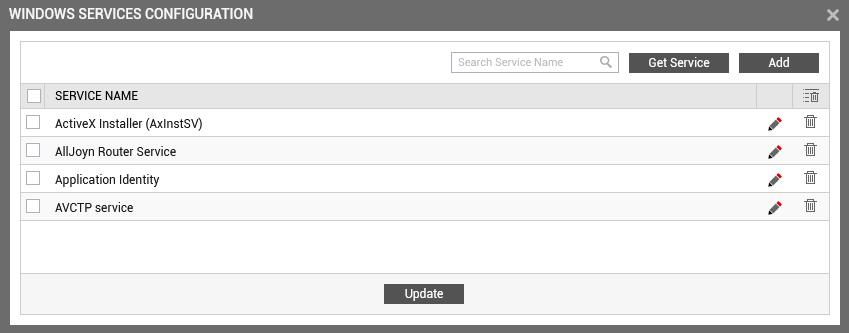
Figure 116 : Multiple auto-discovered services configured for monitoring
-
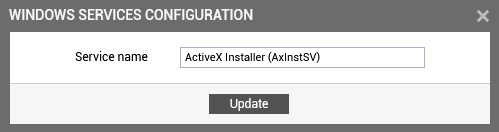
You can add more services in the windows services configuration page by clicking on the Add button present at the right corner. To remove a specification that pre-exists, just click on the
 icon that corresponds to it. You can also manually edit the service name using the
  icon. When you click the icon, a window will popup, where you can edit name of the chosen service (see Figure 116).