
How Does eG Enterprise Monitor Omnissa App Volumes Manager?
eG Enterprise monitors the Omnissa App Volumes Manager using both agent based and agentless manners. The eG agent uses the RESTful APIs to collect the metrics from the target Omnissa App Volumes Manager. To be able to connect to the RESTful API, the eG agent should be configured with the credentials of a user belonging to an active directory group that is vested with the Administrators (Read only) rights. By default, in some versions of Omnissa App Volumes Manager, the Administrators (Read only) role will not be enabled by default. To know how to enable the Administrators (Read only) role and assign the role to an active directory group,
Enabling the Administrators (Read only) role
If the monitored target is an Omnissa App Volumes Manager of version 2.14 and above, then proceed directly to Assigning the Administrators (Read only) role to an Active Directory Group to create a new Administrators (Read only) role. If the monitored target is an Omnissa App Volumes Manager version 2.12 or below, by default, the Administrators (Read only) role will not be visible. To enable the Administrators (Read only) role, first, you are required to set an Environment variable in the machine on which the Omnissa App Volumes Manager is installed. The section below lists the steps that you need to follow to set the Environment variable.
Setting the Environment variable
To set the Environment Variable, do the following:
- Log in as administrator into the machine where the App Volumes Manager is installed.
-
Then, navigate through the Control Panel -> System and Security -> System -> Advanced System Protection. Figure 1 then appears.
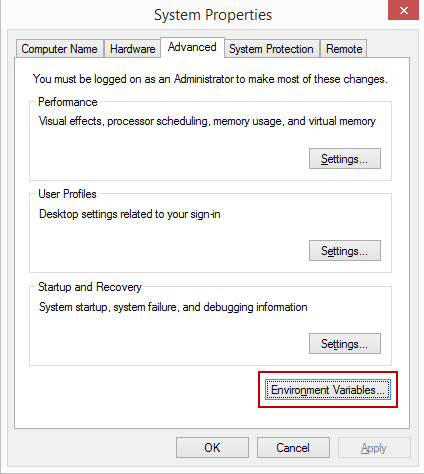
Figure 1 : The System Properties page through which Environment Variable needs to be set
-
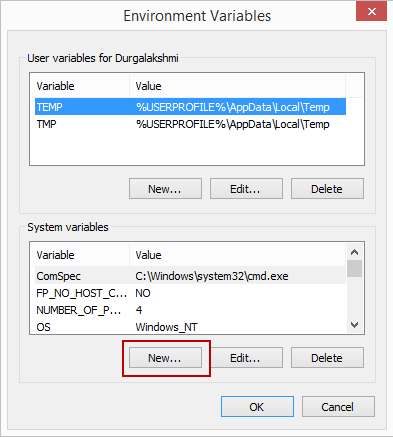
Click the Environment Variables button in Figure 1. Figure 2 then appears.
-
Click the New button available below the System variables section in Figure 2.
-
In Figure 3 that appears, set the Variable name to AVM_ENABLE_READ_ONLY_ROLE and the Variable value to 1.
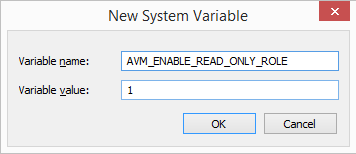
- Click the OK button to set the Environment Variable.
Assigning the Administrators (Read only) role to an Active Directory Group
-
Login to the machine on which the Omnissa App Volumes Manager is installed.
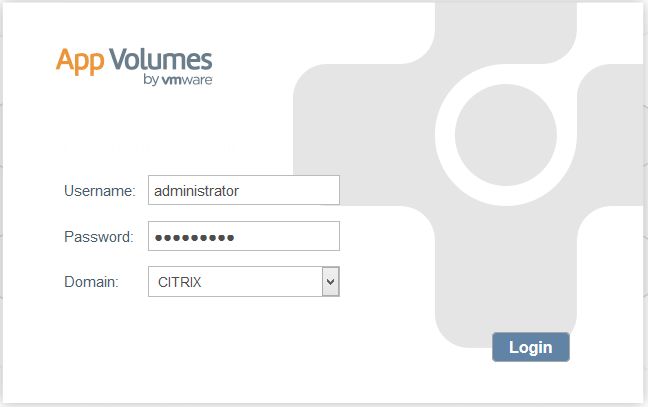
Figure 4 : Logging into the Omnissa App Volumes Manager console
-
Figure 5 then appears.
-
Click the Admin Roles tab in Figure 5. Figure 6 will then appear listing the roles that are assigned earlier to the administrators (if any).
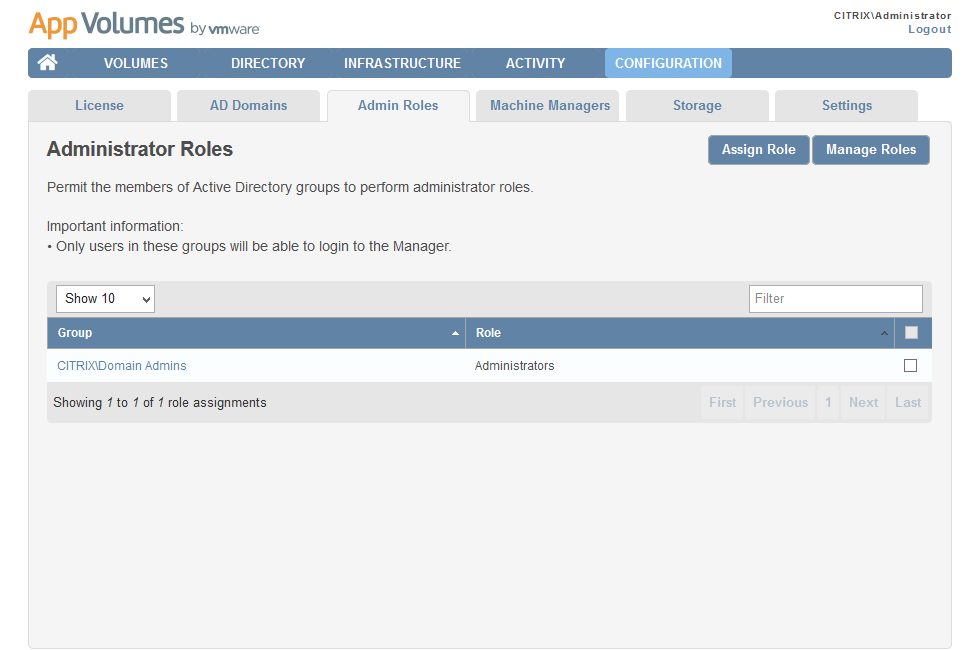
- To create a new role, click the Assign Roles button in Figure 6.
-
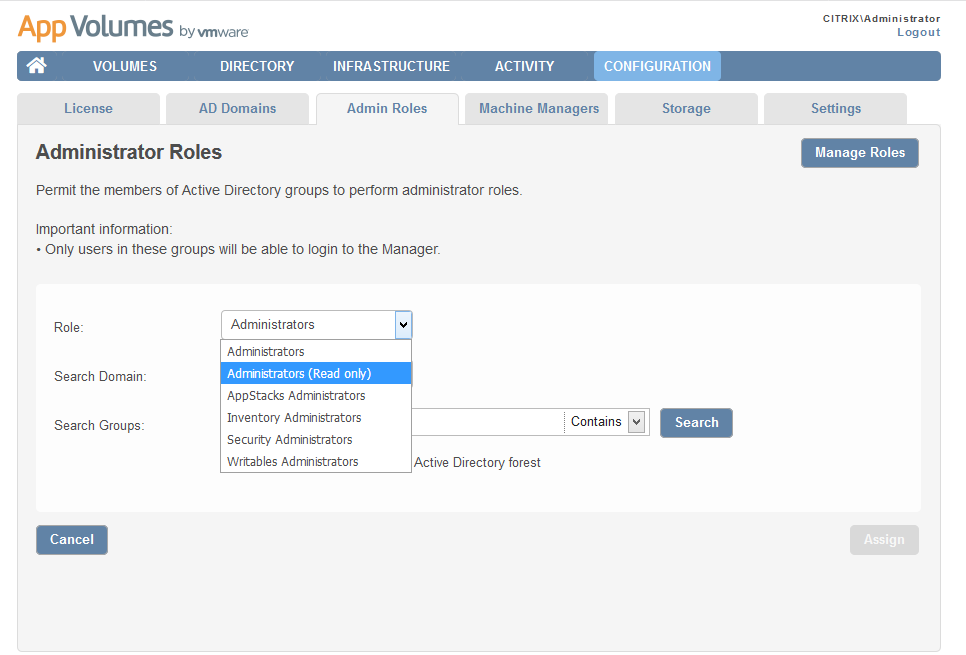
In Figure 7 that appears next, select the Administrators (Read only) option from the Role list box.
-
You can then pick a domain or a group to which the user role should belong to and then click the Assign button. This will ensure you that the users belonging to that active directory group can be specified while configuring the tests in the test configuration page. Figure 8 will then appear listing the groups that are assigned the Administrators (Read only) role.
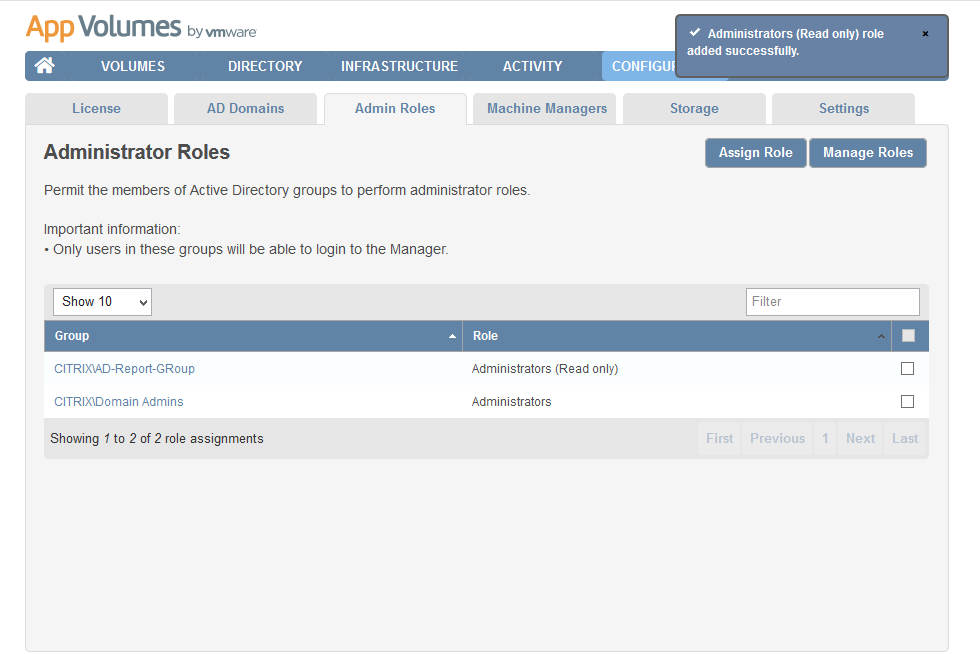
Figure 8 : The Administrators (Read only) role assigned to a group
- Once you have assigned the Administrators (Read only) role to an active directory group, you can proceed to manage the Omnissa App Volumes Manager.
Managing the Omnissa App Volumes Manager
eG Enterprise is capable of automatically discovering a Omnissa App Volumes Manager. To manage an auto-discovered Omnissa App Volumes Manager, follow the steps below:
- Log into the eG administrative interface.
- Follow the Infrastructure -> Components -> Manage/Unmanage/Delete menu sequence in the Admin home page.
-
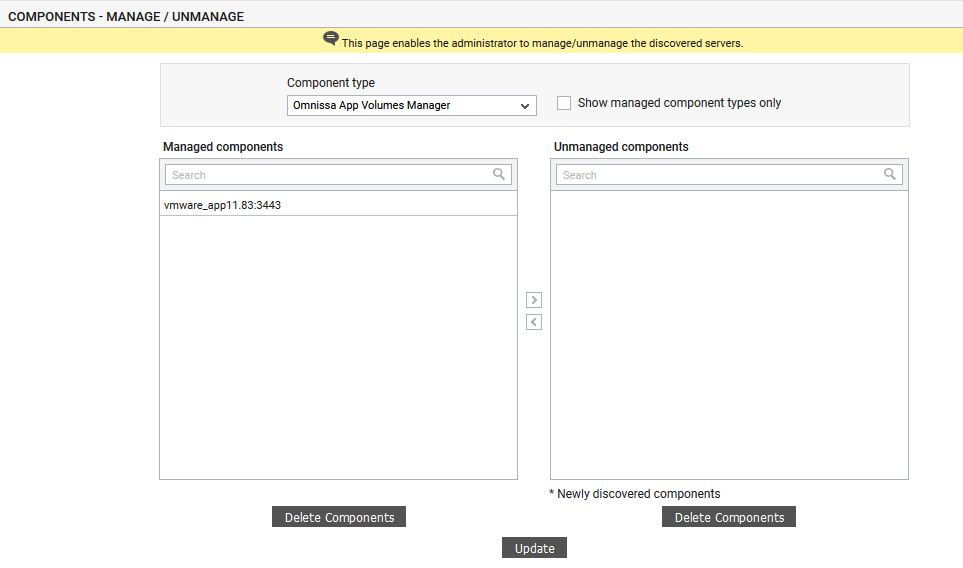
Figure 9 will then appear. Select Omnissa App Volumes Manager as the Component type in Figure 9. All auto-discovered Omnissa App Volumes Managers will be displayed in the Unmanaged components list, with an asterisk (*) symbol alongside. This 'asterisk' denotes that the Omnissa App Volumes Manager has been 'newly' discovered by eG Enterprise. To manage an Omnissa App Volumes Manager, select it from the Unmanaged components list and click the < button in Figure 9. This will transfer the selection to the Managed components list (see Figure 10). Finally, click the Update button.
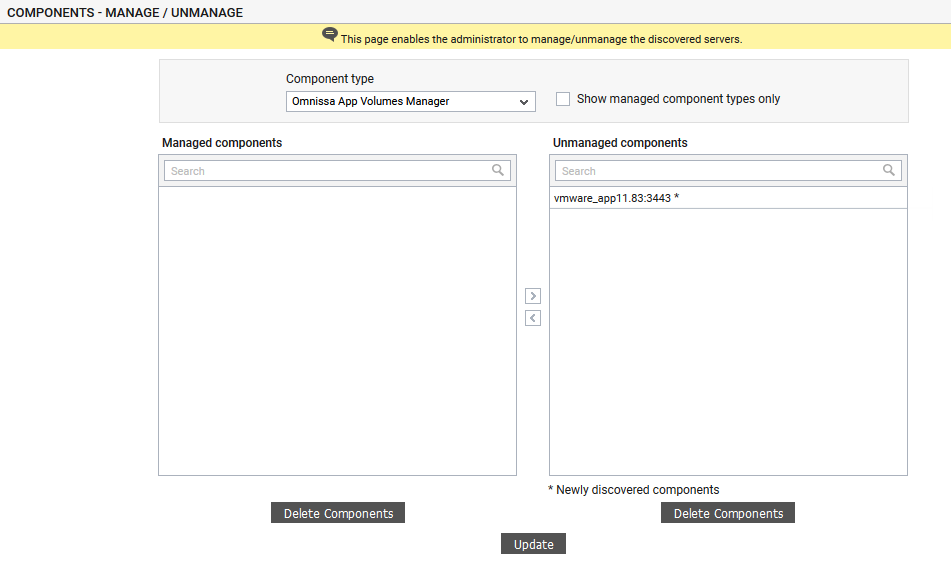
Figure 9 : Newly discovered Omnissa App Volumes Manager listed in the Unmanaged components list
If for some reason, eG Enterprise is unable to auto-discover the Omnissa App Volumes Manager, then, you will have to manually add the Omnissa App Volumes Manager to the eG Enterprise system. For this, follow the steps below:
- Login to the eG admin interface as admin with password admin.
- Follow the menu sequence Infrastructure -> Components -> Add/Modify in the Admin Home page.
- In the page that appears next, select Omnissa App Volumes Manager as the Component type and click the Add New Component button therein.
-
Figure 11 will then appear.
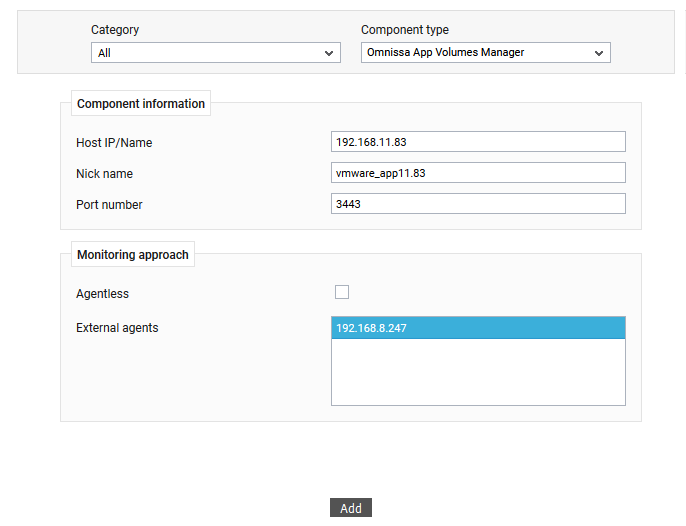
Figure 11 : Adding an Omnissa App Volumes Manager in an agent based manner
- In Figure 11, provide the Host IP/Name of the target Omnissa App Volumes Manager. Assign a Nick name to the Omnissa App Volumes Manager.
- In case you are monitoring a Omnissa App Volumes Manager in an agent-based manner, just pick an external agent from the External agents list box and click the Add button to add the component for monitoring.
-
On the other hand, if you are monitoring an Omnissa App Volumes Manager server in an agentless manner, then do the following:
- Select the Agentless check box.
- Pick the OS on which the Omnissa App Volumes Manager is running.
- Set the Mode to Other.
- Select the Remote agent that will be monitoring the Omnissa App Volumes Manager. Note that the Remote agent you choose should run on a Windows host.
- Choose an external agent for the server by picking an option from the External agents list box.
-
Finally, click the Add button to add the Omnissa App Volumes Manager for monitoring.
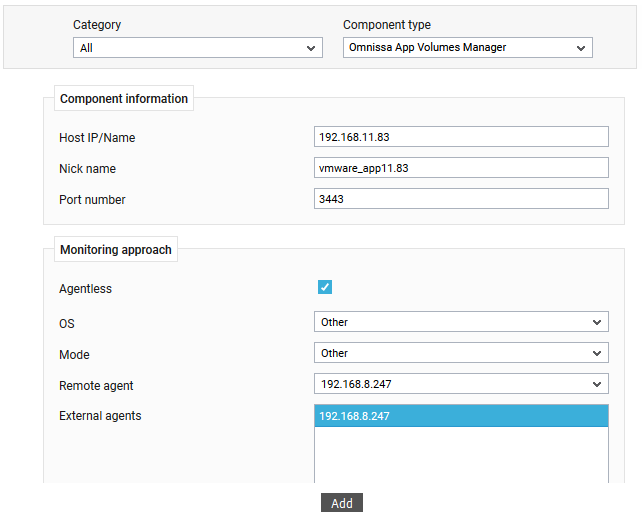
Figure 12 : Managing an Omnissa App Volumes Manager in an agentless manner
-
Now, when you attempt to sign out of the eG administrative interface, Figure 13 appears, listing the tests requiring manual configuration.
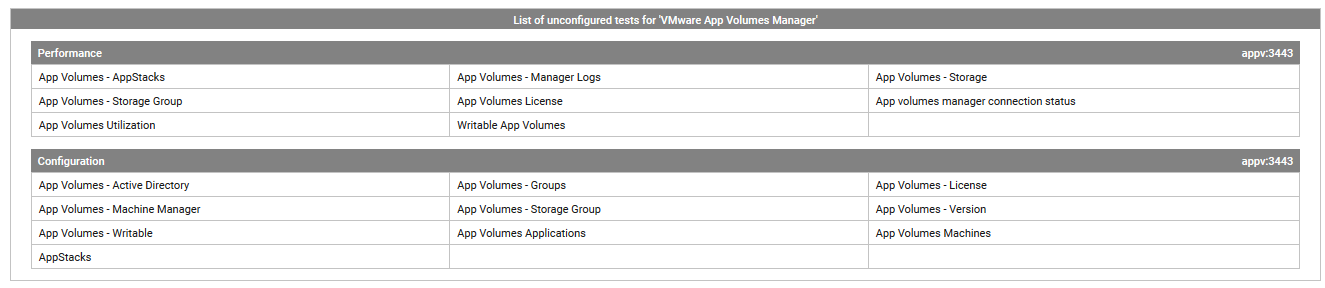
Figure 13 : The list of unconfigured tests for Omnissa App Volumes Manager
- From the List of Unconfigured tests that appears, choose to configure the App Volumes - AppStacks test by clicking on it. To know more on configuring this test, refer to Monitoring the Omnissa App Volumes Manager.
-
Once you have configured the tests, signout of the administrative interface.
