Assigning the ‘Read-Only’ Role to a Local/Domain User to vCenter
In order to ensure that the eG agent uses one/more vCenters in the target environment to auto-discover VMs and to report statistics revealing the relative performance of the VMs (i.e., the outside view), all the tests that the agent executes should be configured with the IP address of the vCenter server to be used; also, the name and password of a user with ‘Read-only’ privileges to vCenter should be provided.
Given below are the steps to be followed for assigning the ‘Read-Only’ role to a local/domain user to vCenter:
- Login to a system on which the VMware Infrastructure Client is installed.
- Double-click on the VMware Infrastructure Client icon on your desktop.
-
A login screen then appears (see Figure 364). To connect to the vCenter, select the IP address / Name of the vCenter, and then provide the login information. To grant access permissions to a user, you will have to login to vCenter as a user with rights to grant permissions to other users. Therefore, provide the User name and Password of such a user in the login screen.

-
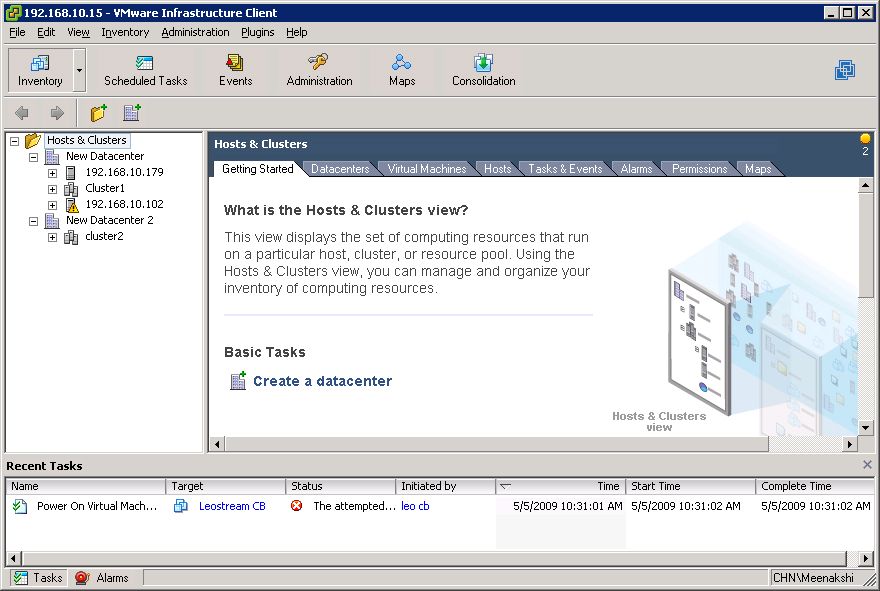
The VMware Infrastructure Client console then opens (see Figure 365). This console has a tree-structured listing of datacenters, clusters, resource pools and ESX hosts on the left hand side and a series of tab pages on the right. Click on the top-most node of the tree in the left panel.
-
To assign ‘Read-only’ permissions to a vCenter user, first click on the Permissions tab page in the right panel (see Figure 366). The list of existing users on vCenter and the roles assigned to each of them is then displayed.
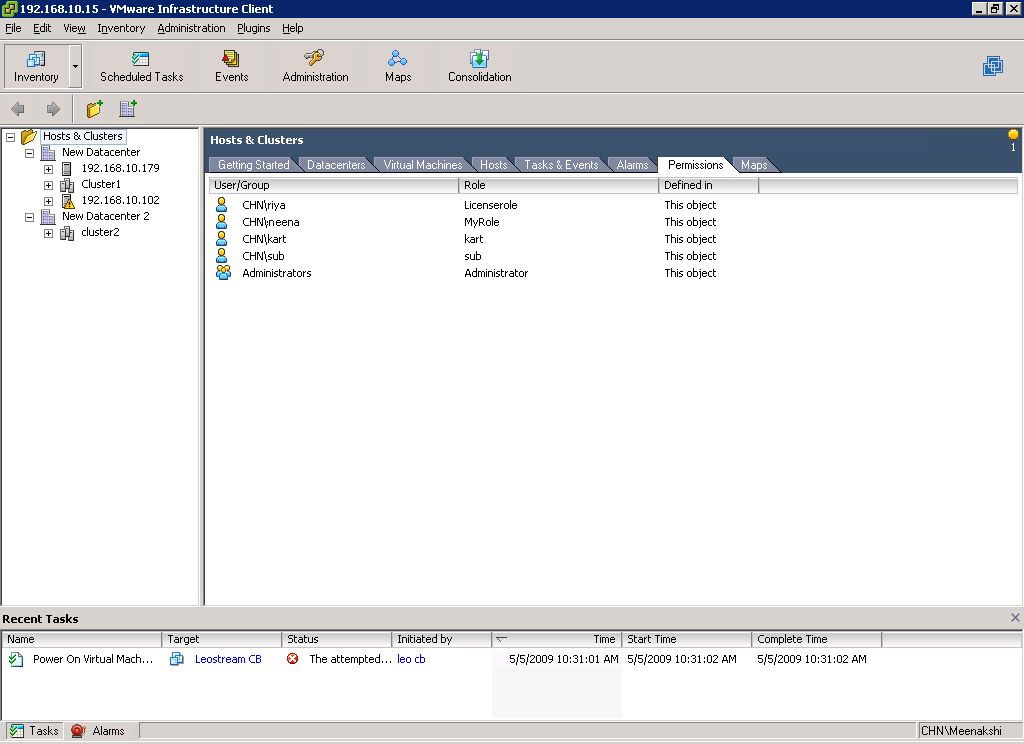
Figure 366 : List of vCenter users and roles assigned to them
-
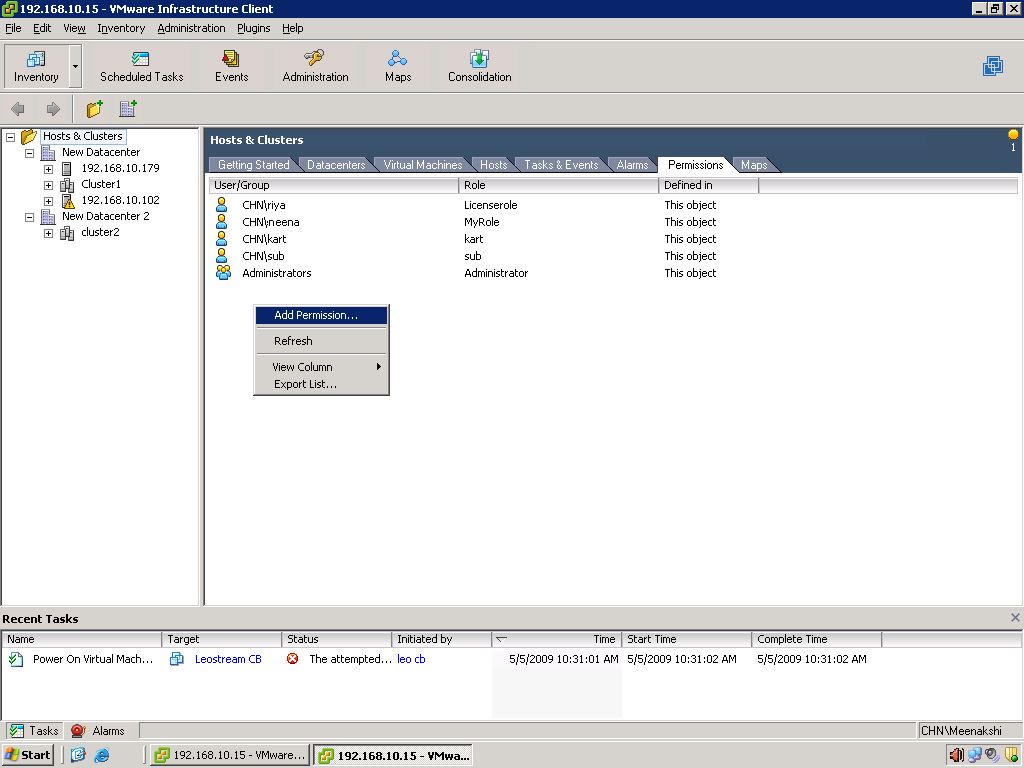
Then, right-click anywhere within the tab page, and select the Add Permission option (see Figure 367).
-
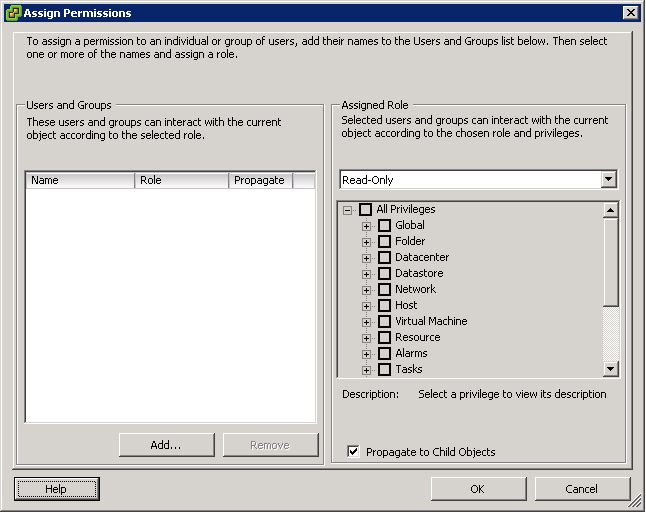
Figure 368 then appears. Click on the Add button in Figure 368.
-
Figure 369 that then appears allows you to select a local/domain user. If you want to grant a local user the right to View and stop sessions, just select <servers> from the Domain list. All valid users to the Windows system hosting the vCenter will then be listed in the Users and Groups section in Figure 369. Select one from this list (see Figure 369). To grant the same privilege to a domain user, select the domain from the Domain list, and then select a domain user from the Users and Groups section (not shown in Figure 369).
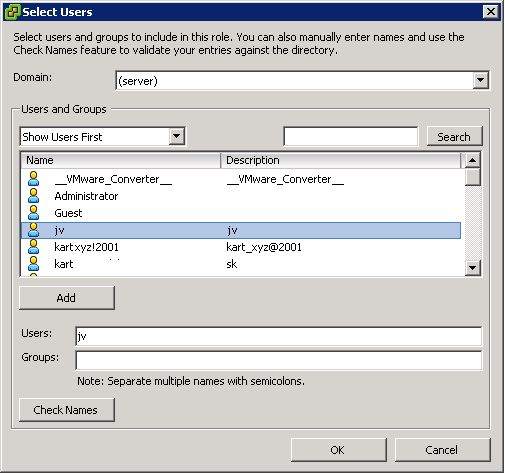
Figure 369 : Selecting the user for whom a role is to be assigned.
- Upon double-clicking a user name in the Users and Groups list, the selected user name will appear against the Users box, as depicted by Figure 369.
-
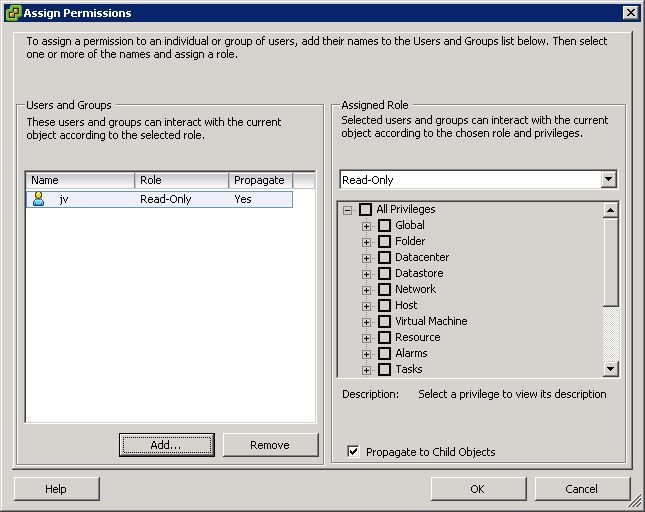
Then, click the ok button in Figure 369. Figure 370 then appears, where you will find the selected user name displayed in the Users and Groups section. To assign the read-only role to this user, select the Read-Only option from the Assigned Role list in Figure 370, and click the ok button therein.
-
Figure 371 then appears indicating the role assigned to the newly created user.
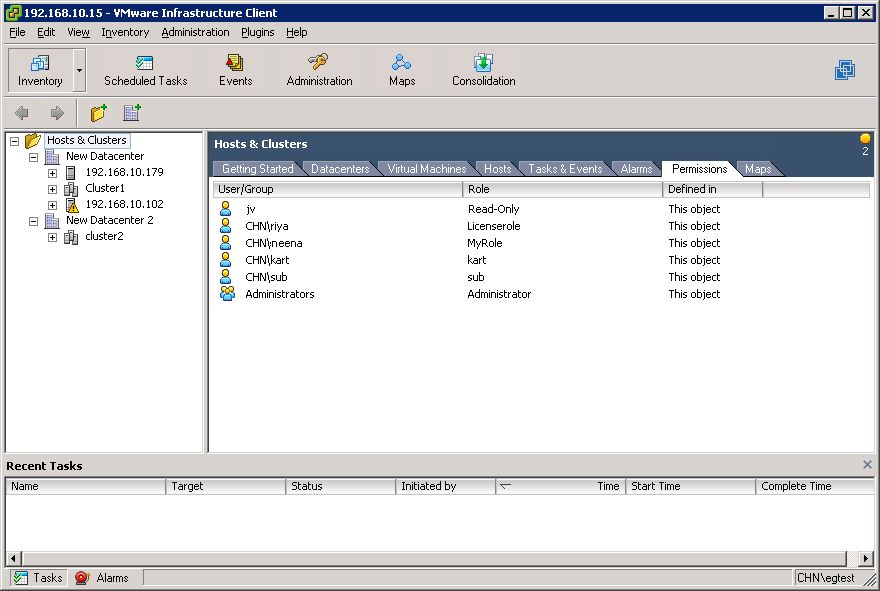
Figure 371 : The new user and the role assigned to the user being displayed