Creating a Special Role on an ESX Server and Assigning the Role to a New User
- Login to a system on which the vSphere Client is installed.
-
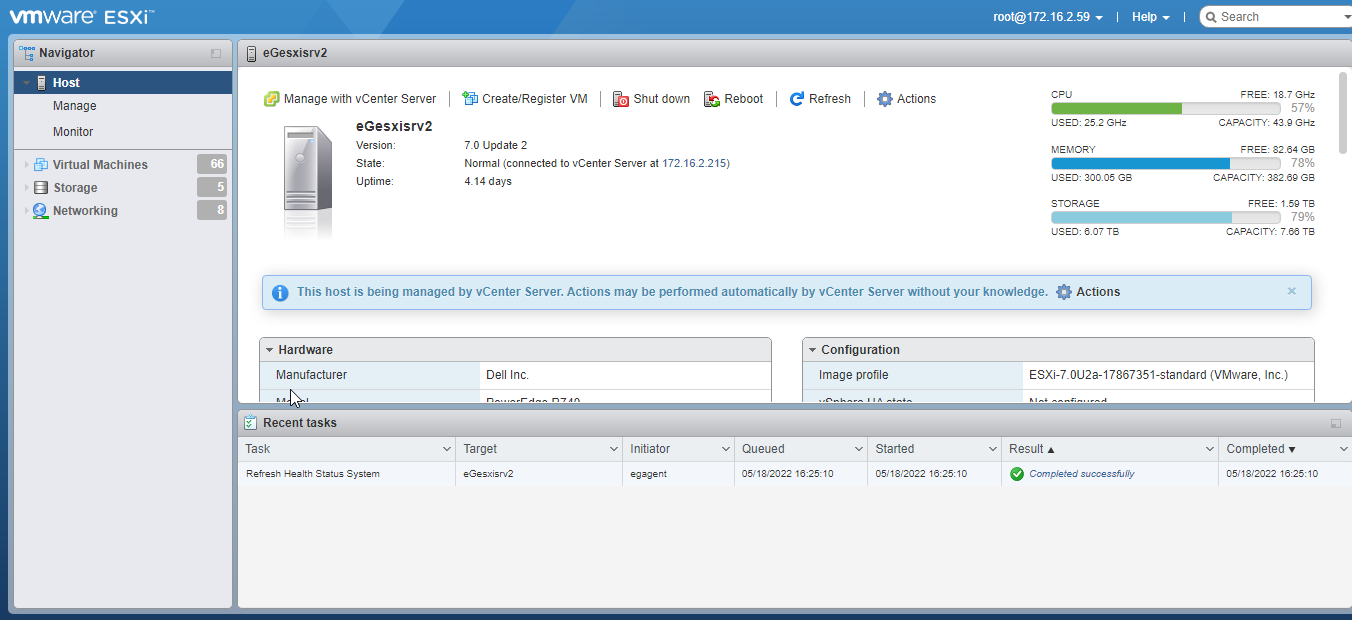
Launch the client. When Figure 1 appears, login to the target vSphere server using root user credentials.

-
Figure 2 then appears.
-
In the left panel of Figure 2, expand the Host node, and select the Manage option (as depicted by Figure 3).
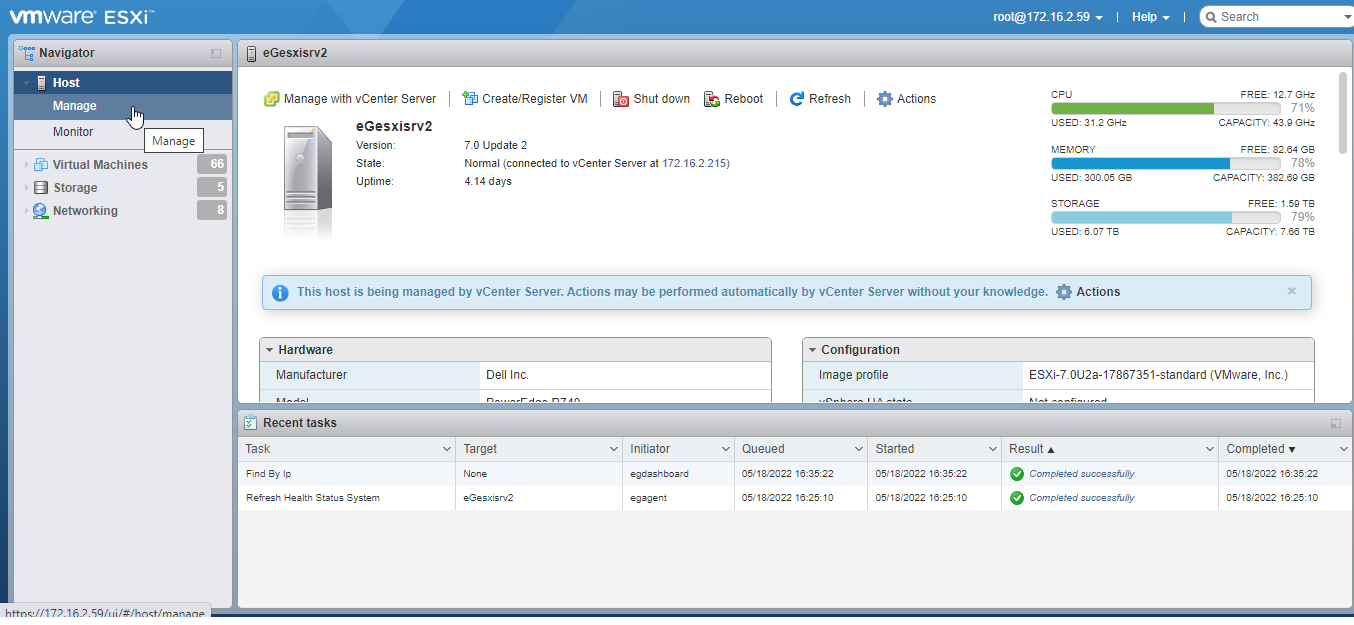
Figure 3 : Selecting the Manage option under the Host node in the left panel
-
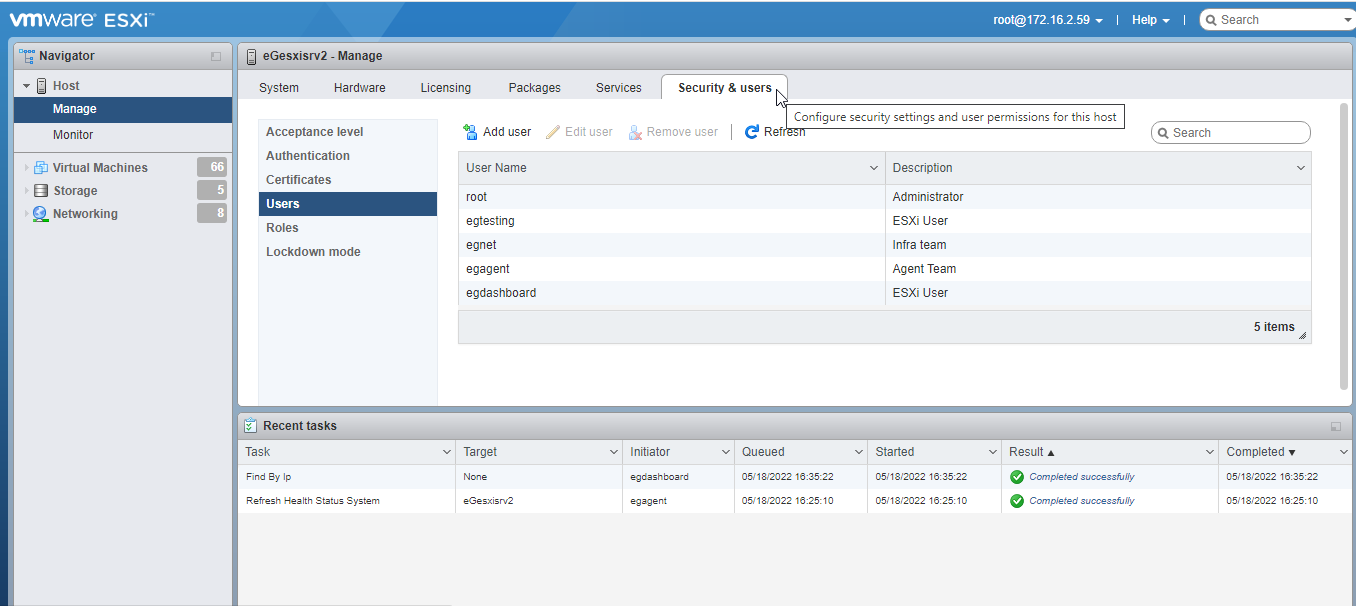
A Manage page will then appear (see Figure 4). From the list of options that you see in the left panel of the Manage page, select the Users option.
-
Then, to add a new user, click on Add user in the right panel of Figure 4. Figure 5 will then appear.

-
In Figure 5, specify the User name and Password of the new user. Confirm the password by retyping it in the Confirm Password text box. Then, click the Add button in Figure 5 to save the details of the new user.
-
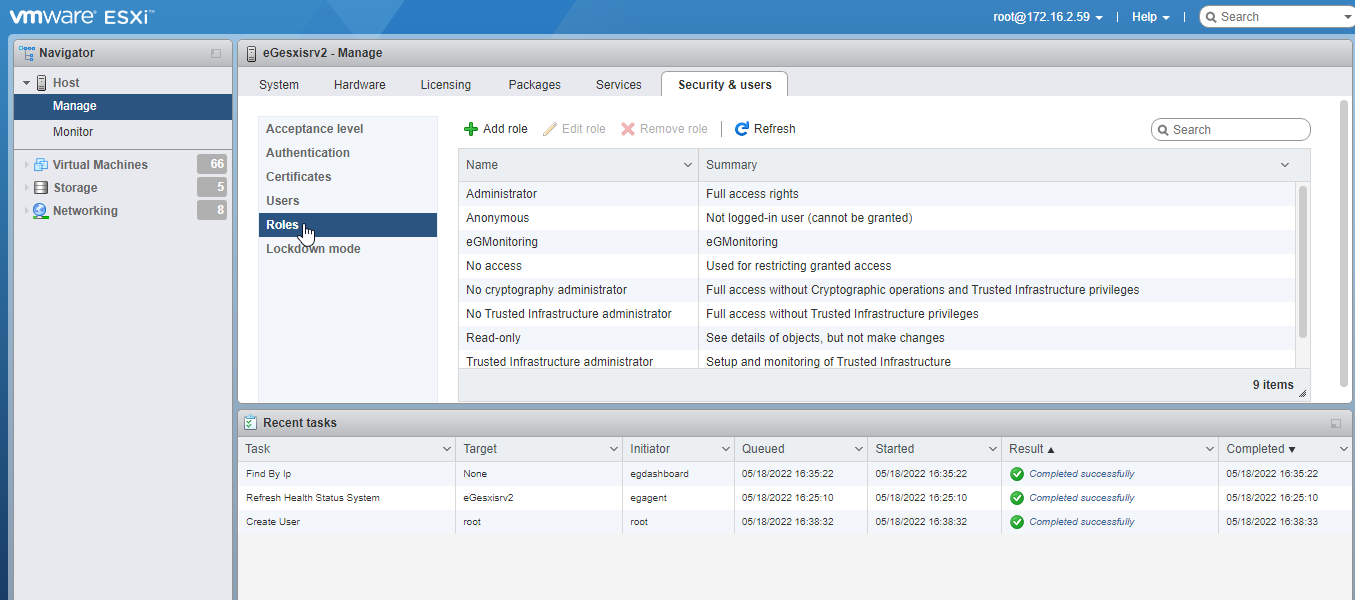
Then, when you return to the Manage page (see Figure 6), click on the Roles option in the left panel.
-
Next, to create a new role, click on Add role in the right panel of Figure 6. Figure 7 will then appear. In Figure 7, specify the Role name. Then, expand the Global node in the Privileges section, and select the Diagnostics permission within (as depicted by Figure 7).
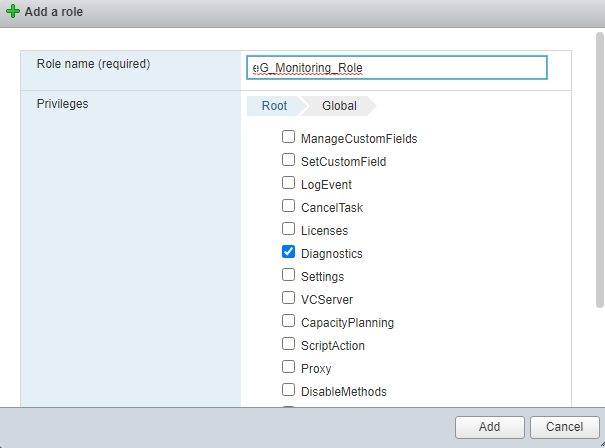
Figure 7 : Adding the Diagnostics permission to the new role
-
Then, expand the Sessions node in the Privileges section, and select the TerminateSession permission within (see Figure 8).
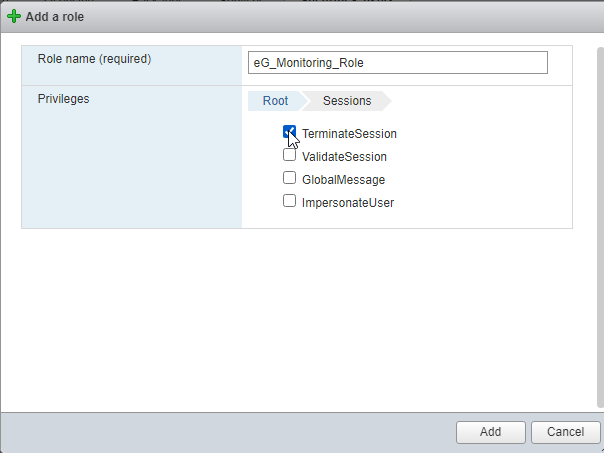
Figure 8 : Adding the TerminateSession permission to the new role
-
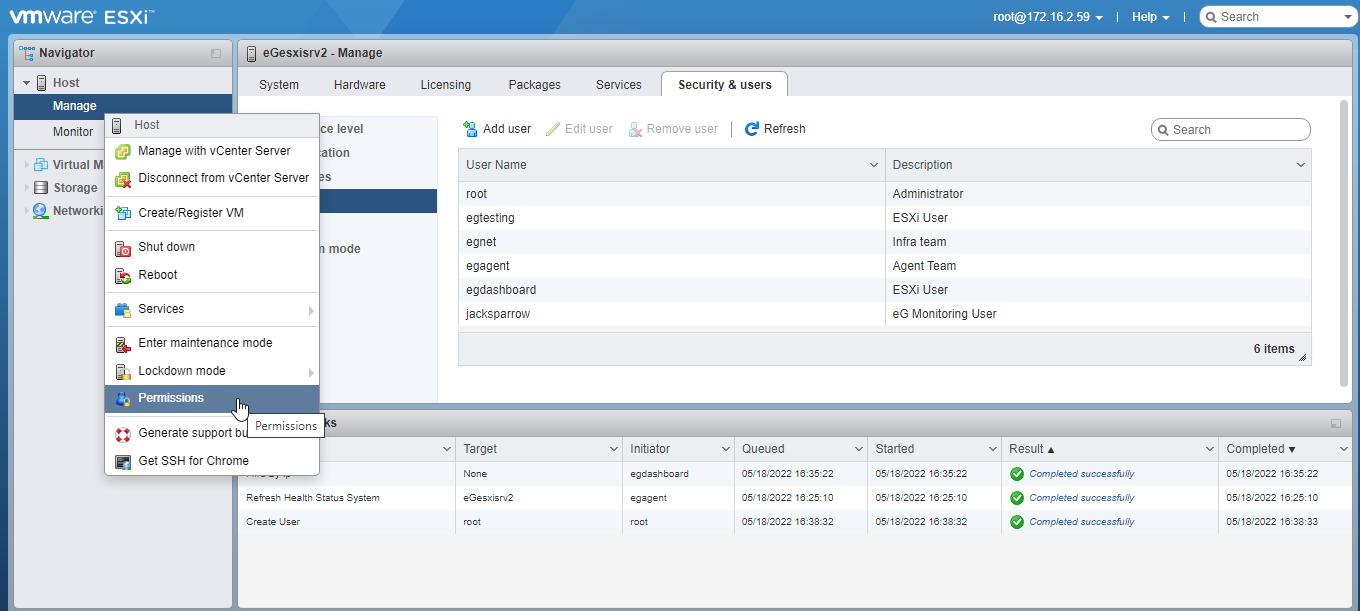
Finally, click the Add button in Figure 8. This will create the new role, with the Diagnostics and TerminateSession permission. When you return to the Manage page, right-click on the Manage option in the left-most panel of the page, and pick the Permissions option (see Figure 9).
-
Figure 10 will then appear. Click on Add user in the left panel of Figure 10.
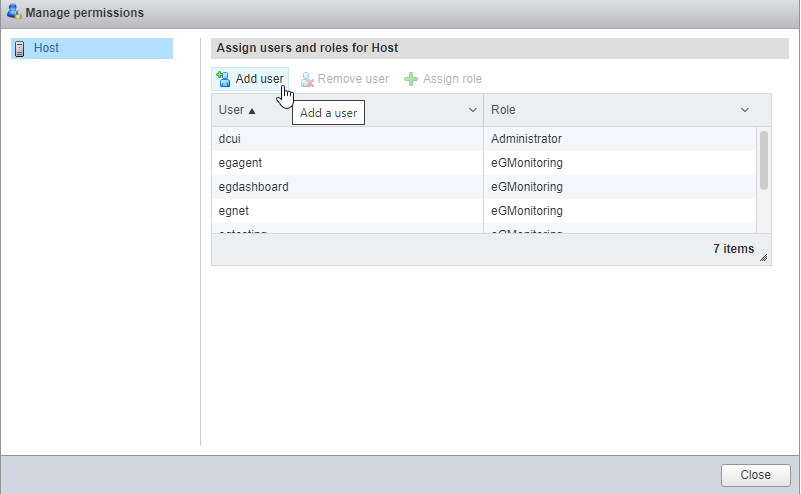
Figure 10 : Clicking on Add user in the left panel of the Manage permissions page
-
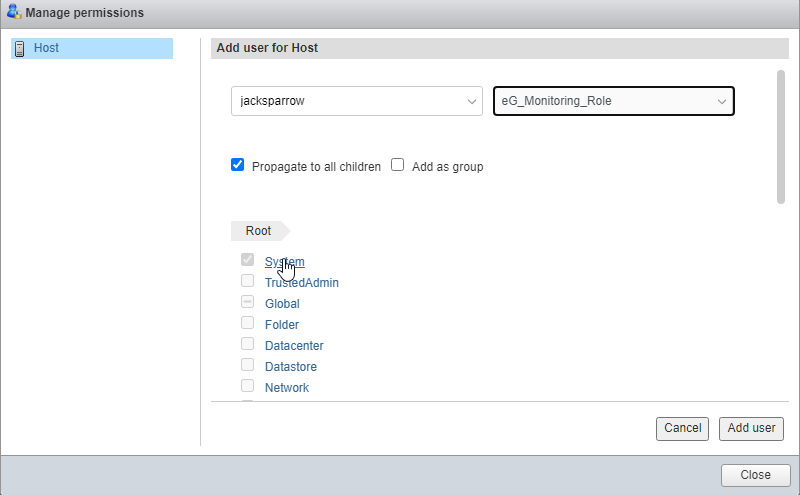
Figure 11 : Selecting the Diagnostics permission under the Global category of privileges
You can now proceed to configure the ESX USER and ESX PASSWORD parameters of all eG tests with the User name and Password (respectively) of the new user you created (see Figure 5).