Adding the eG Agent Service as a Cluster Resource
The final step is to add the eGurkhaAgent service as a cluster resource. For this, follow the steps discussed hereunder:
-
Launch the Failover Cluster Manager. In the tree-view in the left panel of the manager, expand the node representing the cluster, and right-click on the Services and Applications sub-node within. Then, pick the Configure a Service or Application option from the shortcut menu that pops up.
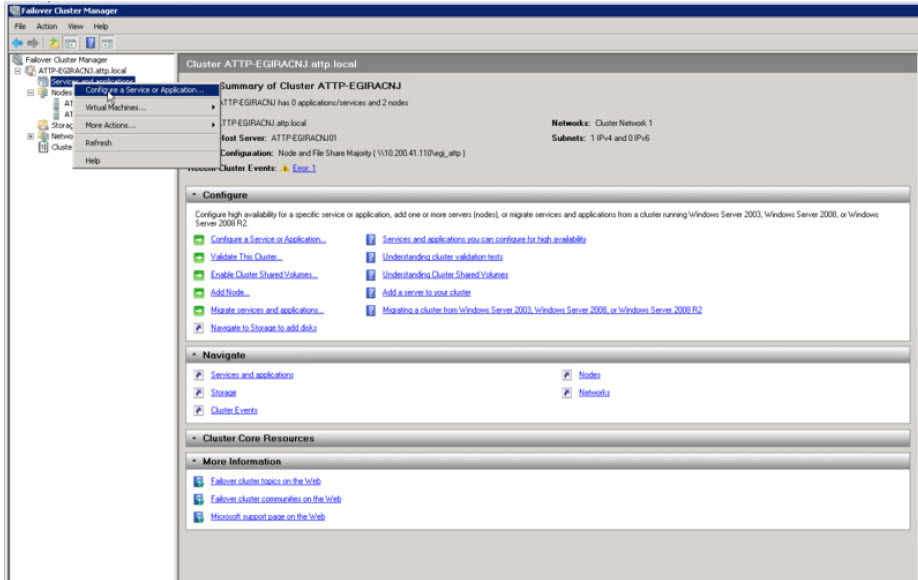
Figure 1 : Choosing to configure a service or application
-
When the wizard opens, click the Next button in the welcome screen of the wizard to proceed to the next step of the service configuration process.

Figure 2 : The welcome screen of the High Availability wizard
-
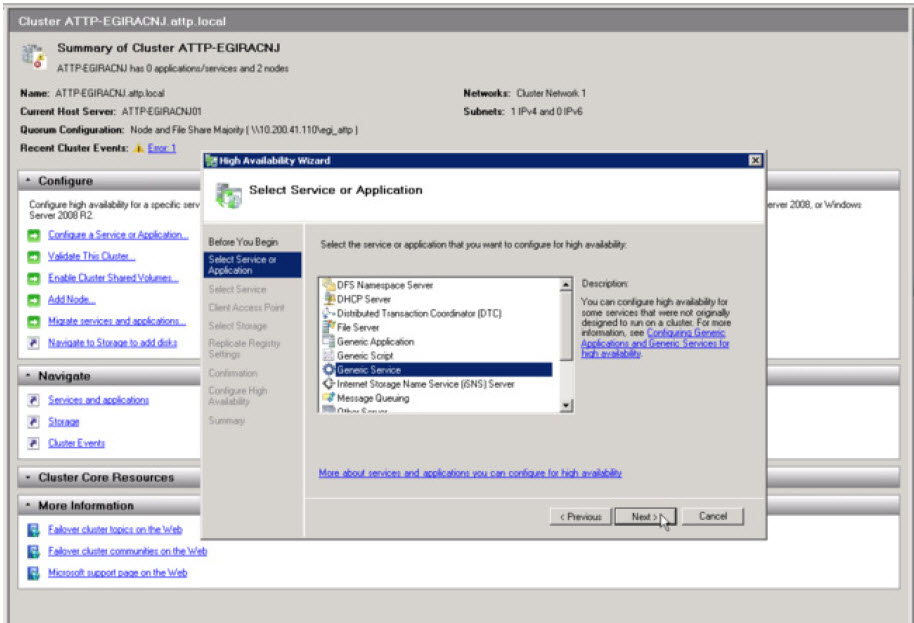
When Figure 3 appears, select the Generic Service option and click the Next button.
-
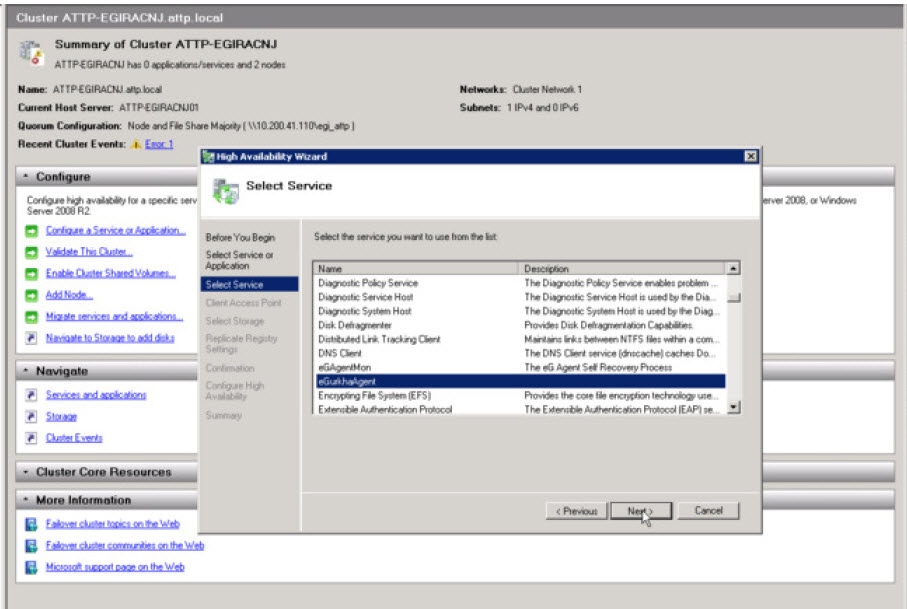
In Figure 4, select the eGurkhaAgent service from the list of services displayed therein and click the Next button.
-
In the Client Access Point page that appears next, provide input for the network name and IP addresses that clients will be using when accessing the eGurkhaAgent service. Then, click the Next button in Figure 5.
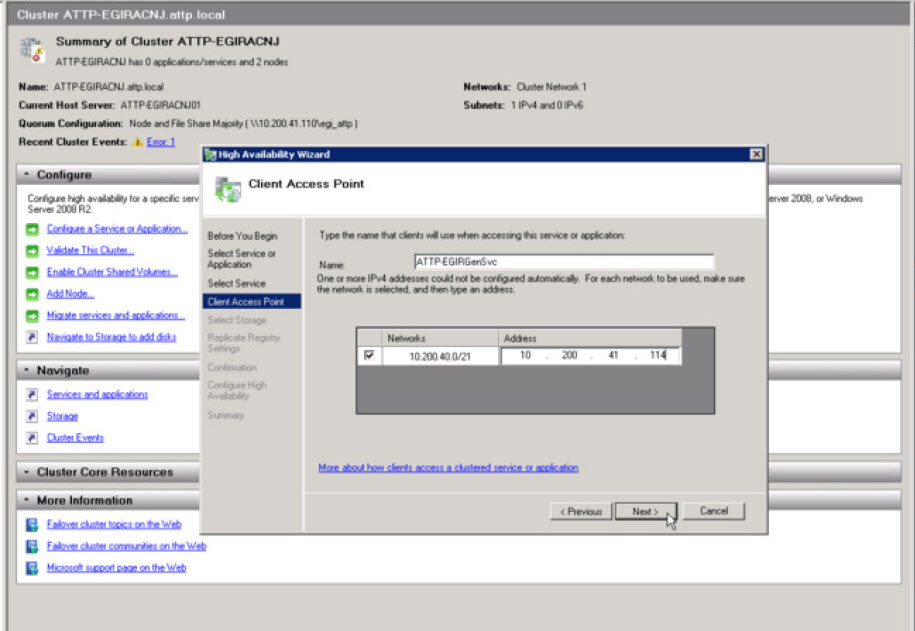
Figure 5 : Entering the network name and IP address using which clients will be accessing the clustered resource
-
When Figure 6, click on the Next button to move on.
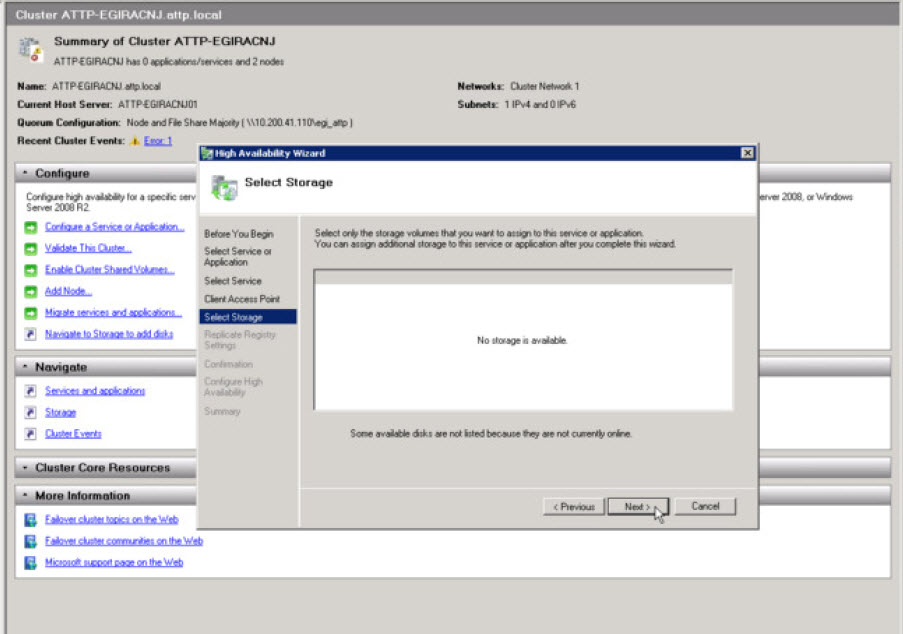
Figure 6 : Clicking the Next button in the Select Storage page
-
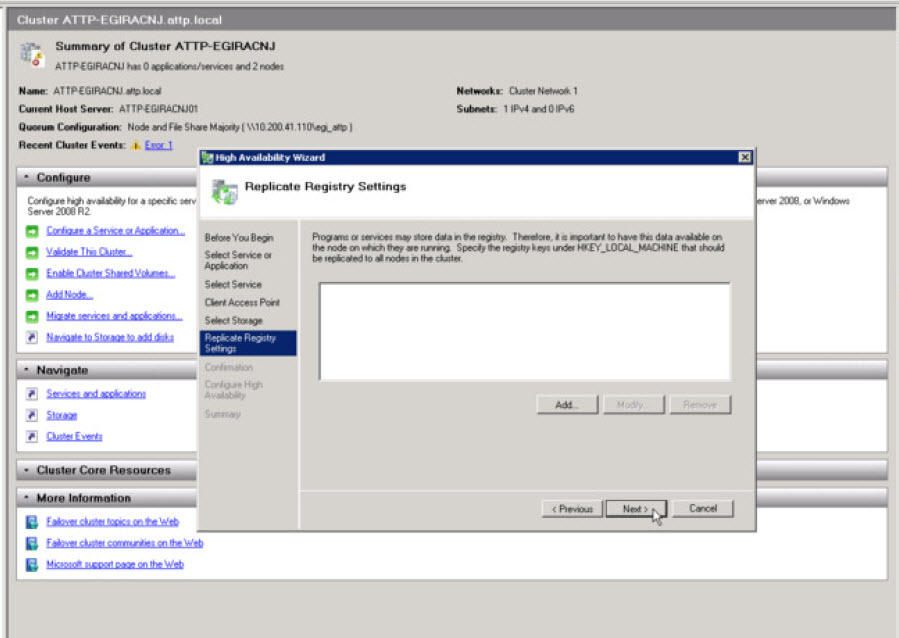
To skip the Replicate Registry Settings page and move to the next step, click the Next button in Figure 7.
-
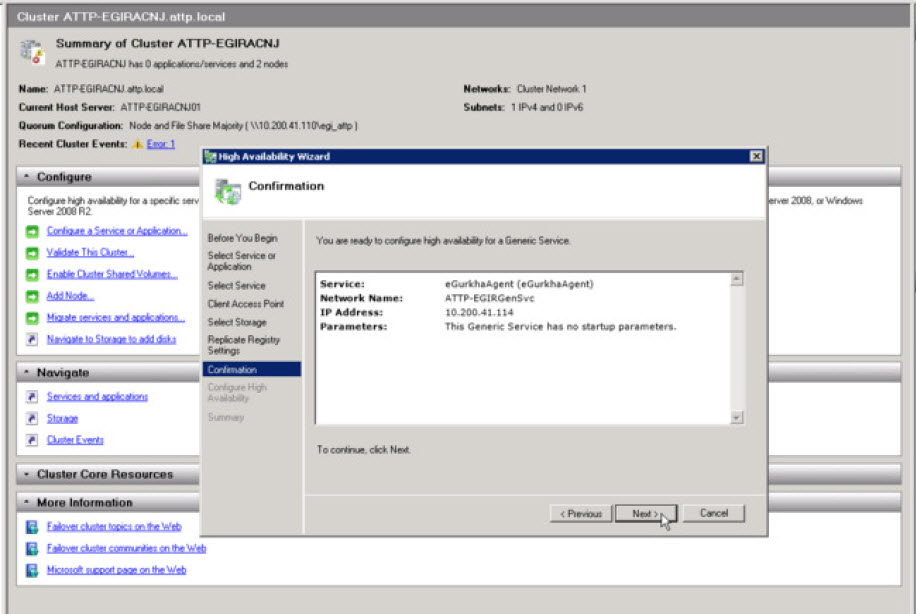
Once the Confirmation page appears (see Figure 8), quickly review the service configuration displayed therein, and click the Next button to confirm the addition of that service as a clustered resource.
-
Upon confirmation, the cluster manager will then begin configuring the high availability of the eGurkhaAgent service (see Figure 9).
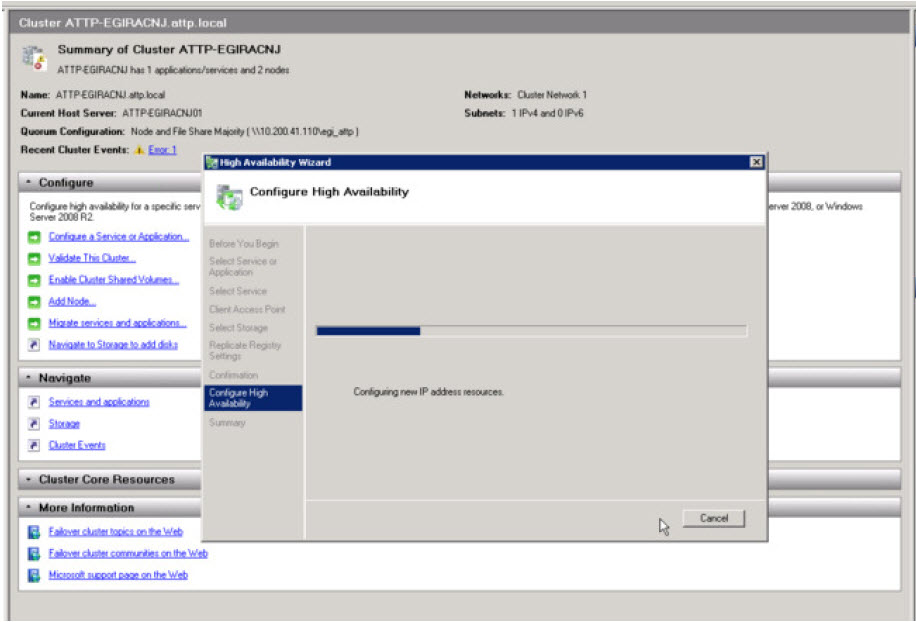
Figure 9 : High availability configuration in progress for the eGurkhaAgent service
-
Once the configuration process ends, Figure 10 appears confirming the successful completion of the high availability configuration, and displaying the details of the eGurkhaAgent service for which high availability was configured.
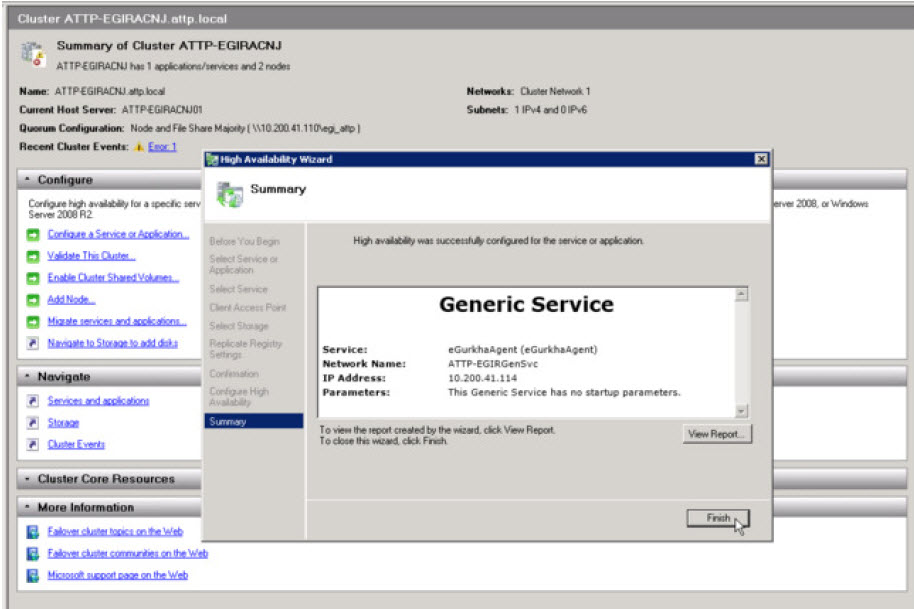
Figure 10 : A message indicating the successful configuration of high availability for the eGurkhaAgent service
- Click the Finish button in Figure 10 to exit the wizard.
-
Now, proceed to indicate which node in the failover cluster owns the eGurkhaAgent service. For that, expand the Services and Applications node in the tree-structure in the left panel of the Failover Cluster Manager, and right-click on the sub-node representing the eGurkhaAgent service. From the shortcut menu that pops up, select the Properties option (see Figure 11).
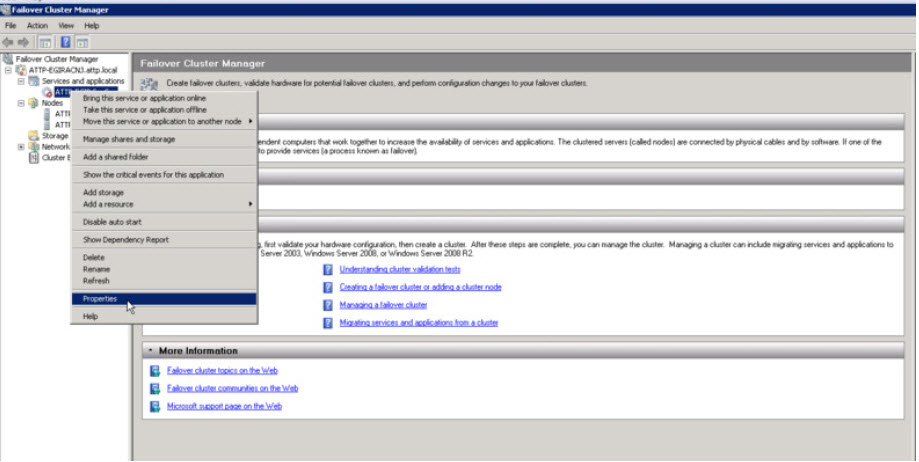
Figure 11 : Editing the Properties of the eGurkhaAgent service that has been added as a cluster resource
-
Figure 12 then appears. In the General tab of Figure 12, the nodes added to the failover cluster you have created will be listed in the Preferred owners section. You can either set a single node as the owner of the service by selecting the check box that corresponds to that node; in this case, you will have to deselect the check box corresponding to the other node. You can also have both nodes as the owners of the clustered resource and configure the order of preference - i.e., which node should be owner 1 and which should be owner 2. To toggle the order, use the Up and Down buttons adjacent to the Preferred owners box. Then, click the Apply and ok buttons in Figure 12 to save the changes you made.
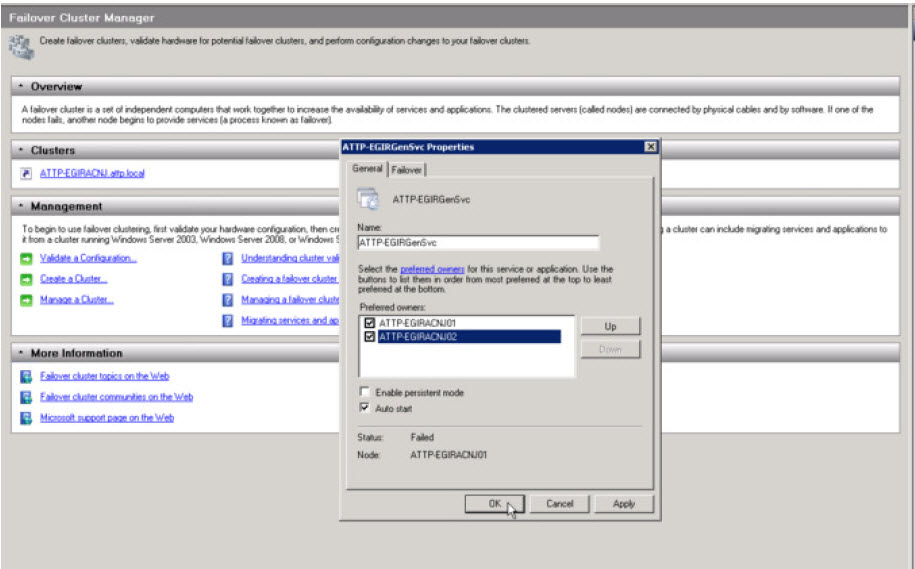
Figure 12 : Configuring the preferred owners of the clustered eGurkhaAgent service
-
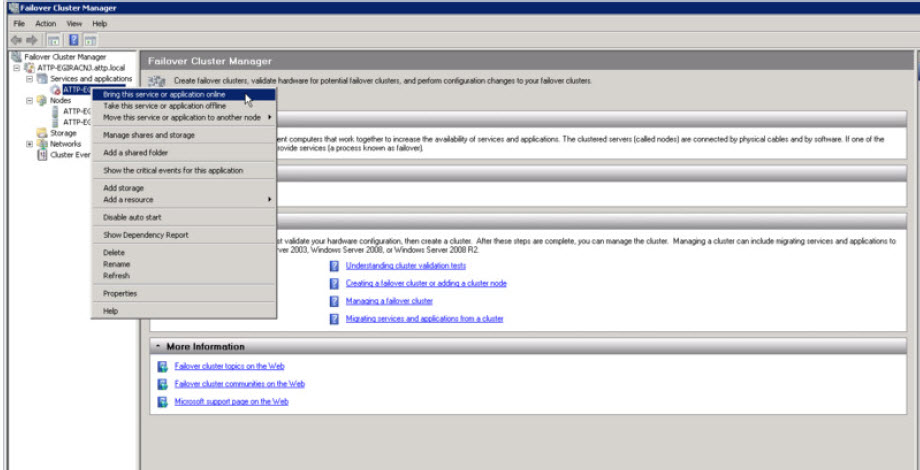
Finally, bring the service online. For this, right-click on the node representing the clustered service in the tree-view in the left panel of the Failover Cluster Manager, and choose the Bring service or application online option (see Figure 13).
-
Once the service goes online, Figure 14 will appear confirming the same.
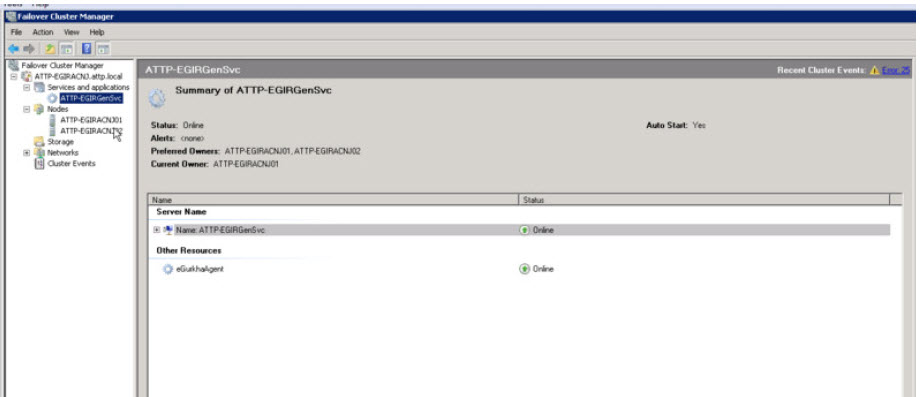
Figure 14 : The right panel of the Failover Cluster Manager indicating that the service is online