Creating a Windows Cluster
To achieve this, follow the steps discussed below:
- Install the Failover Clustering feature on both nodes of the cluster. For this, first, do the following on Node 1:
- If you recently installed Windows Server 2008 R2 on the server and the Initial Configuration Tasks interface is displayed, look for the Customize This Server option, and click the Add features option under it.
-
If Initial Configuration Tasks is not displayed, add the feature through Server Manager. If Server Manager is already running, click Features (see Figure 1). Then, under Features Summary, click Add Features.
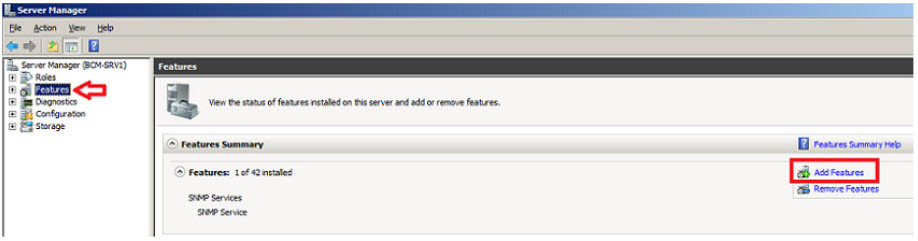
Figure 1 : Clicking the Add Features option in the Server Manager
- If Server Manager is not running, click Start, click Administrative Tools, click Server Manager, and then, if prompted for permission to continue, click Continue. Then, under Features Summary, click Add Features.
-
In the Add Features Wizard, click Failover Clustering and then click Install (see Figure 2).
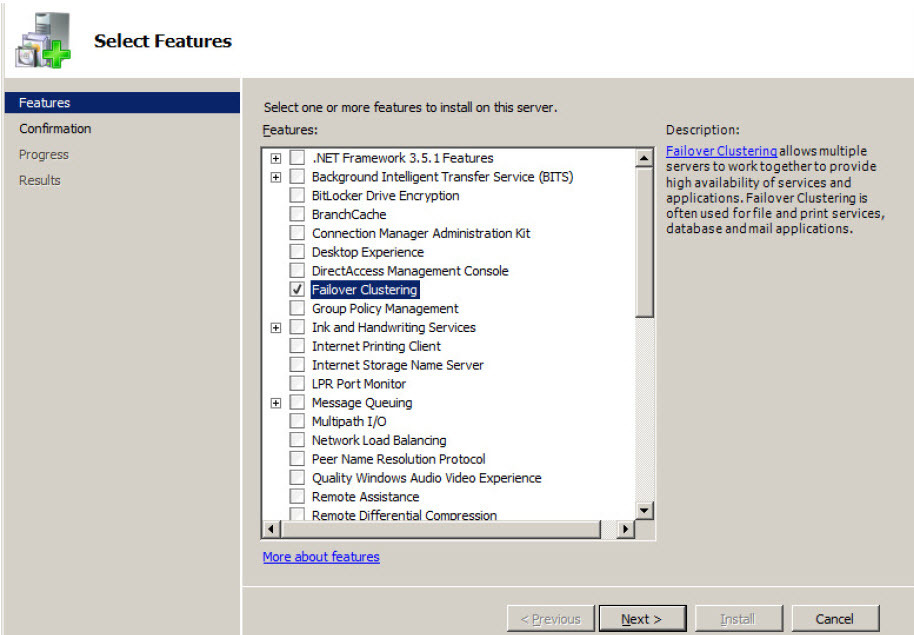
Figure 2 : Installing the Failover Clustering feature
When installation completes, close the wizard.
- Now, repeat the process on each of the nodes that you want to include in the cluster.
-
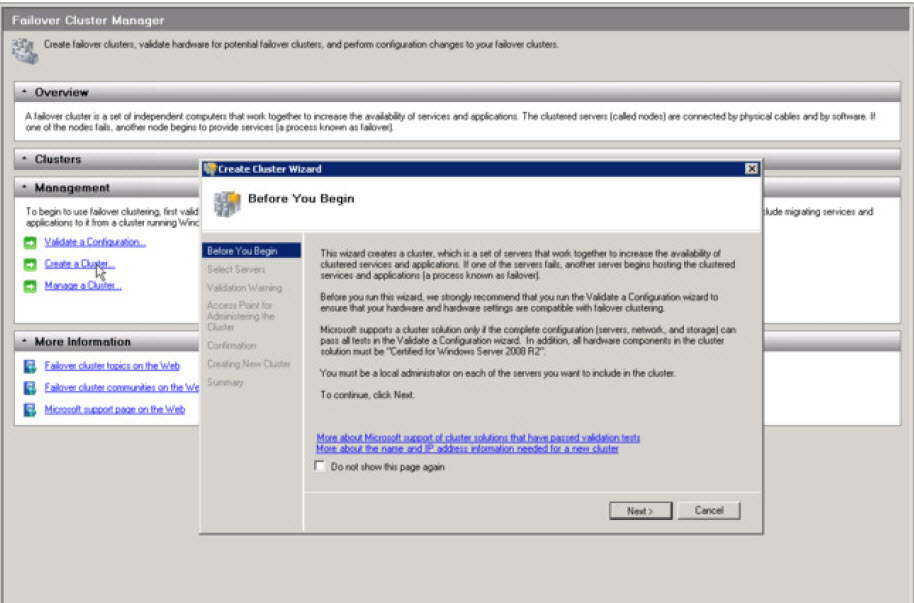
Once this is done, you are ready to create your cluster. For this, first launch the Failover Cluster Manager by following the Start -> Administrative Tools -> Failover Cluster Management menu sequence (see Figure 3). Then, click on the Create a Cluster link therein (see Figure 3).

-
When Figure 4 appears, click on the Next button to proceed.
-
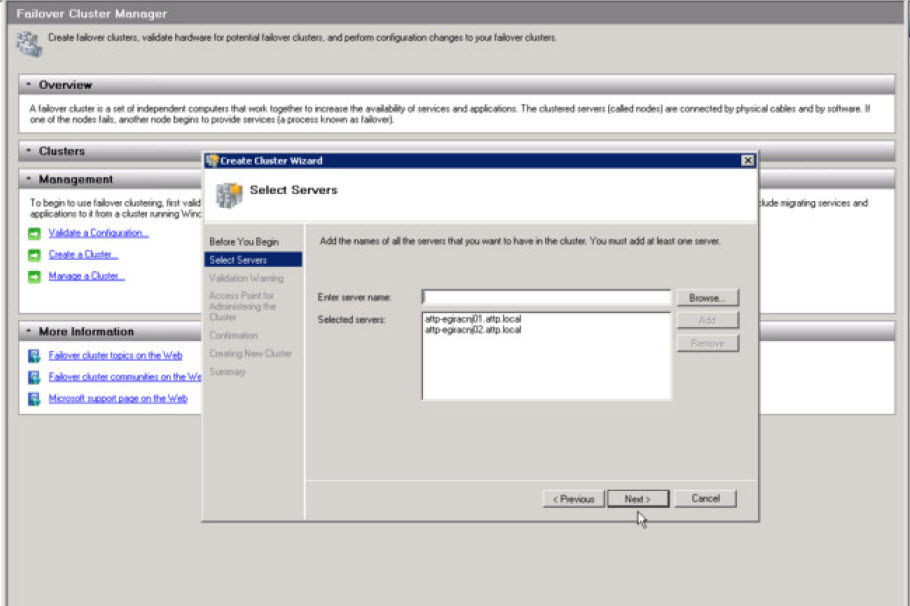
Using Figure 5 that appears next, add Node 1 and Node 2 to the cluster. For that, first enter the server name of Node 1 in the Enter server name text box of Figure 5 and click the Add button. Likewise, specify the server name of Node 2 in the Enter server name text box and click the Add button again. Then, click on Next to proceed.
-
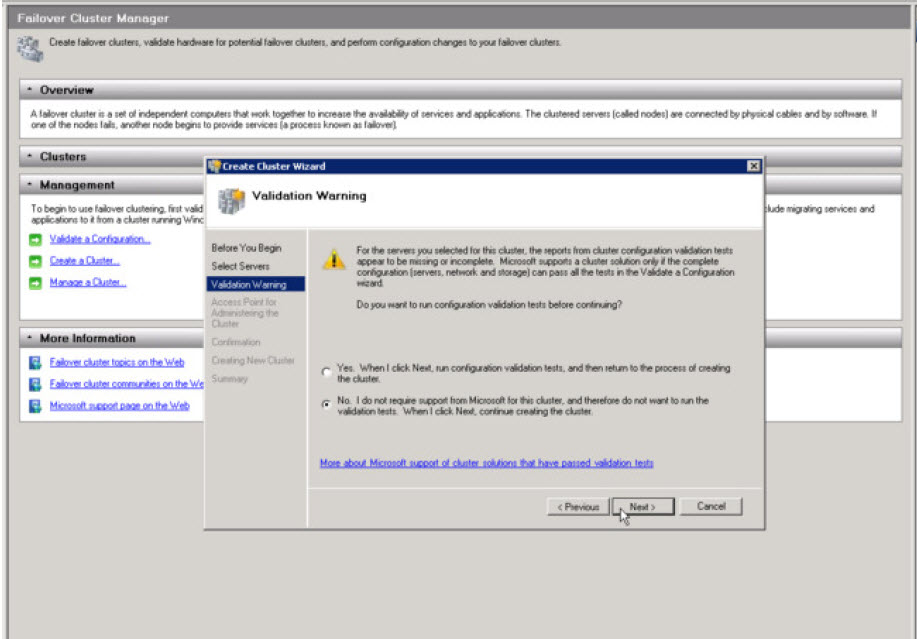
Skip the validation tests by clicking the Next button in Figure 6.
-
Next, provide a name for the cluster and specify its IP address, as depicted by Figure 7 below. Then, click the Next button.
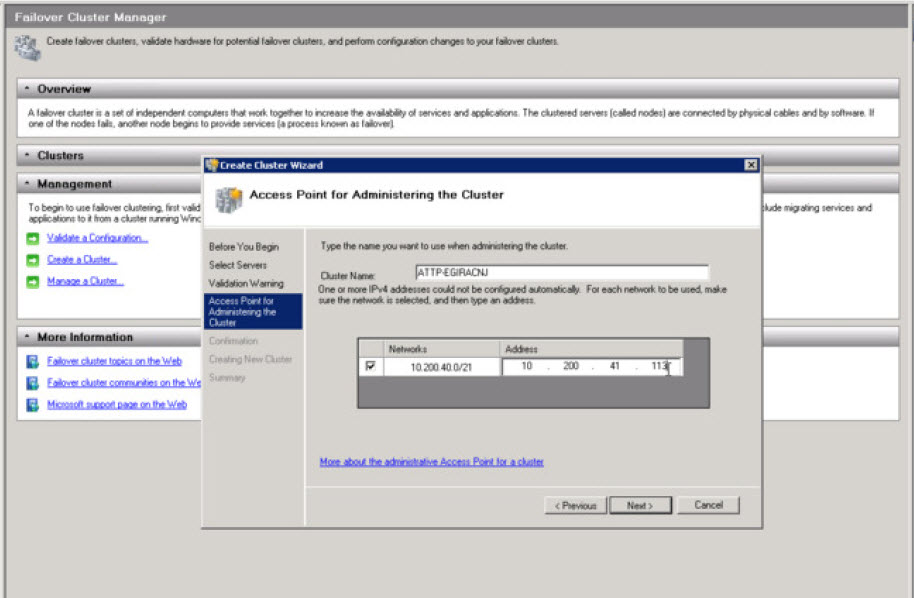
Figure 7 : Specifying the name and IP address of the cluster
-
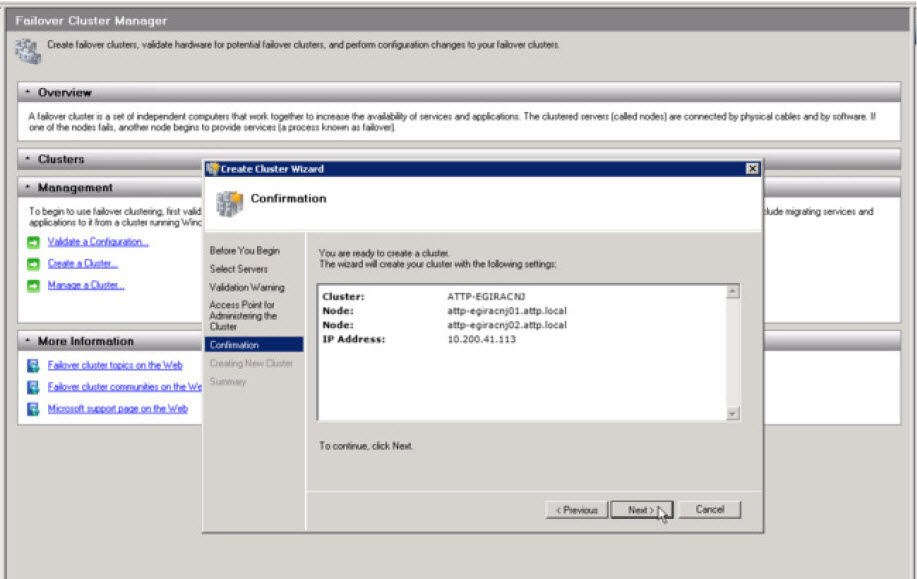
A brief summary of the cluster configuration will then appear, as shown by Figure 8. Click Next therein to confirm and proceed.
-
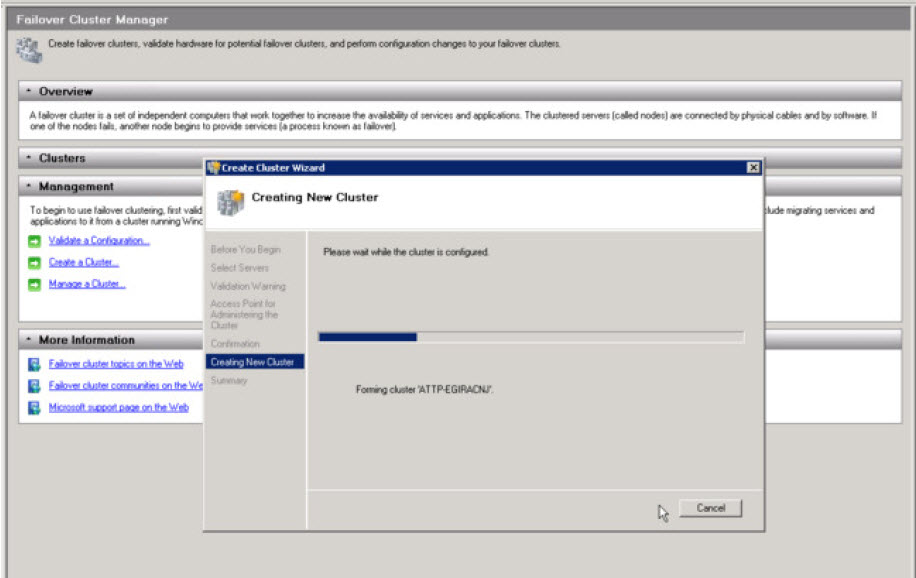
Cluster creation will then begin (see Figure 9).
-
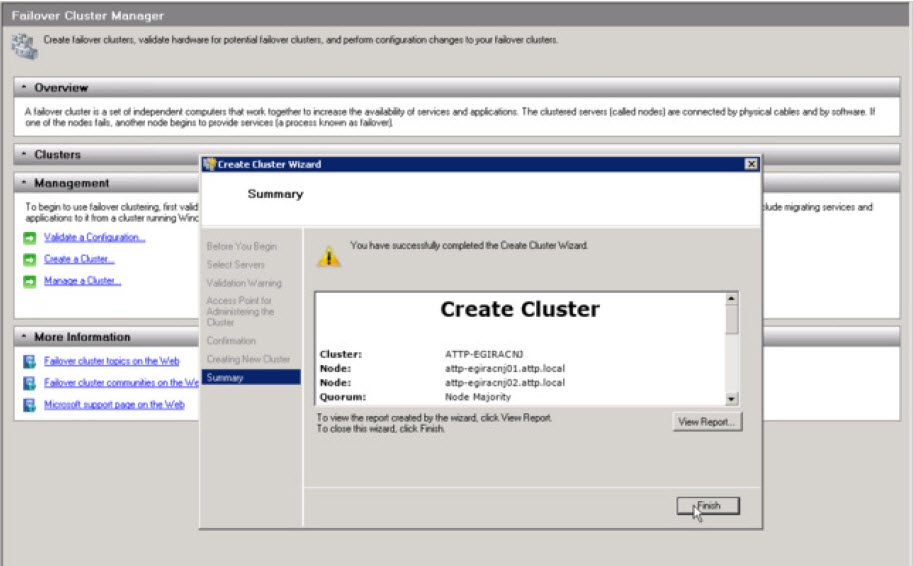
Once cluster creation completes, Figure 10 will appear. Click the Finish button therein to end the cluster creation process.