SSL-Enabling the eG Manager
How to differentiate between a public and private certificate?
A private certificate is often a self-signed certificate that is not validated by any certifying authority. This is why, when connecting to an eG manager that has been SSL-enabled using a self-signed certificate, the following error message appears:
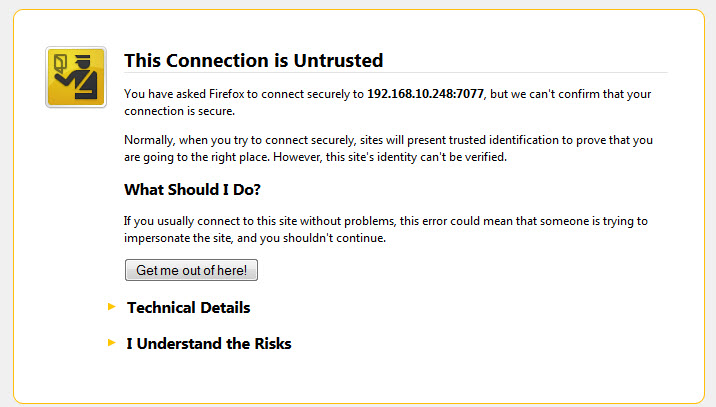
Figure 1 : The error message that appears when connecting to an eG manager using a self-signed SSL certificate
A public certificate on the other hand is a trusted certificate issued by a valid Certificate Authority. If such a certificate is used to SSL-enable an eG manager, then, a ‘lock’ symbol will appear in the address bar of the browser when attempting to connect to that manager (see Figure 2).
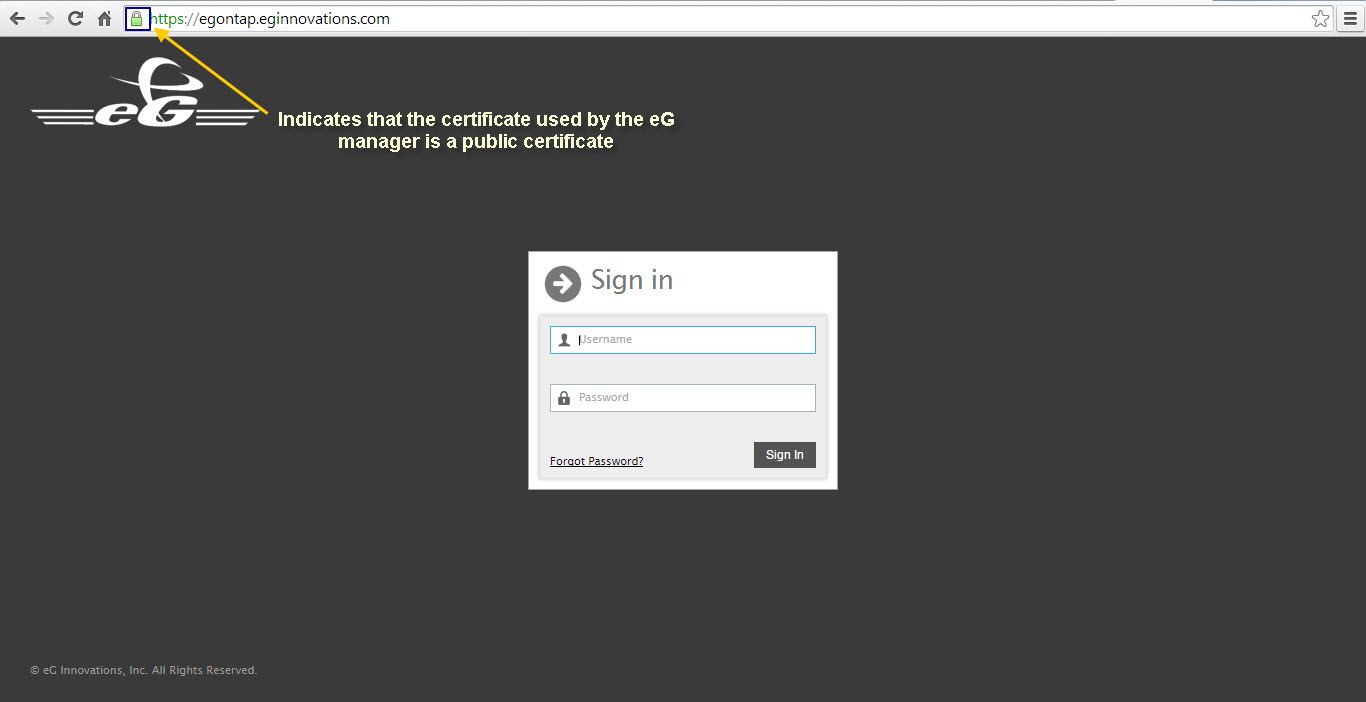
Figure 2 : A lock symbol in the address bar indicating that the SSL certificate used by the eG manager is a public certificate
To view the certificate, click the ‘lock symbol’. From the options that drop down, select the Connection tab page (see Figure 3).
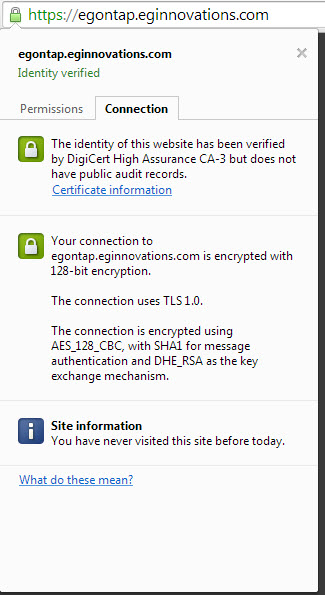
Figure 3 : Viewing the connection details
To view the certificate details, click the Certificate Information link in Figure 3. Figure 4 will then appear, revealing the details of the SSL certificate.
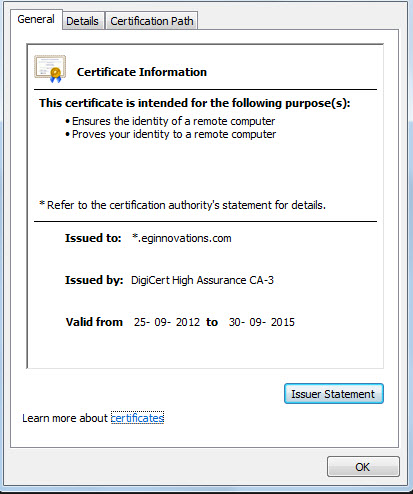
Figure 4 : Viewing the Certificate information
Troubleshooting the error message “Public keys in reply and keystore don’t match”
If the above error message appears when importing a certificate into a keystore, it could imply that you have not downloaded all the certificates that are part of the certificate chain. In this case, go to the web site of the certifying authority to download the certificates. Then, try to import each certificate in sequence of their type – i.e., import the root certificate first, the intermediate certificates next, and the domain certificate last.
Troubleshooting the “Certificate error” that occurs when accessing an eG manager that is SSL-enabled using a certificate from an internal CA
Typically, when you attempt to access an eG manager that has been SSL-enabled using the certificate obtained from an internal CA, the browser will throw the following error message:
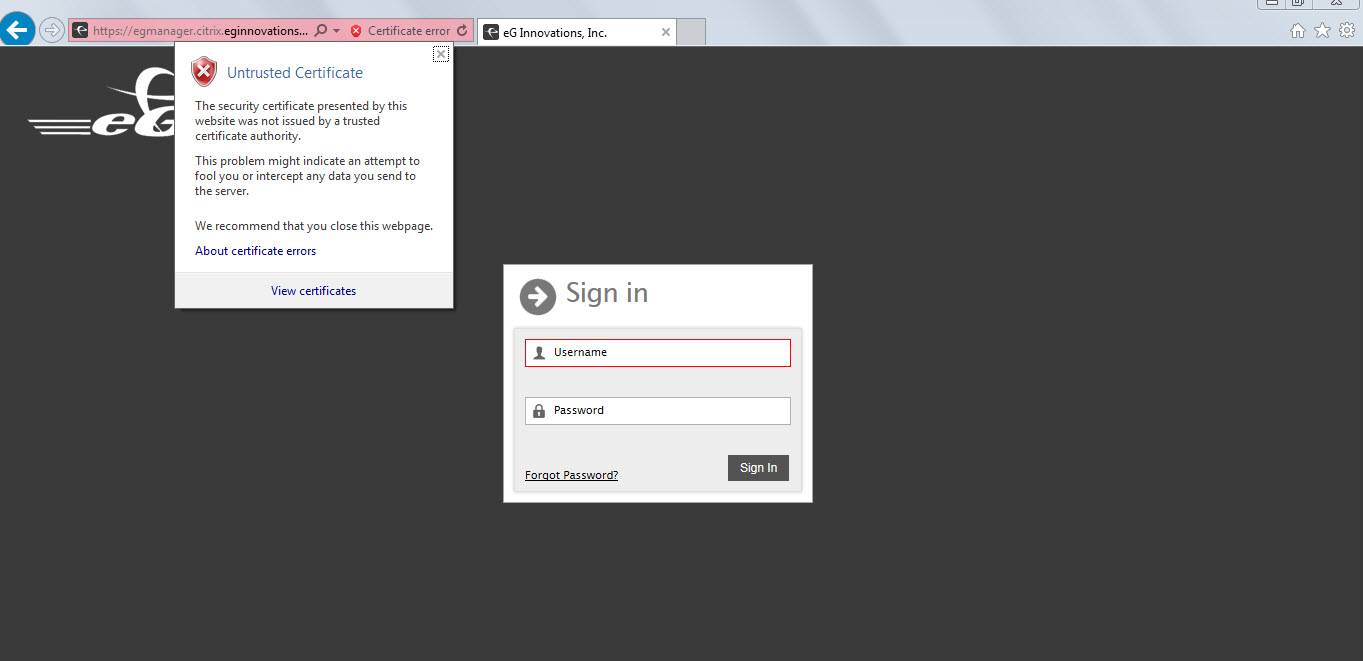
Figure 5 : The “Certificate error” that the browser reports
To avoid this error, you will have to import the internal CA’s root certificate to the browser and store it as a ‘trusted root certificate’. For this, follow the broad steps outlined below:
- Copy the internal CA’s root certificate to the host from which you are accessing the eG manager (i.e., the browser host). For instance, if Microsoft Active Directory Certificate Services is your internal CA, then, you will find the root certificate of this CA on your domain server. So, in this case, you will have to copy the root certificate from the domain server to your browser host.
-
Next, using Windows Explorer, browse for the certificate, and once found, right-click on it. From the shortcut menu that appears, select the Install Certificate option (see Figure 6) to import the certificate to the browser.
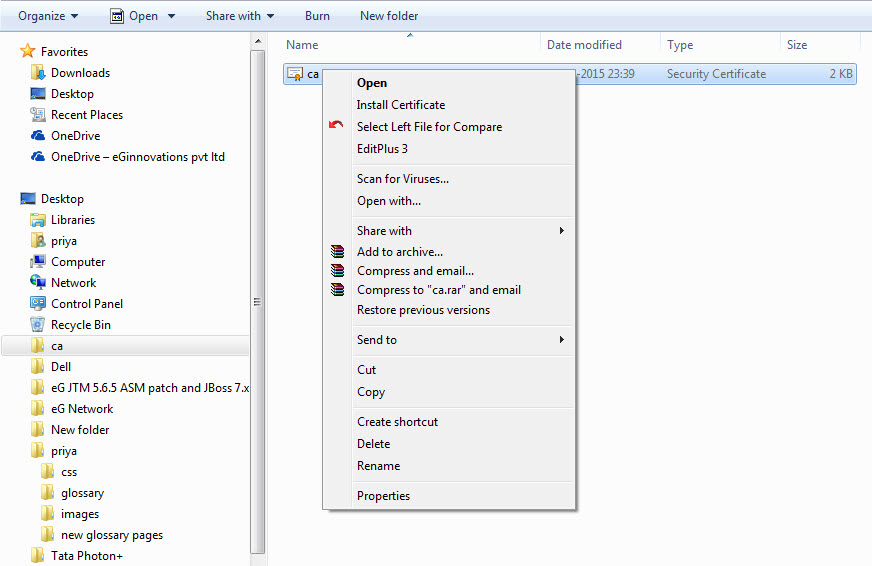
Figure 6 : Selecting the option to install the certificate on the browser host
-
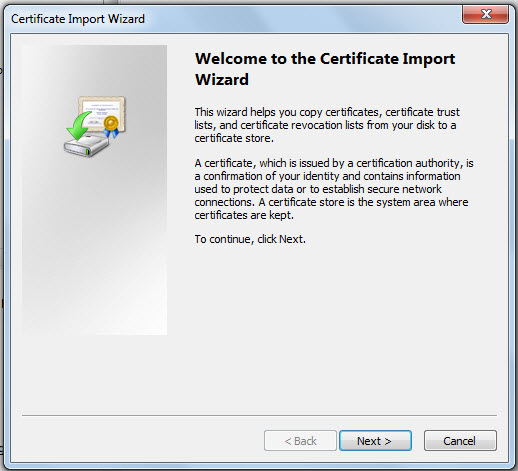
Figure 7 will then appear. Click Next here to continue.
-
Figure 8 will then appear. Here, select the Place all certificates in the following store option, and click the Browser button to indicate where the certificate is to be stored.
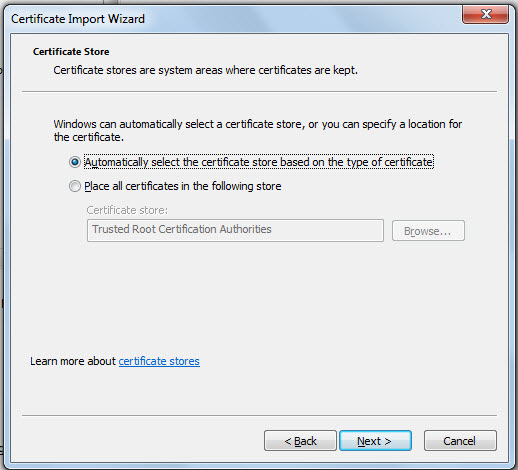
Figure 8 : Choosing to place the certificate in a specific store
-
From Figure 9 that then appears, select the Trusted Root Certificate Authorities store and click ok.
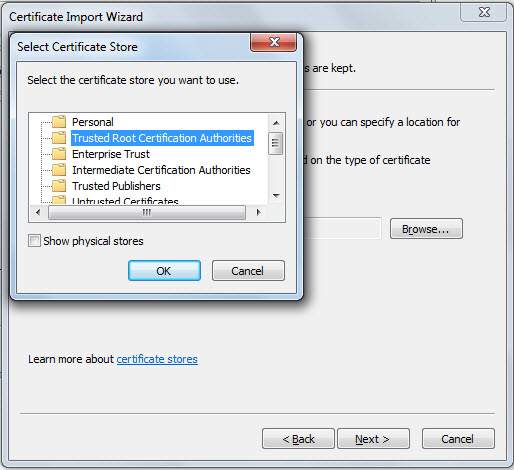
Figure 9 : Storing the certificate in the Trusted Root Certificate Authorities store
-
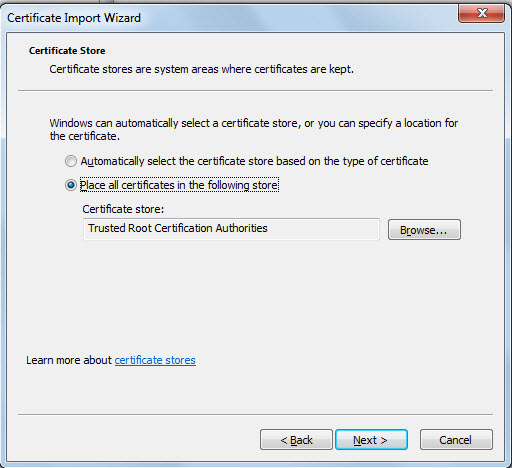
The chosen store will then appear in the text box below Place all certificates in the following store option, as depicted by Figure 10. Click Next in Figure 10 to continue.
-
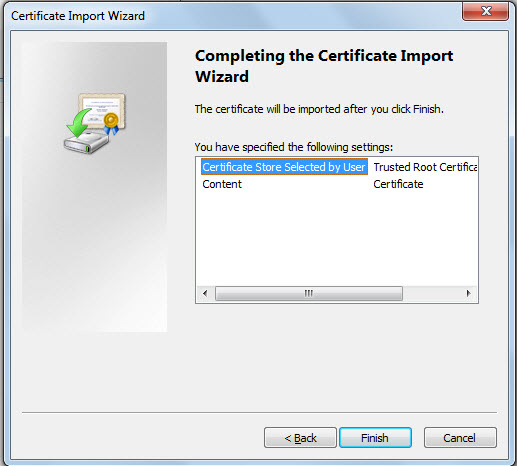
A quick summary of your selections will appear in Figure 11. Review your specifications and click Finish to complete the import.
-
The following warning message will appear. Click Yes in Figure 12 to proceed with the import.
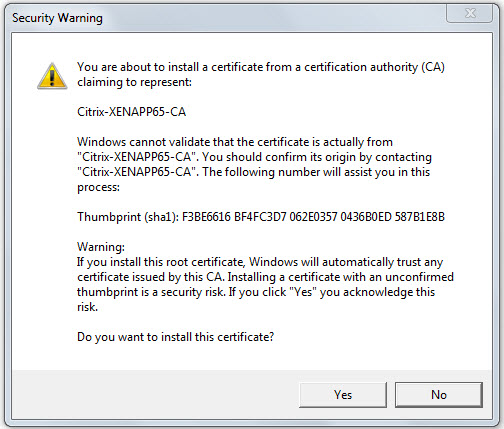
Figure 12 : A warning message that appears when importing a certificate issued by an internal CA
-
If import is successful, the following message will appear. Click ok.
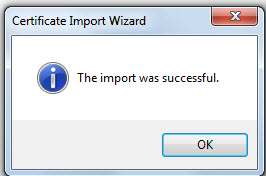
Figure 13 : A message box informing you that the certificate has been successfully imported
You will now be able to access the eG manager without a glitch!
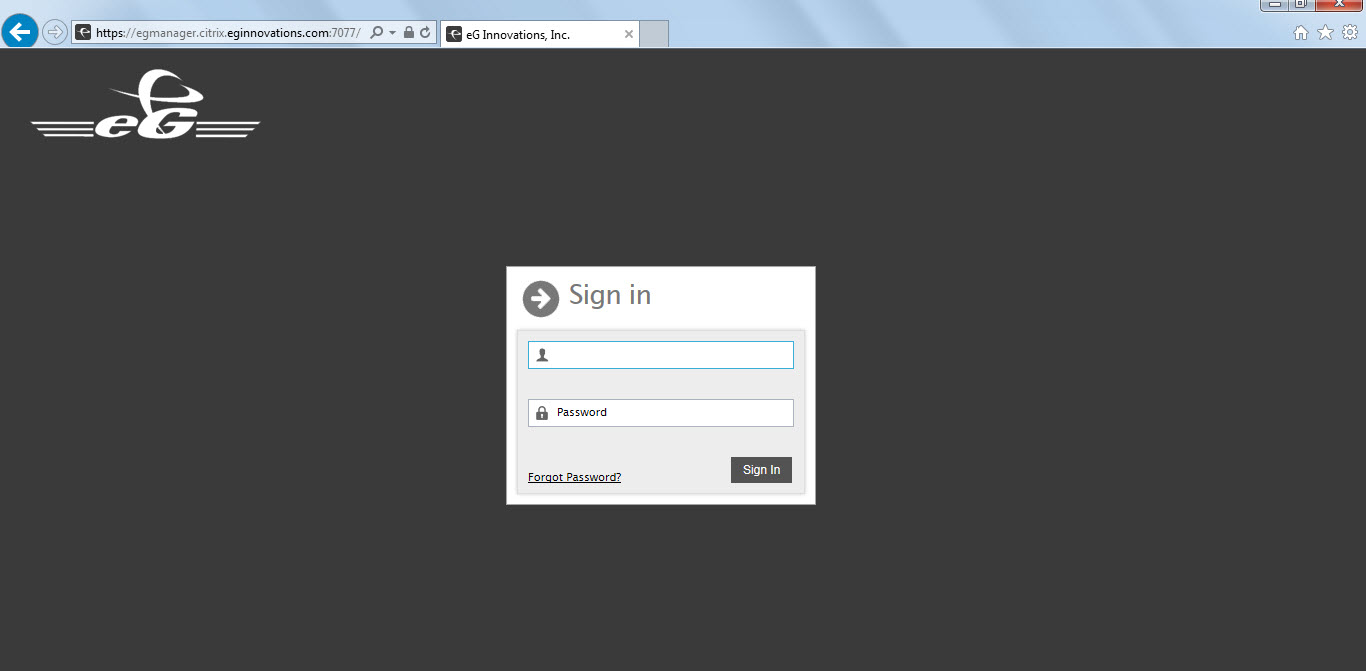
Figure 14 : The login screen of the eG manager, without the ‘Certificate error’
How to convert a certificate from the p7b format to a PEM format?
Digital certificates issued by Microsoft are in a format (p7b) that cannot be used by Tomcat. Therefore, if you have obtained a valid certificate using Microsoft Active Directory Certificate Services as the CA, then, before attempting to import that certificate into a keystore file (i.e., before getting to the ), you will have to convert the digital certificate in p7b (PKCS#7) format to PEM format on Windows. To achieve this, follow the steps below:
- Login to the eG manager host.
- In Windows Explorer, search for the certificate file with the extension .p7b.
-
Once you find it, double-click on it. This will open the Certificates window (see Figure 15).
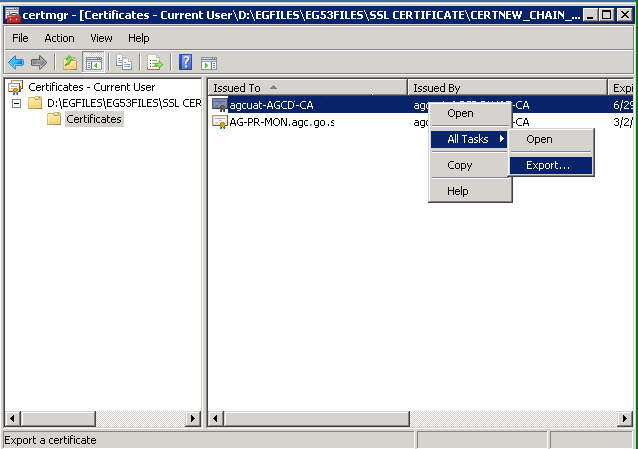
- In the left panel of the Certificates window, you will find a tree-structure with a list of certificate files available on the eG manager host for the current user. Expand the SSL Certificate file node and then click on the Certificates sub-node within. The right panel will then display the certificates.
- From the certificates list in the right panel, select the certificate that needs to converted into the PEM format, right-click on it, and follow the All Tasks -> Export menu sequence in the shortcut menu that appears (see Figure 15).
- A wizard will appear. Click Next in the wizard to proceed.
-
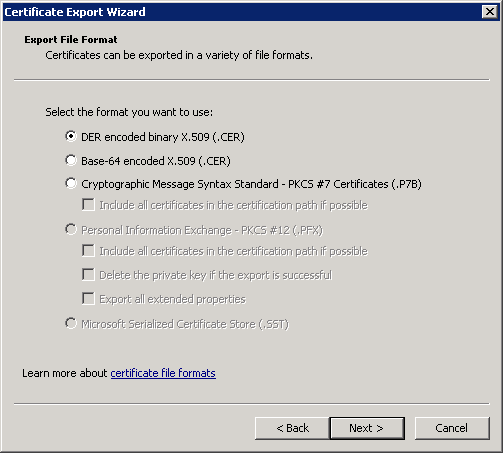
Figure 16 will then appear. Select the DER encoded binary X.509 (.CER) option in Figure 16 and click the Next button.
- You will now be prompted for a File name. Provide a name for the converted digital certificate, and click Next.
How to encrypt the keystore password?
By default, the keystore password is specified in clear text in the <CATALINA_HOME>\conf \server.xml file.
To encrypt the password, do the following:
- Login to the system hosting the eG manager.
- Open the command prompt and switch to the <EG_INSTALL_DIR>\lib directory (in case of a Windows manager; on Linux, this will be the /opt/egurkha/lib directory).
- Run the EncryptedSSLPassword.bat file (in case of a Windows manager; on Linux, you will find the EncryptedSSLPassword.sh file) within.
- This batch/script file (as the case may be), when executed, prompts you to specify the keystore password you want to encrypt. Specify the certificateKeystorePassword you configured in the server.xml file, at this prompt.
- This will provide you with the encrypted password.
- Next, edit the eg-enterprise.properties file in the <EG_INSTALL_DIR>\manager\tomcat\conf directory (on Windows; on Linux, this will be the /opt/egurkha/manager/tomcat/conf directory).
- Copy the encrypted password you received at step 5 above and set it as the value of the EgSslPassword parameter in the file.
- Finally, save the file.