Adding Custom Fields for Service Now Integration
The key pre-requisite for adding a custom field for a specific TT system in eG Enterprise is that the field that you want to add should be supported by the third-party TT system at the time of addition.
Note:
The custom field that you want to add can either be available by default in the TT system or could have been added as a custom column to the TT system.
Assume that you want to add a field/parameter named ‘Subcategory’ to the Trouble Ticket Integration page for Service Now in the eG admin interface. The first step towards this is to confirm that the ‘Subcategory’ field is available in Service Now. Once this is confirmed, proceed as directed below:
-
Find the column name that corresponds to ‘Subcategory’ (in our example) in Service Now. For this, follow the steps below:
-
Login to the Service Now console. Figure 1 will then appear. Follow the menu sequence Incident -> Create New, in the menu options available in the left panel of Figure 1.
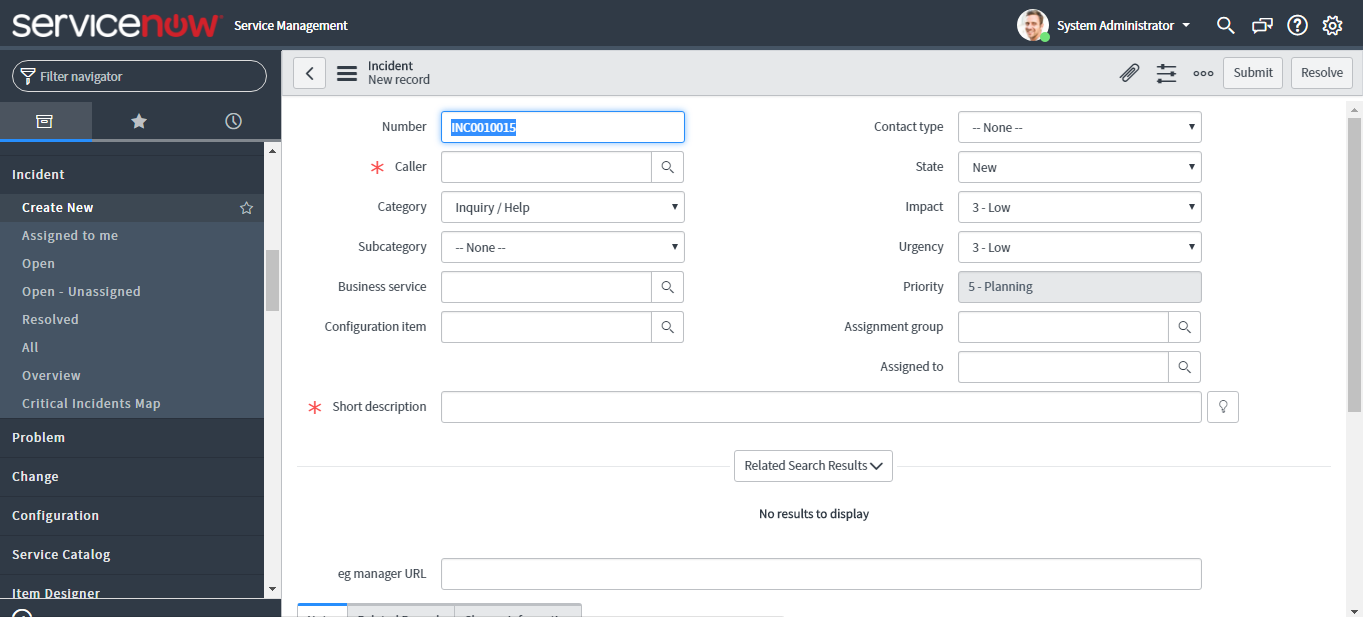
-
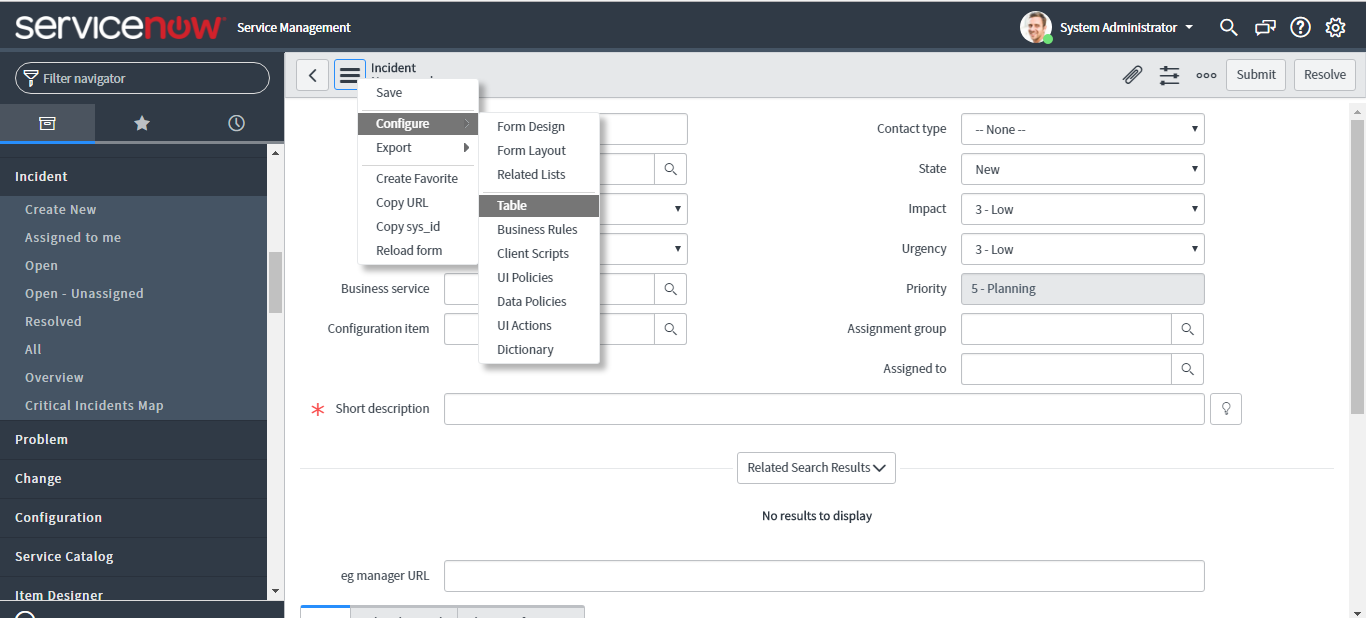
Clicking on the
 button at the top of the right panel in Figure 1 will bring up a shortcut menu as shown by Figure 2. From this menu, select the Configure ->Table option.
-
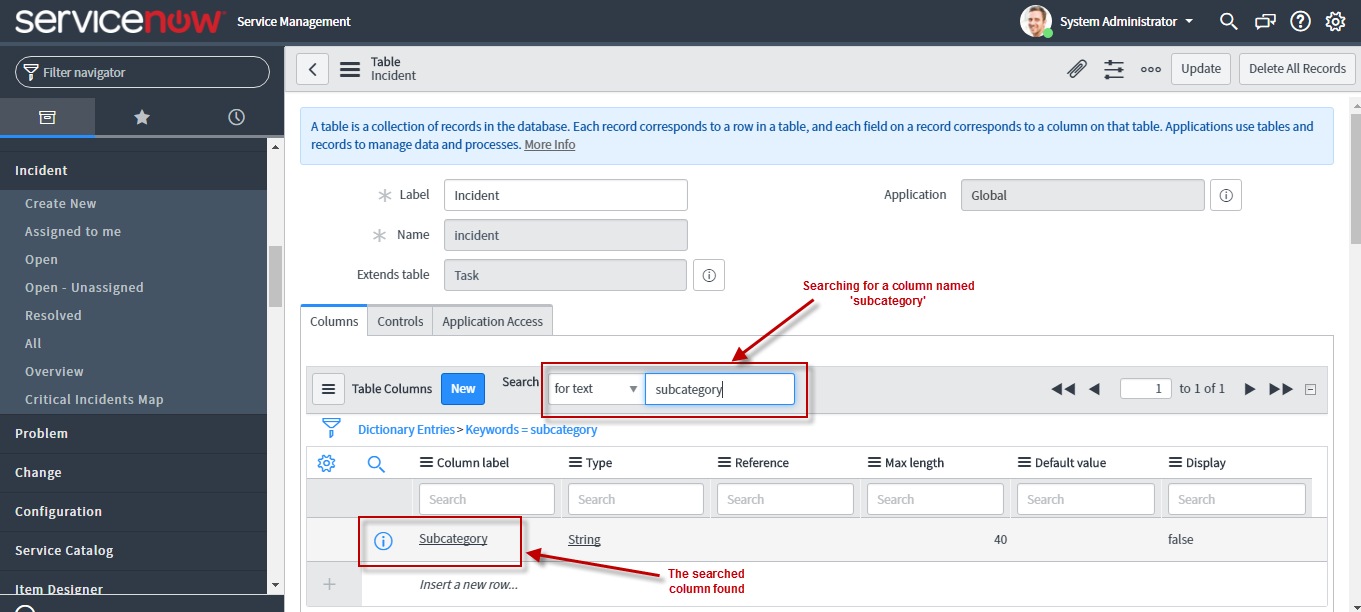
Figure 3 will then appear. Use the Search option indicated by Figure 3 to search for the column named ‘subcategory’. Once it is found, click on it as indicated by Figure 3.
-
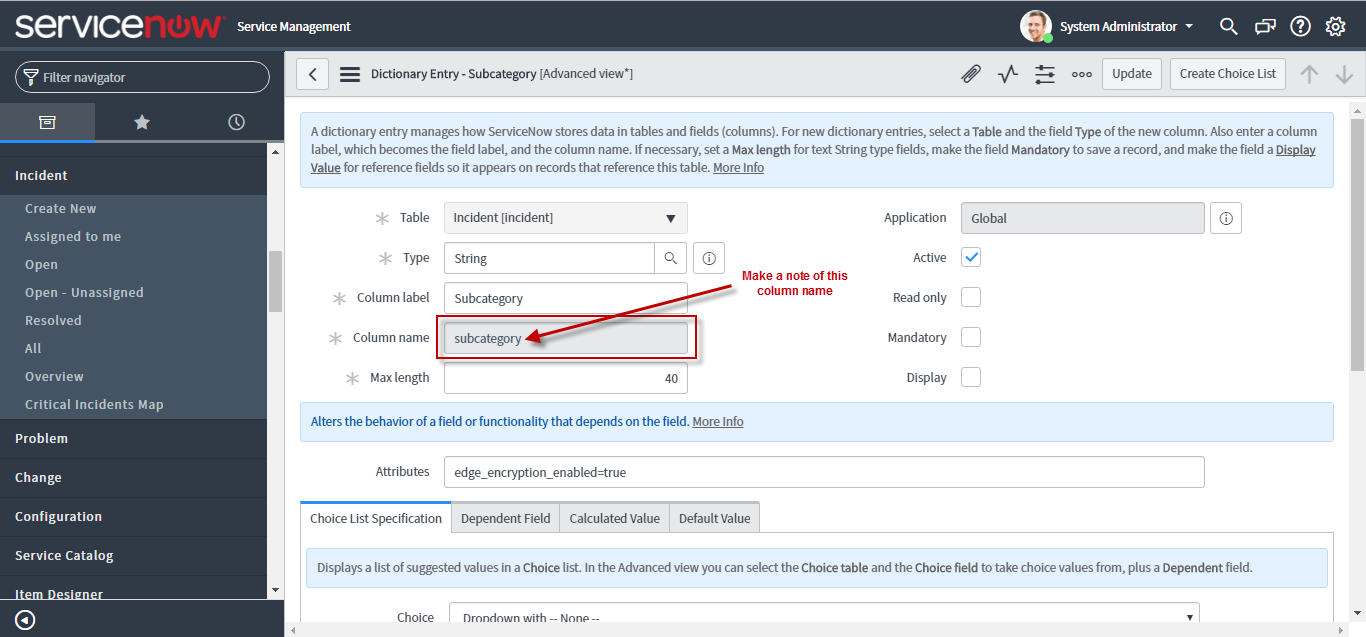
This will open Figure 4. The value of the Column name field will be displayed, as shown by Figure 4. As you can see, it is subcategory. This value should be used as the column name of the ‘Subcategory’ custom field in our example.
-
-
Next, edit the eg_services.ini file (in the <EG_INSTALL_DIR>\manager\config directory). Look for the service now key in the [tt_intergration_system_fields] section of the file. A comma-separated list of parameters currently available in the Trouble Ticket Integration page for Service Now will be displayed by default against the service now key in this section. Add the new field, subcategory, to this list. Note that the field will be displayed in the Trouble Ticket Integration page in the same position in which you insert the field here. In the sample entry below, you can see that the new field has been inserted just before the Critical due period field.
SERVICE NOW=url,port,user,password,isProxyEnabled,proxyHostName,proxyPort,isProxyAuthenticated,proxyUserName,proxyPassword,caller_id,assignment_group,assigned_to,category,subcategory,subcategory,criticalDueDatePeriod,majorDueDatePeriod,minorDueDatePeriod,ticketTitleFormat,ttIntegratorClass
-
Next, look for the [tt_integration_field_mapping] section of the file. Under this section, add an entry of the following format:
<columnname>=<fieldtype>
<fieldtype> represents the type of values the new field will support. In the case of our example, this entry will read as follows:
subcategory=Textfield
-
Then, go to the [tt_integration_text_mapping] section and add an entry of the following format to it:
<columnname>=<displayname>
<displayname> represents the label using which the new field will be displayed in the Trouble Ticket Integration page.
In the case of our example, your specification can be:
subcategory=Subcategory
-
Finally, go to the [tt_integration_service now] section and add an entry of the following format to it:
<columnname>=<defaultvalue>
<defaultvalue> denotes the value that will be displayed by default against the new field in the Trouble Ticket Integration page. You can either provide a valid value or leave it as unconfigured. Let us leave it as unconfigured for the purpose of our example. The specification will therefore be:
subcategory=$unconfigured
In case you want to provide a valid value, then your specification will be:
subcategory=Internal application
- Finally, save the file.
-
If you now visit the Trouble Ticket Integration page for Service Now, you will find that the Subcategory field has appeared just above the Critical due period field (see Figure 5).
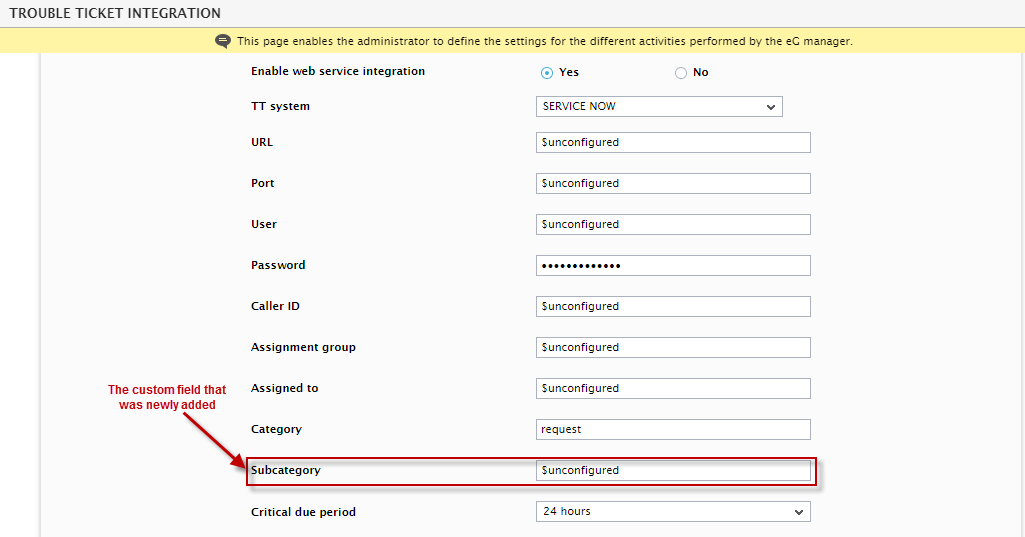
Figure 5 : The custom field appearing in the Trouble Ticket Integration page of Service Now in the eG admin interface