Configuring the Mail Server
You need to configure the mail server in your environment to allow the automatic generation and transmission of email alerts to specified recipients. Figure 1 depicts the configuration of mail settings for the eG manager. This page can be accessed by selecting the Server Settings option from the Mail Settings menu of the Alerts tile.
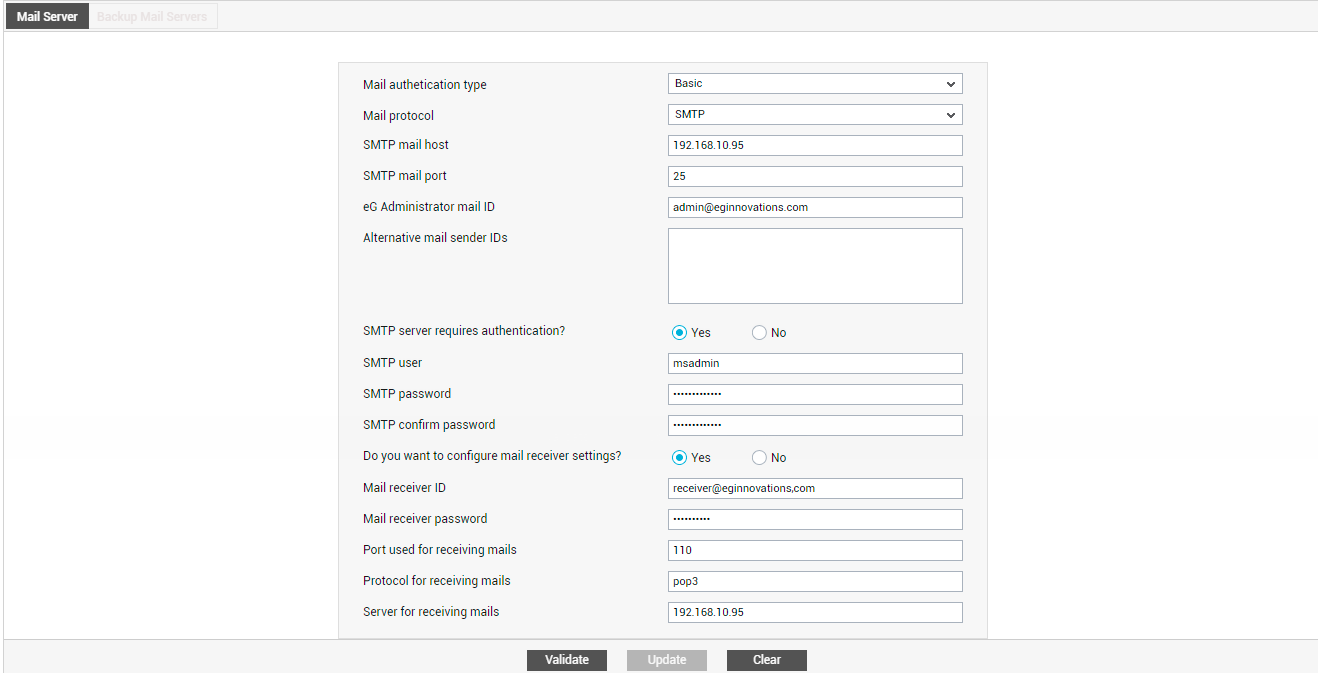
Figure 1 : Mail Server Settings page
First, pick a Mail authentication type. The options are as follows:
-
Basic: Basic Authentication, as the name suggests, is very simple. This type of authentication typically takes a username and password, contained in a single header field, in plain text, base64 encoding. For enhanced protection, these credentials are sometimes combined with SSL. If the mail server that you want to configure for email alerting purposes uses Basic Authentication, then pick Basic from the Mail authentication type drop-down.
-
OAuth 2.0: Modern Authentication is not a single authentication method, but instead a category of several different protocols that aim to enhance the security posture of cloud-based resources. Some examples of Modern Authentication protocols are SAML, WS-Federation, and OAuth. eG Enterprise currently supports OAuth 2.0 with the Office 365 mail server. OAuth is an open-standard authorization protocol or framework that provides applications the ability for “secure designated access”. OAuth does not share password data but instead uses authorization tokens to prove an identity between consumers and service providers. OAuth is an authentication protocol that allows you to approve one application interacting with another on your behalf without giving away your password. If you want to send email alerts to mailboxes managed by Office 365, then select OAuth2.0 as the Mail authentication type. Before selecting, make sure that the pre-requisites detailed in the Pre-requisites for Authenticating Email Alerts Using OAuth topic are fulfilled.
If Basic is set as the Mail authentication type, do the following:
-
The protocol through which you wish to transmit or send the outgoing mail messages across the Internet Protocol (IP) networks has to be selected from the Mail protocol list box.
-
The SMTP option would be selected by default in this list box. If the mail server through which you wish to send the mail messages is SSL-enabled, then select, SMTP-SSL from the Mail protocol list box. If your mail server offers enhanced security and provides certificate based authentication, select the SMTP-TLS option from the Mail protocol list.
-
The identity (IP address or host name) of the mail server to be used by the eG manager for generating alarms has to be entered in the smtpmail host text box. The port at which the mail host listens has to be provided in the SMTP mail port text box. The entry in the eG Administrator mail ID text box will be the mail ID from which the alarms are generated to eG users.
-
In MSP environments typically, different support groups are created to address performance issues relating to different customers. These support groups might prefer to receive problem intimation from customer-specific mail IDs instead of the global admin mail ID, so that they can instantly identify the customer environment that is experiencing problems currently. Moreover, this way, every support group will be enabled to send status updates on reported issues directly to the concerned customer, instead of overloading the admin mailbox. To facilitate this, the MAIL Server SETTINGS page allows the administrator to configure multiple Alternative Mail sender IDs - normally, one each for every customer in case of an MSP environment. While configuring multiple sender IDs in the space provided, ensure that you press the Enter key on your keyboard after every mail ID. This way, every ID will occupy one row of the text area. Later, while creating a new user, the administrator can select one of these configured sender IDs from the Mail sender list in the ADD USER page, and assign it to the new user. This ensures that all email alerts received by the user are generated by the chosen ID only.
-
If the mail server requires users to login before sending mails, then select the Yes option against the SMTP server requires authentication? field. By default, authentication is set to No. Upon selecting Yes, you will be required to provide a valid SMTP user name and SMTP password for logging into the mail server. Confirm the password by retyping it in the SMTP confirm password text box.
-
To safeguard from spam, some mail servers are configured so that they will allow mails to be sent from a system only if that system is also used to receive mails. To allow the eG manager to use such mail servers to send email alerts, additional configuration is needed. In such a case, select the Yes option against the Do you want to configure mail receiver settings? field. By default this field is set to No. When you enable this authentication to Yes, you need to specify the following details in the corresponding text boxes:
-
Mail receiver ID: Specify the login name to be used for receiving mails.
-
Mail receiver password: The password of the mail receiver needs to be specified here.
-
Port used for receiving mails: The port number on the mail server to which the mail manager connects needs to be provided here.
-
Protocol for receiving mails: Mention the protocol used for receiving mails. The protocol can be either POP3 or IMAP.
-
Server for receiving mails: Specify the server to which the mail manager will connect to receive mails.
-
-
Sometimes, alarm mails may not be received by the configured recipients. When such an anomaly occurs, administrators typically spend hours to determine the reason for the non-delivery of emails. One of the most common causes for non-delivery of email alerts is the improper configuration of the mail server for the eG manager. For instance, an incorrect IP address specified against SMTP host in Figure 1 or invalid credentials provided against SMTP user and SMTP password can halt the generation and transmission of email alerts. To enable administrators to spot and fix such configuration issues before the eG manager even attempts to send out email alerts, a Validate button is provided in the mail server settings page of Figure 1. Clicking on this button instantly verifies the correctness of the values configured in the mail server settings page and promptly indicates discrepancies to the administrator. This way, administrators need not have to wait for delivery failures to occur to isolate configuration issues.
Note:
The mail ids provided in the eG Administrator mail ID and the Alternative Mail sender IDs fields will not be validated using the Validate option. If an incorrect mail id is provided in these fields, delivery failures are bound to occur.
-
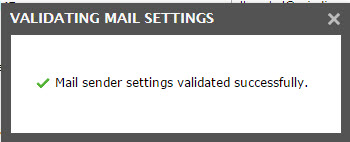
If, upon clicking the Validate button, the corresponding information is validated, the message confirming the success of the validation will appear as shown in Figure 2.
-
If the validation is unsuccessful, then a message to that effect would appear.
-
Finally click the Update button in Figure 1 to register the changes.
If OAuth 2.0 is set as the Mail authentication type, Figure 3 will appear:
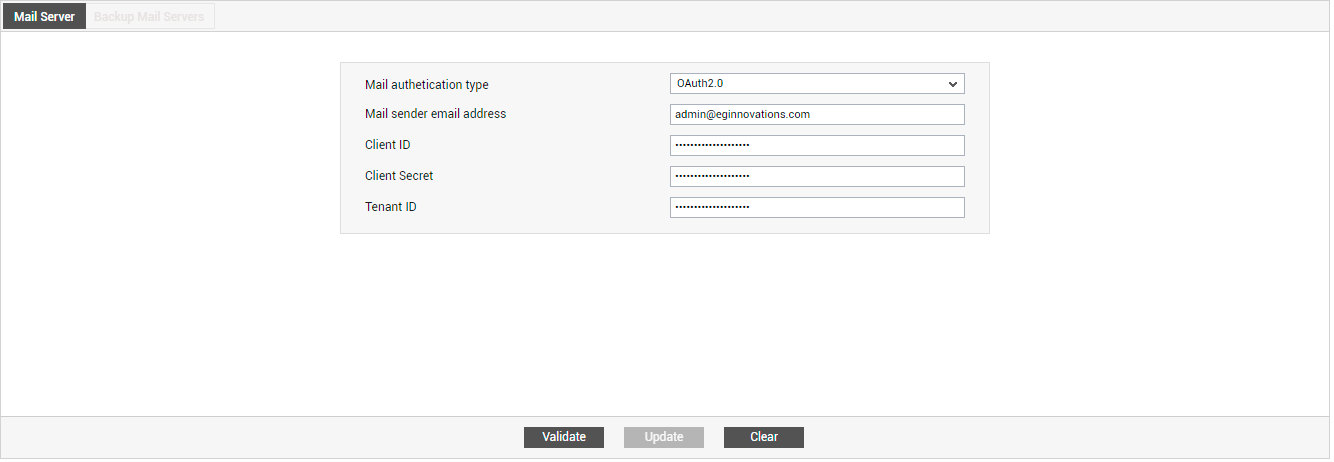
Figure 3 : Configuring email alerting using OAuth
In Figure 3, specify the following:
-
First, in the Mail sender email address text box, specify the email address on the Office 365 server from which email alerts are to be sent.
-
To use OAuth 2.0 with eG Enterprise, you first need to create a special app for this purpose on Azure AD. This app should be assigned a client ID and client secret using which it can identify itself to Office 365 when sending email alerts to it. You should also grant the app permissions to read the user profile and send email alerts. To know how to perform all of the above, look up the Pre-requisites for Authenticating Email Alerts Using OAuth. Once the requirements are fulfilled, specify the Client ID, Client Secret, and Tenant ID of the app you created in Figure 3.
-
Click the Validate button in Figure 3 to check if your specifications are correct. If no errors are thrown, click the Update button to save the changes.