Discovering RabbitMQ Nodes in a RabbitMQ Cluster
eG Enterprise can automatically discover the Rabbit MQ nodes in a RabbitMQ cluster, by connecting to that cluster. To configure auto-discovery through RabbitMQ cluster, do the following:
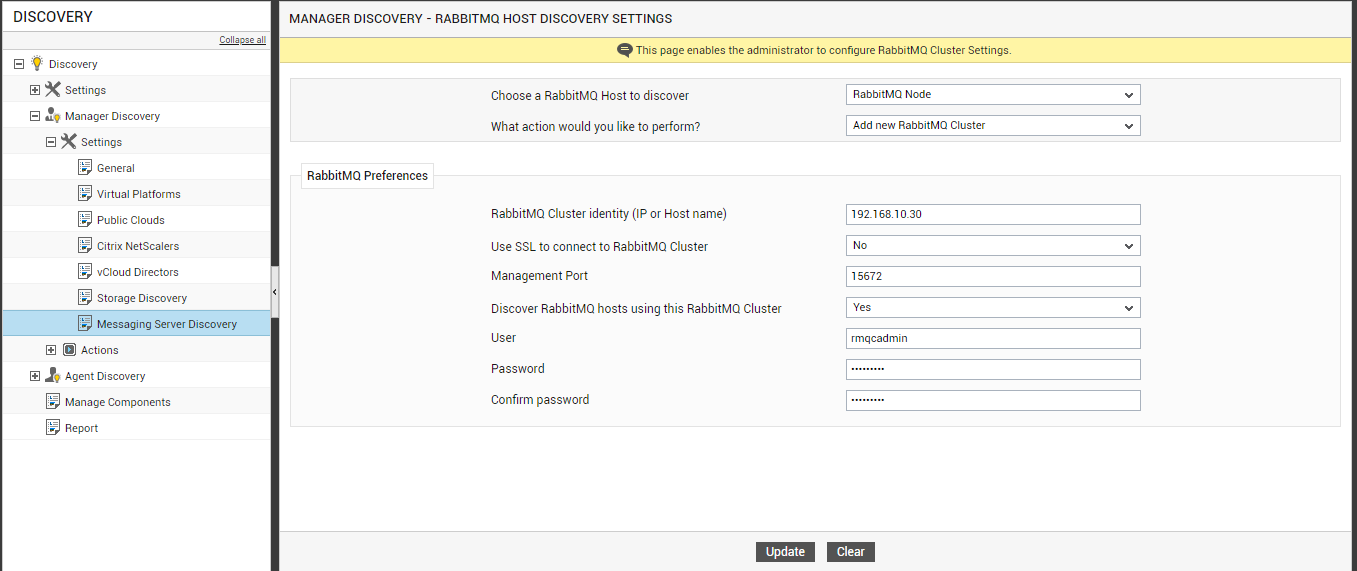
- Select the Messaging Server Discovery option under the Settings sub-node of the Manager Discovery node in the discovery tree in the left panel of Figure 1. Then, choose the RabbitMQ Node option from the Choose a RabbitMQ Host to discover drop-down in the right panel of Figure 1.
-
First, you need to configure the cluster with which the eG manager should connect to automatically discover the RabbitMQ nodes. For this, select the Add new RabbitMQ Cluster option from the What action would you like to perform? drop-down.
-
In the right panel of Figure 1, specify the following:
- RabbitMQ Cluster identity (IP or Host name): Specify the IP address/host name of the RabbitMQ cluster that the eG manager should use for discovery.
- Use SSL to connect to RabbitMQ Cluster: Set this flag to Yes if the cluster is SSL-enabled. Otherwise, set this flag to No.
- Management Port:By default, the RabbitMQ cluster listens on the management port 15672. This implies that to auto-discover RabbitMQ nodes in a cluster, the eG manager connects to the cluster via port 15672.
- Discover RabbitMQ hosts using this RabbitMQ Cluster: If you want to discover the nodes using the configured cluster, set this flag to Yes. If you only want to use this cluster for monitoring the RabbitMQ nodes and not for discovering them, set this flag to No.
- Username to connect to RabbitMQ Clusterand Password for user: Specify the credentials (i.e., user name and password) of a user on the cluster who has been assigned the 'monitoring' tag. If no such user exists, then you will have to create a user for this purpose using the Management Interface. The steps for this have been detailed in
- Confirm password for user: Confirm the password of the user by retyping it here.
-
Then, click the Update button in Figure 1. A message box requesting your confirmation to proceed with the discovery will then appear (see Figure 2). Click the Yes button in the message to trigger the discovery. Clicking the No button will save the details of the cluster, but will not start the discovery. In this case, you can use the cluster configuration so saved to perform discovery at a later point in time.
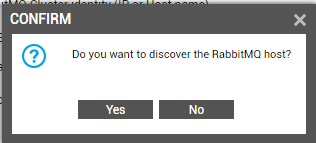
Figure 2 : A message box requesting confirmation to discover the hosts in a RabbitMQ cluster
- This way, you can add the details of the multiple RabbitMQ clusters to the eG Enterprise system.
-
To view the details of all the RabbitMQ clusters that are added, choose the View configured RabbitMQ Clusters option from the What action would you like to perform? drop-down in the right panel of Figure 3. The right panel will then change to display the names and other details of the RabbitMQ clusters that have been configured.
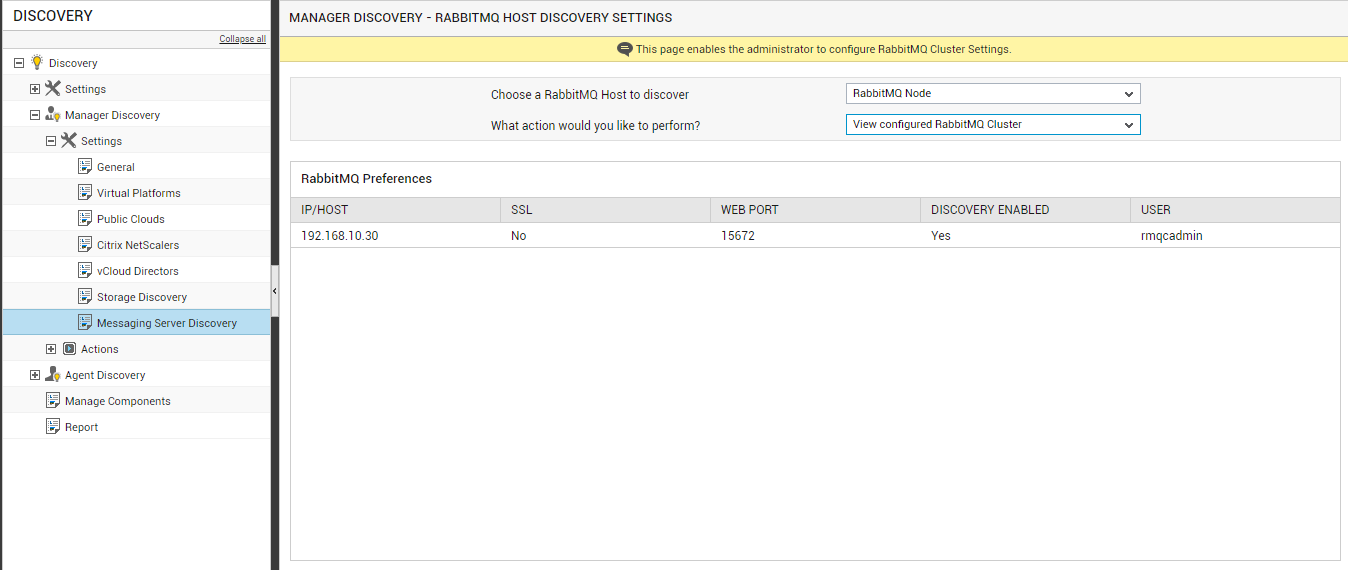
Figure 3 : Viewing the details of RabbitMQ clusters configured for discovery
To modify the details of a RabbitMQ cluster, select the Modify configured RabbitMQ Cluster option from the What action would you like to perform?drop-down. The right panel will then change as depicted by Figure 4. From the RabbitMQ Cluster identity list, select the IP address of the cluster to be modified. Upon selection of the cluster's IP address, the other parameters in the right panel will be populated with the corresponding details. You can change any of the displayed details to suit your needs. Finally, click the Update button to save the changes.
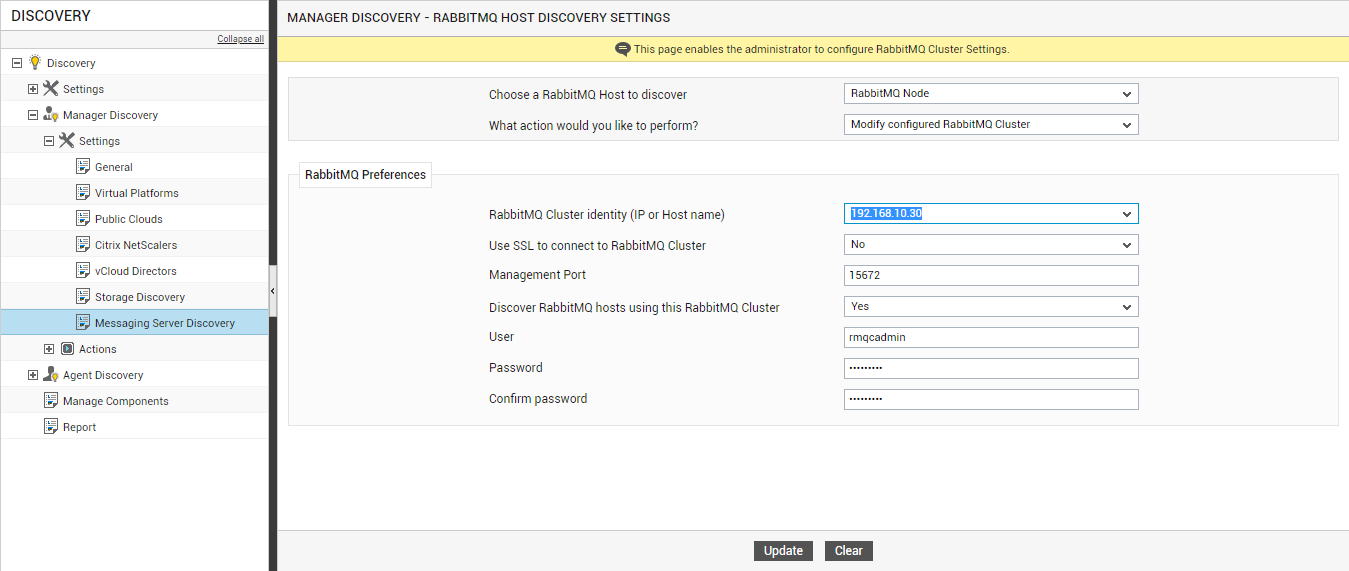
Figure 4 : Modifying the RabbitMQ cluster configuration
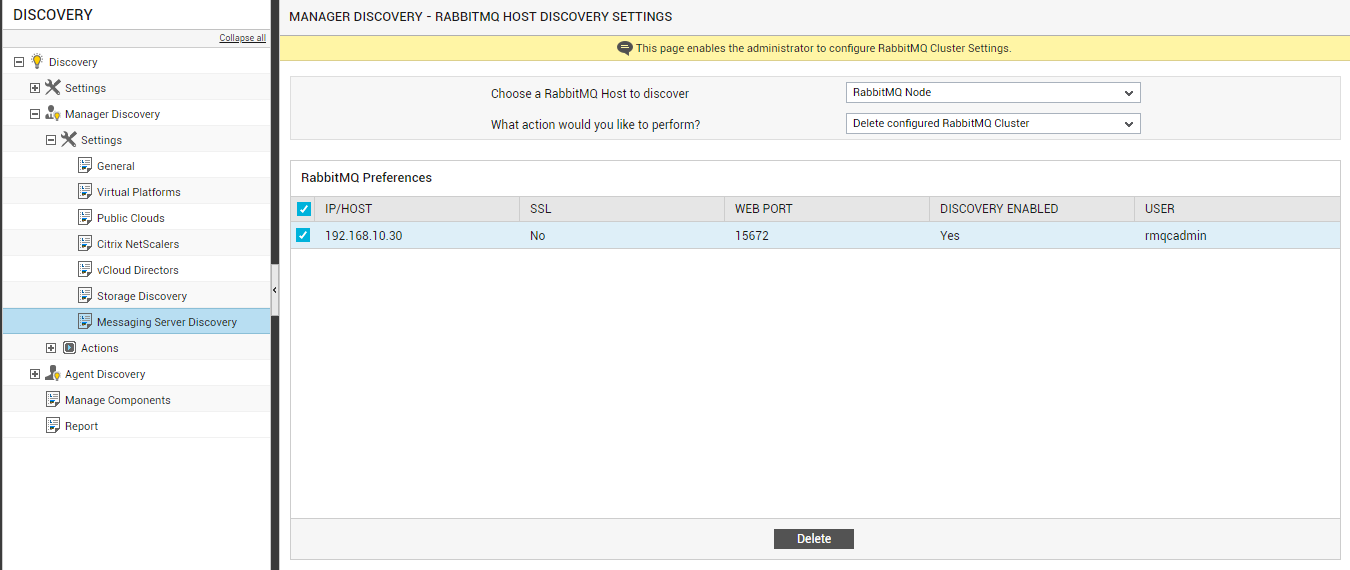
To delete a RabbitMQ cluster, select the Delete configured RabbitMQ Clusters option from the What action would you like to perform? drop-down as shown in Figure 5. Select the check box corresponding to the Prism to be deleted and click the Delete button to delete it. To delete all the RabbitMQ clusters at one shot, select the check box just before the column heading, IP / HOST, and click the Delete button.