How Does eG Enterprise Monitor a RabbitMQ Cluster?
eG Enterprise monitors a RabbitMQ cluster in an agentless manner. An eG agent on a remote Windows host in the environment should be configured to connect to the Management Interface of the rabbitmq-management plugin of any node in the cluster. Once in, the eG agent uses the HTTP-based API provided by the plugin to run commands on the console and pull metrics of interest. To be able to connect and collect metrics using the rabbitmq-management plugin, the eG agent requires the privileges of a user on the cluster who has been assigned the 'monitoring' tag. If such a user pre-exists, then feel free to configure the eG tests with the credentials of that user. On the other hand, if no such user exists, then you will have to create a user for this purpose using the Management Interface. The steps for user creation are detailed below:
- First, open a browser and connect to the Management Interface of any node in the cluster, using the URL: http://<NodeIP/Name>:<ManagementPort> or https://<NodeIP/Name>:<ManagementPort>/
-
Once Figure 2 appears, specify the credentials of an administrator in Figure 2 to login to the console.
-
Upon a successful login, Figure 3 will appear.
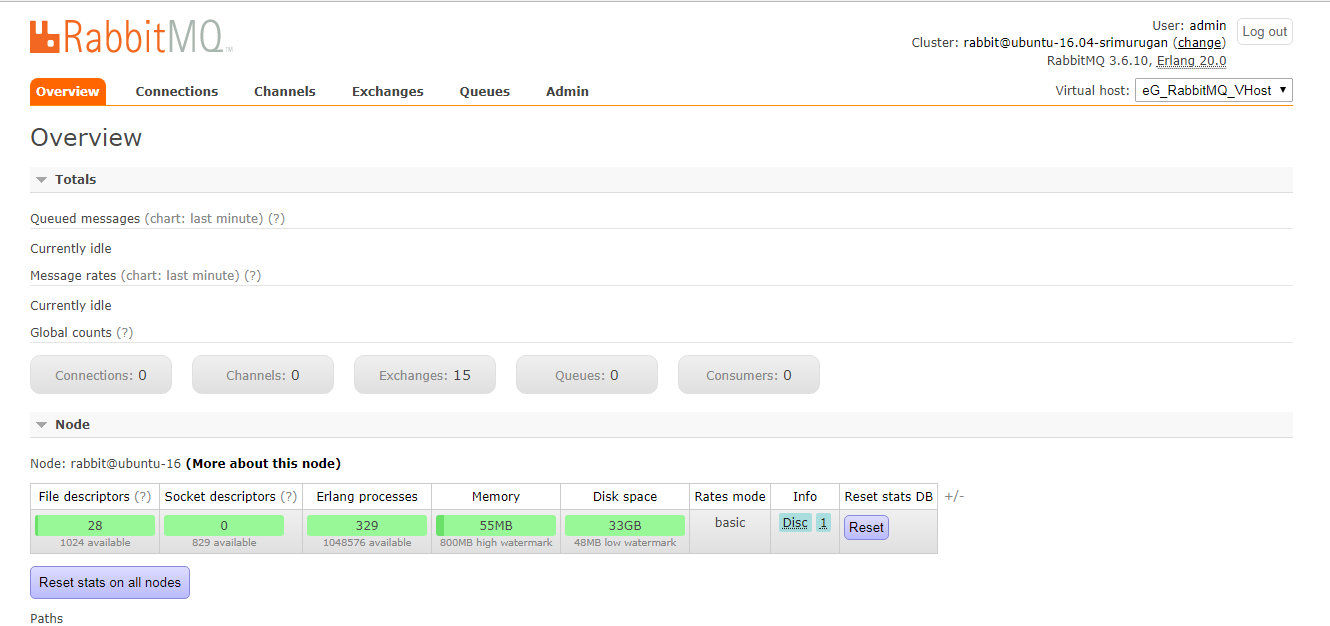
Figure 3 : The Admin console of a cluster node
-
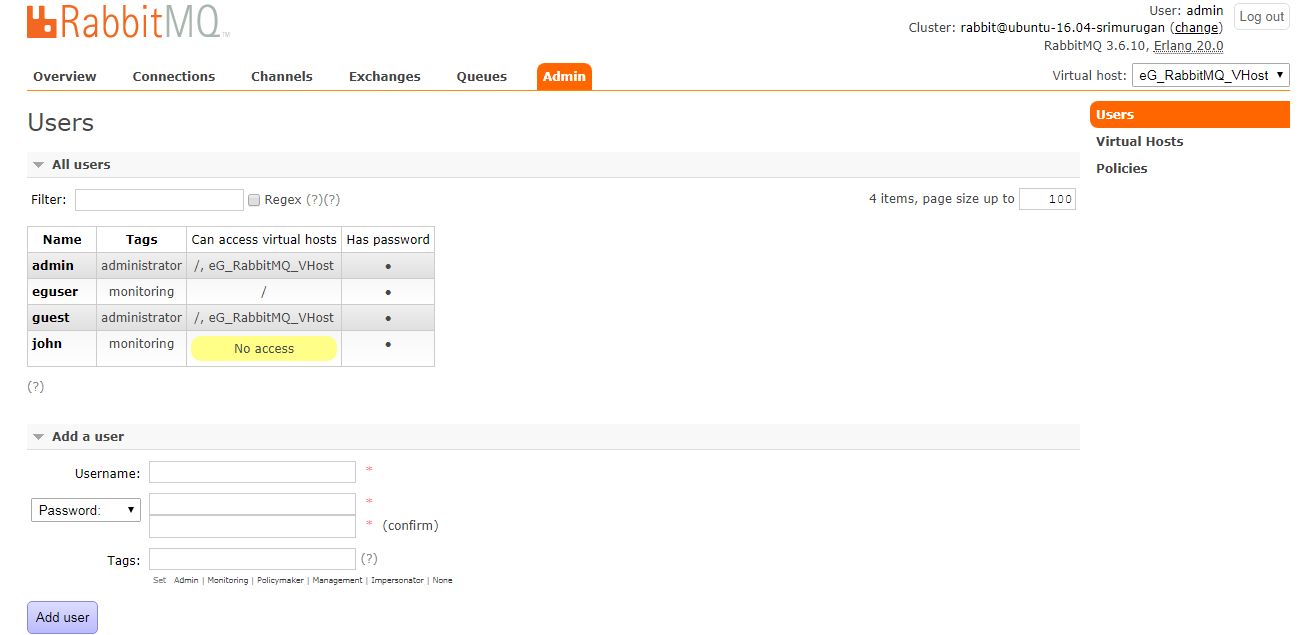
Using the Add a user section of Figure 4, create a new user. For that, first specify the Username and Password for the new user (see Figure 5). Then, from the list of tags listed below the Tags field, select the Monitoring tag to assign it to the user.
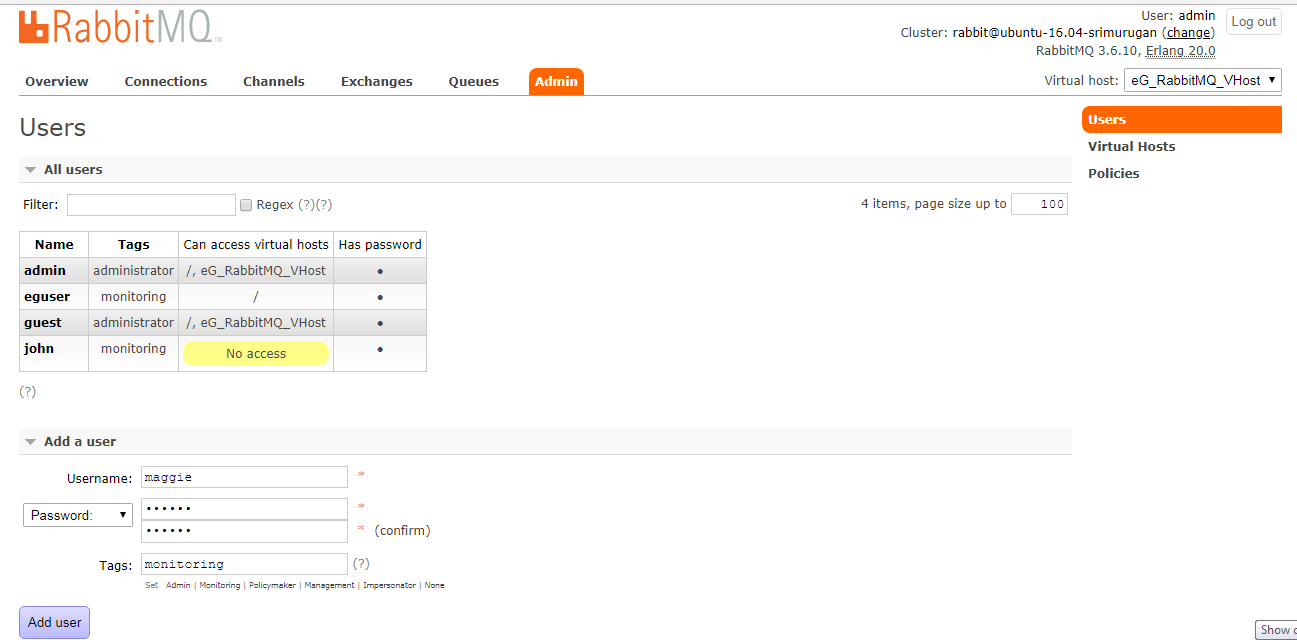
- Then, click the Add user button in Figure 5.
-
Figure 6 will then appear displaying the newly created user and the tag assigned to that user. Make a note of the credentials of this user, and make sure that you specify these credentials when configuring eG tests for a target RabbitMQ Cluster.
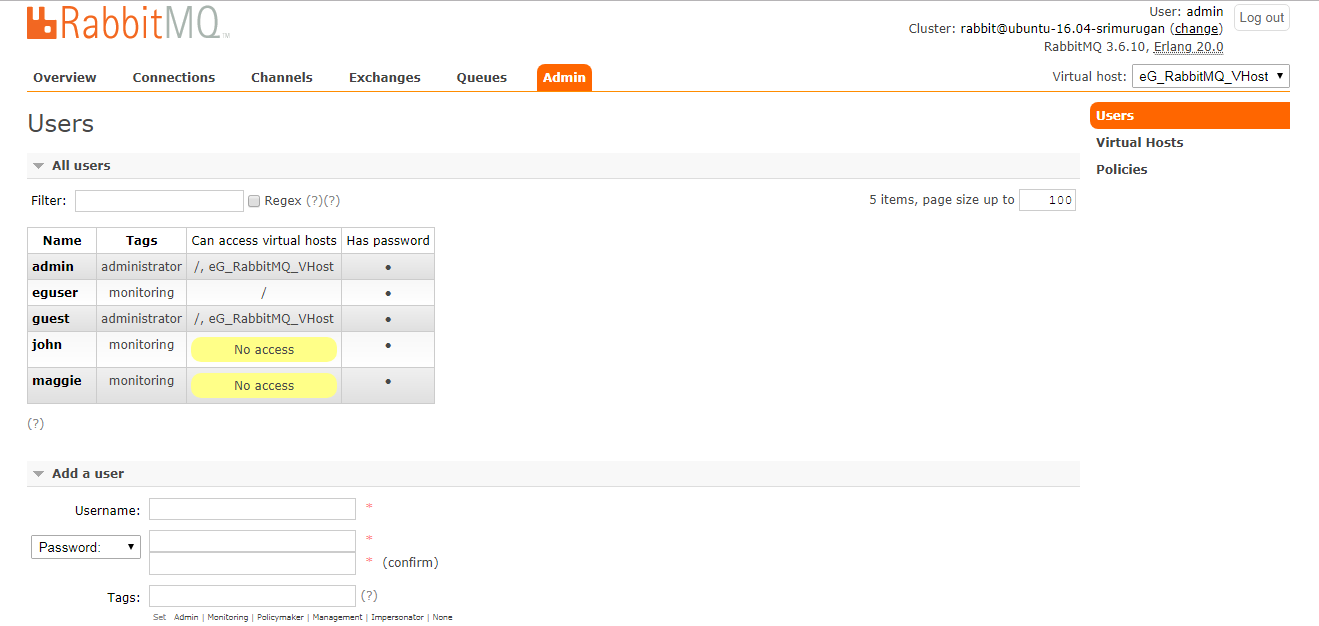
Figure 6 : The newly added user displayed in the All users section
-
RabbitMQ requires that any new user created on a node be associated with one/more virtual hosts. Even from a monitoring standpoint, if you configure the eG tests with the credentials of a 'monitoring' user who is not assigned any virtual host, then the eG agent will not be able to run any test or collect metrics. Therefore, proceed to assign one/more virtual hosts to the 'monitoring' user you just created. For that, click on the Virtual Hosts option, indicated by Figure 7. You will then be able to view the virtual hosts that pre-exist and the users who can access them (see Figure 7).
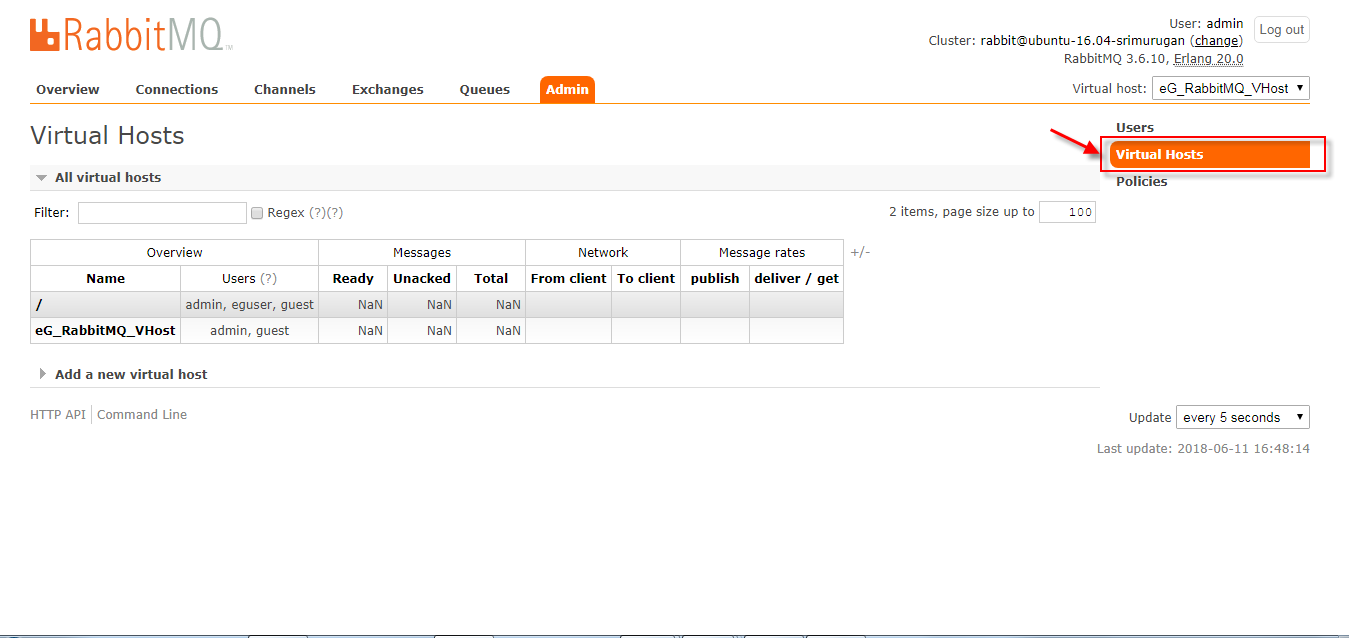
- In the list of virtual hosts in Figure 7, click on the virtual host to which you want to assign the new user.
-
Next, keep scrolling down the Virtual Hosts page (depicted by Figure 7) until you view the Permissions section (see Figure 8). Under Set Permission in Figure 8, select the name of the new User. To grant the Configure, Read, and Write permissions to the new user, enter .* against the Configure regexp, Write regexp, and Read regexp text boxes. Finally, click on the Set permission button therein.
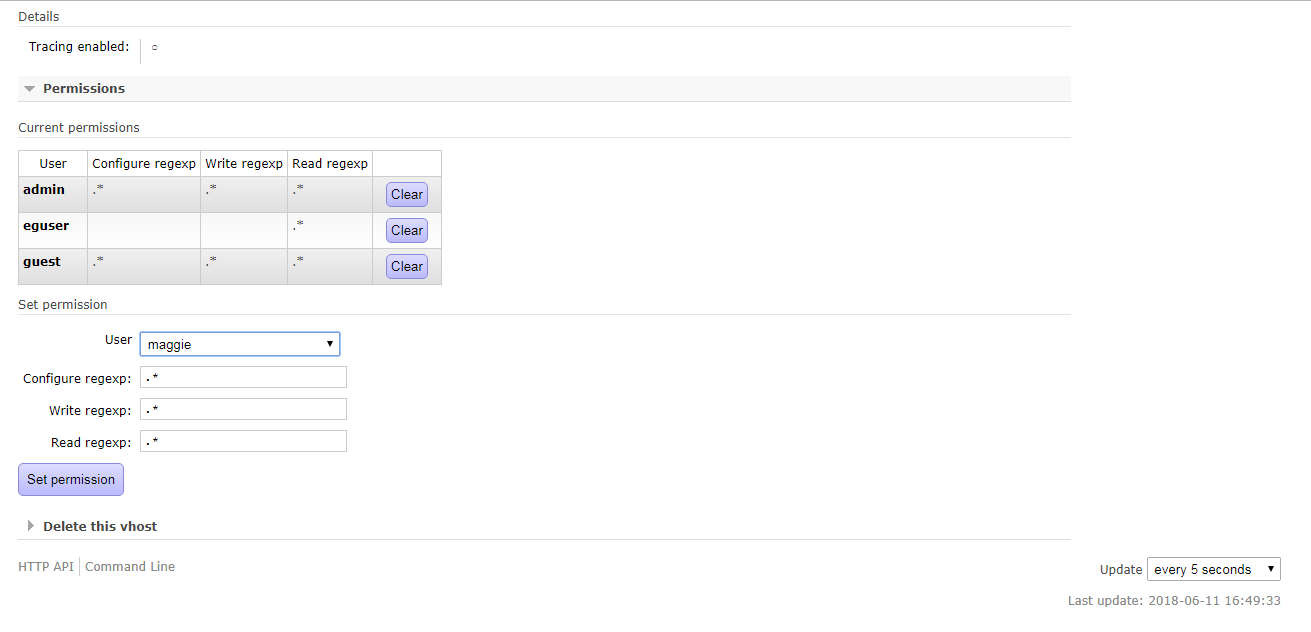
Figure 8 : Granting access permissions to the new 'monitoring' user