Adding an Exchange Online Tenant Component
eG Enterprise cannot auto-discover an Exchange Online Tenant component. This is why, you need to manually add the component to the eG Enterprise system to monitor it. The steps for manually adding an Exchange Online Tenant component are detailed below:
-
Login to the eG admin interface as a user with administrative privileges.
-
Follow the Infrastructure -> Components -> Add/Modify Component menu sequence in the Admin tile menu.
-
From the page that appears, select Exchange Online Tenant as the Component type and click the Add New Component button.
-
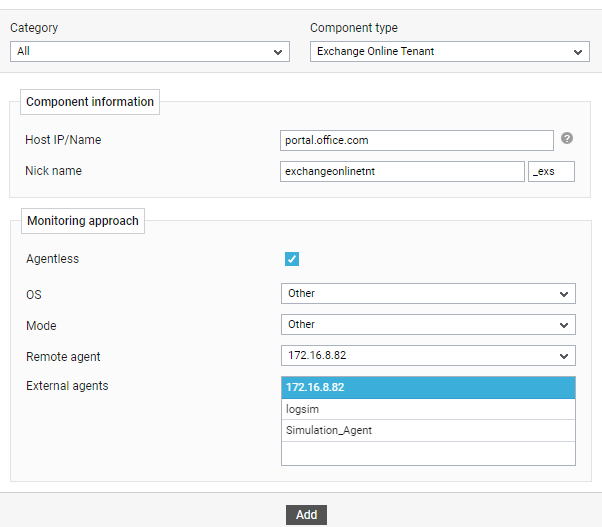
Figure 1 will then appear.
-
In Figure 1, by default, portal.office.com will be displayed as the Host IP/Name of the target Exchange Online Tenant component. If the host name of the Exchange Online component you want to monitor is different in your environment, then modify this specification.
-
Provide a unique Nick Name for the Exchange Online Tenant component being added. Note that any nick name you specify here will be automatically suffixed with the string, _exs.
-
Since Exchange Online Tenant is by default monitored in an agentless manner, the Agentless flag will be enabled. Let the default settings remain in the OS and Mode selection boxes.
-
Next, select the Remote agent and External agent that will monitor the target Exchange Online Tenant component.
-
Finally, click the Add button to add the component to the eG Enterprise system.
