Associating Tests with a Pre-defined Layer
Let us try to associate the TuxDomainTest_ex with the Tuxedo Servers layer that pre-exists in the eG Enterprise system. For this, do the following:
- Focus on the Pre-defined layers list in Figure 1. As can be inferred from Figure 1, you can neither modify nor delete a pre-defined layer. However, you can associate/disassociate tests with a pre-defined layer.
- To associate tests with the Tuxedo Servers layer in our example, click the
 button corresponding to that layer in the Pre-defined layers list of Figure 1.
 -
This will open Figure 1.
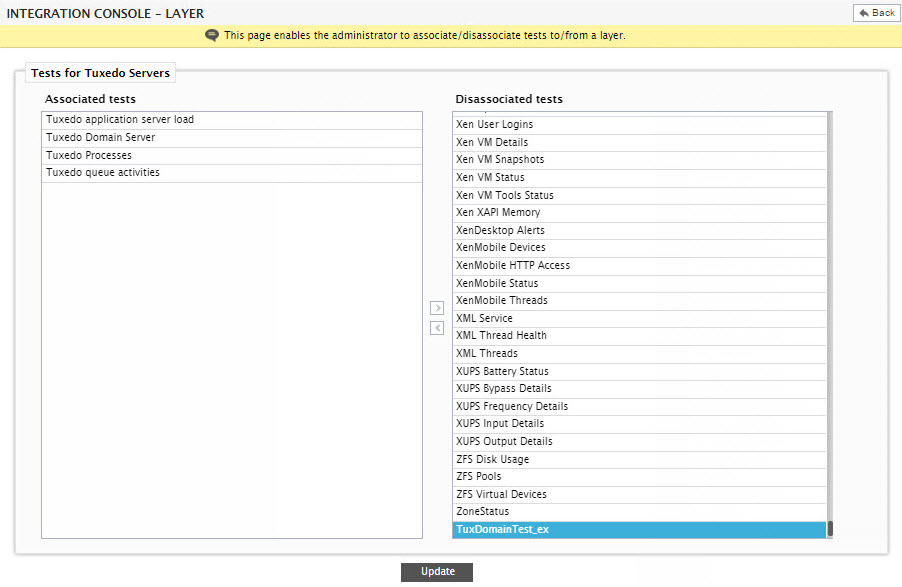
Figure 1 : Selecting the test to be associated with a pre-defined layer
- The Associated tests list in Figure 1 will display all those tests that are already associated with the Tuxedo Servers layer. To associate the TuxDomainTest_ex with this layer, first select that test from the Disassociated tests list of Figure 1. Then, click the < button.
-
This will invoke a message box depicted by Figure 2 below. By default, once a test is associated with a layer, that layer will get automatically associated with all components that support that layer. Sometimes, you may want a test to be associated with only a few components that support that layer and not all of them. In this case, click the No button in the message box of Figure 2. If this is done, then the test will not be associated with that layer. On the other hand, if you want the test to be associated with all components that support the layer, click the Yes button. This will transfer the selection to the Associated tests list.
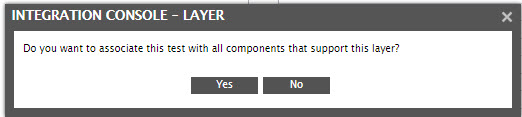
Figure 2 : A message box requesting your confirmation to associate the test with all components that support the chosen layer
- If for any reason, you want to disassociate a test from a layer, simply select the test from the Associated tests list and click the > button in Figure 1.
- Finally, click the Update button to save the changes.