Creating New Help Pages Using the Integration Console
Let us now define an Admin and a Monitor help page for the MsFileTest_ex that we created in Adding a Custom Performance Test . To begin help page creation, do either of the following:
-
Typically, until a new test is properly generated and thresholds are set for its measures in eG Enterprise, you cannot define help pages for that test. This is why, the Help tab page in the new test details page will remain disabled till the Finish button is clicked in Figure 18. Clicking the Finish button will invoke the message box depicted by Figure 1. Click the Yes button in the message box to begin help page creation. This will lead you to the Help tab page of Figure 2.
Figure 1 : A message box requesting your confirmation to define a help page for the new test
-
On the other hand, if you click the No button in the message box of Figure 1, you will exit the new test details page and return to the integration console – test page, where all the new IC tests will be displayed. To create a help page for a test that has already been generated, you need to Modify the specifications of that test. To do this, click the
 button corresponding to that test in the integration console – test page. This will take you to the NEW TEST DETAILS page, where you can click the Help tab page (see Figure 2) to begin creating help pages for that test.
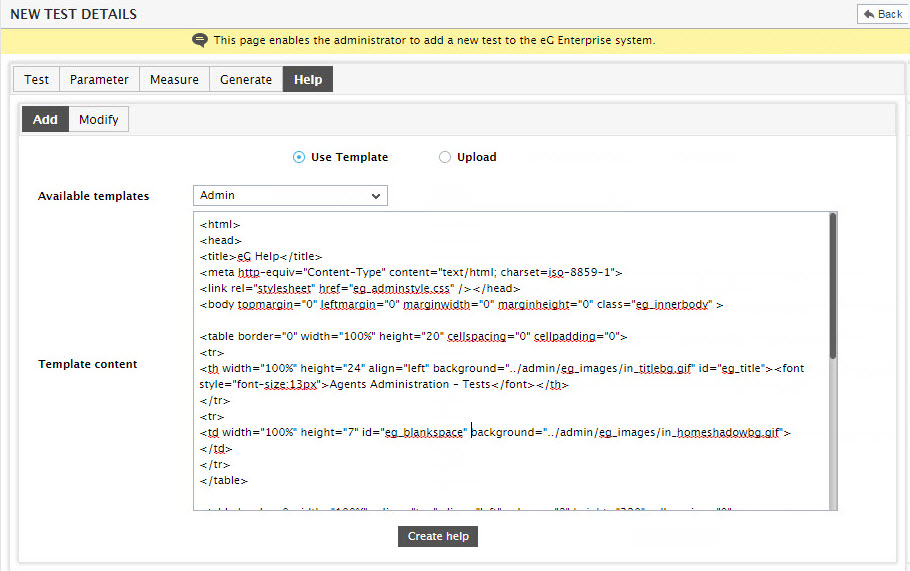
By default, you can define the help pages for Admin and Monitor modules. For this, choose the module for which you wish to create a new help page from the Module list.
Once you choose the module, the Template content section displays the help page template in HTML format. This template content can be easily customized to create the help pages you want. To create an Admin help page for the MsFileTest_ex, do the following:
- From the Module list, pick the Admin option.
- This will bring up the Admin help page template in the Template content section as shown in Figure 3.
-
The Admin help page template of Figure 3 embeds directions on how to edit the template. You just need to scan the template for these instructions and follow them. For instance, search the template for the string Enter the Test Name. Once it is found, remove the string and in its place type the test name, MsFileTest_ex, as directed. Likewise, look for the following strings in the template, remove them one after another from the template, and in the place of each, provide the inputs indicated by the corresponding string.
String Help page information Enter the test purpose
Describe the purpose of the MsFileTest_ex
Enter the name of parameter1
Specify the first parameter that is to be configured for the MsFileTest_ex. If you can recall, while creating the MsFileTest_ex, we had not configured any special parameters for the test. However, by default, any non-port-based test added using IC will take TEST PERIOD and HOST as its parameters. Therefore, type test period as the first parameter.
Describe the parameter
This string will appear after parameter1 and parameter2. Provide a description of the corresponding parameter here.
Enter the name of parameter2
Enter host as parameter 2
The strings in the table above have been highlighted in the template in Figure 3.
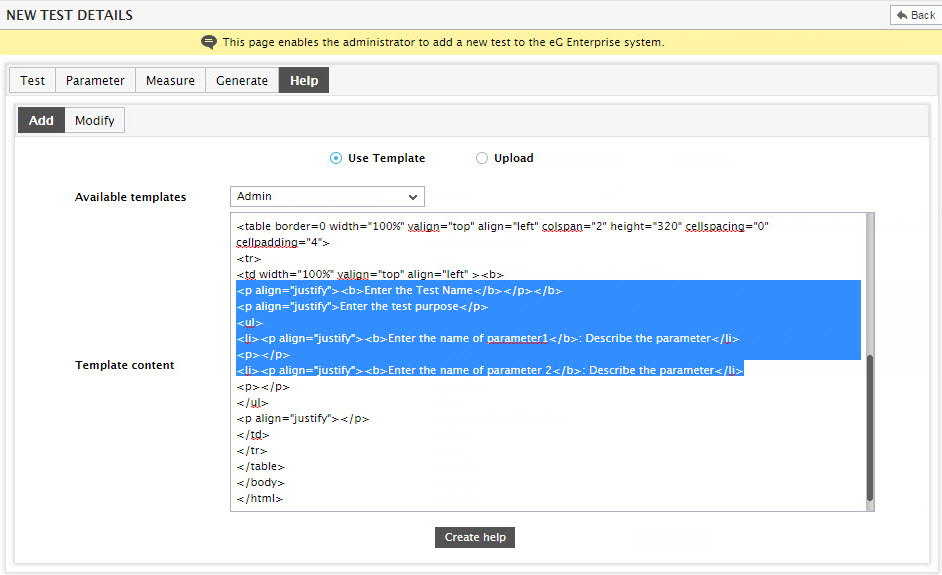
Figure 3 : The strings containing instructions on how to edit the Admin template
-
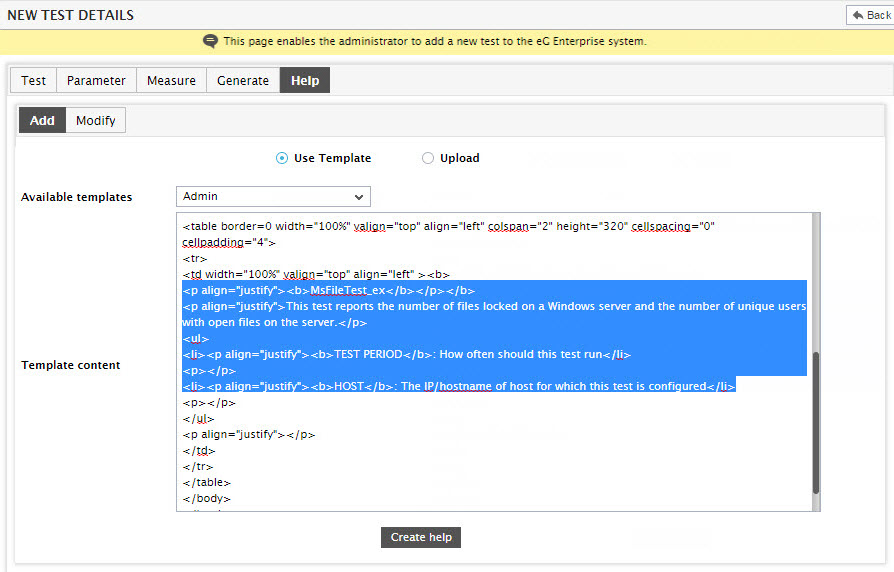
Once the HTML block highlighted in Figure 3 is edited based on the instructions provided in step 4, the same block will look as depicted by Figure 4.
-
By default, the template allows you to provide details for a maximum of two parameters. If your test supports say, one more parameter, and you want to include the details of this additional parameter in the help page, then, insert a line of the following format just above the </ul> tag in the help page template:
<li><p align=”justify”><b>Enter the name of parameter 3</b>: Description of parameter 3</li>
<p></p>
For instance, if you are adding an additional parameter named filename into the help page, then, the new line you insert should be as follows:
<li><p align=”justify”><b>FILENAME</b>: The name of the file to be monitored</li>
<p></p>
Multiple lines of the above format can be inserted for every additional parameter the test takes.
-
Likewise, if your test supports only one parameter, then you will have to explicitly remove the entire row of information available for the second parameter from the template. For instance, if you want to remove the host parameter from the MsFileTest_ex in our example, then, simply delete the following line of code:
<li><p align=”justify”><b>HOST</b>: The host for which the test is being configured</li>
<p></p>
- No additional parameters exist for the MsFileTest_ex in our example. Similarly, no lines of code need to be removed from the template for the purpose of our example. Therefore, simply proceed to click the Create help button to generate the Admin help page for MsFileTest_ex. If the help page is generated successfully, then a message to that effect will appear.
- The eG Enterprise system will automatically assign a name of the format, <TestName>_Admin, for any Admin help page you create for an IC-based test using IC. This help page will be automatically saved to the <EG_MANAGER_INSTALL_DIR>\tomcat\webapps\final\eghelp directory.
Let us now proceed to create a Monitor help page for the MsFileTest_ex. For this, do the following:
- From the Module list, pick the Monitor option.
- This will bring up the Monitor help page template.
-
Like the Admin help page template, the Monitor help page template also includes instructions for editing the template. You just need to scan the template for these instructions and follow them. For instance, search the template for the string Enter the name of the test. Once it is found, remove the string and in its place type the test name, MsFileTest_ex, as directed. Likewise, look for the following strings in the template, remove them one after another from the template, and in the place of each, provide the inputs indicated by the corresponding string.
String Help page information Enter the test purpose
Describe the purpose of the MsFileTest_ex
Enter the name of measure1
Specify the first measure that is reported by the MsFileTest_ex. For our example, type File_locks_count here.
Enter the name of measure2
Specify the second measure that is reported by the MsFileTest_ex. For our example, type Unique_users_count here.
Describe the measure
This will appear after measure1 and measure2. Provide a description for the corresponding measure here.
Specify the unit of measurement
This will appear after measure1 and measure2. Provide the unit of measurement that you have configured for the corresponding measure here. For the File_locks_count and the Unique_users_count measures in our example, the unit will be Number.
Provide interpretation (if any)
This will be available for both measure1 and measure2. Here, you can explain how the high or low values of the corresponding measure will impact the performance of the target server. This is an optional specification. In other words, if you feel that no interpretation is necessary, then, you can just remove the string and leave the placeholder blank.
The strings in the table above have been highlighted in the template in Figure 5.
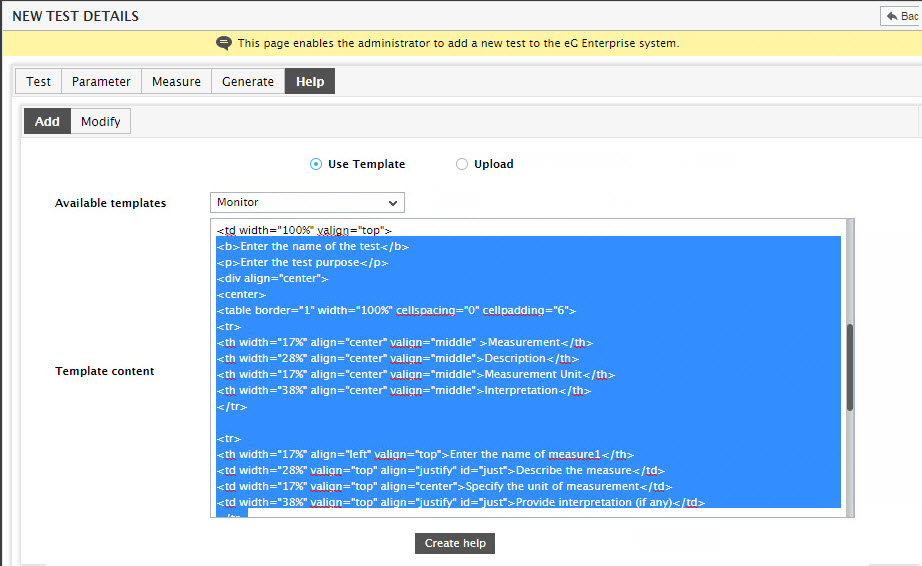
Figure 5 : The strings containing instructions on how to edit the Monitor template
-
Once the HTML block highlighted in Figure 5 is edited based on the instructions provided at step 4, the same block will look as depicted by Figure 6.

-
By default, the template allows you to provide details for a maximum of two measures. If your test supports say, one more measure, and you want to include the details of this additional measure in the help page, then, insert a block of HTML code of the following format, just above the </table> tag in the help page template:
<tr>
<th width=”17%” align=”left” valign=”top”>Enter the measure name</th>
<td width=”28%” valign=”top” align=”justify” id=”just”>Briefly describe the measure</td>
<td width=”17%” valign=”top” align=”center”>Specify the unit of measurement for the measure</td>
<td width=”38%” valign=”top” align=”justify” id=”just”>Provide interpretation (if any)</td>
</tr>
For instance, say that you are adding an additional measure named Open_files; this measure reports the total number of files that have been opened on the server by users over the network. The HTML code block that you insert into the Monitor template for this purpose should be as follows:
<tr>
<th width=”17%” align=”left” valign=”top”>Open_files</th>
<td width=”28%” valign=”top” align=”justify” id=”just”>The total number of files that have been opened on the server by users over the network</td>
<td width=”17%” valign=”top” align=”center”>Number</td>
<td width=”38%” valign=”top” align=”justify” id=”just”>This measurement is an indicator of the workload on the file server.</td>
</tr>
Multiple blocks of the above format can be inserted for every additional measure that you configure for the test.
-
Likewise, if your test reports only one measure, then you will have to explicitly remove the entire block of code that is provided for the second measure from the template. For instance, if you want to remove the Unique_users_count measure from the help page of the MsFileTest_ex in our example, then, simply delete the following line of code:
<tr>
<th width=”17%” align=”left” valign=”top”>Unique_users_count</th>
<td width=”28%” valign=”top” align=”justify” id=”just”>The number of distinct users with open files</td>
<td width=”17%” valign=”top” align=”center”>Number</td>
<td width=”38%” valign=”top” align=”justify” id=”just”>Provide interpretation (if any)</td>
</tr>
- No additional measures are reported by the MsFileTest_ex in our example. Similarly, no lines of code need be removed from the template for the purpose of our example. Therefore, simply proceed to click the Create help button to generate the Monitor help page for MsFileTest_ex. If the help page is generated successfully, then a message to that effect will appear.
- The eG Enterprise system will automatically assign a name of the format, <TestName>_Monitor, for any Monitor help page that you create using IC. This help page will be automatically saved to the <EG_MANAGER_INSTALL_DIR>\tomcat\webapps\final\eghelp directory.
With that, both the Admin and Monitor help pages have been created for the MsFileTest_ex. To modify a help page that you have already created, you can click the Modify icon against the test in the INTEGRATION CONSOLE - TEST page and navigate to the Help tab in the NEW TEST DETAILS page that appears.
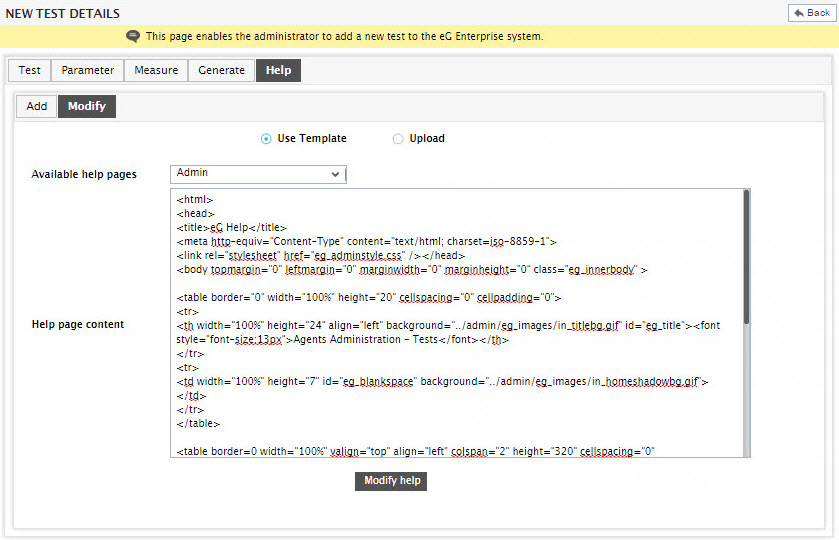
Figure 7 : Modifying a help page created using the Integration Console
Choosing the module from the Module list will appropriately list the help page in the Template content section. To modify an Admin or a Monitor help page displayed in the Template content section, follow the same procedure that has been outlined for creating a help page.