Modifying/Deleting Tests Added Using the Integration Console
To delete a test or to modify the configuration and measures of a test that is added using the Integration Console, follow the steps below:
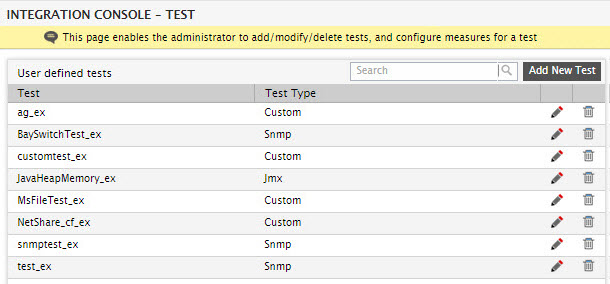
- Select the Test option from the Integration Console tile in Figure 1.
-
Figure 1 will then appear, listing all the tests that have been added using the Integration Console.
-
To delete a test, click the
 button corresponding to that test in Figure 1. You will then be prompted to confirm deletion (see Figure 2).
Figure 2 : A message box that appears requesting your confirmation to delete a test
- Click Yes in Figure 2 to proceed with the deletion. Click No to cancel the deletion.
- To modify a test, click the
 button corresponding to that test in Figure 1.
 -
Figure 3 will then appear displaying the test’s specifications.
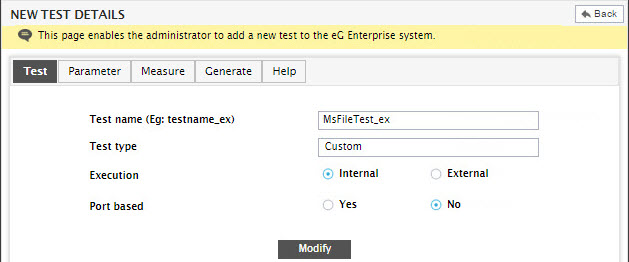
- For any test chosen for modification, you cannot change the Test name or the Test type. However, all other test details displayed in the Test tab page of Figure 3 can be altered. This includes the Execution mode, the Port configuration, the OS type (in case of a Script/batch file test), and the DB Type (in case of a SQL query-based test).
- Once the changes are made, click the Modify button to make sure that the changes take effect.
-
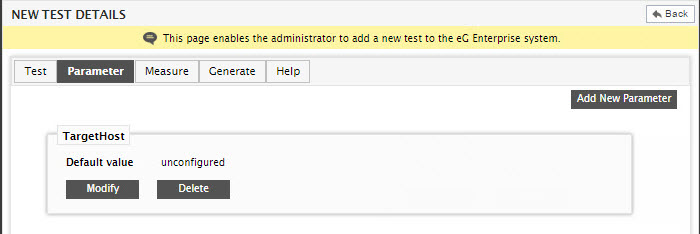
Then, click the Parameter tab page in Figure 4, if you want to add new parameters or modify/delete existing ones.
-
If any parameter pre-exists for a test, the same will be displayed in the Parameter tab page. While some of these parameters could have been user-defined, some others could be default parameters that the test type supports. For instance, tests of type Jmx and Snmp come bundled with a default set of parameters. You can modify/delete a user-defined parameter, but can only modify (and not delete) a default parameter. For example, the TargetHost parameter in Figure 4 above is a user-defined parameter; this is why, it is accompanied by a Modify and a Delete button. To delete this parameter, simply click the Delete button corresponding to it in Figure 4. To modify this parameter, click the Modify button corresponding to it. Figure 5 will then appear.
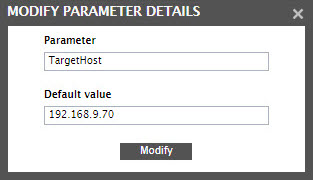
- Using Figure 5, you can change the Parameter name and/or the Default value of a user-defined parameter. Once the changes are made, click the Modify button to save the changes.
-
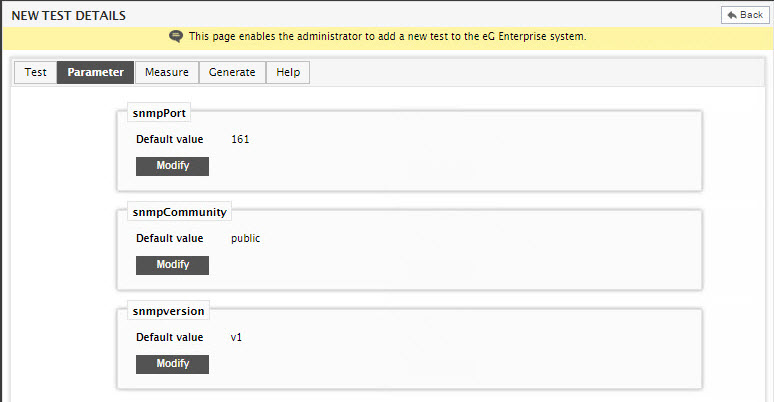
Now, take a look at Figure 6 below, which depicts the Parameter tab page of a test of type Snmp. As you can see, only the default parameters of the Snmp test are displayed in Figure 2.116. This is why, these parameters are accompanied only by a Modify button and not a Delete button. To modify a default parameter, click the Modify button corresponding to it in Figure 6.
-
Figure 7 will then appear, using which you can change the Default value of the parameter. Note that you cannot change the name of a default parameter.
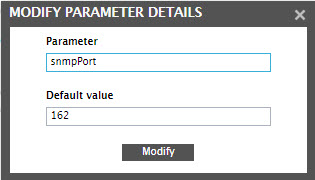
Figure 7 : Modifying the default value of a default parameter
- Finally, click the Modify button in Figure 7 to make the changes.
- If required, you can also add new parameters to a test in the Modify mode. For this, just click the Add New Parameter button in Figure 6.
- Next, click the Measure tab page in Figure 6 to make changes to the measure configurations of the test.
-
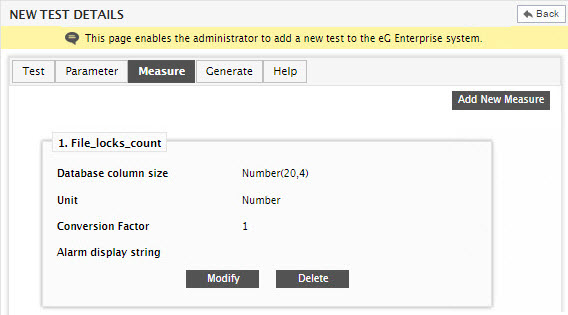
Figure 8 will then appear. If measures have already been configured for the test, then the same will be displayed in the Measure tab page, as depicted by Figure 8.
-
The details displayed for a measure will change according to the type of test to which that measure pertains. For instance, Figure 8 above displays the details of a measure reported by a Custom test. A test of type Script/Batch File will additionally display a Process Method for each of its measures. Likewise, a test of type Snmp will additionally display an Object OID, a test of type Perfmon will include a Counter name as part of its measure specifications, and measures reported by a Jmx test will additionally support an Attribute name. You can delete a measure displayed in Figure 8 by clicking the Delete button corresponding to it. You can even add new measures by clicking the Add New Measure button in Figure 8. To modify an existing measure, click the Modify button corresponding to it in Figure 8.
Note:
If you want to add more measures to a Jmx test in the Modify mode, note that the new measures should belong to same Domain and should follow the same MBean discovery methodology chosen for the old measures. In other words, if the Domain chosen for the old measures was java.lang, then the new measures should also belong to the java.lang domain. Likewise, if the MBeans for the old measures were loaded to a file and read from it, the new measures can also be added using only the MBeans so read.
-
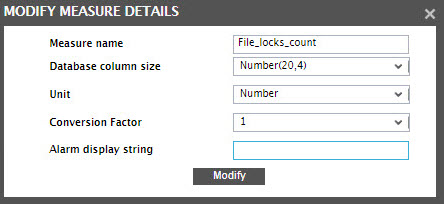
This will invoke Figure 9. Using Figure 9, you can modify all the details of a measure. Then, click the Modify button in Figure 9 to save the changes.
-
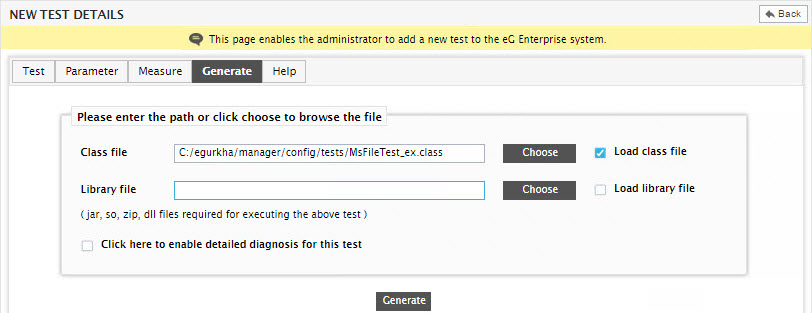
Finally, click the Generate tab page in Figure 8 to regenerate the test. Figure 10 will then appear.
-
The contents of the Generate tab page too will change according to the test type. However, regardless of the test type, you can change all details displayed in the Generate tab page, if required. For instance, for a Custom test, you can change the following:
- The Class file specification
- The Library file specification
- Enable/disable detailed diagnosis for the test
- Alter the detailed diagnosis specification, if it is enabled;
For a Script/Batch File test, you can change the Path of the file displayed in the Generate tab page.
For a SQL query test, you can modify the query to be executed or the stored procedure call.
For a Perfmon test, you can change the name of the performance Object, and Instances to be included or excluded from monitoring.
For an Snmp test, you can indicate whether the measures pertain to a Single element or Multiple elements. If Multiple elements is chosen, you can also change the Element ID, the Element status, the Element valid status, and the Rediscovery period.
For a Jmx test, you can modify the MBeans to be included and/or excluded. The Domain Name however, cannot be changed.
- Finally, click the Generate button to generate the test.
-
If a test specification is modified and the test is regenerated, the performance data previously collected by the test will no longer be available. A warning message to this effect will be displayed when the Generate button is clicked (see Figure 11). Click the ok button in Figure 11 to go ahead with the modifications.
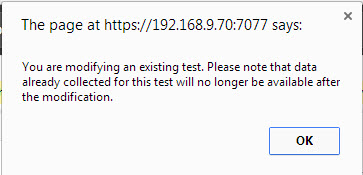
Figure 11 : A warning message that appears when a test is modified and regenerated