Enabling JSON Command on the JEUS Web Application Server
To enable the JSON command for the target server, do the following:
- Login to the JEUS7 WebAdmin console.
-
In Figure 30 that appears, click on the Domain option in the left panel. This will open the Domain page in the right panel. Then, click on the Lock & Edit button to modify the settings on the Domain page (see Figure 30).
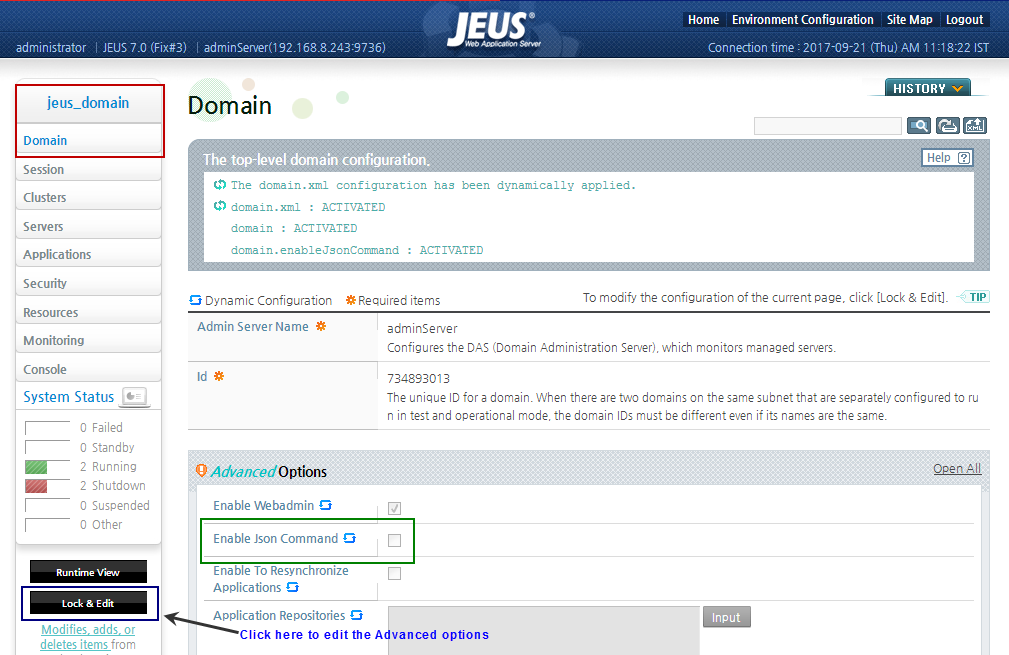
-
Now, check the Enable JSON Command check box of the Advanced Options section (see Figure 1.30). This is to enable the JSON commands the target server.

- Finally click OK to save the changes. Then, click on the Apply Changes button in the left panel of Figure 31 to specify a Description of the changes that you have done so far. This description will be useful at times when you need to revert back to the settings that were included previously. To know how to do this, refer to the steps 15 & 16 of Enabling JMX Support for the JEUS Web Application Server