Adding a Component to a Tier
Next, proceed to add a component to a tier, by doing the following:
- Click on the [Add server] link under a tier (see Figure 4).
-
Figure 1 will then appear.
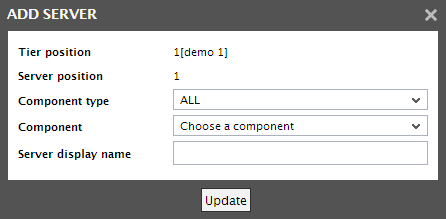
- Select a Component type to be added, and from the list of components of the chosen type, select the Component to be added.
- Provide a display name for the component in the Server display name text box, and click the update button to register the changes.
- Figure 1 will then appear displaying the newly added server name in the place of the Add server link that was earlier clicked on.
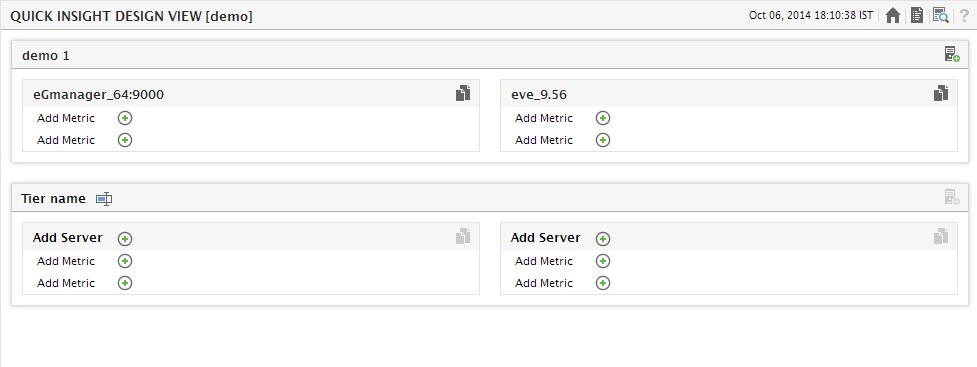
Figure 2 : The name of the new server appearing in the layout
-
The added server will then appear in this page. To modify the server details, click on the server name here and then make changes to it in the Configure Server page that will subsequently appear. To save users the trouble of adding the servers individually, this page houses the
 icon, using which all the servers that need to be added to a tier can be added at one shot. The button appears next to the tier name in this page.
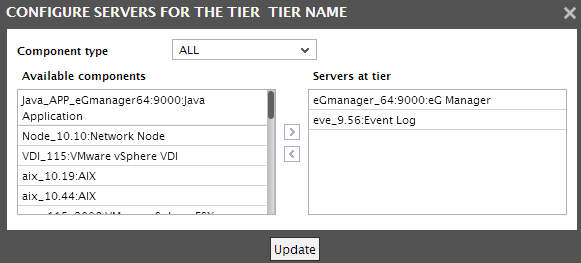
Figure 3 : A page displaying all the component that are available for association with a tier
- Figure 3 also houses a Servers at tier list box that lists multiple [Add server] slots, equal to the number of servers per tier configured in the layout.
-
To assign a component to a particular slot, first select a Component type as depicted by Figure 4. Then, from the list of components of the chosen type, select the component that is to occupy a particular slot (see Figure 4).
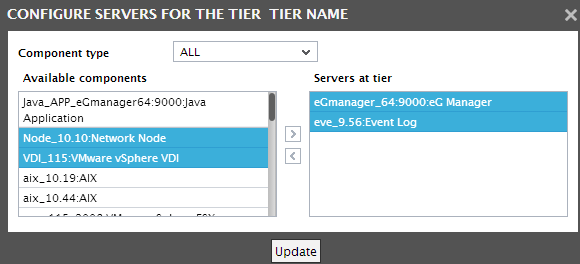
- Next, with the component selected, select the [Add server] option (from the Servers at tier list) that corresponds to the slot that is to be occupied by the chosen component (see Figure 4). For example, if the chosen component needs to be assigned the second position in the tier, then select the second [Add server] option in Figure 4. Then, click the > button in Figure 4.
- Figure 4 will then appear indicating that the selected component(s) has replaced the [Add server] slot(s) that was chosen (see Figure 4).
- Similarly, you can assign components of different types to occupy the [add server] slots.
- Finally, click the Update button in Figure 4.
-
Upon clicking the Update button in Figure 4, you will return to the design view (see Figure 5), which will reflect the recent changes in the server configuration.

- Using Figure 5 that appears, change the Server name of the server that was clicked on, and click the Update button therein. In the modify mode, a Delete button appears, which when clicked on removes the server configuration from the database (see Figure 5).
- In the same way, the display names for the other servers configured for a tier can also be modified. Figure 5 depicts the design view after the display name change.
- Similarly, servers can be configured for all the tiers in a custom view (see Figure 5).