Configuring a ORACLE WebLogic Application Server 6.x or WebLogic Server 7.x
The eG agent package contains a web archive file called egurkha7x.war. On Unix environments, this file will be available in the /opt/egurkha/lib location. On Windows environment, this file will be available in the <EG_HO8ME_DIR>\lib directory. Prior to monitoring a WebLogic Server 6.x or a WebLogic Server 7.x, make sure that this file is deployed on the target WebLogic server to enable the eG agent to monitor it.
Before deploying the war file, make sure that you follow the steps below:
- Login to the system hosting the eG agent that is monitoring the WebLogic server 6.x/7.x.
- Copy the egurkha7x.war file from the /opt/egurkha/lib directory to any other directory on the eG agent host.
- Rename the war file as egurkha.war.
You can deploy the egurkha.war file on WebLogic Server 6.x by following the instructions discussed in Configuring an Oracle WebLogic Application Server 6 (with SP 2) to work with the eG Agent above. To deploy the egurkha7x.war file on a ORACLE WebLogic application server 7.x that requires monitoring, do the following:
- Go to the following URL: http:\\<WebLogic_server_IP>:<WebLogicPort>/console
-
Now, an authentication dialog (see Figure 1) that requires a username and password, will appear. Specify the same password you gave during the installation of the Weblogic server. If your environment is configured differently, please contact your WebLogic administrator to find out the username and password to use to login to the WebLogic console.

Figure 1 : Specifying user name and password in the authentication dialog box
-
Upon successful authentication, the WebLogic 7.0 Administration console will appear (see Figure 3).
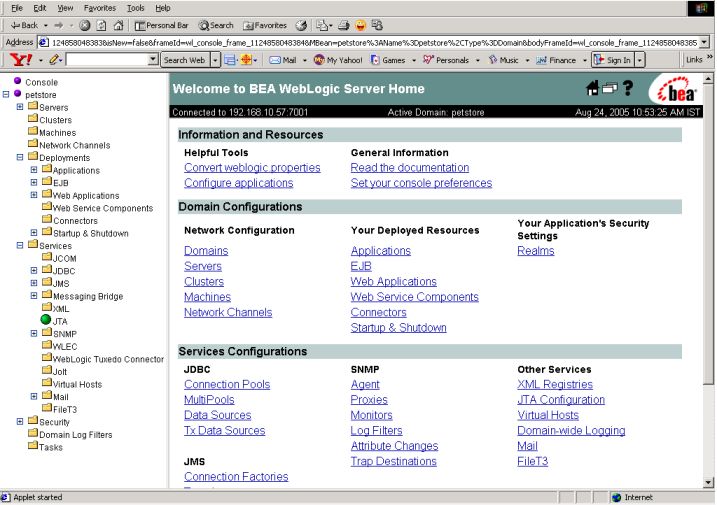
Figure 2 : The Administration Console of the ORACLE WebLogic server 7.0
-
From the tree-structure in the left panel, choose the Web Applications node under the Deployments node. Then, click on the Configure a new Web Application link in the left pane to begin the deployment of the egurkha.war application (see Figure 3).
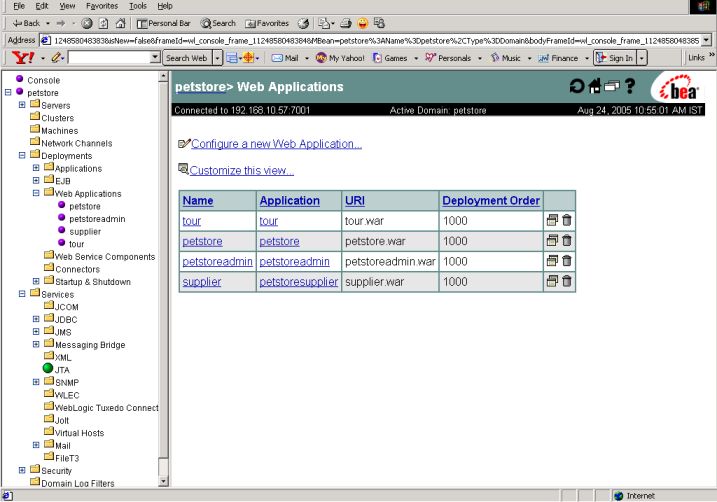
Figure 3 : Screen where you can install or update an Application
-
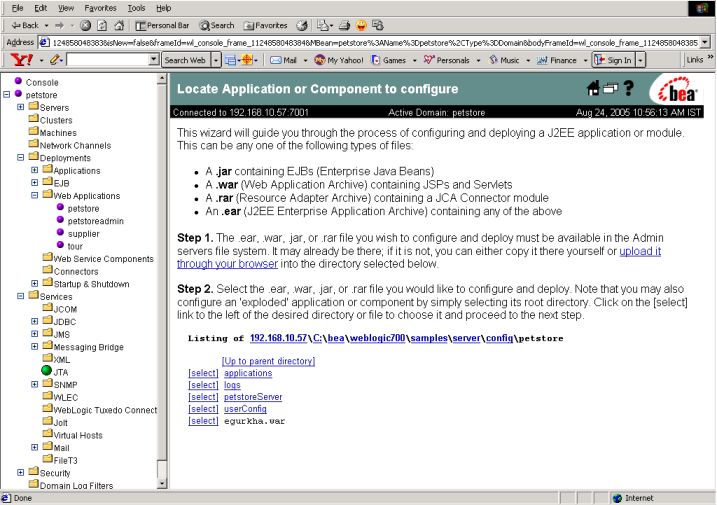
Upon clicking the link, Figure 4 will appear, which will explain the procedure for application deployment. To proceed, click on the upload it through the browser link in the right panel of Figure 4.
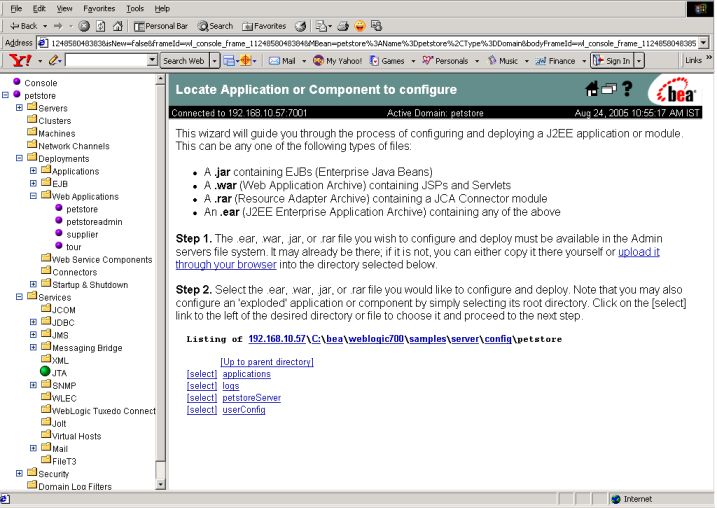
Figure 4 : Attempting to upload the “egurkha.war” file
Note:
By default, the egurkha.war file will be searched for in the local disk of the system from which the browser is launched. Therefore, if you are trying to access the WebLogic console from a system that does not host an eG agent, then, before attempting to deploy the egurkha.war file, copy the war file from the <EG_HOME_DIR>\lib directory (in Windows environments. In Unix, this will be /opt/egurkha/lib) of an agent host, to your local disk.
-
In Figure 5 that appears, specify the full path to the egurkha.war file to be deployed on the WebLogic server. Alternatively, you can use the Browse button to locate the war file. Finally, click the Upload button in Figure 5 to upload the war file.
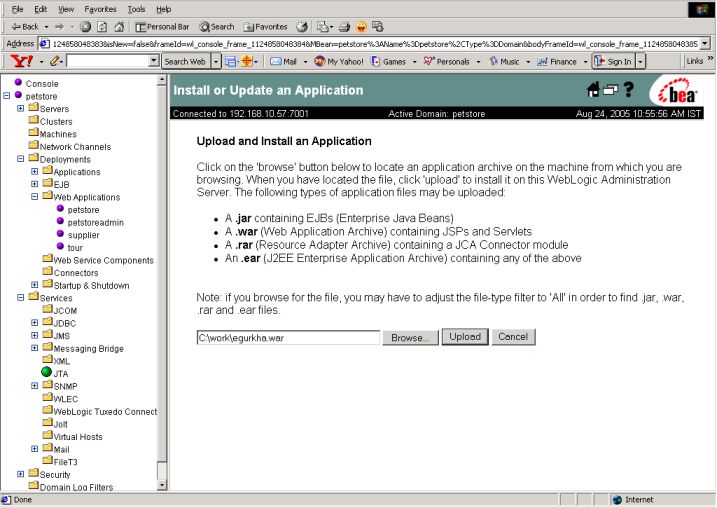
Figure 5 : Screen informing you that egurkha.war file has been successfully uploaded
-
Upon a successful upload, Figure 6 will appear. At the bottom of the right panel of Figure 6, you will find displayed the name of the file that was just uploaded – i.e., egurkha.war – preceded by a [select] link. This is a clear indicator of the success of the upload process. To complete the deployment however, you will have to associate the deployed war file with one or more WebLogic server instances as you deem necessary. To achieve this, click on the [select] hyperlink that precedes the egurkha.war entry in the right panel of Figure 6.
-
Doing so will open Figure 7. The Available Servers list in the right panel of Figure 7 will list all the available WebLogic server instances. From this list, choose the instances on which the egurkha application is to be deployed. Then, click on the -> button to transfer the selection to the Target Servers list (see Figure 8). Finally, deploy the egurkha application on the Target Servers by clicking on the Configure and Deploy button in Figure 8.
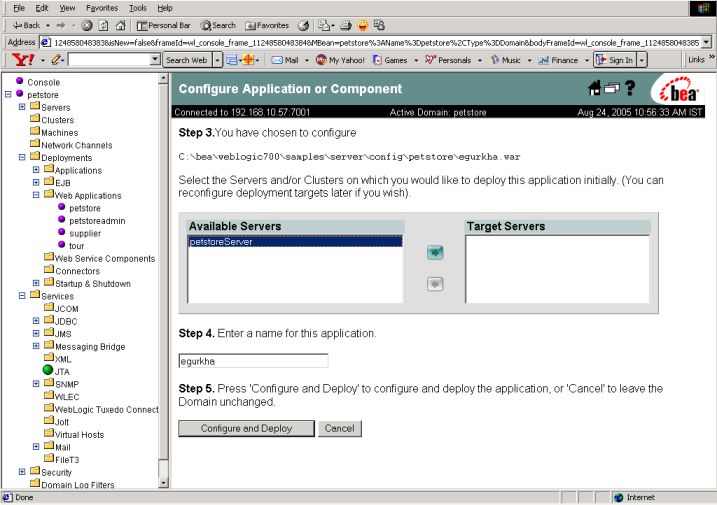
Figure 7 : Selecting the WebLogic server instances on which the ‘egurkha’ application is to be deployed

Figure 8 : Deploying the ‘egurkha’ application on the Target Servers
-
Once the deployment completes and is successful, the Deployment Status section in the right panel of Figure 9 will display true against each of the target servers. Similarly, the Deployment Activity section will display the Completed status for each of the target servers. On the contrary, if the Deployment Status is false and the Deployment Activity is “Running…”, it indicates that deployment is ‘in progress’. In such a case, wait until the status changes. Upon completion of the deployment, the egurkha application will appear as a sub-node under the Web Applications tree in the left panel of Figure 9.
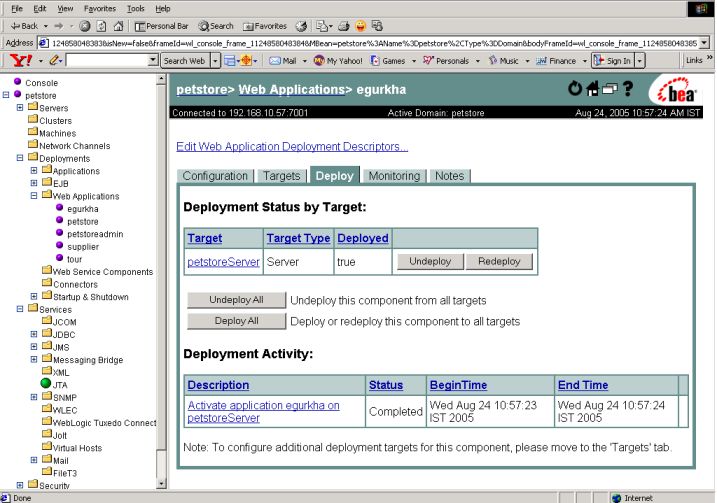
Figure 9 : Successful deployment of the ‘egurkha’ application