Creating a Custom Report Template
To create a new custom template, do the following:
-
Click the Custom Reports option from the Reporter tile that appears when you click the
 icon against the Reporter tab.
 -
Figure 1 then appears displaying that there are no templates that pre-exist on the target eG manager.
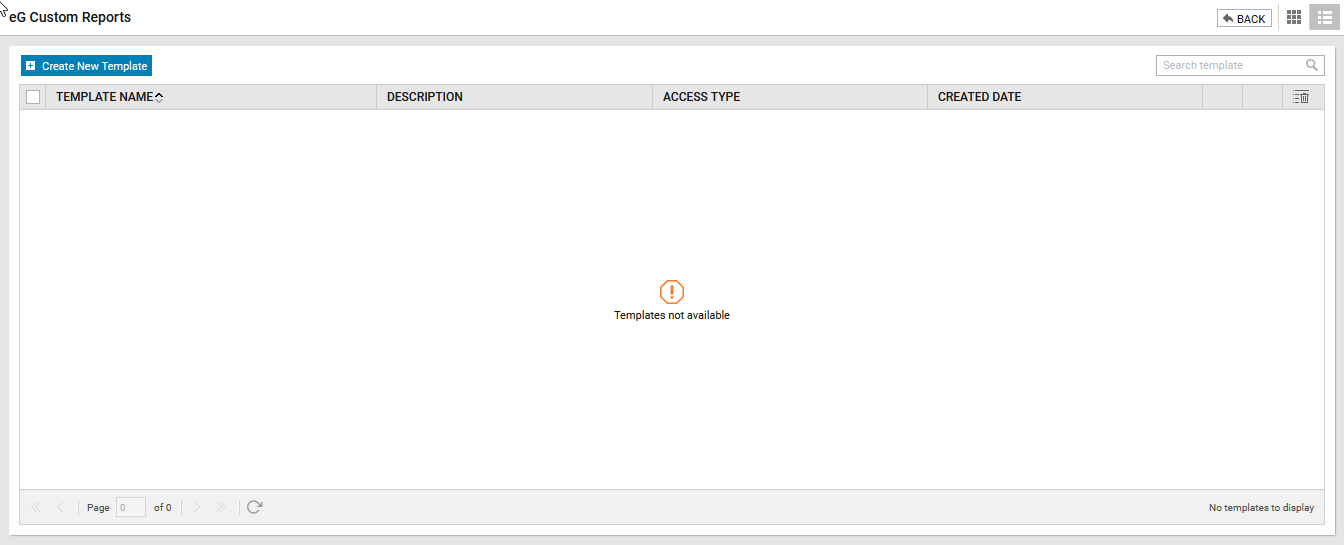
Figure 1 : The message that appears when no template pre-exists
-
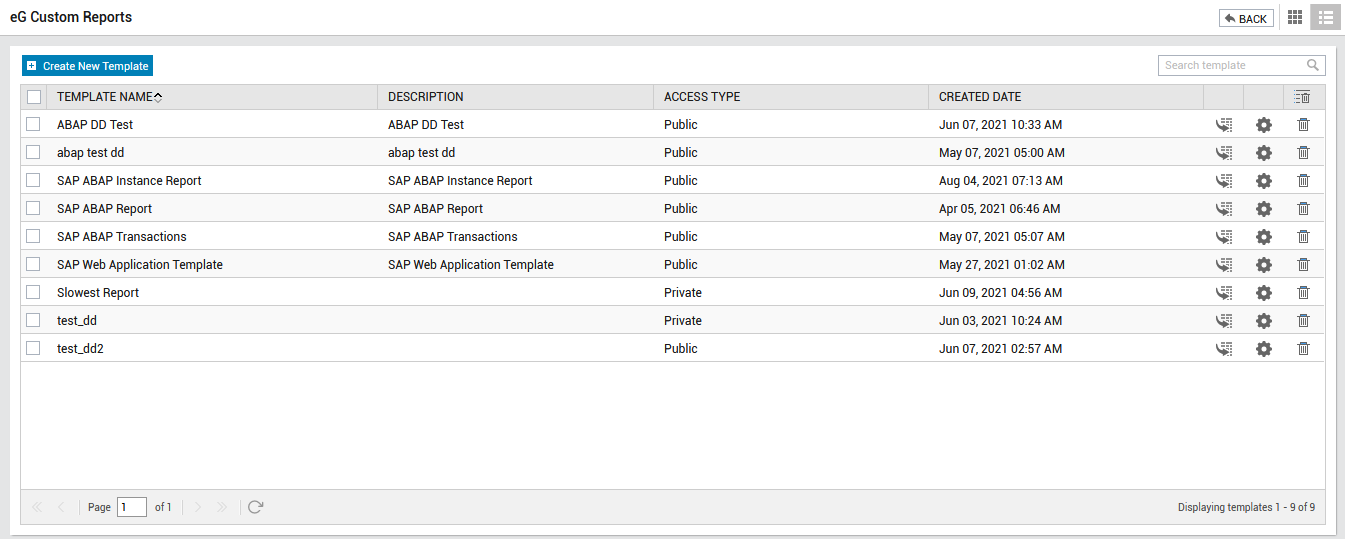
If multiple templates pre-exisit, then, the templates will be listed as shown in Figure 2.
-
To generate a report based on any of the existing template, click the
 icon available against each template (see Figure 2).
 -
To delete a template, click the
 icon. To delete multiple templates, select the check box available beneath each template and click the
  icon (see Figure 2).
 -
To search for a report template from the list of pre-existing templates, enter the name of the template in the Search template text box and click the
 icon within (see Figure 2).
 -
To create a new report template, click the Create New Template button in Figure 2.
-
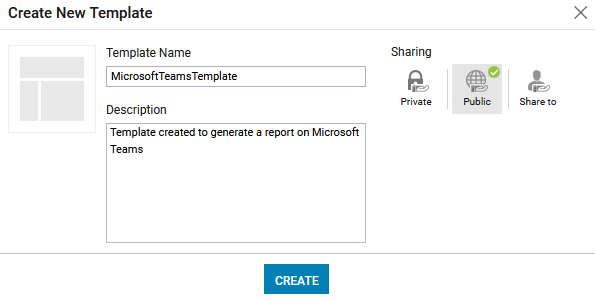
Figure 3 then appears.
-
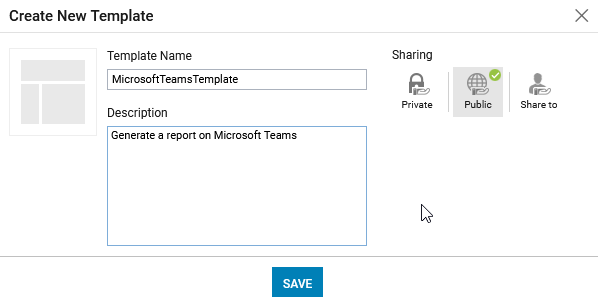
In Figure 3, specify the following:
-
Template Name: Specify the name of the template.
-
Description: Here, provide a brief description of the new template.
-
Sharing: Indicates whether or not you want to share the new template with other users, and if so, what should be the level of sharing. For this, click on any of the following options from the Sharing section. By default, the Private option is chosen from this section.
-
Private: Indicates that the user building the template is alone authorized to view/modify/delete the template. This is the default option.
-
Public: Allows all users to the eG Enterprise system to view (not modify/delete) the template that is being created.
-
Share to: You can select this option to share the template with specific users to the eG Enterprise system. From the Share to - Available Users list that then appears (see Figure 4), select the users with whom you want to share the dashboard by clicking the check box preceding each user.
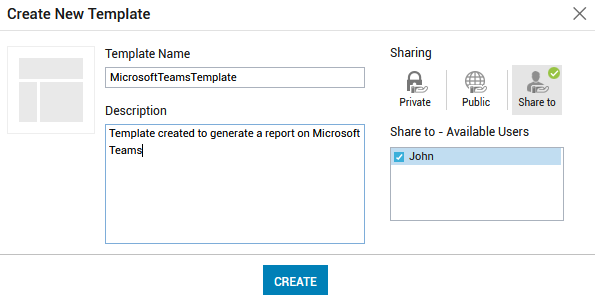
Figure 4 : Sharing the template with the users of your choice
-
-
-
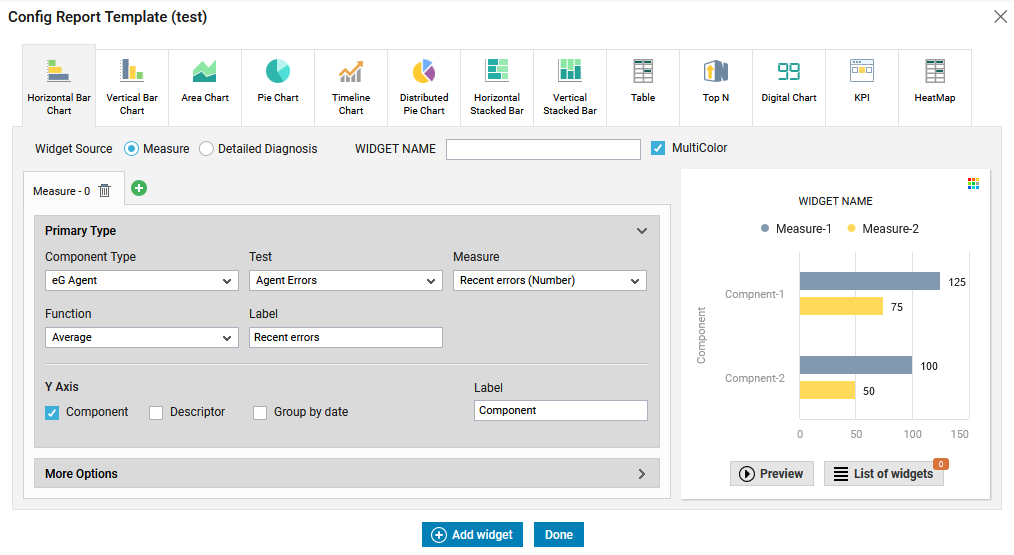
Clicking the CREATE button will lead you to Figure 5 using which you can configure the widgets for the template.
-
To know how to configure the widgets for the Report template, refer to Designing a Report Template.
-
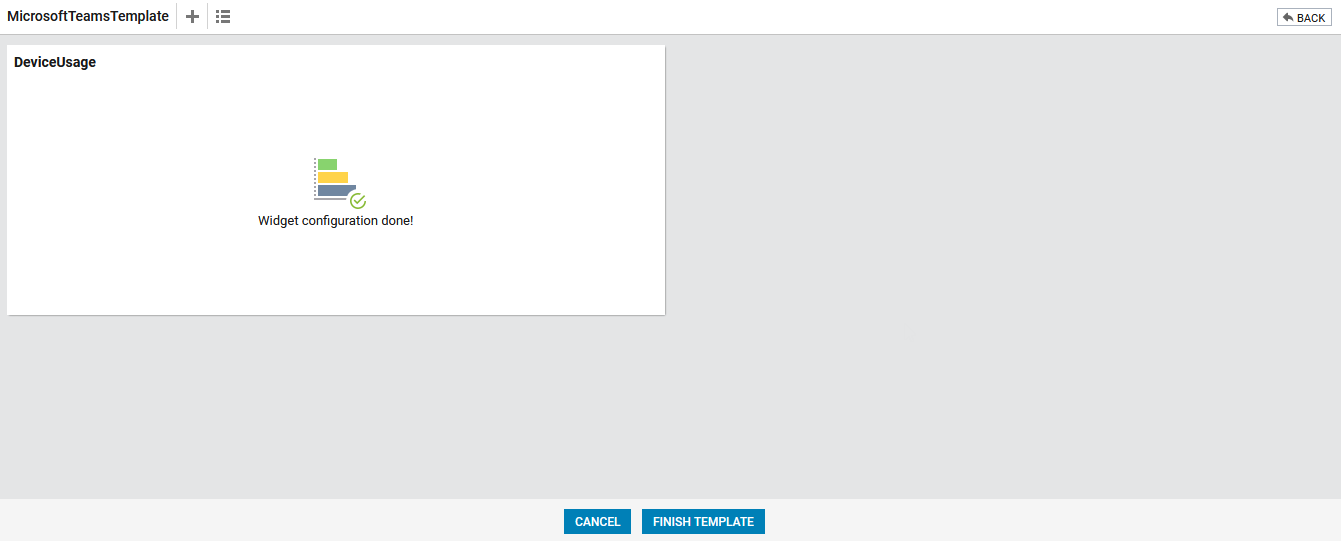
Clicking the Add Widget button in Figure 5 will add the widget to the report template (see Figure 6).
-
To add another widget, click the
 button (see Figure 6).
 -
To view the list of widgets added to the report template, click the
 icon. You can also view the list of widgets added to the report template by clicking on the List of Widgets button in Figure 5. The List of Widgets button will display a badge indicating the number of widgets that have been configured for the report template. Figure 7 then appears listing all the widgets added to the newly created report template.
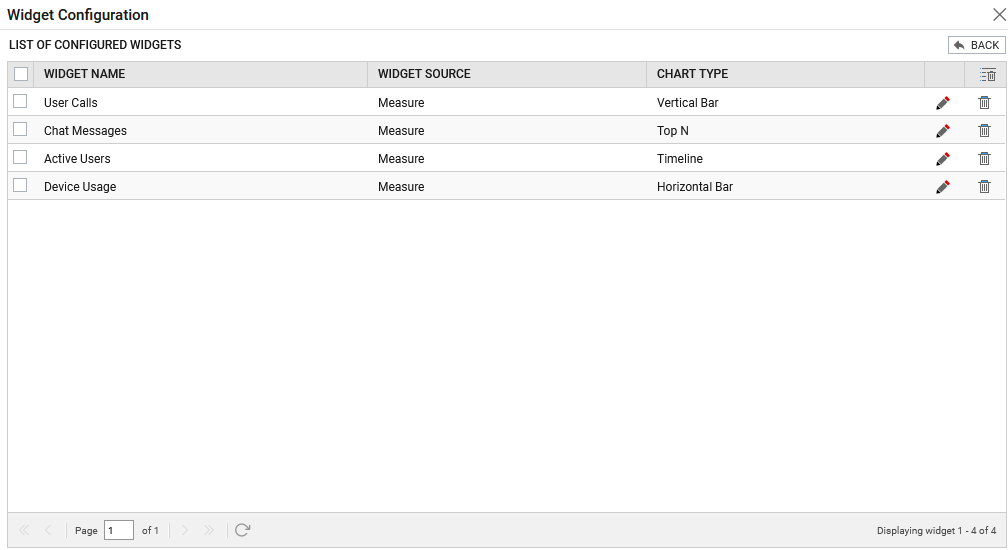
-
Upon clicking the FINISH TEMPLATE button in Figure 6, Figure 8 will appear.
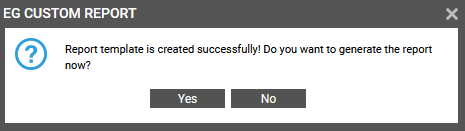
Figure 8 : A message stating that the report template is created successfully
-
Click Yes in Figure 8 if you wish to generate the report. Figure 9 will then appear.

-
Clicking the Run Report will generate the report as shown in Figure 10.
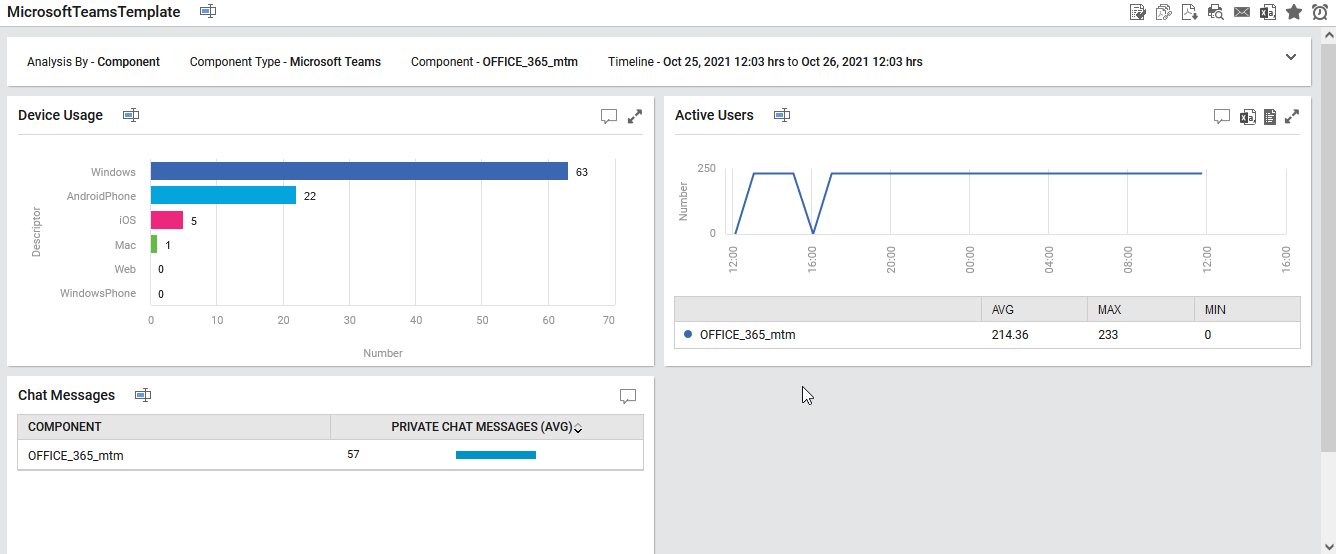
Figure 10 : A sample report generated using the created report template
-
Clicking No in Figure 8 will lead you to Figure 11 where you can view the newly added report template.

-
To modify a template, click the
 icon against that template (see Figure 11). Figure 12 will then appear.
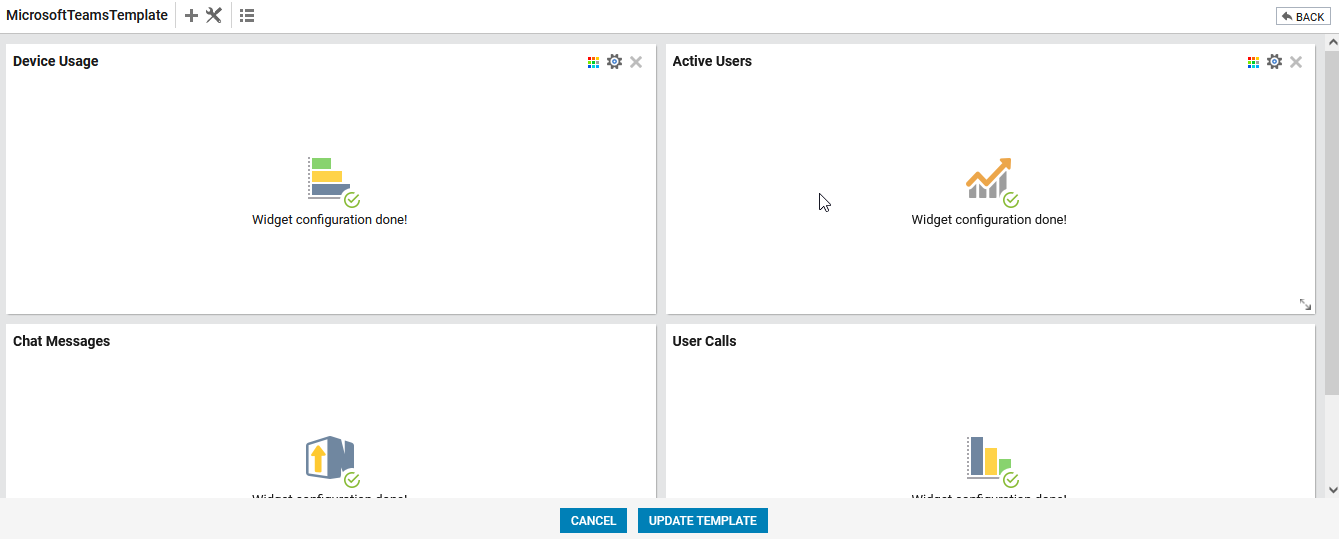
-
To edit a widget, click the
 icon in Figure 7 or click the
  icon by hovering over a widget in Figure 12.
 -
To edit the description of the report template, click the
 button in Figure 12.
 -
Figure 13 then appears using which you can edit the description of the report template.
-
To delete a widget, click the
icon in Figure 7 or click the cross button that appears upon hovering over the widget in Figure 12. -
To delete multiple widgets at a single shot, check the check box preceding each widget in Figure 7 and click the
icon.