Configuring the Web App Simulator to Perform the Simulation
Once the Pre-requisites for Using Web App Simulator are fulfilled and a script is recorded and exported to the eG manager, follow the steps detailed below to get the simulator up and running.
- Log into the eG administrative interface.
- Add a dedicated external agent for the purpose of the simulation. For that, follow the Agents -> External Agents menu sequence and click the Add New Agent button. Then, specify the IP address/host name of the system that is hosting the dedicated external agent, and also provide a Nick name for the agent (see Figure 1).
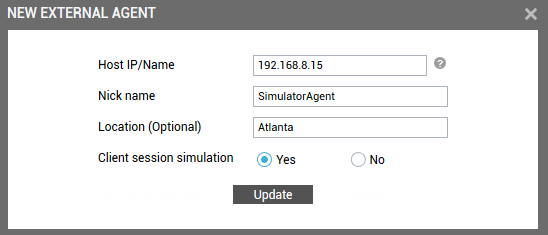
Figure 1 : Adding a dedicated external agent for the simulation
Note:
A single eG external agent can be used to run different types of simulations (for e.g., Citrix logon simulation,
- If you wish to specify the location of the external agent, then, you can do so using the Location text box.
- Also, make sure that the Client session simulation flag is set to Yes for the agent.
- Finally, click the Update button in Figure 1 to save the changes.
-
Once this external agent is started, it simulates the entire simulation process by periodically running a Simulated Web Transactions test. It is this test that serves as the Web App Simulator. Since this test is mapped to a Web App Simulation component, you now need to manage a component of that type. For this, follow the Infrastructure -> Components -> Add/Modify menu sequence, and then pick Web App Simulation from the list of Component types. Then, click Add New Component. When Figure 2 appears, add a Web App Simulation component using any nick name you want.
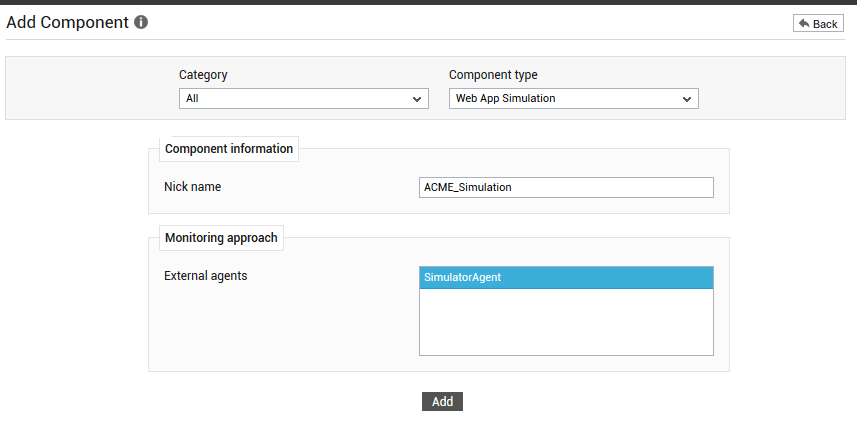
- When adding, make sure you assign the dedicated external agent, which you had previously installed and configured for the sole purpose of this simulation, to the Web App Simulation component.
- After clicking the Add button in Figure 2, proceed to sign out of the eG administrative interface. You will then be prompted to configure the Simulated Web Transactions test for this component. Click on the test to configure it.
-
Figure 3 will then appear.
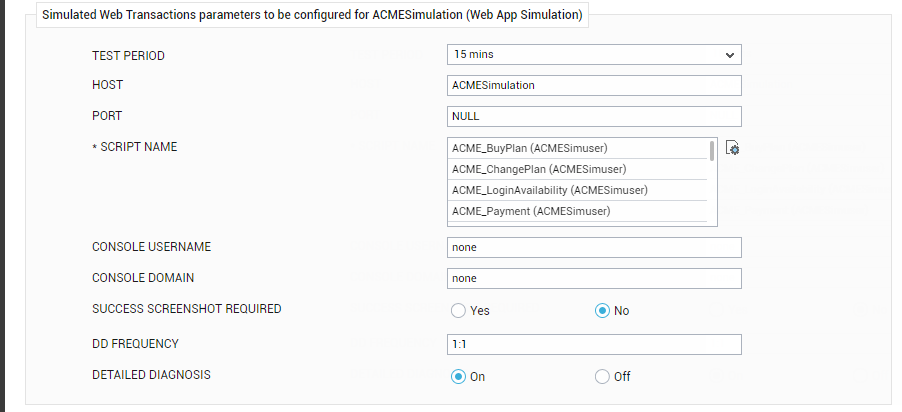
- To know how to configure the test, refer to Simulated Web Transactions Test
- Once all parameters are configured, click the Update button to save the configuration.