Configuring eG Mobile App
Once the mobile app is installed successfully, you should configure it on your mobile device, so that the eG manager is able to send performance and problem data to it. For this, follow the steps below:
-
After installing the app, tap the Open button. This will prompt you to enter the eG manager URL as shown in Figure 1.
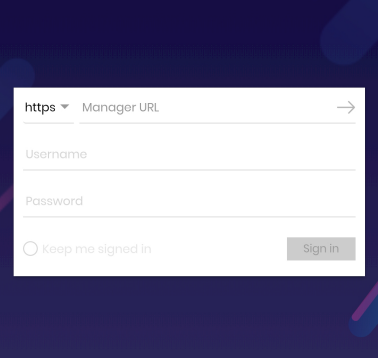
- First, select the protocol through which the eG manager will transfer monitoring data from the drop-down. If the eG manager is SSL -enabled, choose https; if not, http. By default, it is set to https.
-
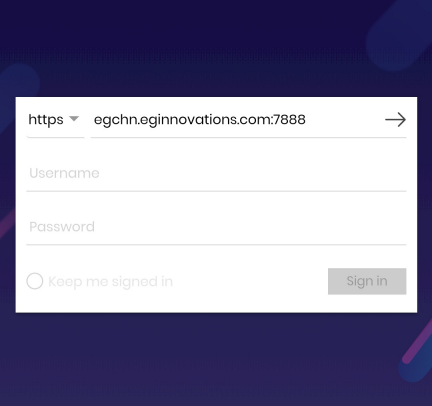
Next, enter URL of the eG manager in the Manager URL field (Figure 2).
-
Clicking the
 icon will help you validate the manager URL that you specified. If the URL is valid, then the
  icon will be flashed at the right-corner of the Manager URL field (see Figure 3).
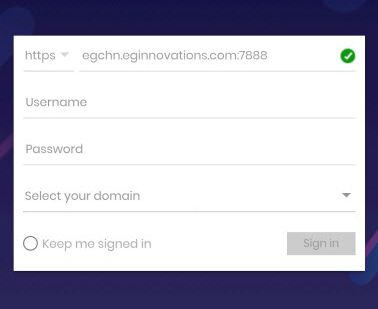
-
After the successful validation, the
icon will be replaced with the  icon using which you can edit the URL specified in the Manager URL field (see Figure 4).
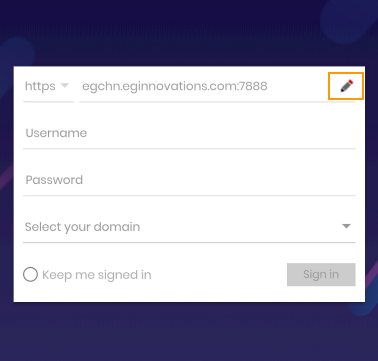
-
If the specified URL is invalid, then you will get a message as shown in Figure 5. Now, reenter the correct URL and then proceed.

-
Once the manager URL is successfully validated, next, specify the user credentials in the Username and Password fields.
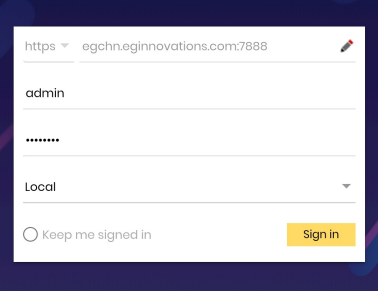
Figure 6 : Specifying user credentials
Note:
- Provide the credentials of a user who is registered with the eG Enterprise system.
- The user can be a local or a domain user. In case of a domain user, Select your domain drop-down will appear using which you can pick the name of the domain to which that user belongs.
- eG Enterprise offers the capability to keep you signed in once you have signed in to the eG Monitor app. This implies that you need not to sign in every time you open the app until you elect to turn that feature off or sign out. To enable this feature, select the Keep me signed in check box.
-
Now, click on the Sign in button to sign in to the eG Mobile app. If two-step verification is enabled for the user, once the login credentials are validated, the second step of the verification will be initiated. As part of this step, you will be prompted for an OTP/verification code. You will receive an OTP/code either by email or via Google Authenticator based on how 2-step verification is configured in your environment.
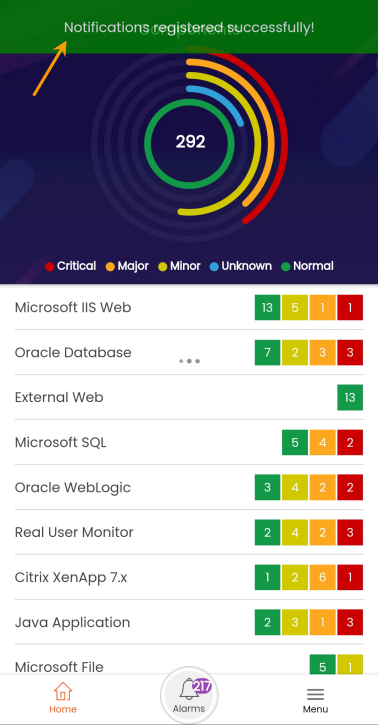
- When the Home page is appeared, you will see the toast message (see Figure 7) at the top of the page stating Notifications registered successfully!. This message indicates that the app is configured to send the push notifications, by default, even when the app is not running.
-
The push notifications alert you in real-time of performance degradations that your environment experiences, without requiring you to login to the mobile app. The problem issues will be received as push notifications in the status bar of your mobile device. You can view these push notifications by pulling over the notification drawer as shown in Figure 8
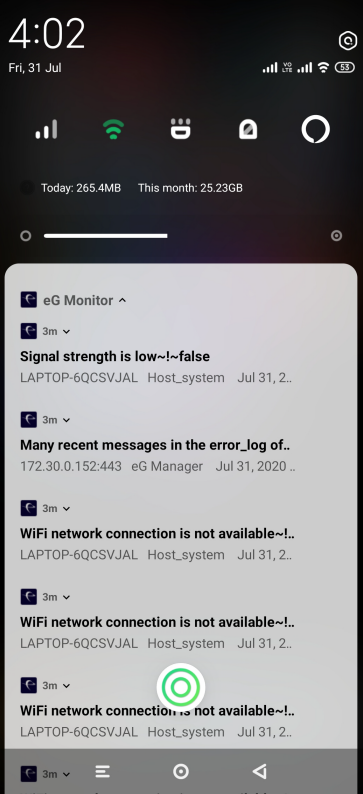
Figure 8 : Push notifications displayed on the mobile device
By default, the push notifications are listed in the notification drawer (see Figure 8). From the list of notifications, you can view any of the notifications of your interest by clicking on it. This directly leads you to the Measurements page where you can see the abnormal value of the measure that generated the alert.
-
If you do not want to receive the push notifications, click on the Menu tab. This will display the Menu page that lists Settings and Logout options (see Figure 9).
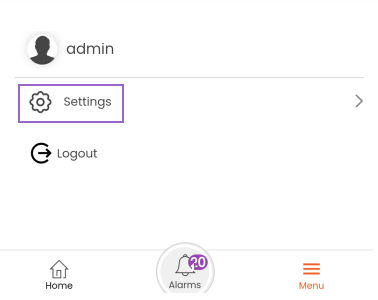
Now, click on the Settings to see the option for enabling/disabling the push notifications.
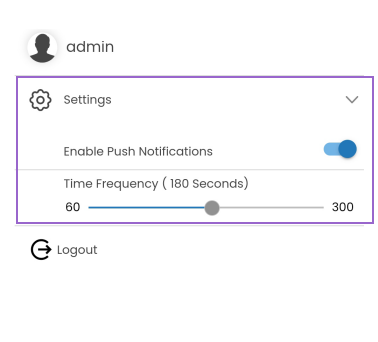
Figure 10 : Settings options
The push notifications are enabled by default. To disable the push notifications, pull the Enable Push Notifications slider to the left side.
Note:
You can also disable the push notifications from the eG manager that is being configured. By default, the EnablePushNotification flag in the eg_services.ini file is enabled to receive the push notifications. To disable this capability do the following:
- Edit the eg_services.ini flag in the <EG_INSTALL_DIR>\manager\config directory
- In the [MISC_ARGS] section of this file, set the EnablePushNotification flag to No. By default, this flag is set to Yes.
- Finally, save the file.
Note:
-
The eG Monitor app sends the push notifications using Urban Airship as a messaging gateway.
- You will not receive any push notifications if you logged out from the mobile app.
-
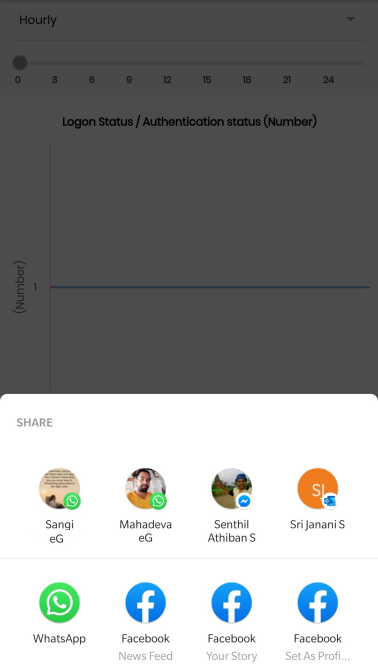
The push notifications include the alert messages and icons for sharing the notification and for viewing graph and detailed diagnosis, if enabled. By clicking on the SHARE button, you can share the notifications with other users via the sharing applications such as Gmail, WhatsApp, etc., (see Figure 11) on your mobile device.
-
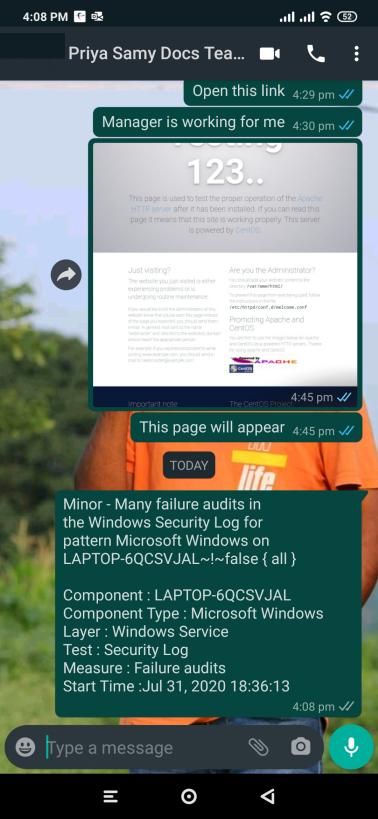
For instance, if you choose the WhatsApp, then the notification will be send as a WhatsApp message (see Figure 12). This message will contain the alert description, the component name, the component type, the layer name and the time stamp at which the alert was generated.
- You can indicate how often the pages of the eG Monitor app need to be refreshed when you are using the app by adjusting the Time Frequency in the Menu page. By default, this is set to 180 seconds.
-
The eG mobile app allows you to see the number of notifications to be viewed by simply looking at the badge on the app icon (see Figure 13). This way, you can easily find out the notifications that are awaiting to be viewed without opening the mobile app.