Pre-requisites for Monitoring vCloud Director
To enable the eG agent to use JMX for pulling out metric from vCloud director, do the following;
- Login to the system hosting the vCloud Director.
- Edit the vmware-vcd-cell script file in the /opt/vmware/vcloud-director/bin directory.
- Look for an entry that begins with the string, JAVA_OPTS= in the file.
-
Insert the following lines to the java_opts entry as depicted by Figure 1 below:
-Dcom.sun.management.jmxremote.port=<PortNo>
-Dcom.sun.management.jmxremote.authenticate=false
-Dcom.sun.management.jmxremote.ssl=false
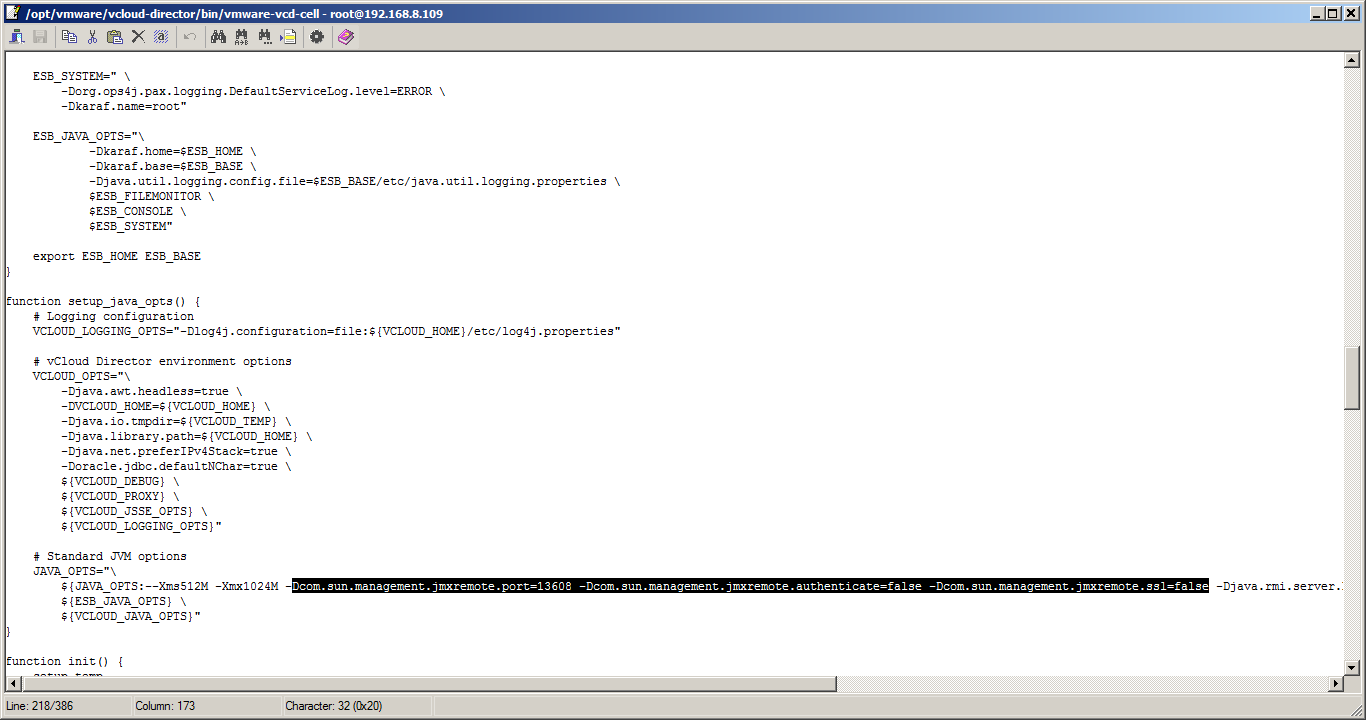
Figure 1 : Enabling JMX (without authentication or security) for a vCloud Director cell
For instance, if the JMX listens on port 13608, then the first line of the above specification would be:
-Dcom.sun.management.jmxremote.port=13608
- Finally, save the file.
-
Next, during test configuration, do the following:
- Set the port that you defined in step 4 above (in the vmware-vcd-cell file) as the jmx remote port;
- Set the User and Password parameters to none.
- Update the test configuration.
On the other hand, if JMX requires only authentication (and no security), then the following steps will apply:
- Login to the vCloud Director host.
- Copy the jmxremote.password.template file from the <JAVA_HOME>/jre/lib/management folder used by the vCloud Director to any other location on the same host.
- Rename the jmxremote.password.template file as jmxremote.password and then copy it back to the <JAVA_HOME>/jre/lib/management folder.
- Next, edit the jmxremote.password file and the jmxremote.access file to create a user with read-write access to the JMX. To achieve this, follow the steps below:
-
Open the jmxremote.password file and scroll down to the end of the file. By default, you will find the commented entries indicated by Figure 2 below:
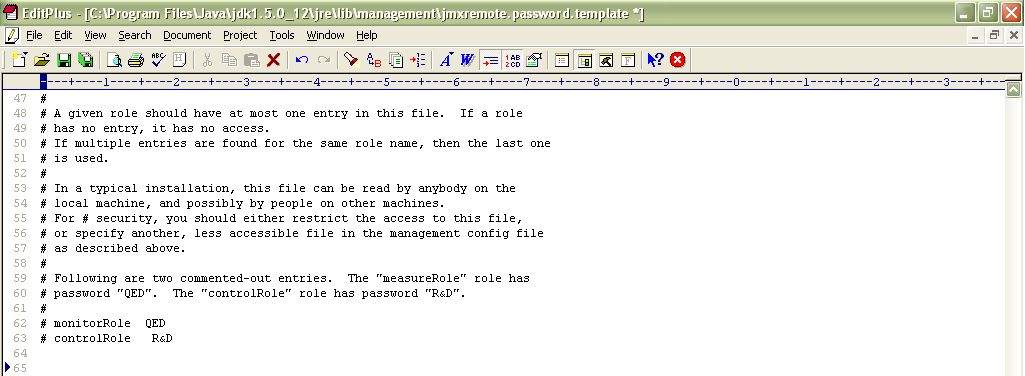
Figure 2 : Scrolling down the jmxremote.password file to view 2 commented entries
- The two entries indicated by Figure 2 are sample username password pairs with access to JMX. For instance, in the first sample entry Figure 2, monitorRole is the username and QED is the password corresponding to monitorRole. Likewise, in the second line, the controlRole user takes the password R&D.
-
If you want to use one of these pre-defined username password pairs during test configuration, then simply uncomment the corresponding entry by removing the # symbol preceding that entry. However, prior to that, you need to determine what privileges have been granted to both these users. For that, open the jmxremote.access file in the editor.
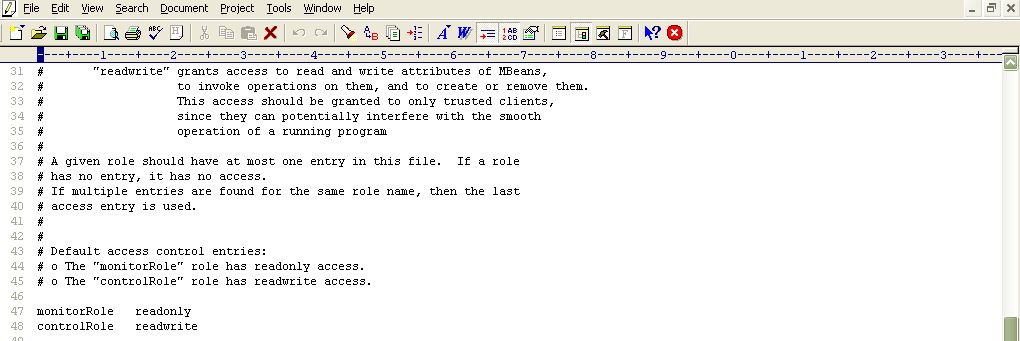
- Scrolling down the file (as indicated by Figure 3) will reveal 2 lines, each corresponding to the sample username available in the jmxremote.password file. Each line denotes the access rights of the corresponding user. As is evident from Figure 3, the user monitorRole has only readonly rights, while user controlRole has readwrite rights. Since the eG agent requires readwrite rights to be able to pull out metrics using JMX, we will have to configure the test with the credentials of the user controlRole.
-
For that, first, edit the jmxremote.password file and uncomment the controlRole <password> line as depicted by .
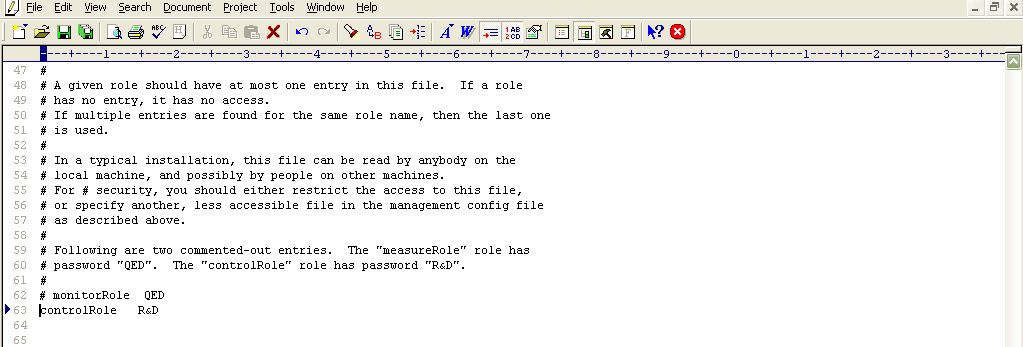
- Then, save the file. You can now proceed to configure the tests with the user name controlRole and password R&D.
- Alternatively, instead of going with these default credentials, you can create a new username password pair in the jmxremote.password file, assign readwrite rights to this user in the jmxremote.access file, and then configure the eG tests with the credentials of this new user. For instance, let us create a user john with password john and assign readwrite rights to john.
-
For this purpose, first, edit the jmxremote.password file, and append the following line (see Figure 5) to it:
john john
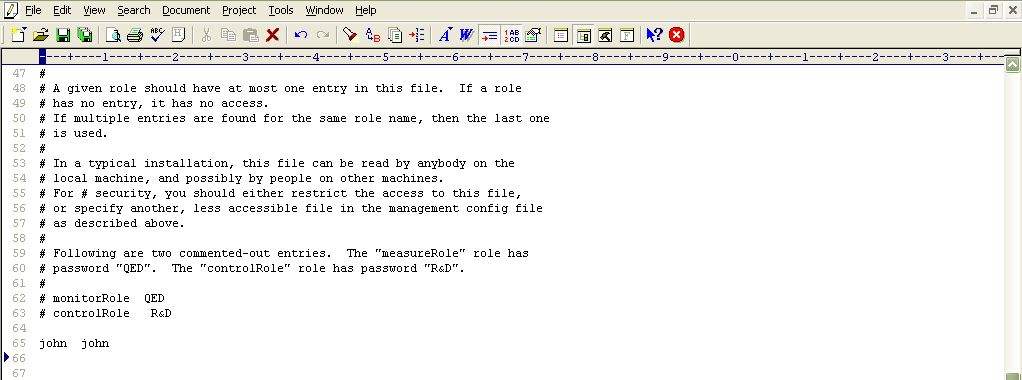
- Save the jmxremote.password file.
-
Then, edit the jmxremote.access file, and append the following line (see Figure 6) to it:
john readwrite
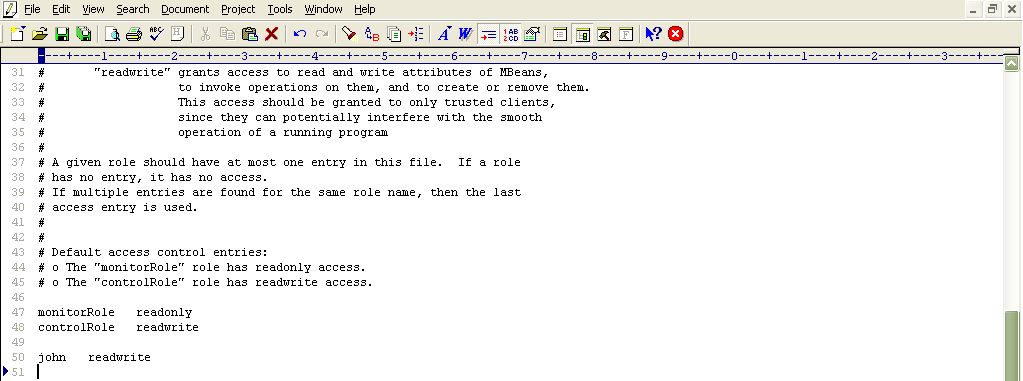
Figure 6 : Assigning rights to the new user in the jmxremote.access file
- Then, save the jmxremote.access file.
- Finally, proceed to configure the tests with the user name and password, john and john, respectively.
- Then, proceed to make the jmxremote.password file secure by granting a single user “full access” to that file. To do so, follow the steps below:
- Login to the vCloud Director host as the user who is to be granted full control of the jmxremote.password file.
-
Issue the following command:
chmod 600 jmxremote.password
- This will automatically grant the login user full access to the jmxremote.password file.
- Next, edit the the vmware-vcd-cell script file in the /opt/vmware/vcloud-director/bin directory.
- Look for an entry that begins with the string, java_opts= in the file.
-
Insert the following lines to the java_opts entry as depicted by Figure 1.3 below:
-Dcom.sun.management.jmxremote.port=<PortNo>
-Dcom.sun.management.jmxremote.authenticate=true
-Dcom.sun.management.jmxremote.ssl=false
-Dcom.sun.management.jmxremote.access.file=<Path of jmxremote.access>
-Dcom.sun.management.jmxremote.password.file=<Path of jmxremote.password>
For instance, assume that the JMX remote port is 9005, and the jmxremote.access and jmxremote.password files exist in the /usr/jdk1.5.0_05/jre/lib/management folder of the host. The specification above will then read as follows:
com.sun.management.jmxremote.port=9005
com.sun.management.jmxremote.access.file=/usr/jdk1.5.0_05/jre/lib/management/jmxremote.access
com.sun.management.jmxremote.password.file=/usr/jdk1.5.0_05/jre/lib/management/jmxremote.password - Finally, save the file
Note:
By default, JMX support is enabled on port 8999 for the vCloud Director 10.0. This means that you have to specify 8999, by default, as the JMX Remote Port during test configuration when the vCloud Director 10.0 is to be monitored. Doing so will enable the eG agent to use JMX for collecting the JVM-related metrics. However, if JMX support is enabled on a different port, then, override this default setting by specifying the particular port number at the time of test configuration.