Deploying the egurkha.ear file in a Clustered Environment
If the WebSphere server to be monitored is in a clustered environment, then the ear file deployment should be performed in the following manner:
- Open Internet Explorer, and type the following URL: http://<WebSphereIP>:<WebSpherePort>, to connect to the administration console of the Node manager, which manages the application servers in the cluster.
- Then, follow step 2 to step 8 of Configuring a WebSphere Application Server 5.1 to work with the eG Agent.
-
Next, specify the application server in the cluster on which the egurkha.ear file is to be deployed, by selecting the cluster name from the Clusters and Servers list of Figure 1. Then, select the check box against the egurkha module in Figure 1, click the Apply button, and then the Next button.
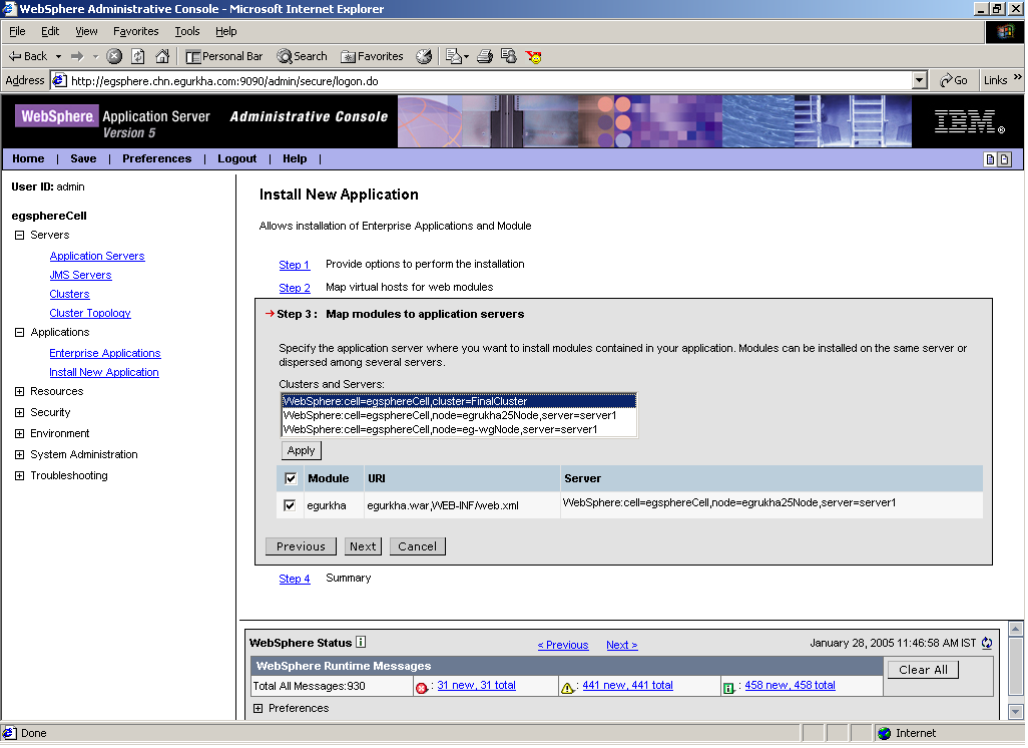
Figure 1 : Mapping the newly installed application to a server in the cluster
- Next, you will be prompted to map security roles to users/groups. If security has been enabled for the WebSphere server, then this mapping is mandatory. If not, simply click on the Next button to switch to the next step of the installation. In the case where security is enabled, it is recommended that you always map the administrator role with a specific admin user/group for monitoring purposes. To achieve this, follow step 10 to step 14 of the procedure discussed in Configuring a WebSphere Application Server 5.1 to work with the eG Agent.
-
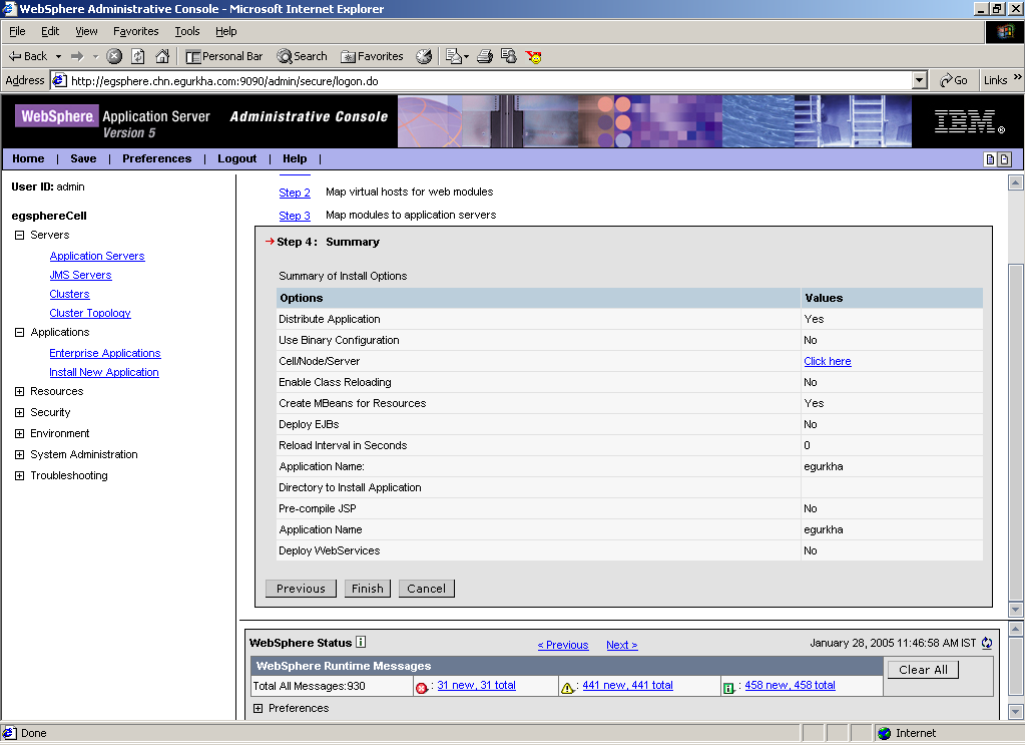
Figure 2 displaying a summary of the install options chosen will then appear.
-
Click on the Finish button in Figure 2 to begin installation of the egurkha application. Figure 3 will appear indicating the progress of the deployment.

-
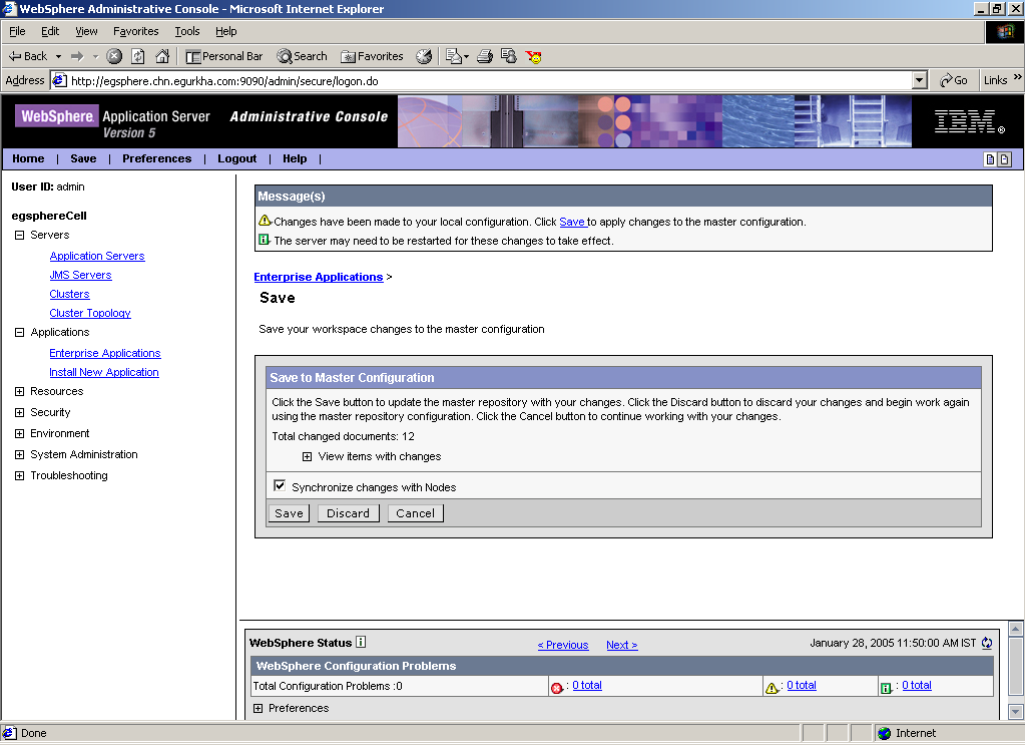
Upon successful installation, a message to that effect will appear (see Figure 3). Now, click on the Save to Master Configuration link in Figure 3. Consequently, Figure 4 will appear wherein the Save button will have to be clicked in order to save the configuration changes to the node manager.
- Finally, log out of the admin console and restart the WebSphere server. For that, first stop the server using the command ./stopServer.sh <servername>, and then, start it using the command ./startServer.sh <servername>. Both these commands are available in the <WAS_HOME>/bin directory, where <WAS_HOME> is the install directory of the WebSphere server.
- Then, proceed to enable performance monitoring for the application servers to be monitored using the procedure discussed in Enabling Performance Monitoring.