Building a Custom Template
Though eG Enterprise offers the flexibility to build the One Click Dashboard based on pre-built dashboard templates for certain mission-critical component-types, administrators may still want to create their own template for the component types of their interest. To address the needs of such administrators, eG Enterprise provides the capability to build custom templates and widgets. These templates when configured with key metrics on the performance of the component type that is of interest to the administrator, can be used extensively while creating a My Dashboard.
To build a custom template, do the following:
- Follow the menu sequence: Monitor -> Dashboards ->My Dashboard ->Templates.
-
Figure 1 will then appear listing the default templates that are pre-built by eG Enterprise. Note that these templates will vary across environments as eG Enterprise intelligently displays the pre-built templates based on the component types managed in the target environment.
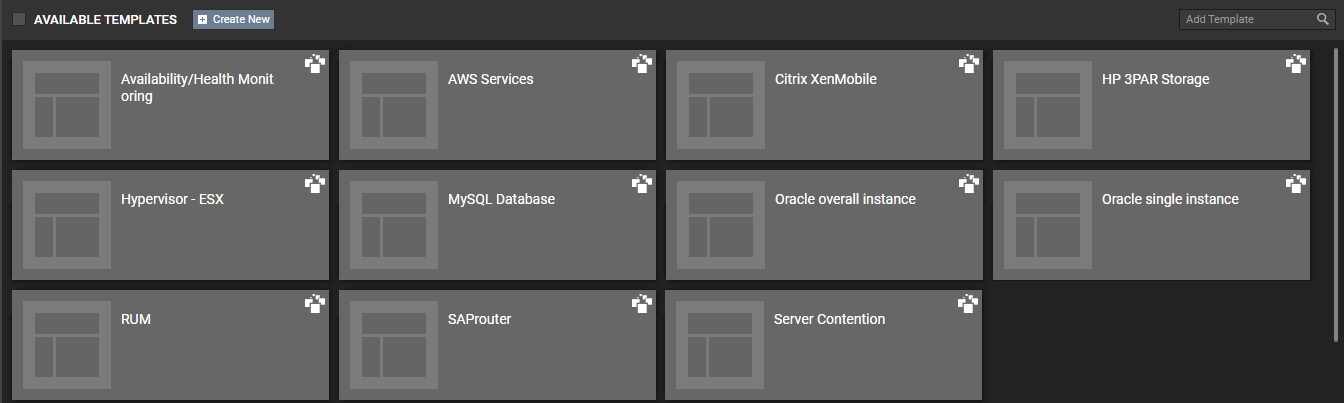
Figure 1 : The pre-built templates in the target environment
-
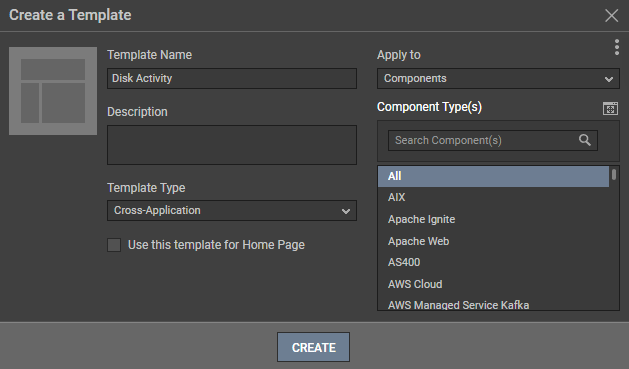
To create a new template click the Create New button in Figure 1. Figure 2 then appears.
-
In Figure 2, specify the following:
-
Template Name: Specify the name of the template.
-
Description: Here, provide a brief description of the new template.
-
Template Type: By default, Cross-Application option is chosen from this list. This implies that the template can be created for any number of component types managed in the target environment. If you choose application, then, you will be allowed to choose only a single Component Type.
-
Apply to: This option is applicable only when Cross-Application is chosen from the Template Type list. To categorize the template, or to view only the components available in the Zone/Segment/Services, select the option under the Apply to drop down. For example, selecting the Service option will list only the components that are part of a service. To view all the components in the environment, click on the Components option. By default, the Components option will be chosen in the Apply to list.
-
Component Type(s): Select a Component Type for which you wish to create the template. If the Component Type(s) list consists of too many component types, then viewing all the component types and selecting the ones you need for creating the template could require endless scrolling. To avoid this, you can click the
 icon next to the Component Type(s) list. The COMPONENT TyPE(S) pop up window (see Figure 3) will then appear using which you can view almost all the component types in a single interface and SELECT the ones for which you wish to create the template.
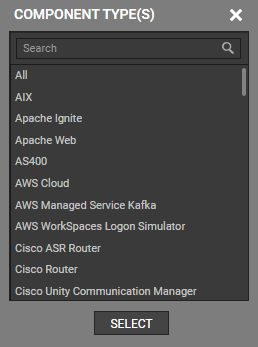
Figure 3 : Choosing the Component types of your choice
You can even search for a component type of your choice using the Search text box in Figure 3 or the Search Component(s) text box in the Component Type(s) list of Figure 2.
-
Apply to individual servers: This option appears only when the Application option is chosen from the Template Type list. By default, this slider will be turned off. Turning on this slider will ensure that a new template is created for each component added for the chosen Component Type.
-
Use this template for Home Page: If you wish to set this template as the Monitor Home page, then, first you need to check this option. Once you created the template, navigate to the USER PROFILE page where you are allowed to set the Monitor Home page. In the Set Monitor Home section, choosing the Domain Dashboard flag would list all the dashboards and the templates that you wish to set as the Monitor Home page (see Figure 4).
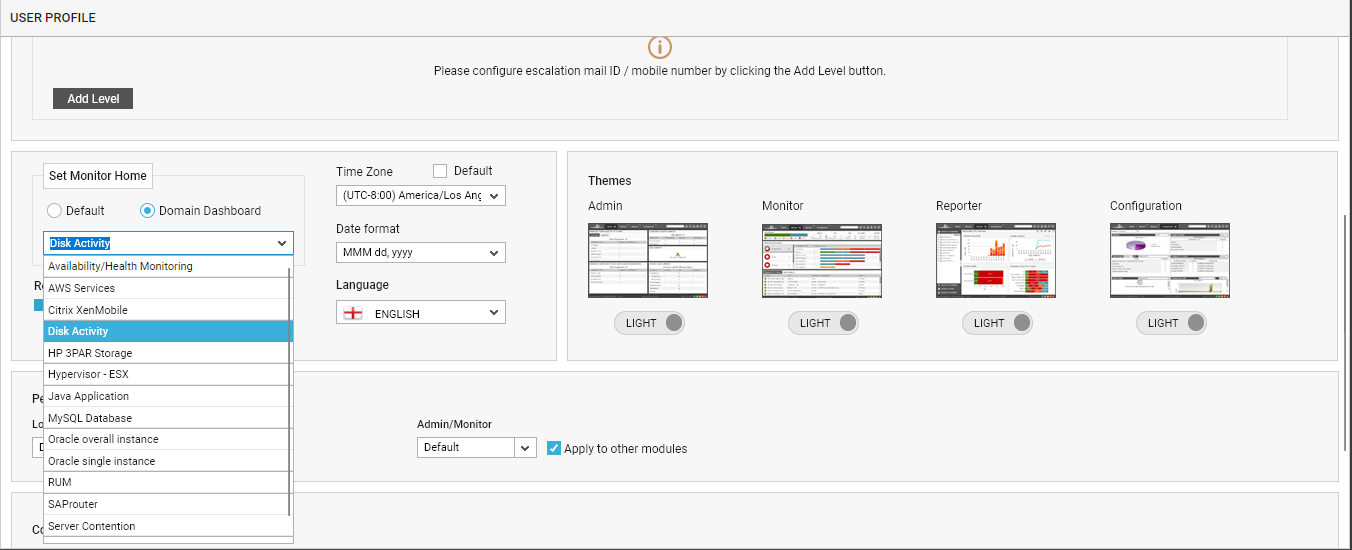
Figure 4 : Editing the USER PROFILE page to set the created template as Monitor Home page
-
-
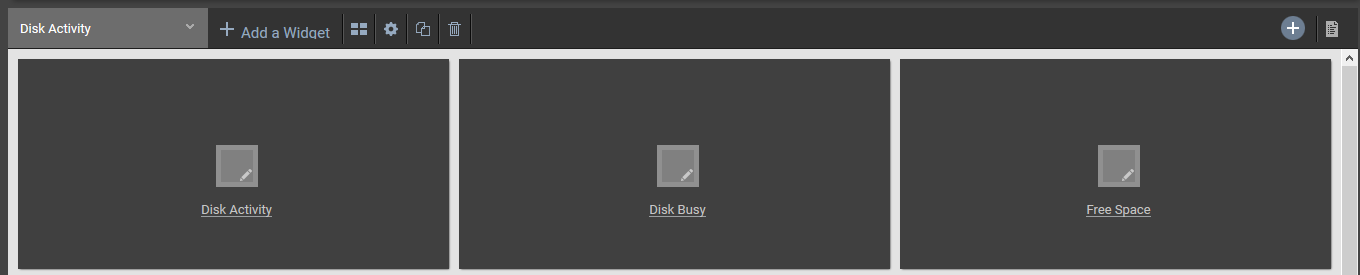
Click the CREATE button to create the new template. Figure 5 will then appear.
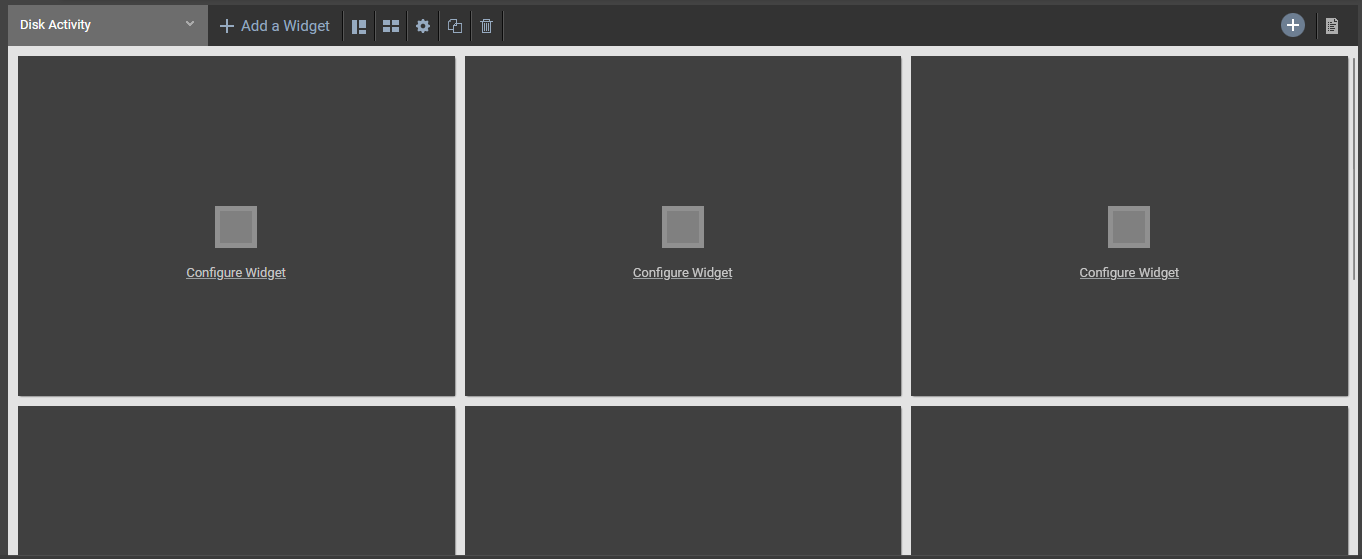
- Once the template is created, you can configure the widgets for the template either by creating your own widget or adding the widgets that are offered as pre-built widgets by eG Enterprise. To know how to create a widget, refer to Creating a Custom Widget.
- Clicking the Add a Widget button will append a new unconfigured widget to the created template.
-
To add a widget that was created by you or was shared by other users with you or to add a pre-built widget, click the
 icon. Figure 6 then appears.
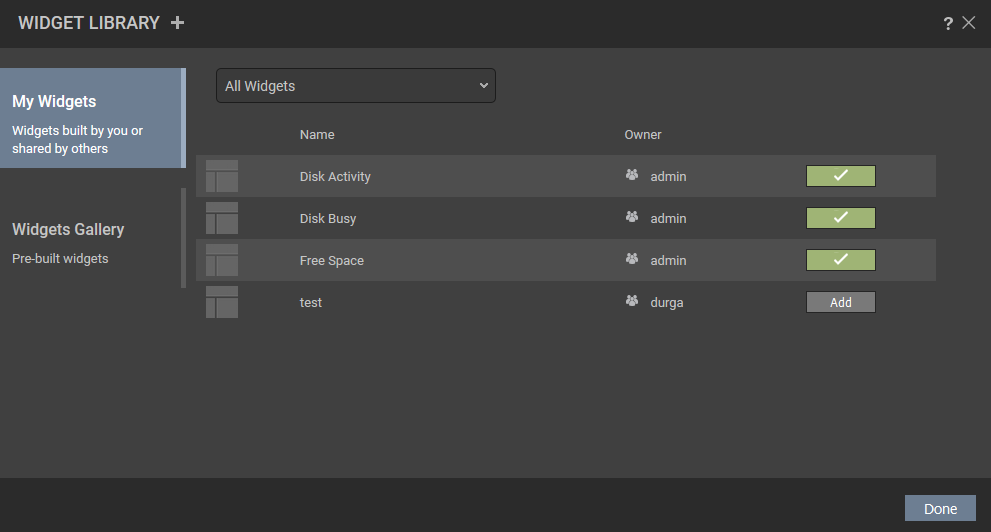
- In Figure 6 that appears, the My Widgets tab will be chosen by default from the left panel. The context-sensitive right panel will display the widgets that are either created by you or are shared with you by other users of eG Enterprise. By default, All Widgets will be chosen from the list in the right panel. You can choose the name of the widget group from this list to view specific widgets that you have created within that widget group.
- The Widgets Gallery tab will list the pre-built widgets offered by eG Enterprise. To know more about these widgets refer to Pre-built Widgets of My Dashboard.
- To edit a template, click the
 icon.
icon. -
To clone an existing template, click the
 icon. Figure 7 will then appear.
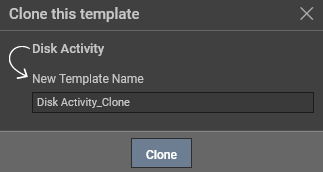
In Figure 7, specify the name of the template in the New Template Name and click the Clone button.
- To delete a template, click the
 icon in Figure 5.
 -
To view the list of templates in your environment, click the
 icon in Figure 5. Figure 8 then appears listing the templates.
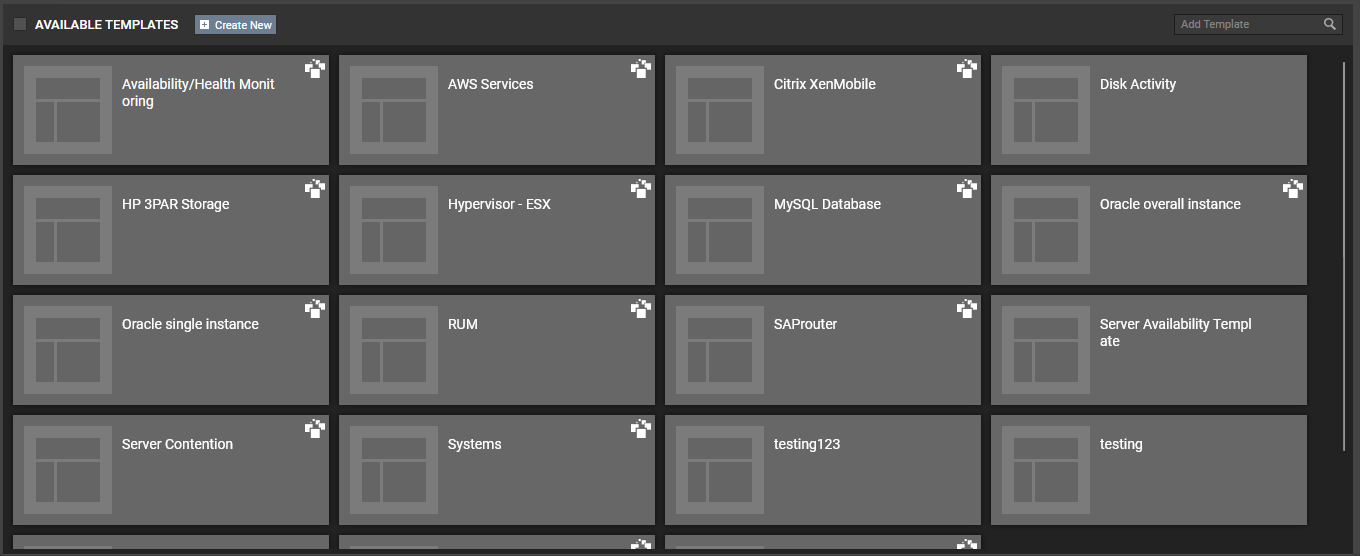
Creating a Custom Widget
To create a custom widget, click the Configure Widget option in Figure 5. Figure 9 then appears.
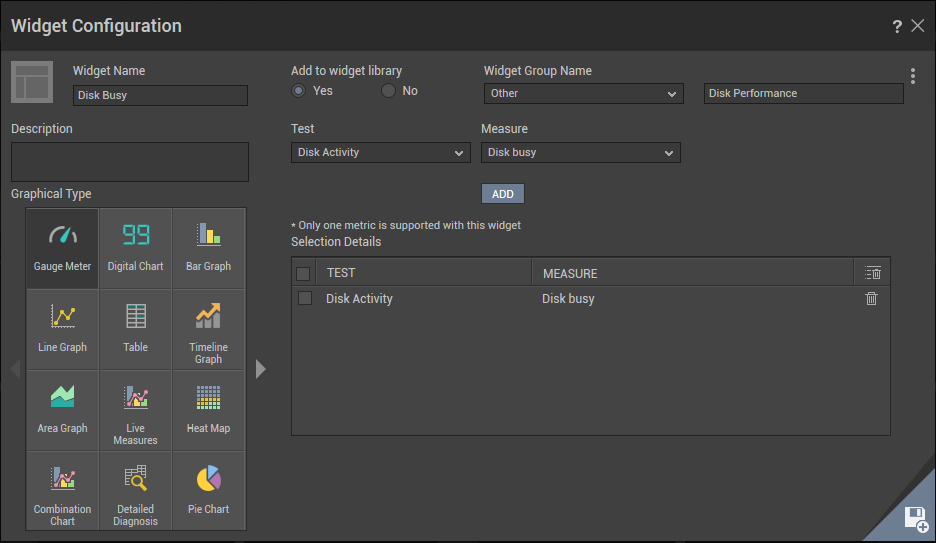
Figure 9 : Configuring the custom widget
Specify the following in Figure 9:
- Widget Name: Specify the name of the widget.
- Description: Here, provide a brief description of the new widget.
- Graphical Type: Specify the type of graphical representation that you want to use to represent the widget. This list consists of the graphical representations offered by default by eG Enterprise. To navigate across the next page, click on the arrow icon next to the list.
- Add to widget library: By default, this flag is set to No indicating that the widget that you are adding is exclusive to the created template. If you wish to reuse the widget across the templates/dashboards, then set this flag to Yes.
- Widget Group Name: This list appears only when the Add to widget library flag is set to Yes. Choose a group name under which you would like to categorize the widget. By default, this list will contain the My Widgets option and the Other option. When Other option is chosen from the list, an Enter New Group text box will appear where you will be allowed to provide the name of your choice to the group under which you would like to place the widget.
- Test: Select a test for which you would like to configure the widget.
- Measure: Select the Measure(s) for which you would like to configure the widget. You can even search for the measure of your choice from this list using the Search Metric(s) text box.
- Clicking the ADD button will list your selection in the Selection Details section.
- If you wish to delete a test/measure combination from the Selection Details section, click the icon.
- If you wish to delete multiple selections, then you can check the check box against the test/measure combination and click the
 icon.
icon. -
When you click the
 icon, a separate configuration section will appear as shown in Figure 10 which will vary based on the Graphical Type that you have chosen. To know more on how to configure this section, refer to Configurable Widgets of My Dashboard.
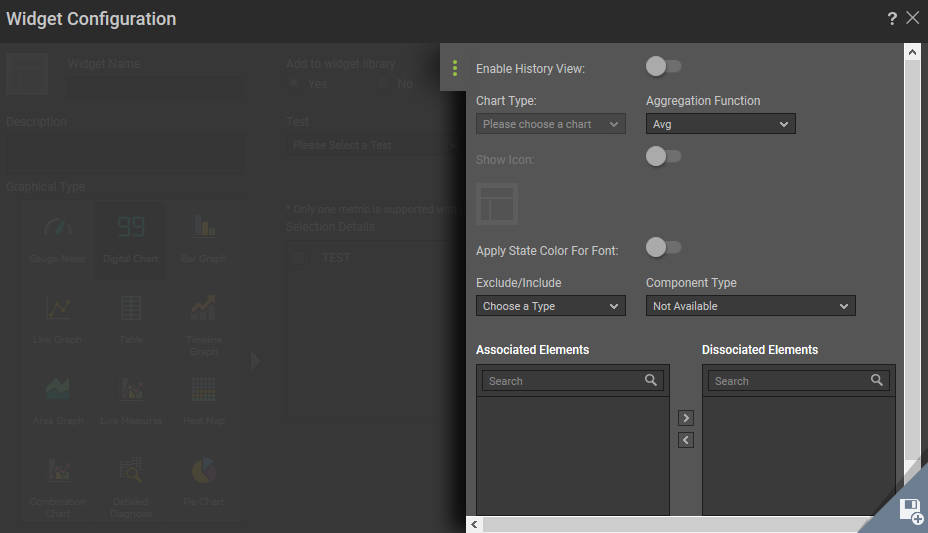
- Finally click the
 icon to save the widget.
Once the widgets are configured, the template will appear as shown in Figure 11.