Managing BIND DNS Using eG Enterprise
To achieve this, do the following:
- Login to the eG admin interface as a user with the Admin role.
-
eG Enterprise uses a port-scanning technique to automatically discover the BIND DNS servers in an environment. By default, BIND DNS listens on port 53. This is the port that eG Enterprise uses for discovery by default. If BIND DNS listens on a different port in your environment, then, before starting discovery, you will have to change the port that eG Enterprise uses for discovery. For this, follow the steps below:
- Invoke the Admin tile menu and follow the menu sequence, Infrastructure -> Components -> Discovery
-
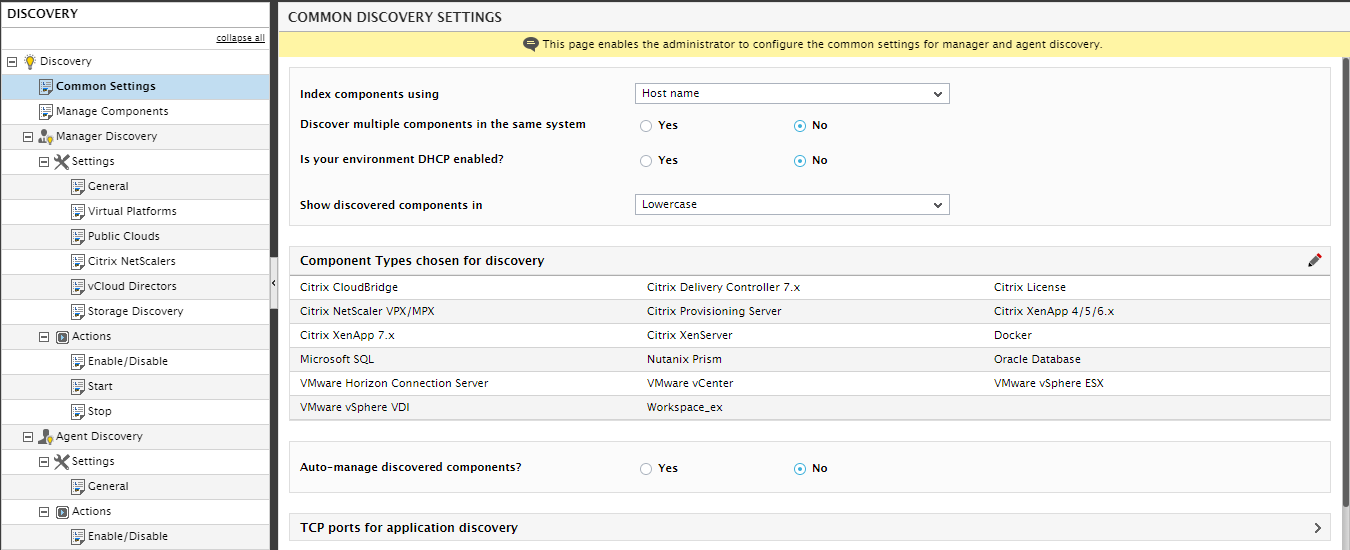
When Figure 1 appears, click the Common Settings node in the tree-structure in the left panel of Figure 1. The right panel will then change to display many common discovery settings.
-
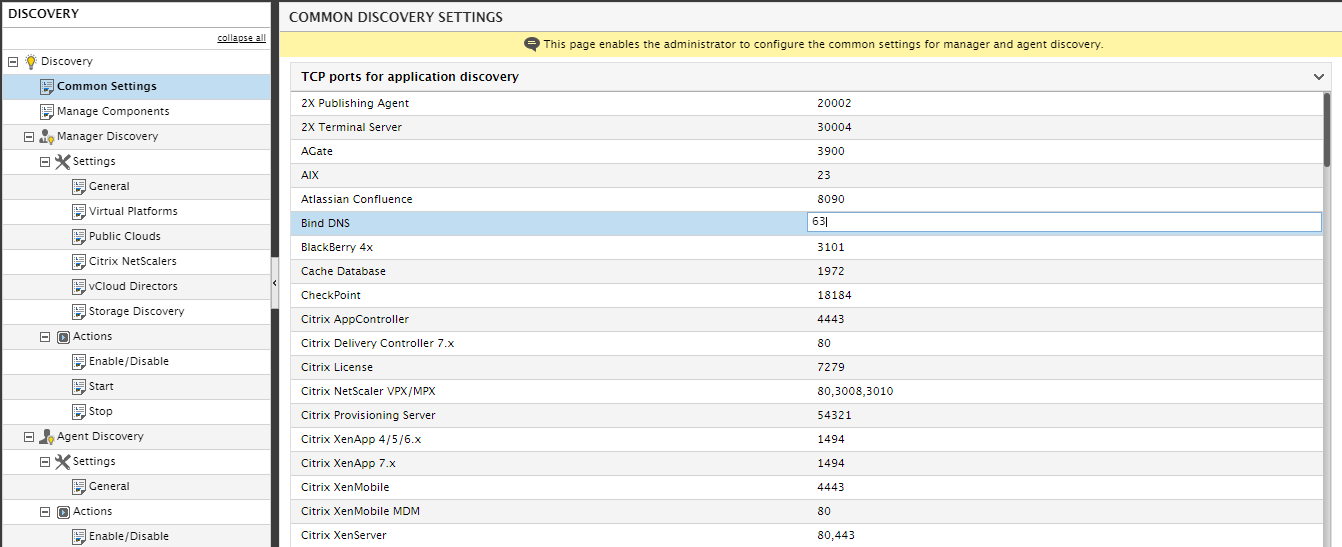
Scroll down the right panel and expand the TCP ports for application discovery section to view the port-based applications that eG Enterprise can monitor and their ports. Once you locate Bind DNS in the list, click on the port number displayed against Bind DNS (default: 53), and change the port number (see Figure 2).
-
Then, proceed to begin discovery. To auto-discover BIND DNS, do the following:
- Invoke the Admin tile menu and follow the menu sequence, Infrastructure -> Components -> Discovery
-
When appears, click the Common Settings node in the tree-structure in the left panel of . The right panel will then change to display many common discovery settings.
Figure 3 : Viewing the common discovery settings
-
In the right panel, you will see the Component Types chosen for discovery section. Using this section, you can configure all the component types that you want auto-discovered, every time discovery runs. For eG Enterprise to auto-discover BIND DNS, you need to add the Bind DNS component-type to this list. For that, first click the
 button in the Component Types chosen for discovery section. Figure 6 will then appear.
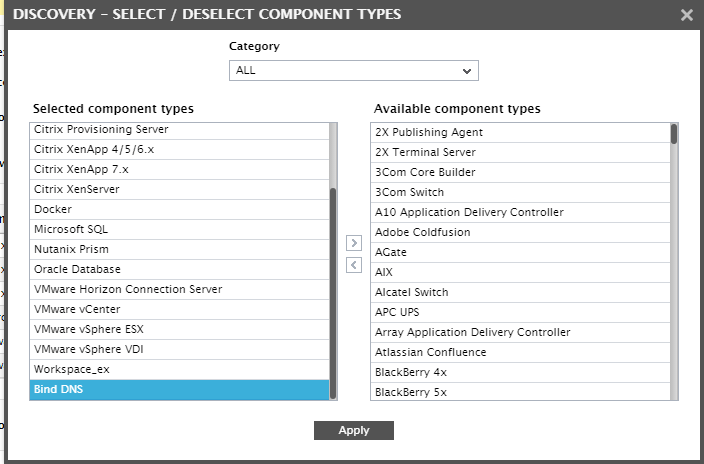
Figure 4 : Selecting Bind DNS for discovery
- Pick Bind DNS from the Available component types list in Figure 6 and click the < button to transfer the selection to the Selected component types list. Finally, click Apply in Figure 6 to save the changes.
-
Next, click the Settings sub-node under the Manager -> Discovery node in the tree-structure in the left panel of . Figure 5 will then appear.
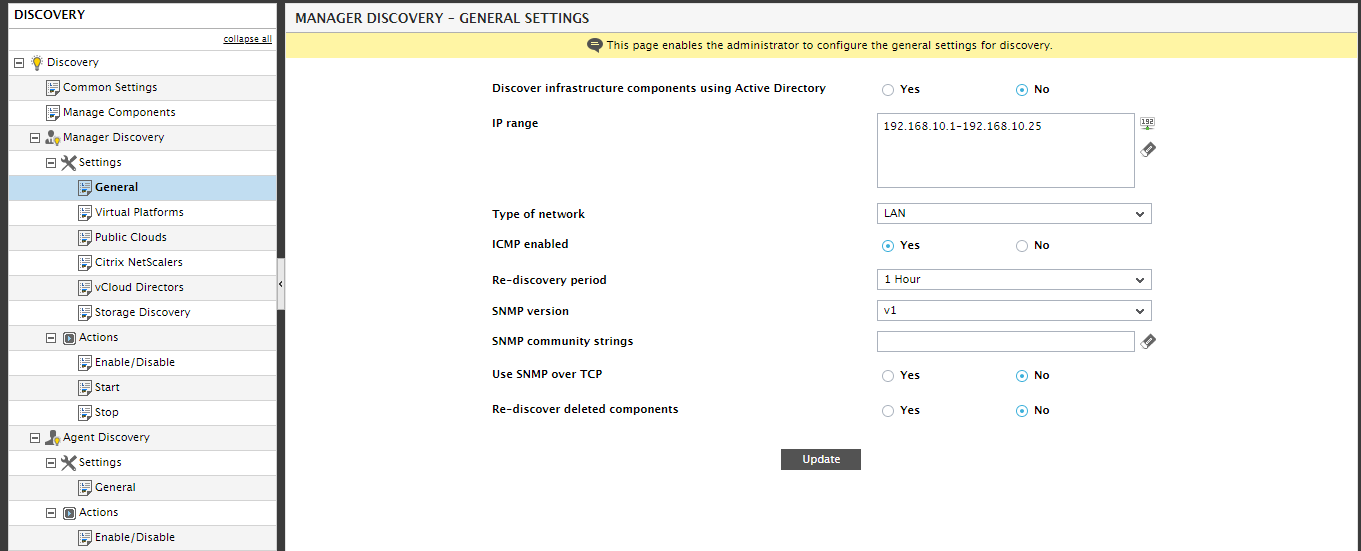
- Provide an IP range for discovery in Figure 5 and click the Update button to register the changes.
-
Finally, click the Start sub-node under the Actions node in the tree-structure to begin discovery.
-
Once discovery ends, proceed to figure out which BIND DNS servers have been automatically discovered by eG Enterprise. For that, invoke the Admin tile menu and follow the Infrastructure-> Components -> Manage/Unmanage/Delete menu sequence. Figure 6 will then appear.
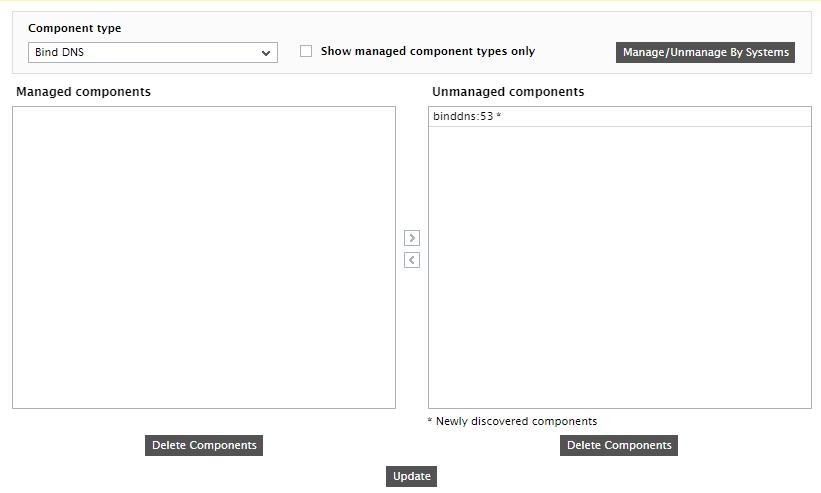
- Select Bind DNS as the Component type in Figure 6. The auto-discovered BIND DNS servers will then appear in the Unmanaged components list. Newly discovered servers will be indicated by an asterisk (*) suffix.
-
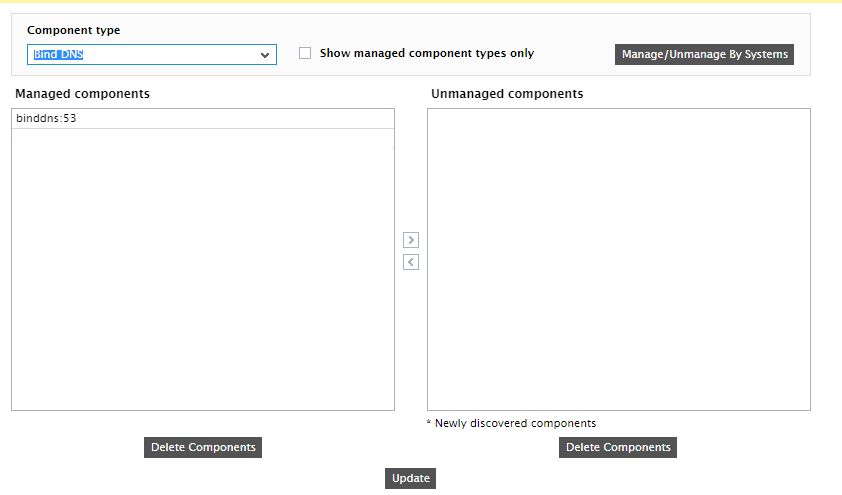
To manage a discovered BIND DNS server, select the server from the Unmanaged components list and click the < button in Figure 6. This will transfer the selection to the Managed components list (see Figure 7).
-
Finally, click the Update button.
If for some reason the eG manager is unable to auto-discover the BIND DNS server, you can manually add the server for monitoring. For that, do the following:
-
Invoke the Admin tile menu and follow the Infrastructure -> Components -> Add/Modify menu sequence. In the page that appears next, select Bind DNS as the Component type and click the Add New Component button. Figure 8 will then appear.
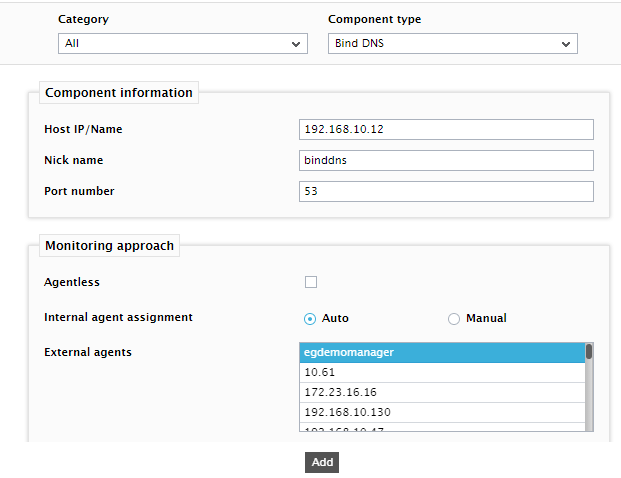
- In Figure 8, specify the Host IP/Name of the BIND DNS server to be monitored and also assign a unique Nick name for that server.
- Then, assign an External agent to monitor the network connectivity and traffic to/from the server and click the Add button in Figure 8 to add the server for monitoring.