Creating a New Citrix Cloud User for Monitoring Purposes
To communicate with the Citrix Cloud and pull metrics of interest, the eG agent requires an API client on the cloud. This API client should be created by a Citrix cloud user with Read-only administrators rights to virtual apps/desktops. It is recommended that you create a new user for this purpose on the Citrix cloud, and then create an API client as that user. To know how to create such a user, read on:
- Sign in to the Citrix Cloud administrator console.
- Click the “chocolate menu”
 in the upper left corner of the console.
 -
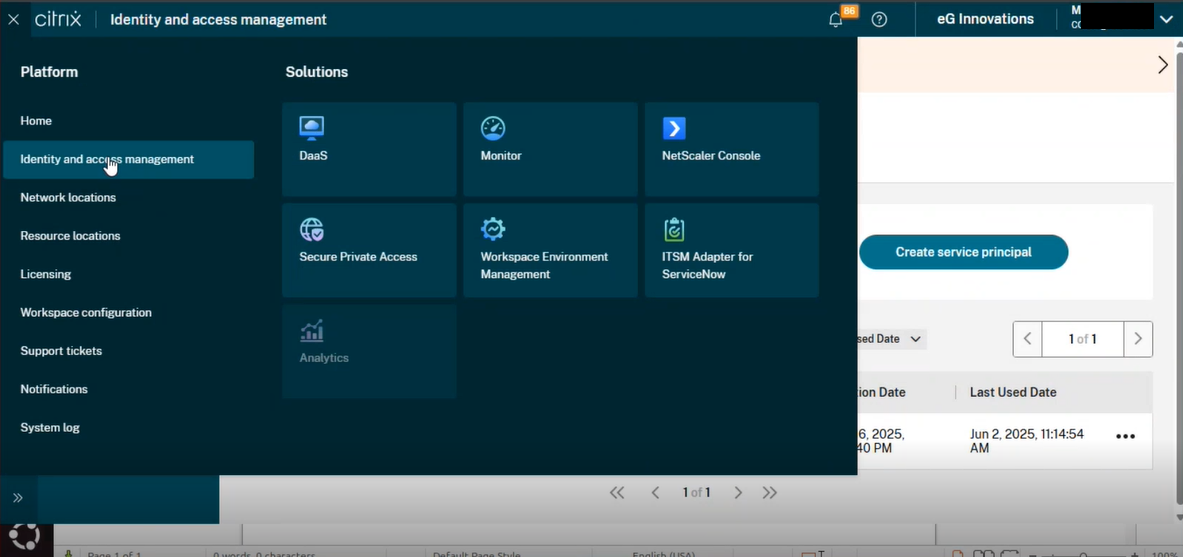
Select Identity and Access Management from the drop-down menu (see Figure 1).
-
Figure 2 then appears. Click on the Administrators tab in Figure 2.
-
Figure 3 then appears. Click the Add administrator/group button in Figure 3.
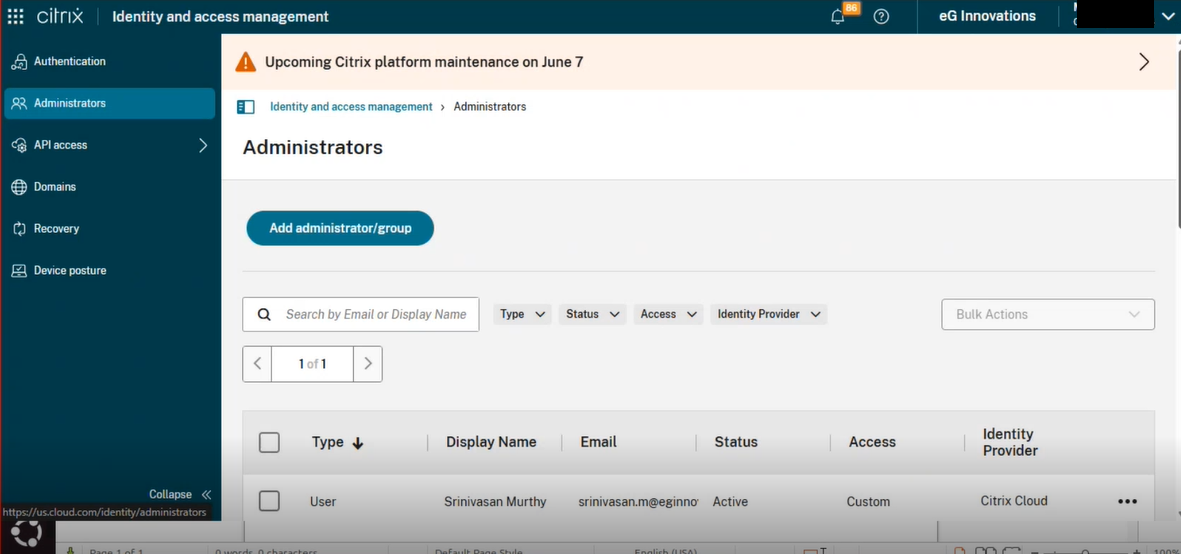
Figure 3 : The Administrators tab page displaying the users in the Citrix Cloud console
-
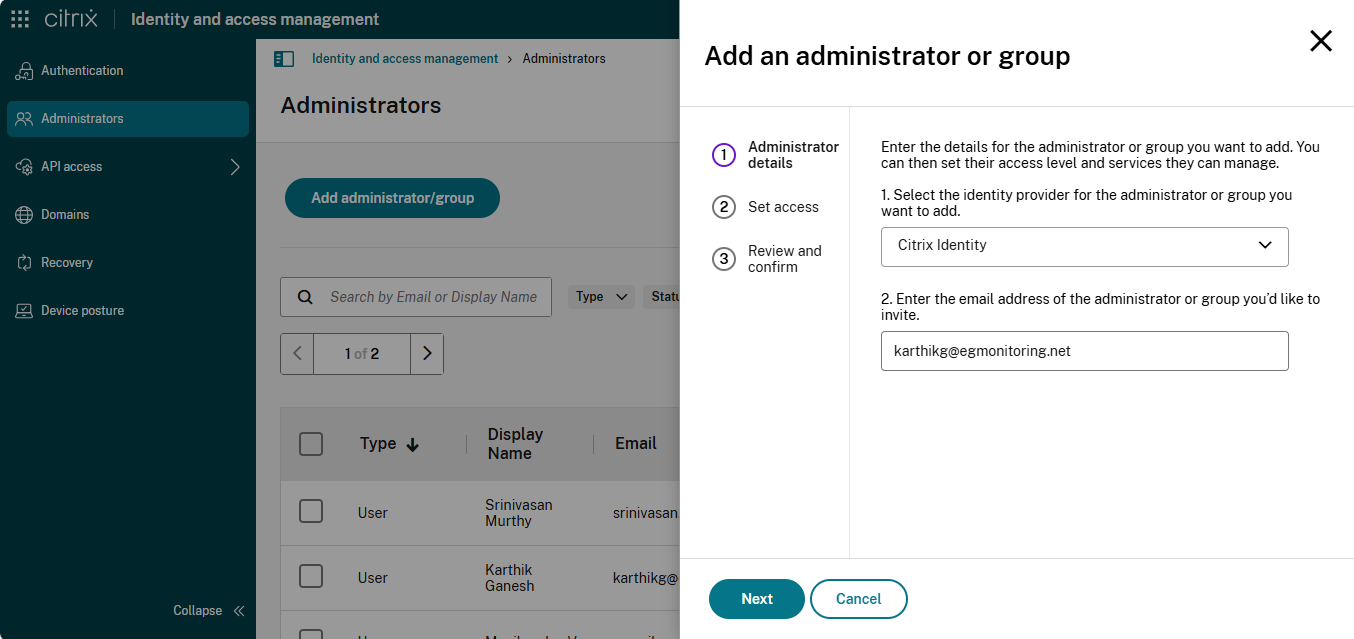
Clicking the Add administrator/group button in Figure 3 will reveal Figure 4 where you can add a new user/administrator.
-
In Figure 4 specify the identity provider of the user/administrator and the email address of the new user who needs to be allowed cloud access.
-
Clicking the Next button in Figure 4 reveals Figure 5 where you can define the access rights of the new user. For this, first select the Custom access option.
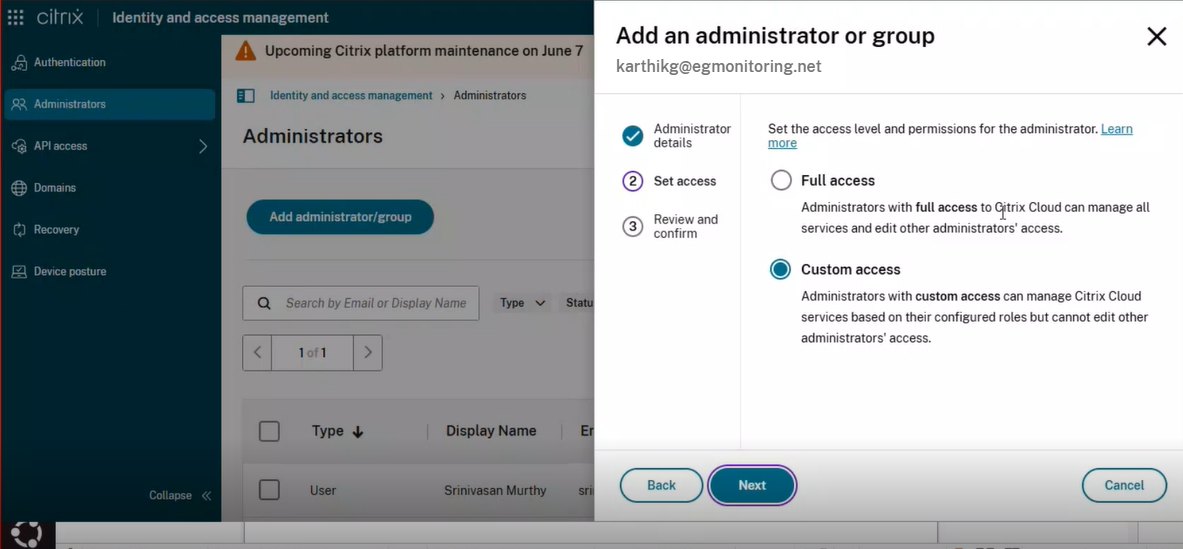
Figure 5 : Choosing to customize the access rights of the new user
-
Next, allow the user Read only Administrator access to all virtual apps and desktops. For that, scroll down Figure 5, so that the DaaS group becomes visible. Expand the group and select the check box alongside Read Only Administrator. By default, All scopes will be chosen once you select the Read Only Administrator (see Figure 6).

Figure 6 : Granting Read-only Administrator access to all Virtual Apps and Desktops
-
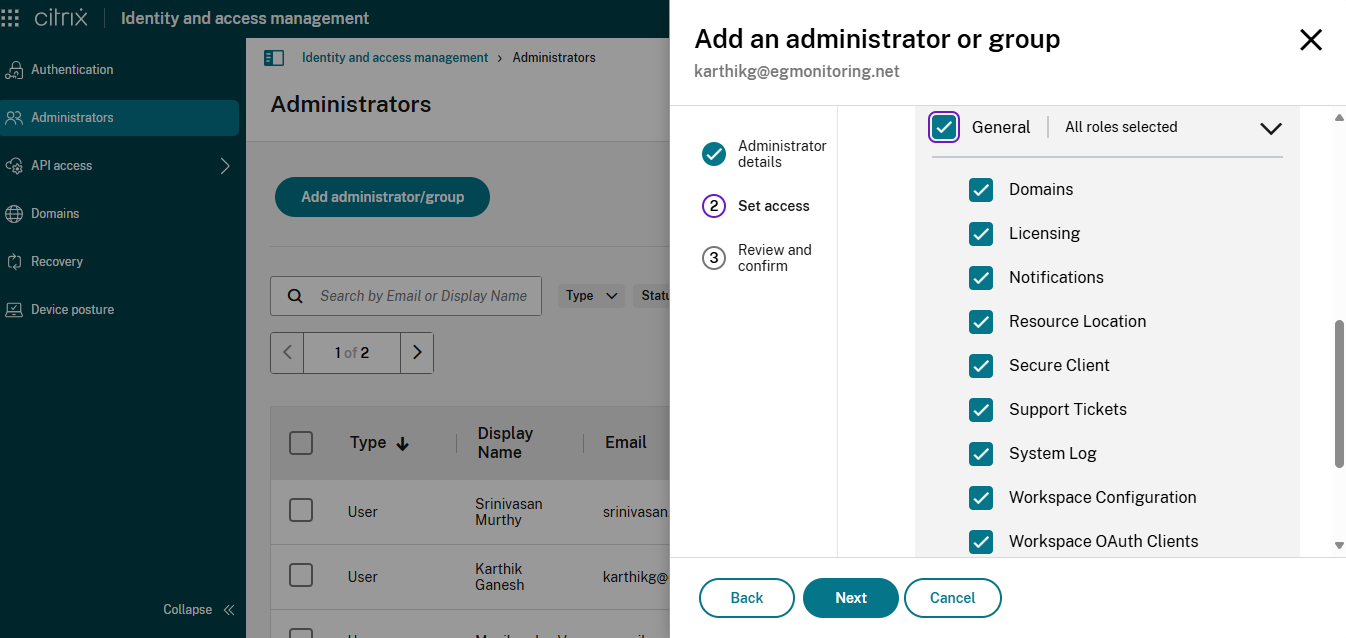
Then, scroll down further and click on the General check box in Figure 7, so that the user is granted access to all the basic configurations on the cloud such as domains, libraries, licenses, secure clients etc. These General settings are displayed in Figure 7.
-
Clicking the Next button will reveal Figure 8 where you can review and confirm the details of the new user.

Figure 8 : Review the access rights of the new user to be created
- Finally, click the Send Invitation button in Figure 8, so that the invite is emailed to the new user. Once the invite is received, the user should follow the link in the invite to setup their login credentials. Then, using those credentials, the user should login to the cloud, and proceed to create a new API client.