Managing Citrix Desktop Group Component in eG Enterprise
Follow the procedure detailed below to manage a Citrix Desktop Group component in eG Enterprise:
-
Login to the eG administrative interface as a user who has been assigned the Admin role.
-
Invoke the Admin tile menu and follow the Infrastructure -> Components -> Add/Modify menu sequence in it.
-
Select Citrix Desktop Group as the Component type from the page that appears next. Then, click the Add New Component button alongside.
-
Figure 1 will then appear.
-
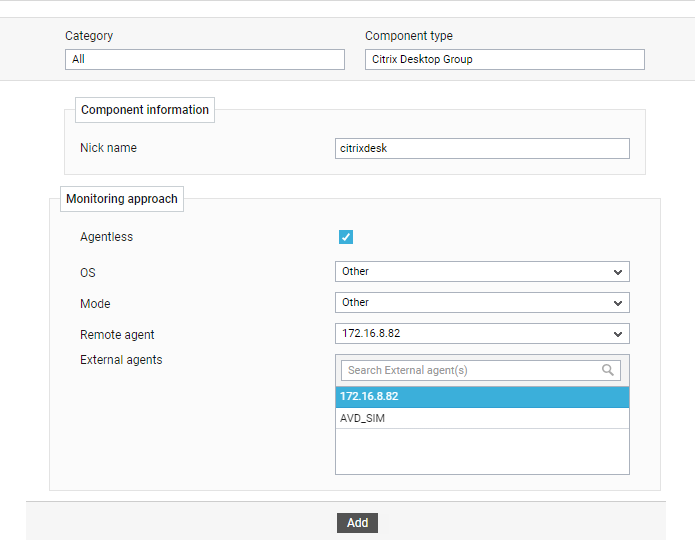
In Figure 1, specify the following:
-
Provide a Nick name for the Citrix Desktop Group component being added. Make sure that the nick name you specify here is the same as the nick name you provided for the Citrix Desktop Group component when configuring the eG VM Agent (see Configuring the eG VM Agent to Communicate with the eG Manager/eG Remote Agent
-
Select the Agentless check box, set the Mode to Other, and pick the Remote agent that should monitor the Citrix Desktop Group component. Ensure that the remote agent you choose here is the same as the remote agent you specified when configuring the eG VM agent (see Configuring the eG VM Agent to Communicate with the eG Manager/eG Remote Agent
-
Assign an External agent to the Citrix Desktop Group component, and click the Add button to add the component into the eG Enterprise system.
-