How Does eG Enterprise Monitor Google Workspace Synthetic Monitor?
eG Enterprise uses an eG external agent to perform synthetic monitoring of Google Workspace. This agent periodically runs a series of tests on Google Workspace services by emulating user interactions to those services.
Inorder to collect the required metrics from Google Workspace services, the following pre-requisites should be fulfilled.
-
Create a Service Account on Google Cloud
-
Download Private Key for Service Account
-
Enable Service APIs of the Google Workspace that should be simulated
-
Create a User on Google Workspace to be used for Synthetic Monitoring
-
Grant Permission to Service Account to Access Google Calendar of Simulation User
-
Provide Domain Wide Delegation for Classroom Simulation
Creating a Service Account on Google Cloud
A Service Account acts as a virtual user that allows your script or application to authenticate with Google APIs. Hence, for the simulation user to interact with the Google Workspace operations, you have to create a service account on Google Cloud. To achieve this, follow the steps given below:
-
Open Google Cloud Console.
-
Log in with an account that has administrative access to Google Cloud and Google Workspace.
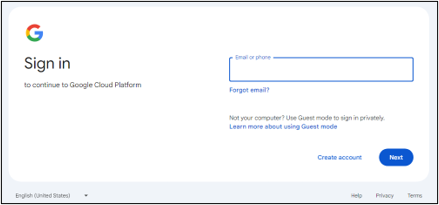
Figure 1 : Signin to Google Cloud
-
If you have multiple projects, select the project where you want to create the service account from the project selector drop down menu Figure 2.

-
In the Google Cloud Console, go to IAM & Admin, then select the Service Accounts option from the IAM & Admin tree in the left-side navigation menu as shown in Figure 2.
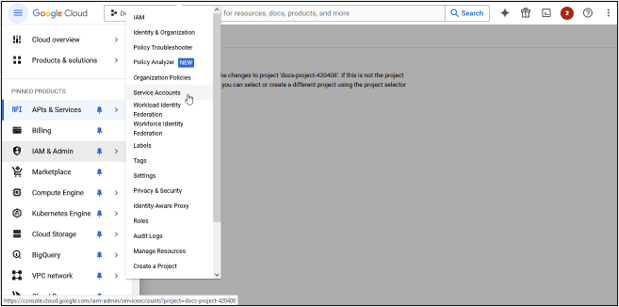
Figure 3 : Selecting the Service Accounts option from the IAM & Admin tree
-
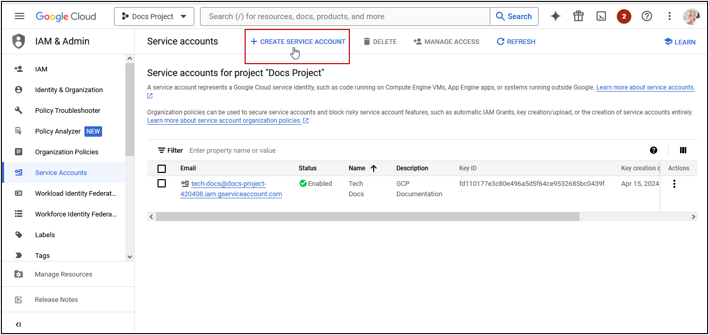
Selecting the Service Accounts option will invoke the Service Accounts page where you can view the list of service accounts (if any) created for the chosen project. In this page, click on the Create Service Account button as shown in Figure 4.
-
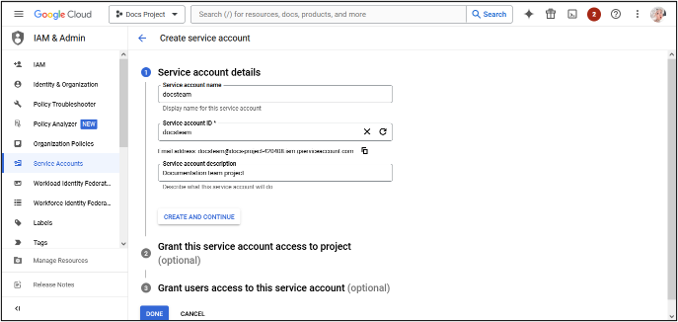
Enter a name for the service account, and optionally, provide a description in as shown in Figure 5. Next, click the create and continue button to proceed to the next step.
-
Next, you will be prompted to grant permissions to the service account in the Grant this service account access to project section. Click Continue and then Done. If you want the service account to have access to specific resources, you can specify these permissions in the Grant users access to this service account section.
-
Finally, click Done button to create the service account. The newly created service account will be listed in the Service Accounts page.
Downloading Private Key of Service Account
When you create a service account in any of the projects in GCP, to authenticate API requests, you need to create a private key for the service account in the form of a JSON file. The private key file includes information such as email address, unique identifier (private key ID), and the private key of the service account. To download the key associated with the created service account, do the following:
-
Navigate to IAM & Admin → Service Accounts, choose the service account for which you want to download the key in the list of service accounts. Click on the service account name to open its details.
-
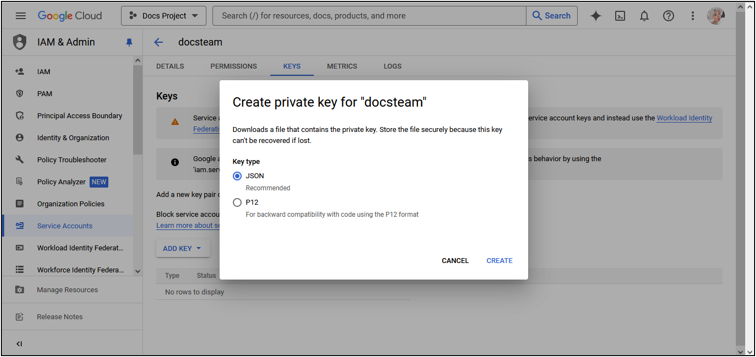
In the Service account details page, navigate to the Keys tab. Under the Keys tab section, you can see a list of existing keys, if any. To create a new key, click on the Add Key drop down and select the Create new key option.
-
Next, select the Key type as JSON in the prompt that appears and click on the Create button(see Figure 6).
-
This will generate the private key file in the JSON format for the service account. The key file will be downloaded to your local system automatically as depicted by the following image.
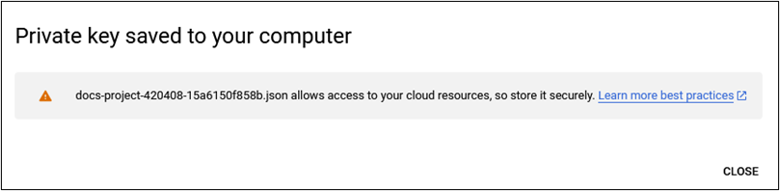
Figure 7 : Downloading the keyfile to the local system
-
Then, copy the downloaded key file to the<eG_INSTALL_DIR>/agent/GWS/Accounts folder. Now, rename the Private key as the Nickname of the Google Workspace Synthetic Monitor component that you manage in eG Enterprise.

Figure 8 : Saving the key file
Enabling Service APIs
For eG Enterprise to track critical processes like sheet creation and calendar operations, etc. it is necessary to enable the APIs for these services. To enable APIs of the services in the chosen Google Cloud project, do the following:
-
First, select the project to be monitored from the project selector drop down.
-
Next, expand the API & Services menu option from the left-side navigation pane. Select Library from the expanded menu as shown below.
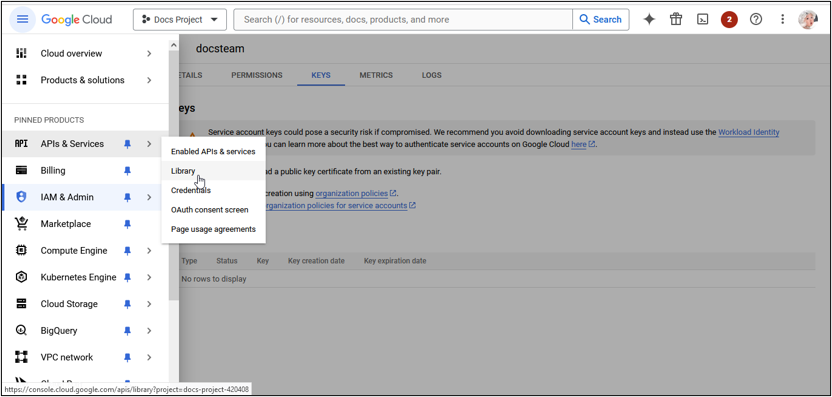
Figure 9 : Selecting the Library
-
This will lead you the API Library page where you can view a list of APIs of available Google Workspace services. To find out the API of a service that you wish to monitor, you can specify whole or part of the service's name and as shown in Figure 10.
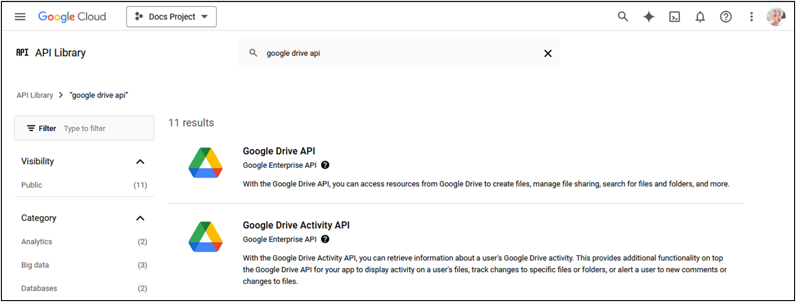
Figure 10 : Searching the API of service that is to be monitored
-
Then, click on the API in Figure 10 to open its Product details page.
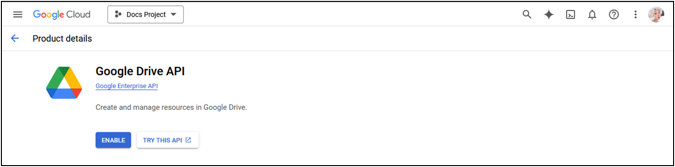
Figure 11 : Enabling the APIs
-
On the Product details page, click on the Enable button to enable the service. Note that the eG agent will be unable to report metrics if the service is not API-enabled in the chosen project.
-
Make sure that the APIs of services (that you want to monitor) in the project are enabled. The APIs are given below:
-
Google Drive API
-
Google Docs API
-
Google Sheets API
-
Google Slides API
-
Google Calendar API
-
Google Chat API
-
Google Classroom API
-
Creating a Simulation User on Google Workspace
To perform simulation of certain operations (such as Chat, Classroom and Calendar) on Google Workspace, you may need a simulation user. You can either use an existing user or create a new simulation user. To create a new user, follow the steps given below:
-
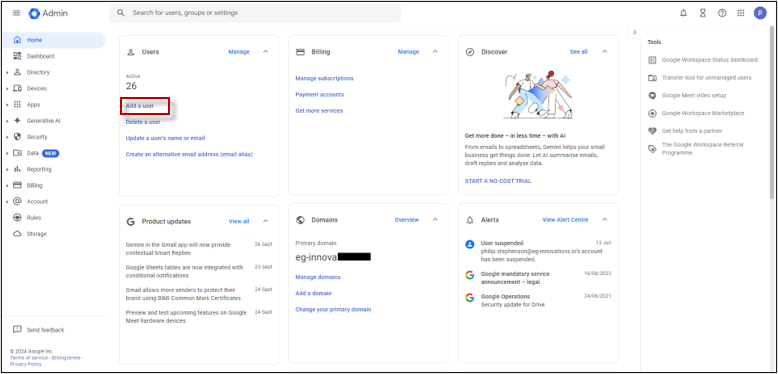
Log in to Google Admin Console using an account that has administrative access to Google Cloud and Google Workspace.
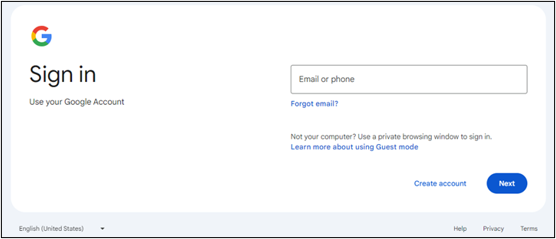
Figure 12 : Login to Google Workspace as an Administrator
-
Click on the Add a User link located in the Users section, see Figure 13.
-
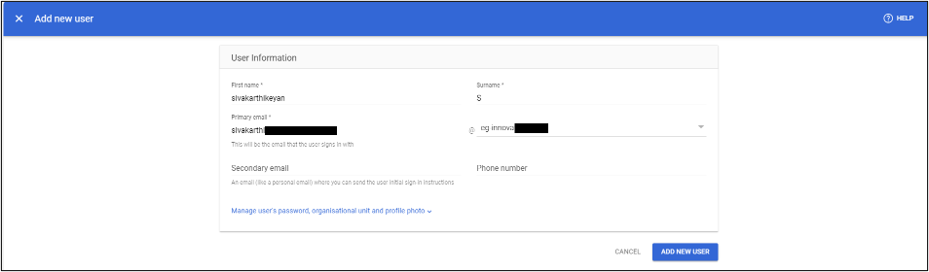
Now, specify the credentials of the user you wish to create in the Figure 14 shown below. Then click Add New User.
-
After this, Navigate to Directory-> Users, to view the newly created user.
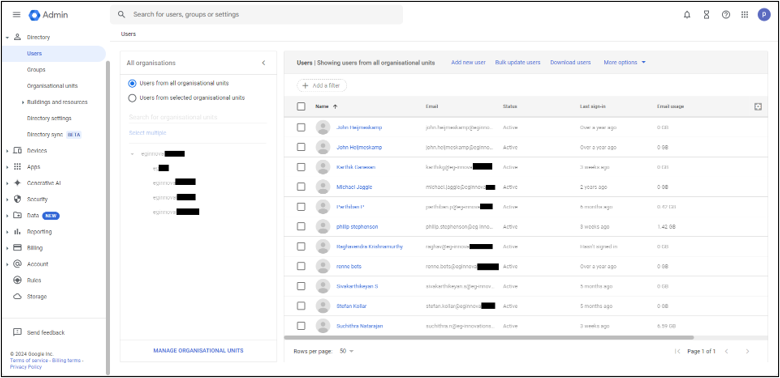
Figure 15 : Viewing the newly created user
-
Provide the email ID of this user against the USER EMAIL parameter while configuring the tests for the target component using the Specific Test Configuration page as shown below.
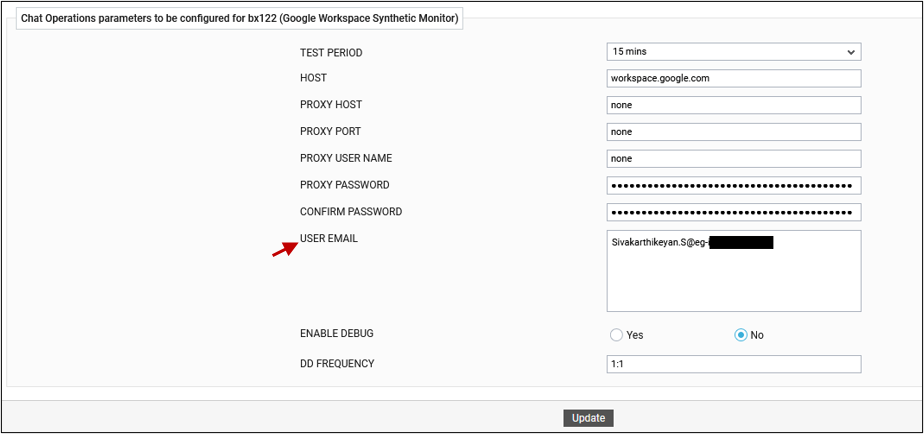
Figure 16 : Configuring the tests using the user email
-
Note:
To perform simulation of Classroom operations (i.e., Teacher and Student operations), in addition to the simulation user, you may need another simulation user who is also a Classroom Owner/Teacher. Follow the same steps mentioned to create these users.
-
Ensure that you create such simulation users on Google Workspace before proceeding with Synthetic Monitoring.
Granting Permission to Service Account to Access Google Calendar
To allow a service account to access a user's Google Calendar, you need to share the calendar with the service account and grant the necessary permissions. This is because Google Calendar restricts access to authorized users only, and without proper permissions, the service account cannot track calendar activities. Therefore, granting permission to the service account is necessary for accessing and monitoring calendar operations. For this,
-
Login to Google Calendar with the credentials of the newly created simulation user.

Figure 17 : Login to Google Calendar
-
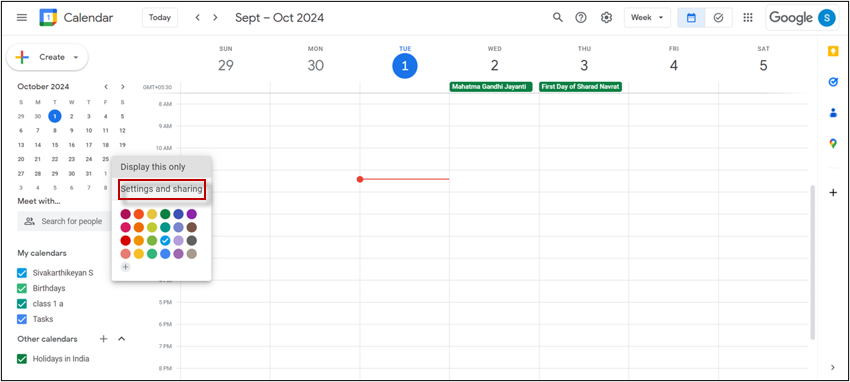
In the left panel, under My Calendars, find the simulation user's calendar.
-
Now, click the Options next to the calendar and select Settings and sharing, as given in Figure 18.
-
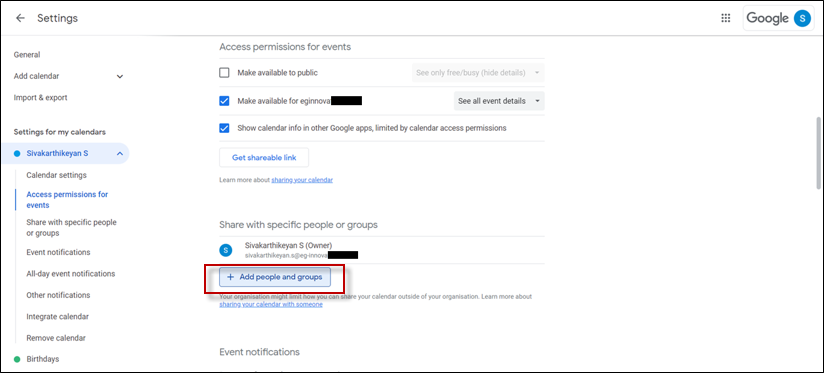
This will invoke a list of settings, from that select Share with specific people or groups options. Then, click on Add people and groups to share the simulation user’s calendar with the Service account, refer Figure 19.
-
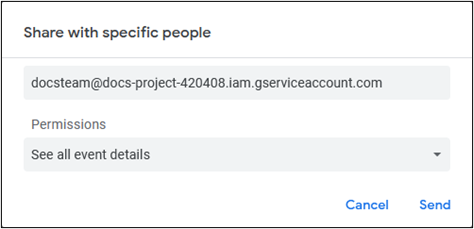
Now, specify the email ID of the Service account to which you wish to share the calendar, and choose the required permission level, as given in Figure 20.
Providing Domain Wide Delegation Access
Domain-wide delegation enables a service account to act on behalf of all users in your Google Workspace organization, granting it access to specific APIs (such as Google Calendar) without individual user consent. To grant Domain-Wide Delegation to the service account,
-
Login to Google Workspace as an Administrator.
-
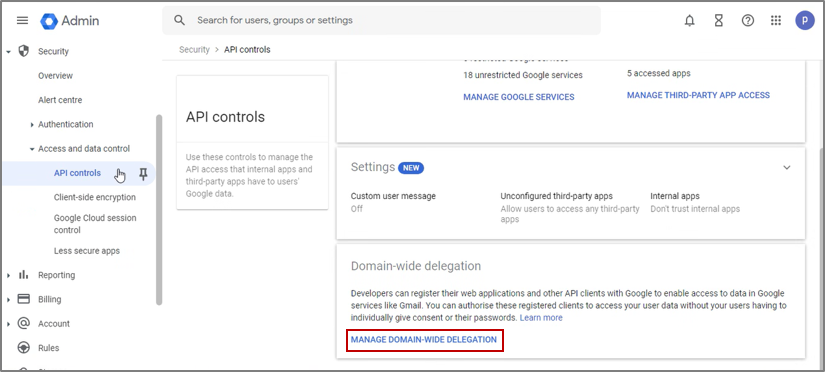
Now, navigate through the menu sequence, Security -> Access and data control -> API Controls. Then, click Manage Domain-Wide Delegation under Domain-wide Delegation,, see Figure 21.
-
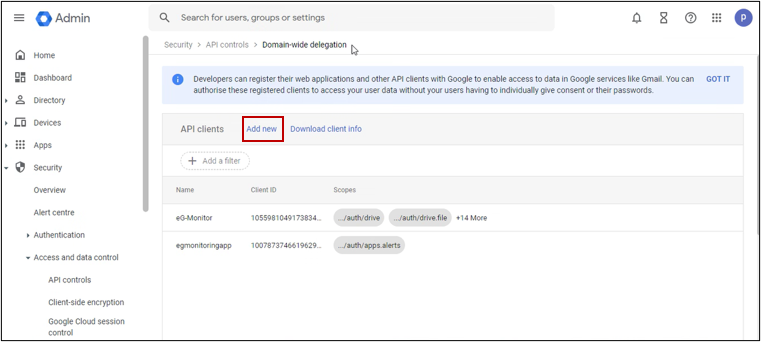
This will invoke Figure 22, next click the Add New button.
-
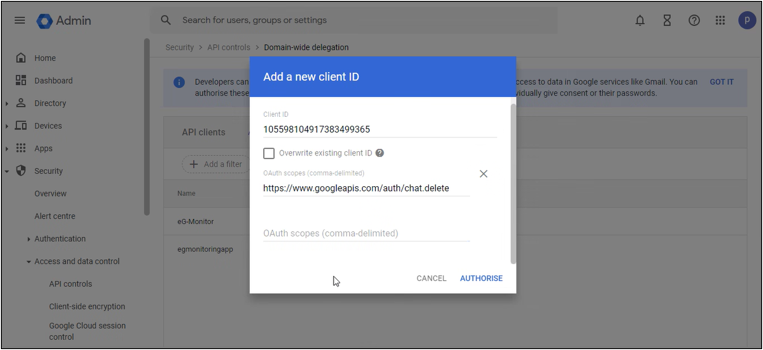
In the box that appears, as in Figure 23, specify the Client ID available in the Private Key file. In the OAuth Scopes field, Specify the following OAuth scopes:
-
https://www.googleapis.com/auth/chat.messages
-
https://www.googleapis.com/auth/chat.spaces
-
https://www.googleapis.com/auth/chat.memberships
-
https://www.googleapis.com/auth/chat.messages.create
-
https://www.googleapis.com/auth/chat.delete
-
https://www.googleapis.com/auth/classroom.coursework.students
-
https://www.googleapis.com/auth/classroom.rosters
-
https://www.googleapis.com/auth/classroom.courses.readonly
-
-
Finally, click AUTHORISE button.