Installing eG Java BTM on an IBM WebSphere
The steps for deploying the eG Java BTM on a WebSphere server will differ based on how the target WebSphere server is monitored - whether in an agent-based manner or in an agentless manner.
BTM-Enabling a WebSphere Server Monitored in an Agent-based Manner
If the WebSphere server is managed in an agent-based manner, then follow the steps below to BTM-enable that server:
- Login to the WebSphere server.
- Open a browser on the server, connect to the eG manager, and login to the eG admin interface.
-
Manage the WebSphere server as a separate component using the eG administrative interface. When doing so, make sure that the Agentless flag is unchecked.
-
Next, follow the Agents -> BTM Profiler Download menu sequence in the eG admin interface. Figure 1 will then appear, listing the Java application servers managed in the environment. Locate the WebSphere server that you managed recently in that list, and click the Copy JVM icon (
 ) corresponding to it (see Figure 1).
Figure 1 : Identifying theWebSphere server monitored in an agent-based manner, which is to be BTM-enabled
-
Figure 2 will then appear. Copy the JVM option displayed in Figure 2 to the clip board or any text editor.
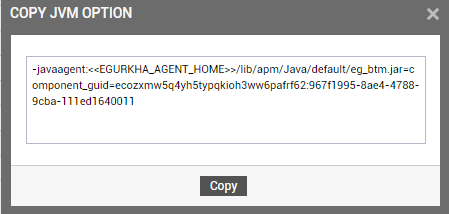
Figure 2 : Copying the JVM option for BTM-enabling a WebSphere server monitored in an agent-based manner
-
Next, proceed to BTM-enable the WebSphere server, using one of the following procedures:
- Using the WebSphere administration console;
- By editing the server.xml file
-
To use the administration console, do the following:
-
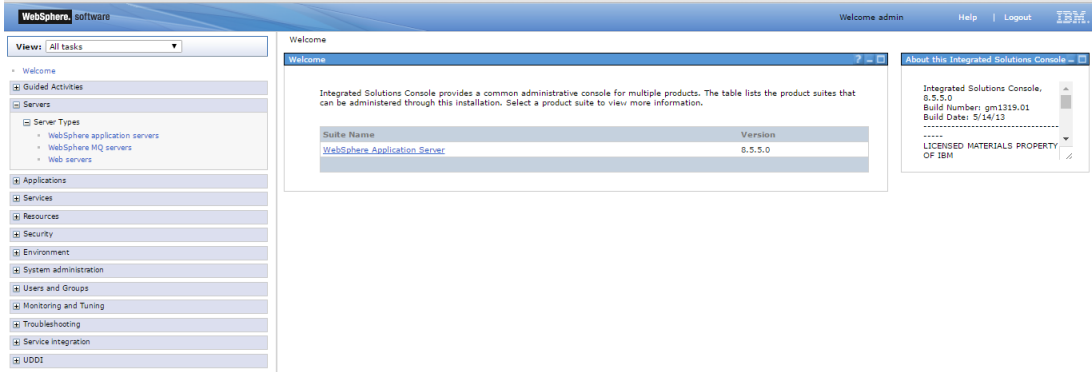
First, login to the console. When Figure 3 appears, click on the WebSphere Application Server link in the right panel.
-
This will invoke Figure 4. In the right panel of Figure 4, click on the link representing the WebSphere server instance that you want to BTM-enable.
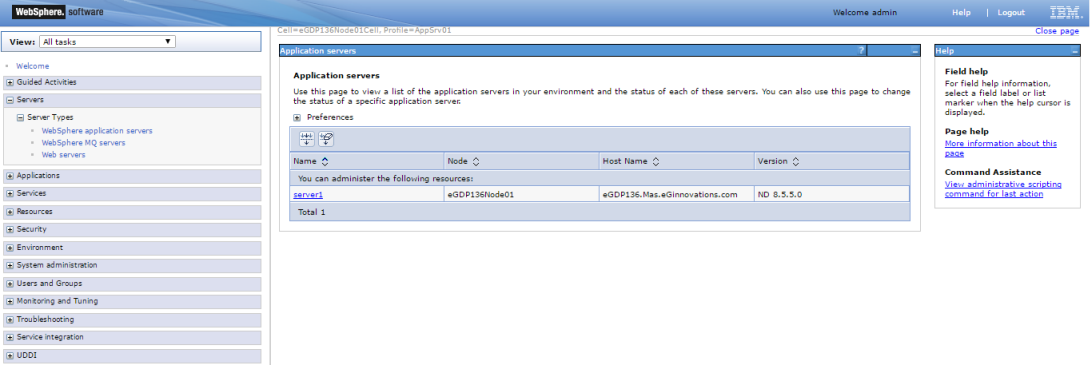
Figure 4 : Clicking on the WebSphere server instance to be BTM-enabled
-
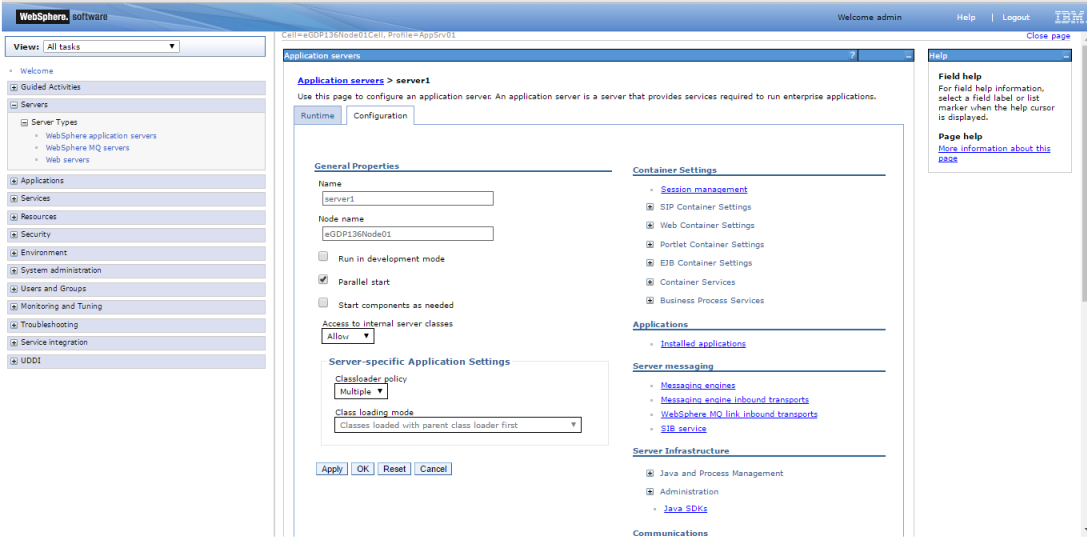
Figure 5 : The Configuration tab page of the WebSphere server instance to be BTM-enabled
-
Keep scrolling down the right panel of Figure 6 until you find the Server Infrastructure section. Expand the Java and Process Management node in that section, and click on the Process definition link within.
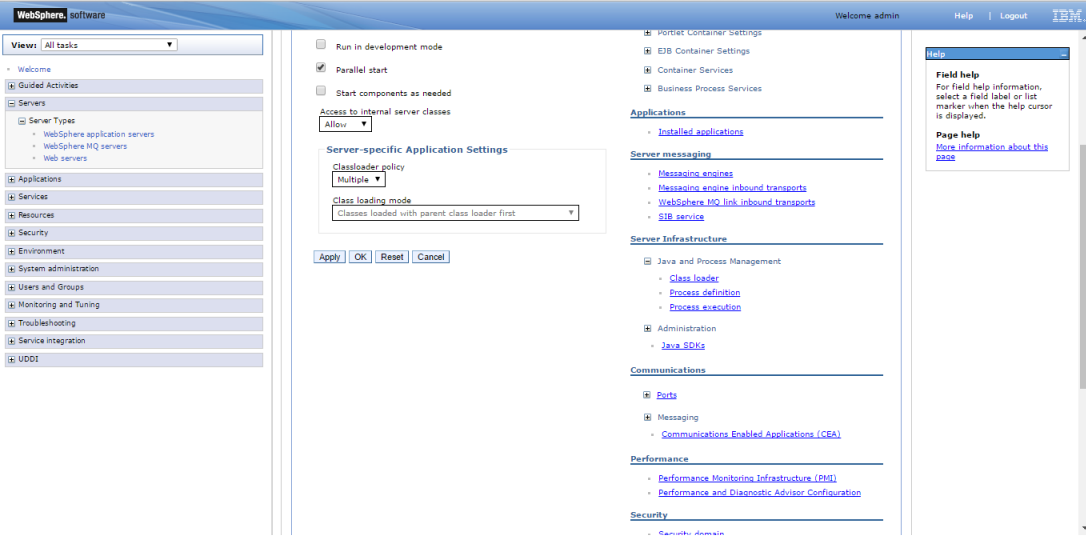
Figure 6 : Selecting the Process definition option from Java and Process Management tree
-
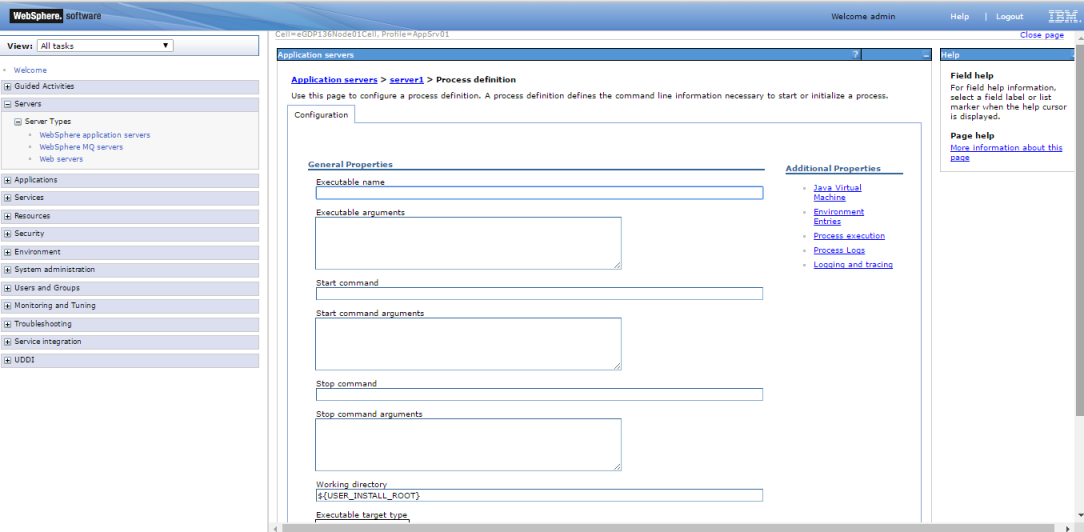
Figure 7 will then appear. From the Additional Properties section, select Java Virtual Machines.
-
When Figure 8 appears, scroll down its right panel until the Generic JVM Arguments text box comes into view.
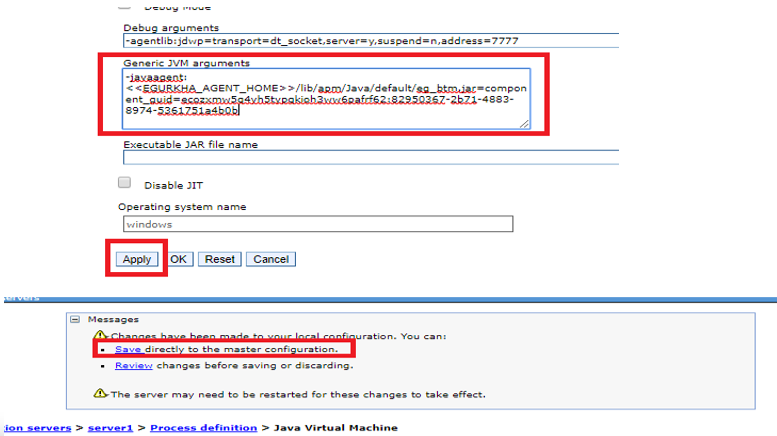
Figure 8 : Configuring the JVM arguments for a WebSphere Server on Windows
- Paste the code block you copied at step 5 above to the Generic JVM arguments specification, as indicated by Figure 8 above. When doing so, make sure you replace the <<EGURKHA_AGENT_HOME>> tag in the entry with the actual install directory of the eG agent deployed on the WebSphere server.
- Then, click the Apply button and Save link in Figure 8 to save the changes.
- Finally, stop and start the server.
-
-
To use the server.xml file, do the following:
- Edit the server.xml file in the <WebSphere_Install_Dir>\AppServer\profiles\AppSrv01\config\cells\eGDP183Node01Cell\nodes\eGDP183Node01 \servers\<WebSphere_server_instance_to_be_BTM-enabled> directory.
-
Look for the genericJvmArguments section in the file, and append the code block you copied at step 5 above to that section (see Figure 9).
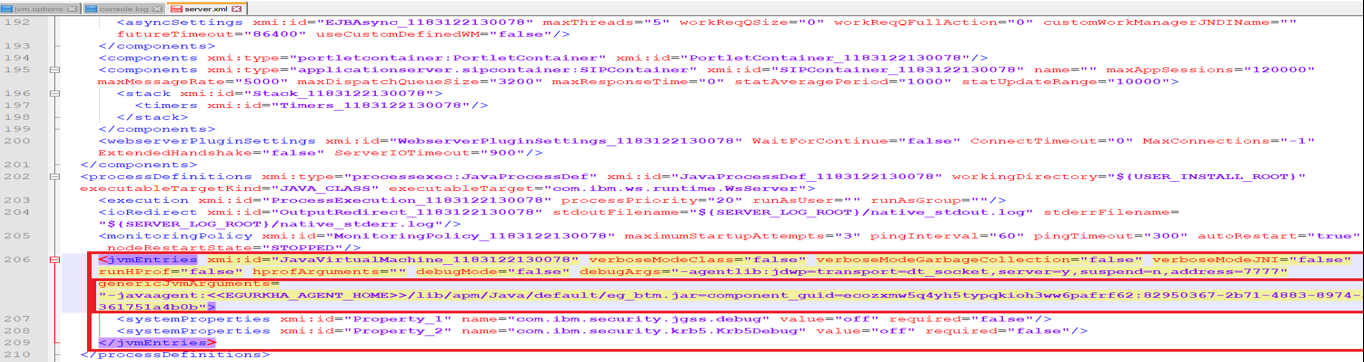
- Then, save the file.
-
Finally, start and stop the server.
Verifying Whether/not the WebSphere server is Successfully BTM-enabled
You can verify whether/not the WebSphere server was successfully BTM-enabled. For that, follow the steps below:
-
Open the application server’s standard output log file. This is the native.stdout.log file, which you will find in the <WEBSPHERE_INSTALL_DIR>\AppServer\profiles\AppSrv01\logs\<WEBSPHERE_SERVER_INSTANCE>\ directory.
-
Check for the presence of “[eG BTM]” and “BTM is ENABLED” in application server’s standard output. If this text is present in the native.stdout.log file, as indicated by Figure 10, it implies that the –javaagent entry is taken and BTM is successfully enabled.
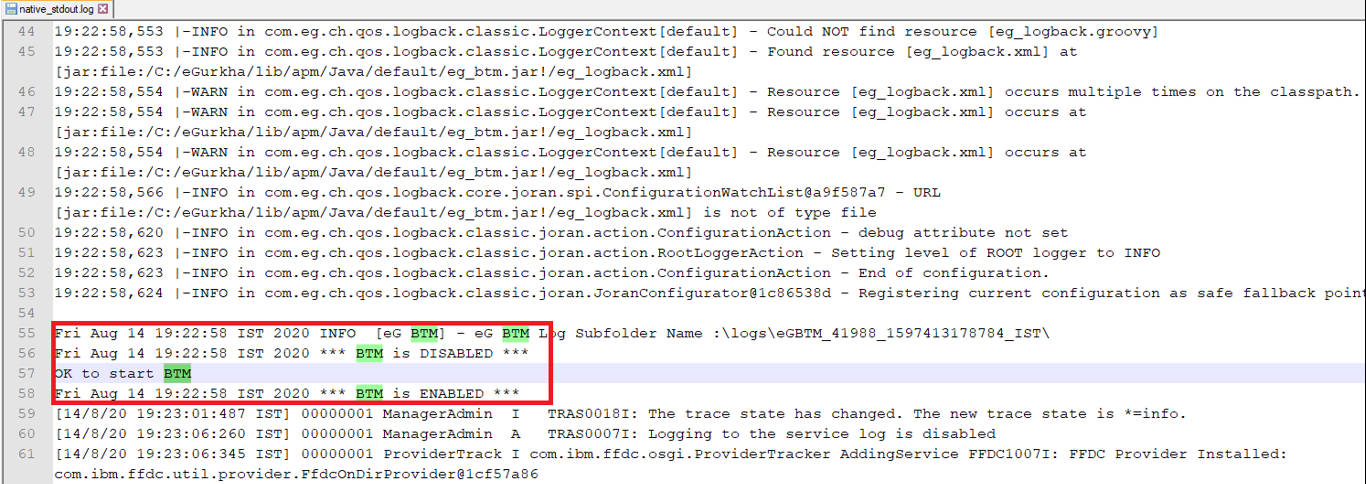
Figure 10 : Verifying whether/not the WebSphere server is successfully BTM-enabled