Control Actions
Monitoring solutions often provide the ability to alert an administrator over email, pager, SMS, etc., when problems occur. In response to an alert, the administrator has to perform domain-specific detailed analysis of the problem, often by running different commands on the target system. In this process, the administrator has to figure out and initiate corrective measures. Most monitoring solutions provide remote problem alerting capability, but the ability to remotely login in a secure manner and perform detailed analysis and troubleshooting is not available. To allow true anytime, anywhere management capability, such remote control of the target IT infrastructure must be possible using a web browser.
eG’s Remote Control Action capability allows an administrator to remotely and securely access any monitored server in an IT infrastructure and to execute remote commands in order to perform detailed analysis of problems and to initiate corrective actions against them.
The benefits of eG’s remote control actions are:
- Enable remote control in addition to routine monitoring, thereby offering a quick and easy way of initiating corrective actions
- Remote diagnosis and control of any component in the monitored infrastructure is enabled from anywhere, using just a web browser
- Remote control capability is selectively enabled for users based on their access rights
The control actions are enabled with no change in the eG architecture. The agents do not listen on any TCP ports. Hence, security risks in the target environment are minimum. Furthermore, since control actions can be initiated from a web browser, they can be triggered from anywhere, at any time.
To understand this concept better, consider the example of a web server shown in Figure 1.
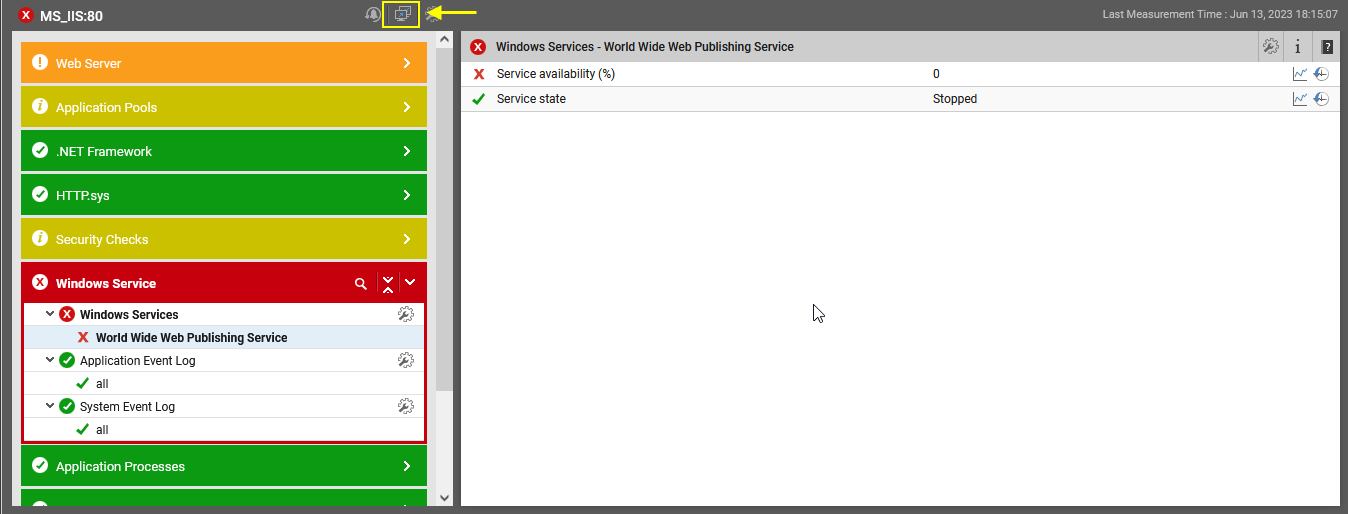
Figure 1 : A web server indicating a problem in the Windows Service layer
Figure 1 indicates that the World Wide Web Publishing service of a web server has stopped running and hence, the web server is not available. Starting this service in the web server host will solve this problem. For this, you will not be required to manually access the host and start the WWW service in it.
Instead, simply click on the  (Remote Control) button indicated by Figure 1. Upon clicking, a page depicted by Figure 2 will appear.

Figure 2 : Executing a remote command for starting the service
Follow the steps below on Figure 2, to get the WWW service back up:
-
From the Actions drop-down list in Figure 2, you need to pick the remote action that you want to perform on the web server host. Typically, for any managed component, eG Enterprise readily provides a set of pre-configured commands to choose from. Closely-related commands are grouped together to form a command category - for instance, commands that are to be run on the operating system are grouped under the OS category. The Actions drop-down will list these default categories and the commands in each category. If no command is pre-configured for any component, then the OS category alone will appear in the Actions drop-down, with a single 'Execute Command' (if a user is authorized to execute custom commands) bundled within. In the case of the web server in our example, the Actions drop-down list displays the 'Execute Command' option alone. Selecting this option enables you to run any custom command on the target host, remotely. In the case of our example therefore, select Execute Command and then specify the command to start the WWW Service in the Command text area in Figure 2.
The Execute command option will appear only if a user is authorized to execute a command that is outside of the Actions list. By default, eG Enterprise will not allow any user (including a user with unlimited administrative privileges) to execute custom commands. To enable this capability, first, you need to do the following:
- Edit the eg_services.ini file in the <eg_install_dir>\manager\config directory
- You will find an ExecuteAnyCommand parameter that is set to No, by default. This indicates that, by default, only the admin user is privileged to execute commands other than the ones listed in the pre-configured list.
-
To extend that right to other users, set Yes against the ExecuteAnyCommand parameter:
ExecuteAnyCommand=Yes
- Finally, save the eg_services.ini file.
-
Then, enter the Timeout period. This is the duration for which the eG manager will wait for an output for the specified command. Upon the expiry of the period, the command execution will be automatically terminated.
-
Finally, execute the command by clicking the Execute button in Figure 2.
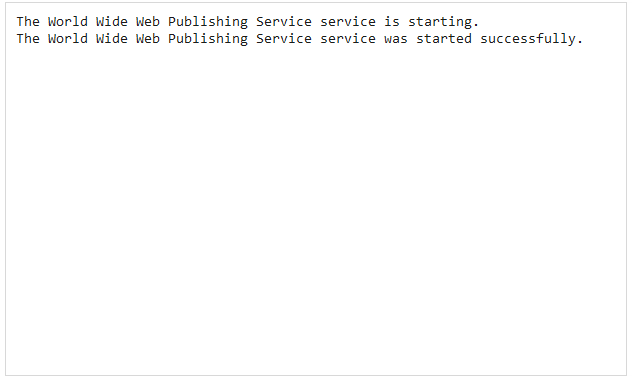
Figure 3 : Output of the specified command
Note:
If you attempt to run a remote command on a Citrix Virtual Apps server, Microsoft RDS server,
To run the Shadow user session command remotely on a Citrix Virtual Apps server, Microsoft RDS server,
-
Login to the target server.
-
Open the Group Policy Management Editor.
-
Browse the folder structure in the left panel, and open the Remote Desktop Services folder within. Then, expand the Remote Desktop Session Hosts folder, and click on the Connections folder therein.
-
The right panel will then change as shown by Figure 4 below.

Figure 4 : Enabling remote control of RDP user sessions via group policy
-
Double click on the Set rules for remote control of Remote Desktop Services user sessions option in the right panel.
-
When the Set rules for remote control of Remote Desktop Services user sessions dialog box appears, select the Enabled option therein to activate the policy setting. Then, pick the Full control with user's permission option from the Options list box (see Figure 4).
-
The eG monitoring console also allows you to choose one or more components you want to remotely control, and run commands on them simultaneously. For this, do the following:
-
Select the Remote Control option from the Miscellaneous tile in the Monitor menu. The Multi-System Remote Control Actions page will then appear as shown in Figure 5.

-
First, you need to select from the Category list to which a component to be added belongs ( see Figure 5). In eG Enterprise, components are grouped into categories based on their functionality – for instance, Active Directory, Cisco Routers, Citrix PVS, Kubernetes Cluster, HP 3PAR Storage, Oracle, Microsoft SQL, etc. are grouped under the Systems category, Physical Desktop Group, Microsoft Hyper-V, XenServer- VDI, VMware ESX, etc. are grouped as Hypervisors/Cloud VMs/Endpoints category and Microsoft AVD Host Pool component is grouped under AVD Host Pool category. If a specific Category is chosen, then only those component types that belong to the selected category will be available for selection in the Component type list of Figure 5. By default, the Systems option is chosen from this list (see Figure 6).

-
Once you selected the category, select the component type that you want to control from the Component Types list (see Figure 7).

-
Once you selected the component type from the list, the components of the chosen type will be populated in Components list box (Figure 7). Now, select one or more components that you want to control remotely as shown in Figure 8.

Figure 8 : Selecting components
Next, the Actions drop-down list will appear upon selecting the components. From the Actions list in Figure 8, you need to pick the remote action that you want to perform on the chosen host. Typically, for any managed component, eG Enterprise readily provides a set of pre-configured commands to choose from,. Closely-related commands are grouped together to form a command category - for instance, commands that are to be run on the operating system are grouped under the OS category. The Actions drop-down will list these default categories and the commands in each category.
-
For an example, let us consider a situation where you are facing slowness in one of the eG manager components that are being monitored and you wish to check whether the slowness is caused by poor network connectivity. In this case, select the action to be performed to check the connectivity of the target host from the Actions list and specify the IP address of the host in the IP Address field that appears upon selecting the action as shown in Figure 9.

-
Finally, execute the command by clicking the Execute button in Figure 9.
-
The output of the executed command will be displayed as shown in Figure 10.
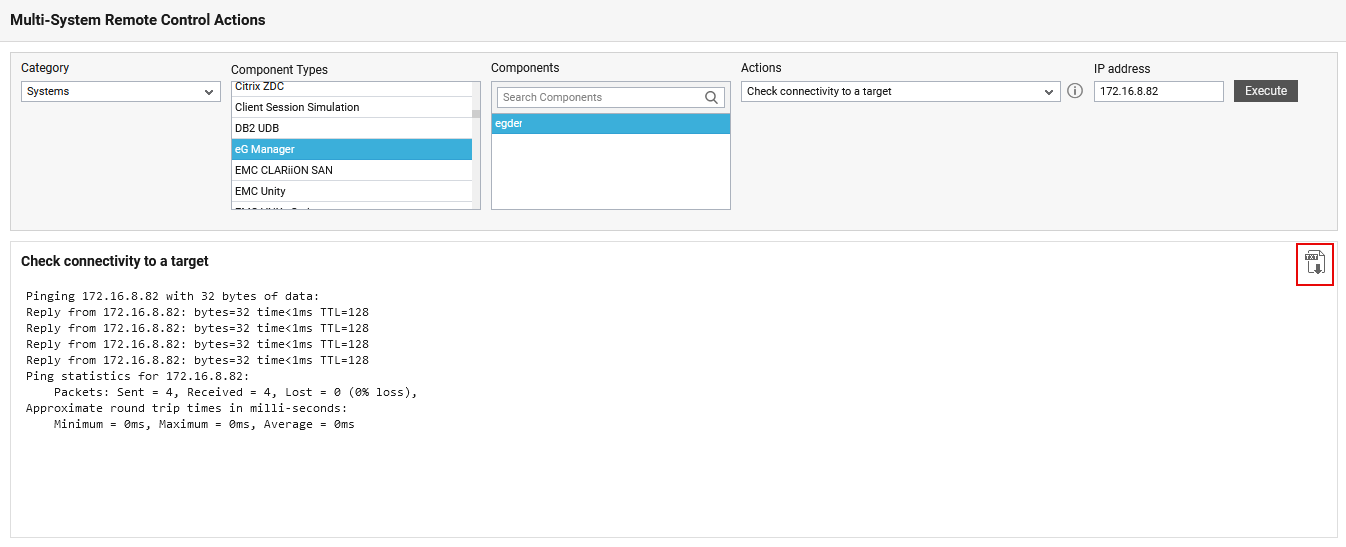
Figure 10 : The output of the executed command
You can download the output as a text file using the
 icon (see Figure 10) provided in the output panel. When you click the icon, the output will be downloaded in a text file format in the local system folder, by default.
 -
If no command is pre-configured for any component, then the OS category alone will appear in the Actions drop-down, with a single 'Execute Command' (this option will appear only of the user is authorized to run custom commands) bundled within. In such a case, the Actions drop-down list displays the 'Execute Command' (this option will appear only of the user is authorized to run custom commands) option alone. Selecting this option enables you to run any custom command on the target host, remotely.
- From the Actions drop-down, select the command to be executed remotely. By default, the Actions drop-down contains a set of pre-configured, ready-to-use commands. If the command to be executed is already available in the Actions list, select it, and specify the additional arguments (if any), that may be supported by the chosen command (see Figure 9).
-
If the command you want to execute is not pre-configured, then you have the following options:
-
First, add the command to the Actions list (using the Agents -> Settings -> Remote Control menu sequence in the eG administrative interface), and then select that command from the Actions list, OR,
-
Directly issue the command using the Multi-System Remote Control Actions page.
-
- If you opt for the former, then follow the procedure discussed in Administering eG Enterprise document.
-
If you pick the latter, you need to first check whether you are authorized to execute a remote command that is outside of the Actions list.
Note:
By default, only the admin user has the right to directly execute a command on the agent host. To grant such a right to any other user(s), follow the steps given below:
- Edit the eg_services.ini file in the <eg_install_dir>\manager\config directory
- You will find an ExecuteAnyCommand parameter that is set to No, by default. This indicates that, by default, only the admin user is privileged to execute commands other than the ones listed in the pre-configured list.
-
To extend that right to other users, set Yes against the ExecuteAnyCommand parameter:
ExecuteAnyCommand=Yes
- Finally, save the eg_services.ini file.
-
Once the right is granted to you, you can proceed to directly execute an 'unregistered' remote command by selecting the Execute Command (this option will appear only of the user is authorized to run custom commands) option from the Actions list, and providing the Command (see Figure 3).
- Then, enter the Timeout period. This is the duration for which the eG manager will wait for an output for the specified command. Upon the expiry of the period, the command execution will be automatically terminated.
- Finally, execute the command by clicking the execute button in Figure 3.