Designing a My Dashboard
Follow the steps mentioned below to design a custom My Dashboard of your interest.
-
The icon ribbon available next to the dashboard name list box (Figure 1) helps you to design the look and feel of the dashboard. To design a custom My dashboard of interest to you, click on the Add a Widget button in Figure 1.
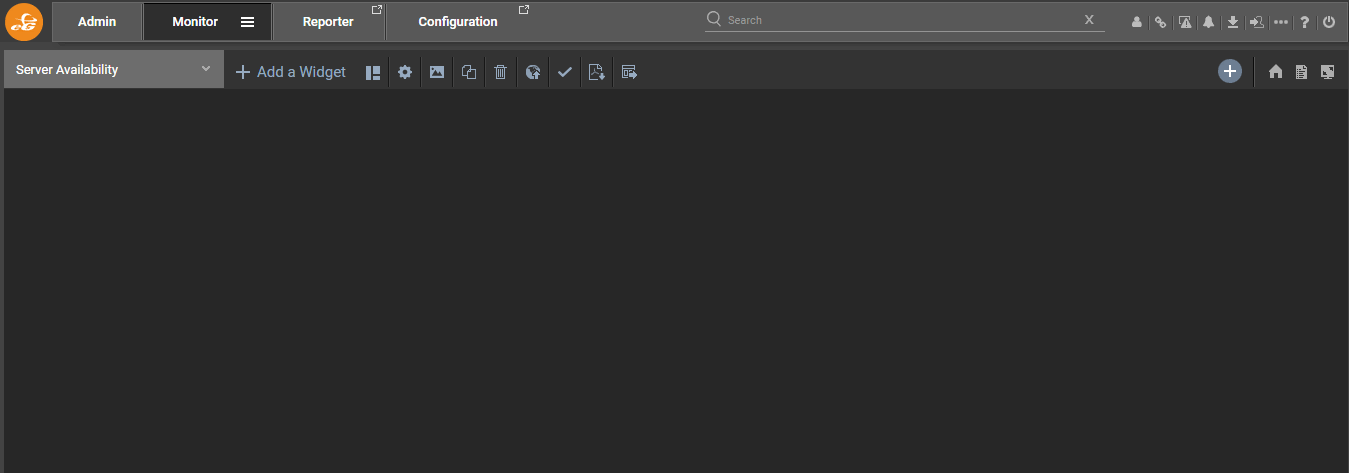
Figure 1 : A My Dashboard that is newly created
Figure 2 then appears. By default, there are two panels in the Add Widgets pop up window as shown in Figure 2 i.e., the left panel and the right panel. The Configurable Widgets tab is selected by default in the left pane and the widgets corresponding to that tab are displayed in the right panel (see Figure 2). Using the widgets available in Figure 2, you can configure the dashboard according to your choice. To know how to configure the widgets, refer to Configurable Widgets of My Dashboard.
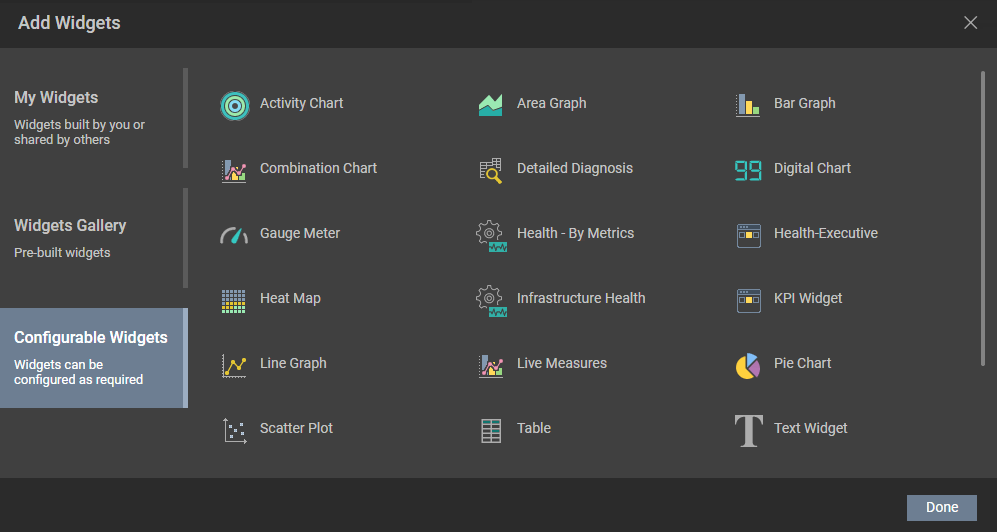
Figure 2 : The Add Widgets pop up window
Note:
You cannot add a widget corresponding to the Configurable Widgets tab while designing a One Click Dashboard. To this effect, the Configurable Widgets tab will be inaccessible when you click the Add a Widget button in a One Click Dashboard.
-
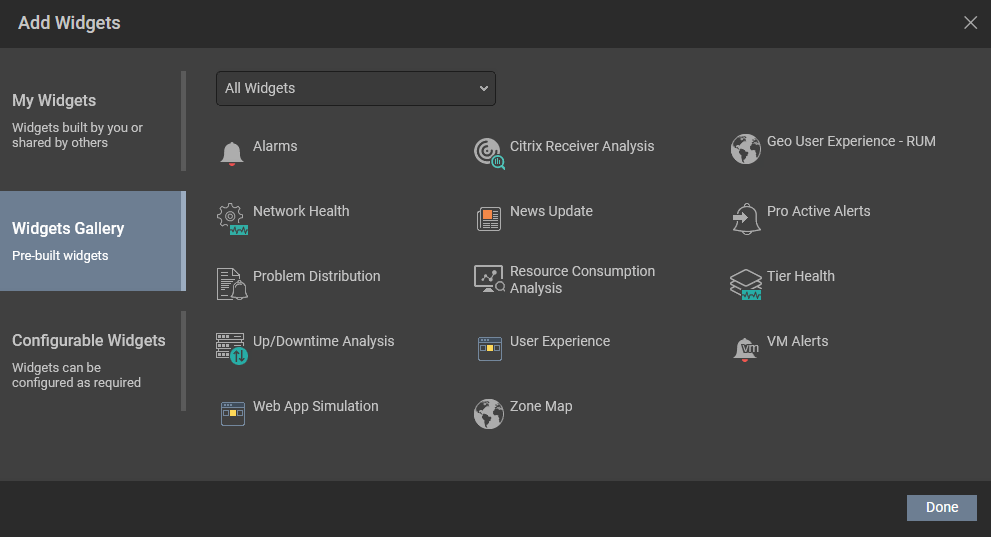
If you do not wish to configure the widgets, but instead, wish to build the dashboard with the pre-built widgets offered by eG Enterprise, then, you can use widgets from the Widgets Gallery tab. Figure 3 lists the widgets that are pre-defined and offered by eG Enterprise to create a dashboard. To know more on the pre-built widgets offered, refer to Pre-built Widgets of My Dashboard.
-
If you have created a template on your own with the widgets of your own or if other users have shared widgets that they have created with you, then such widgets will be available in the My widgets tab (see Figure 4). You can use these widgets too to build a custom My dashboard. To know how to create a custom template and custom widgets, refer to Building a Custom Template.

-
To choose a layout of your choice for your dashboard, click the
 icon. Figure 5 will then appear listing all the pre-defined template layouts.
Figure 5 : Choosing a pre-defined template layout
By default, 3 will be chosen in the Columns list of Custom Template section indicating that 3 widgets will be added to a single row in the dashboard that is to be built. However, if you wish to add more than 3 widgets to a single row, you can do so by choosing an appropriate number from the Columns list.
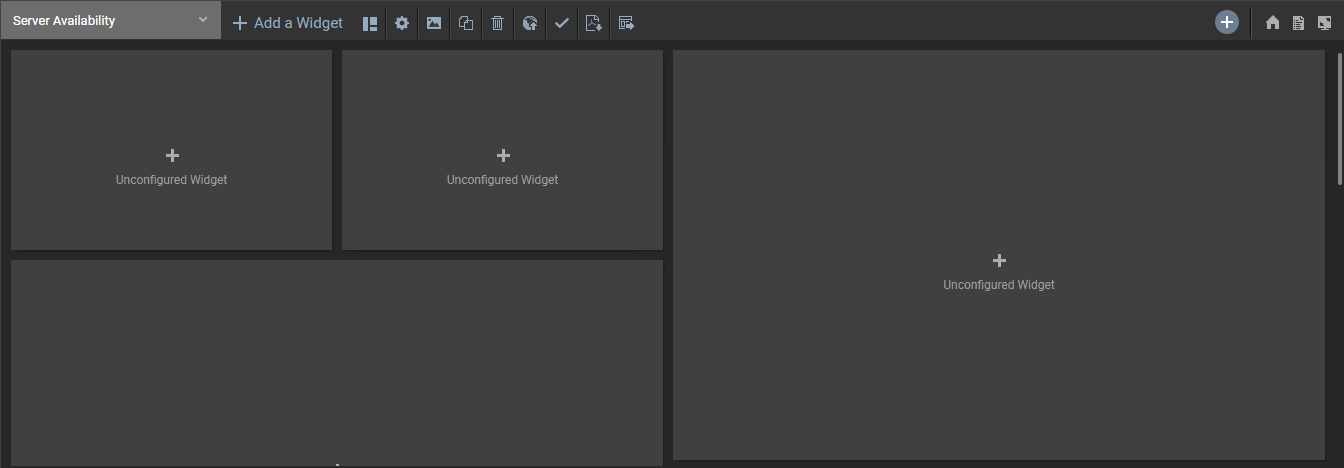
Alternately, choosing a layout from the Predefined Templates section (see Figure 5) will populate an empty template in your dashboard as shown in Figure 6 using which you can configure the widgets for the dashboard.
-
To modify the dashboard on the fly, click on the
 icon in Figure 6 . The Modify Dashboard pop up window (see Figure 7) will then appear allowing you to modify the settings of the dashboard that is currently being built.
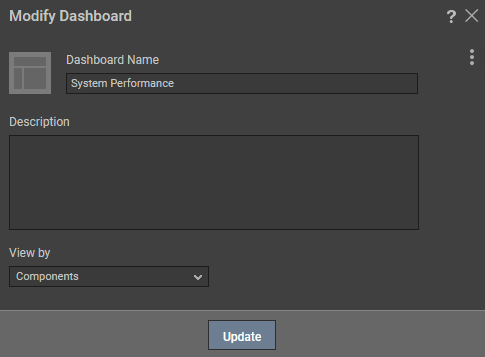
-
You can even personalize the background of your dashboard by clicking the
 icon. Figure 8 will then appear listing a set of background themes.
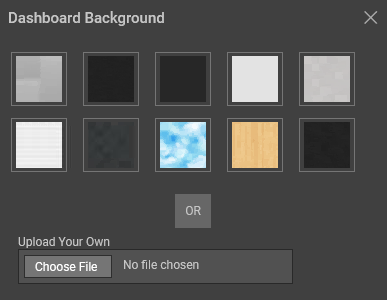
Figure 8 : Changing the background of the dashboard
Clicking on any background theme will change the background of the dashboard accordingly. You can also import any image of your interest as a dashboard's background to reflect your interest or mood by simply uploading an image using the Choose File option available in the Upload Your Own section of Figure 8.
-
To clone a dashboard, click the
 icon in Figure 6. Figure 9 then appears. In the New Dashboard Name text box, specify a name for the new dashboard and click the Clone button.
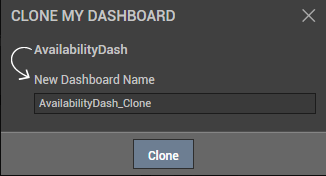
-
If you want to delete the dashboard, click the
 icon in Figure 6.
 -
To publish any of the existing dashboards through Microsoft SharePoint to other users in your organization, click on the
 icon in Figure 5 or
  icon corresponding to each dashboard (see Figure 11) Figure 10 will then appear listing the Name and the Publish Url of the dashboard that is to be published.
Figure 10 : The Publish Dashboard pop up window
Clicking the Publish button will help you publish the chosen dashboard. Once the dashboard is published, the
 icon will appear along with the Name of the dashboard as shown in Figure 11.
Figure 11 : An icon appearing next to the published dashboard
You can hover over this icon to view the Publish URL at any point of time. Likewise, you can unpublish a published dashboard by clicking the
icon corresponding to each published dashboard in Figure 11. Figure 12 will then appear. Clicking the Unpublish button in the Unpublish Dashboard pop up window will unpublish the dashboard.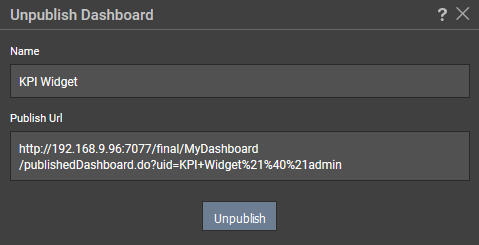
Figure 12 : Unpublishing the dashboard
Note:
When the dashboard is accessed through the Publish URL, the dashboard shows the time at which the dashboard was last updated. The displayed time will be in the time zone in which the user created the dashboard.
If you do not want to publish the dashboards created in your environment and wish to permanently remove the
icon from being displayed in Figure 11, then, you can do so by setting the hidePublishedDashboard option to Yes in the [DASHBOARD_SETTINGS] section of the eg_customdashboard.ini file available in the <eG_INSTALL_DIR>/manager/config folder. Note that before you set the hidePublishedDashboard option to Yes, ensure that you have unpublished all the dashboards in your environment. -
To set a dashboard as the default dashboard, click the
 icon available against the dashboard ( see Figure 11) or
  icon in Figure 1.
 -
To export the dashboard as a PDF, click the
 icon (see Figure 1).
 -
To export the dashboard as a template, click the
 icon (see Figure 1). Figure 13 will then appear.
Figure 13 : Specifying the name of the Exported Template
In the New Template Name text box, specify a name for the new template and click the Export button. The exported template will then be listed in the AVAILABLE TEMPLATES page as shown in Figure 14.
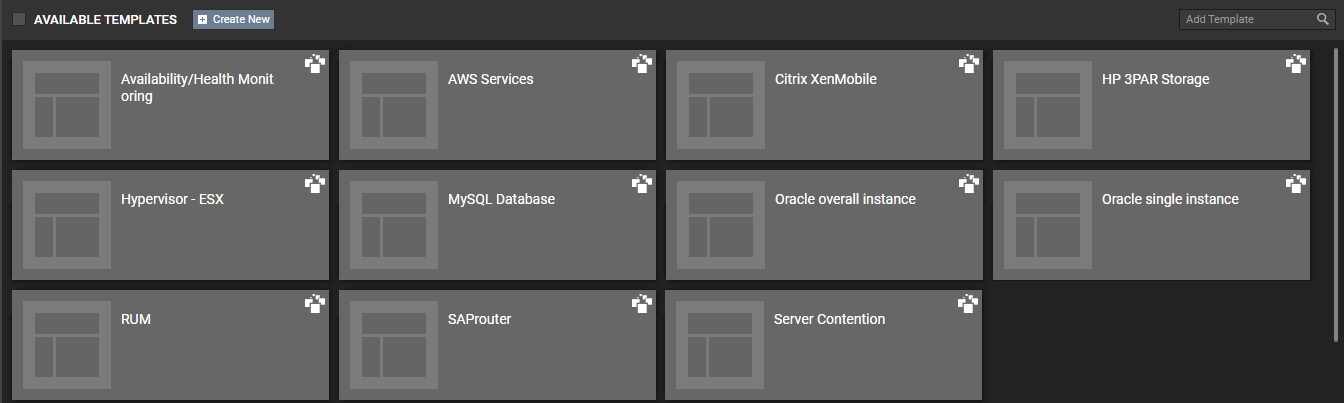
Figure 14 : The Available Templates page listing the exported template
-
If you wish to open the dashboard in a separate window, then you can do so by clicking the
 icon (see Figure 1).
 - If you want to delete a dashboard, click the
 icon in Figure 1 or click the icon against a listed dashboard in Figure 11. To remove all dashboards, select the check box that pre-fixes each dashboard, and then click the
  icon (see Figure 11).
 -
A sample dashboard built with different widgets is shown in Figure 15.
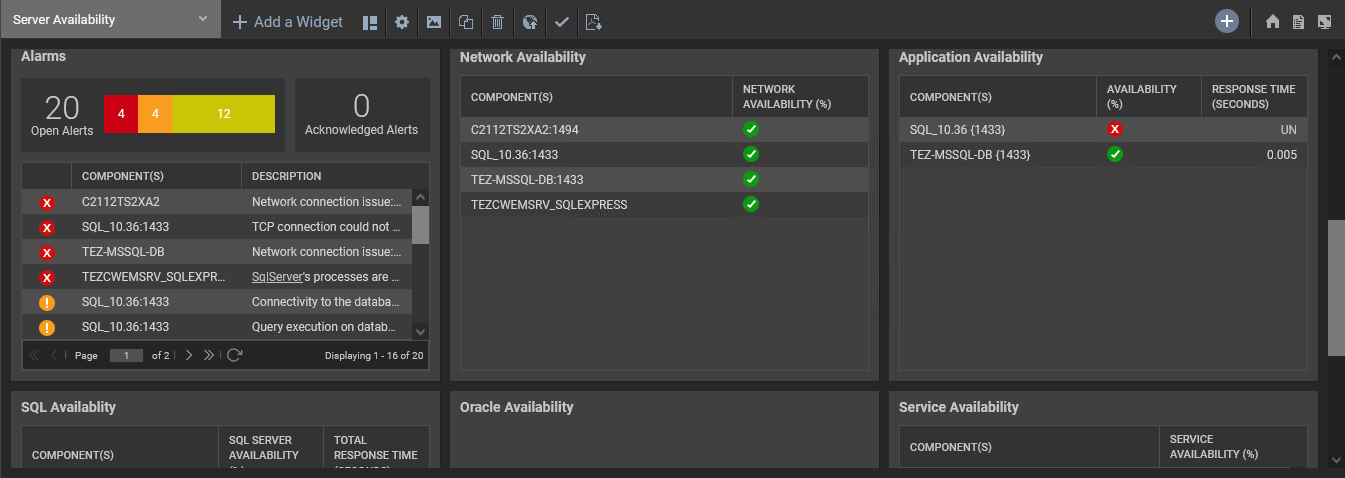
Figure 15 : A sample dashboard that is not set as the default dashboard