Pre-requisites for Monitoring Oracle Cloud Infrastructure Load Balancer
In order to pull metrics through REST API calls, we need to create a user in the Oracle Cloud Infrastructure. Users must be assigned to groups in a domain. Policies will be assigned for each group.
To monitor the Oracle Cloud Infrastructure Load Balancer using eG Enterprise, you need to fulfill certain prerequisites.
-
For this, you need to login to the Oracle Cloud Infrastructure using a valid email ID belonging to a valid Oracle Cloud account (see Figure 1).
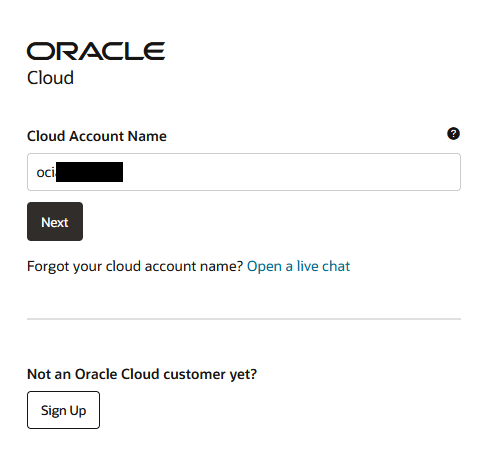
Figure 1 : Specifying the Oracle Cloud Account name
-
Next, specify the credentials of the user to login to the Oracle Cloud Infrastructure console (see Figure 2).

Figure 2 : Signing in to the Oracle Cloud
-
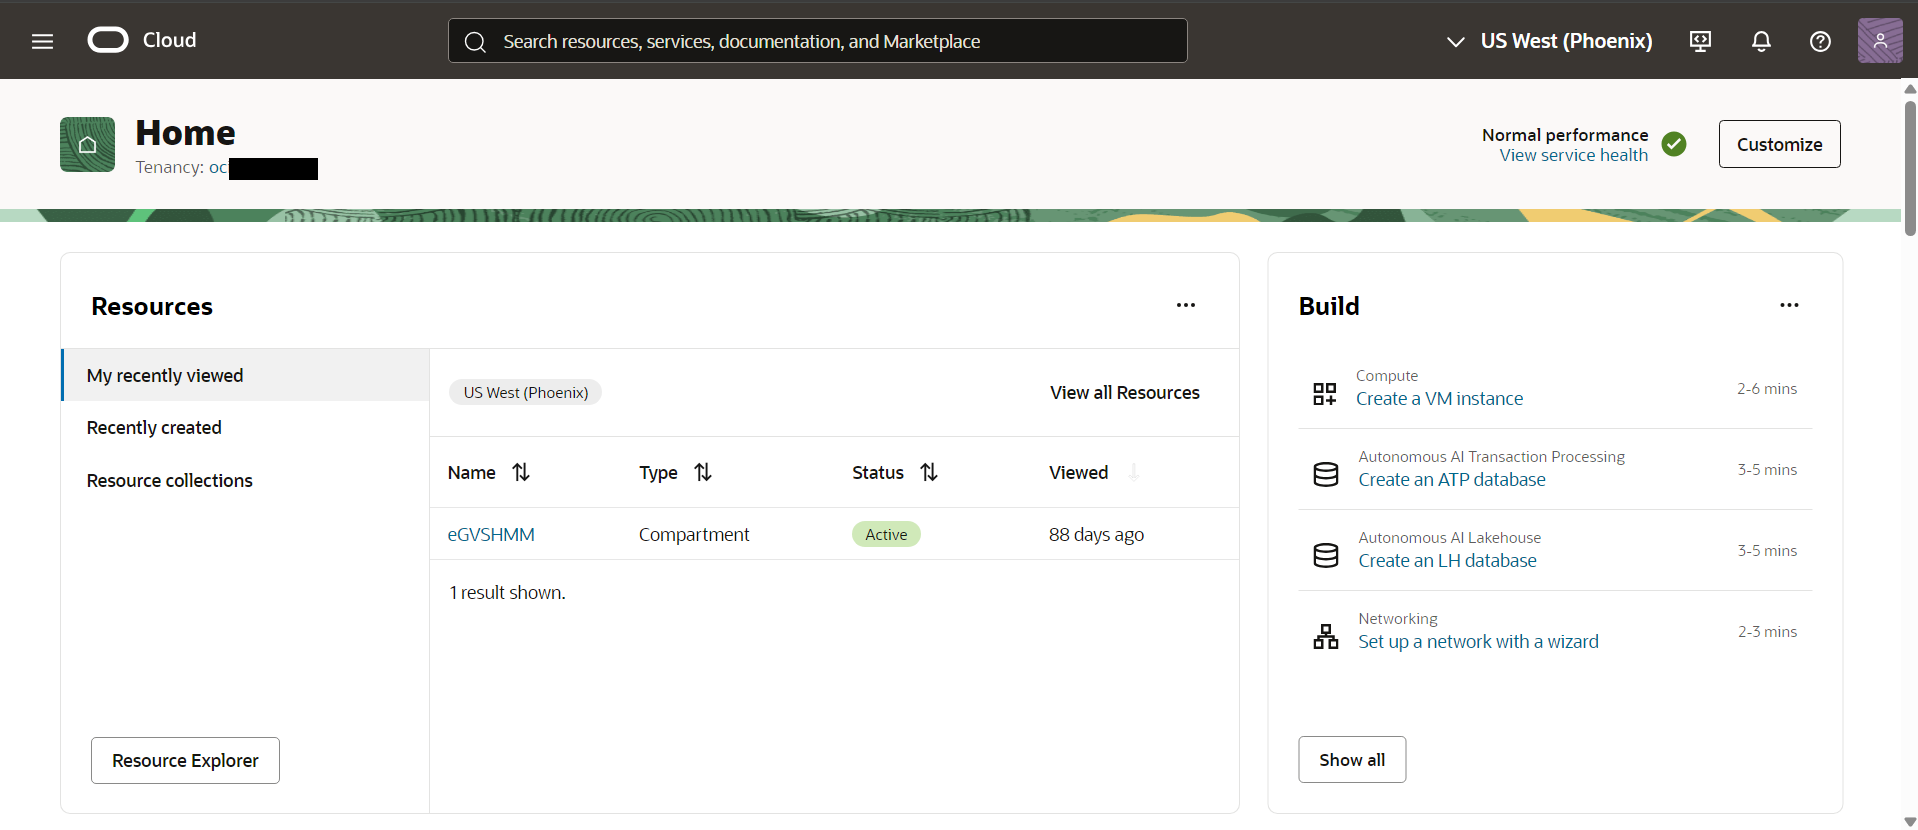
Once you Sign in, you will be directed to the home page (see Figure 3).
Creating a Group
To create a group in the Oracle Cloud Infrastructure, follow the below steps.
-
Navigate through Identity & Security -> Domains as shown in Figure 4.
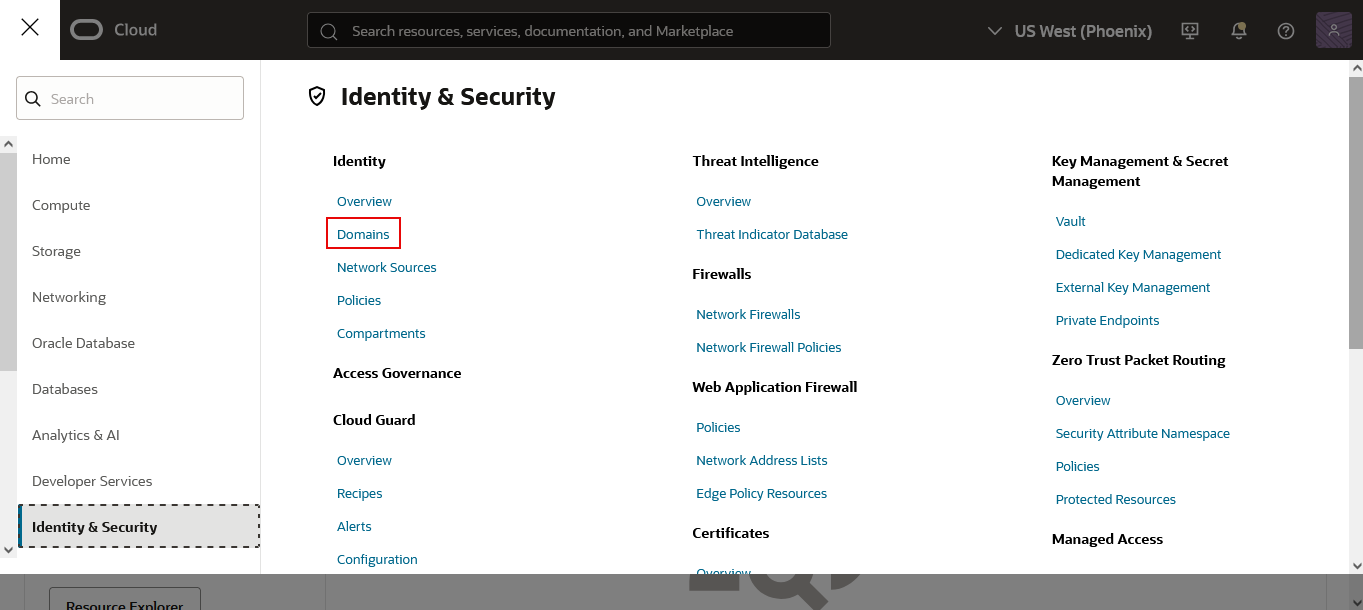
Figure 4 : Identity and Security Tab Page
-
In the page that appears (see Figure 5), the domains that pre-exist will be displayed. Click the domain within which you wish to create a new group. In our case, we are about to create a group in the Default domain.
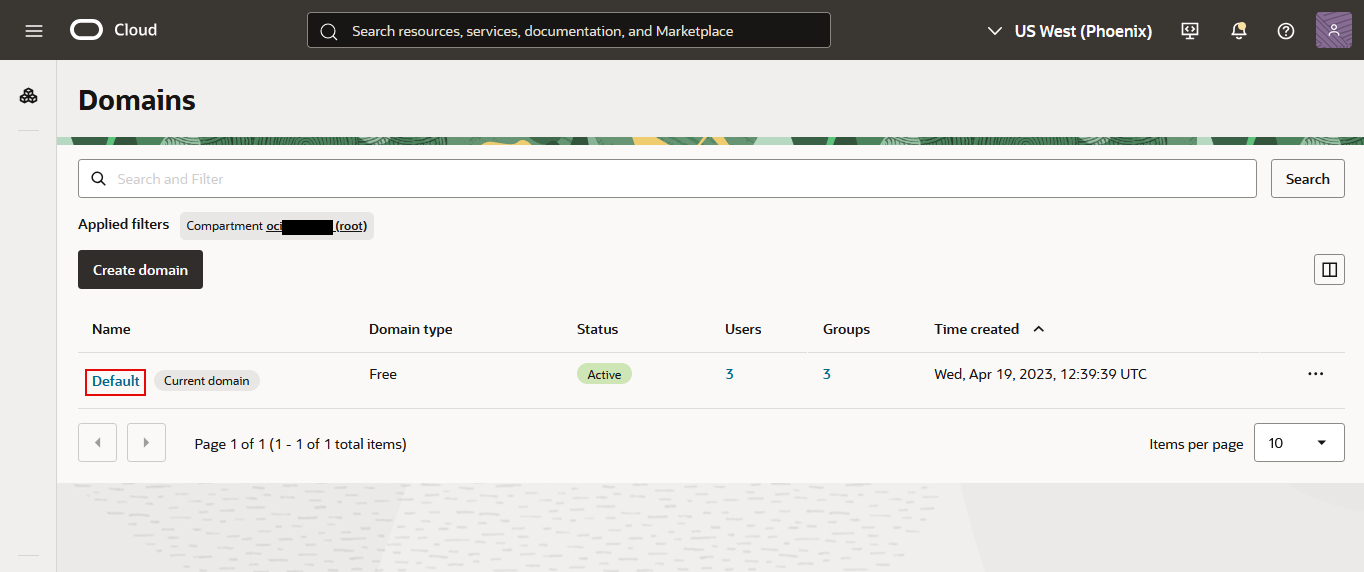
Figure 5 : Creating a Group in the Domain
-
Figure 6 will then appear listing the details of the domain.
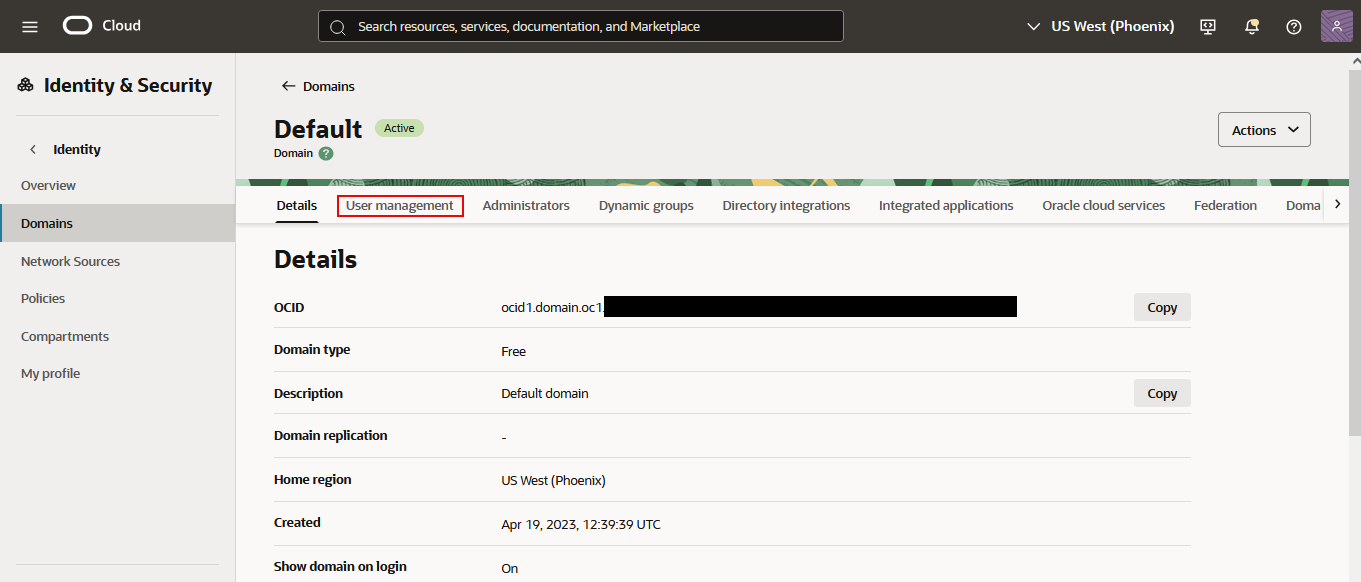
Figure 6 : Domain Details Page
-
Clicking on the User Management tab in Figure 6 reveals Figure 7 that lists the users and groups that are pre-exisitng in this domain. To create a new group, scroll down to the Groups section and click the Create group button.
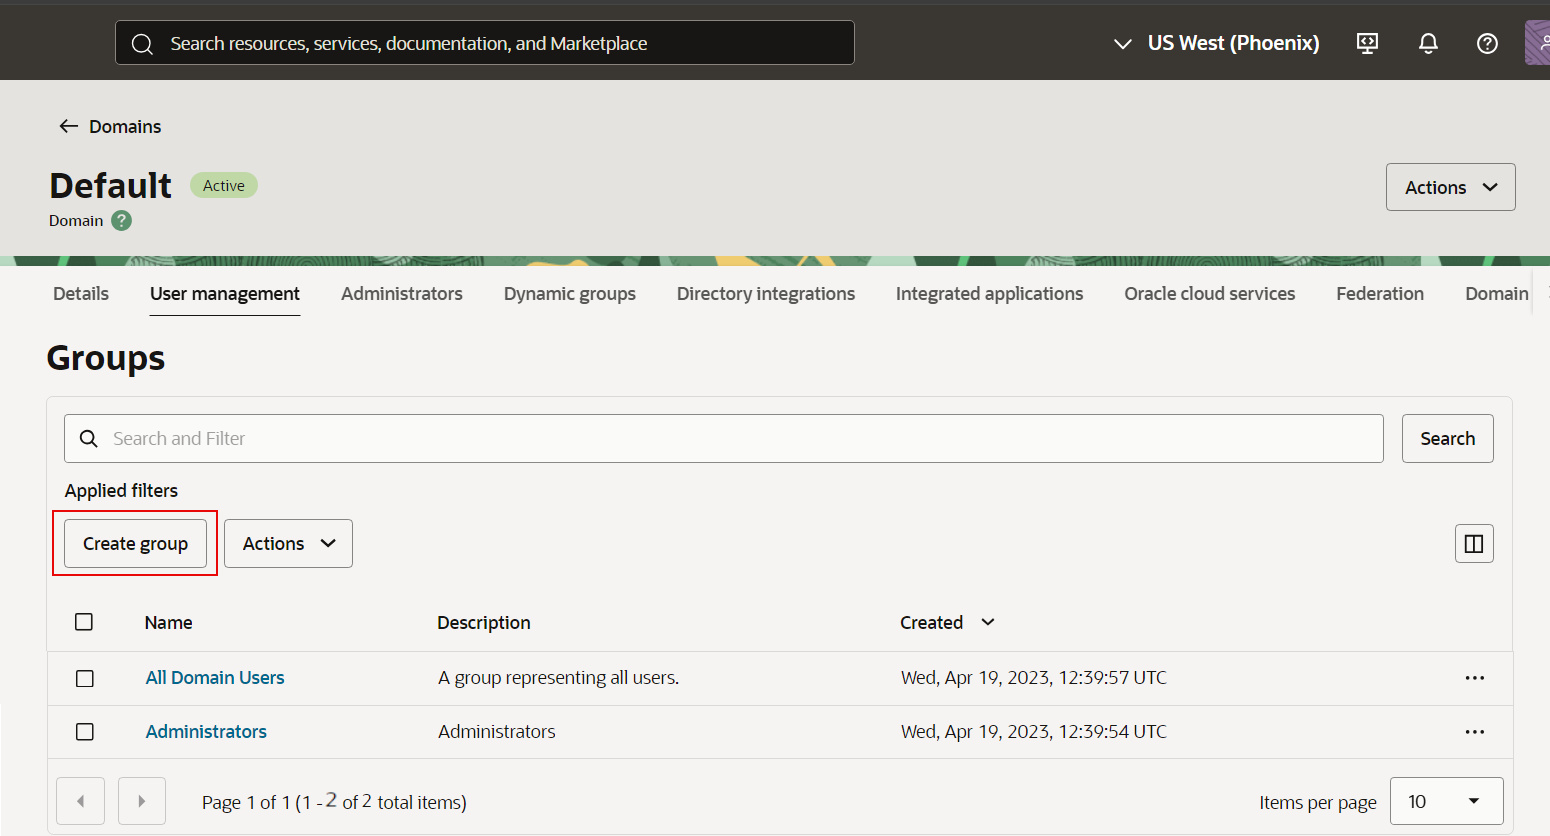
Figure 7 : List of Existing Groups
-
Figure 8 then appears. Enter the Name and Description and then click the Create button.
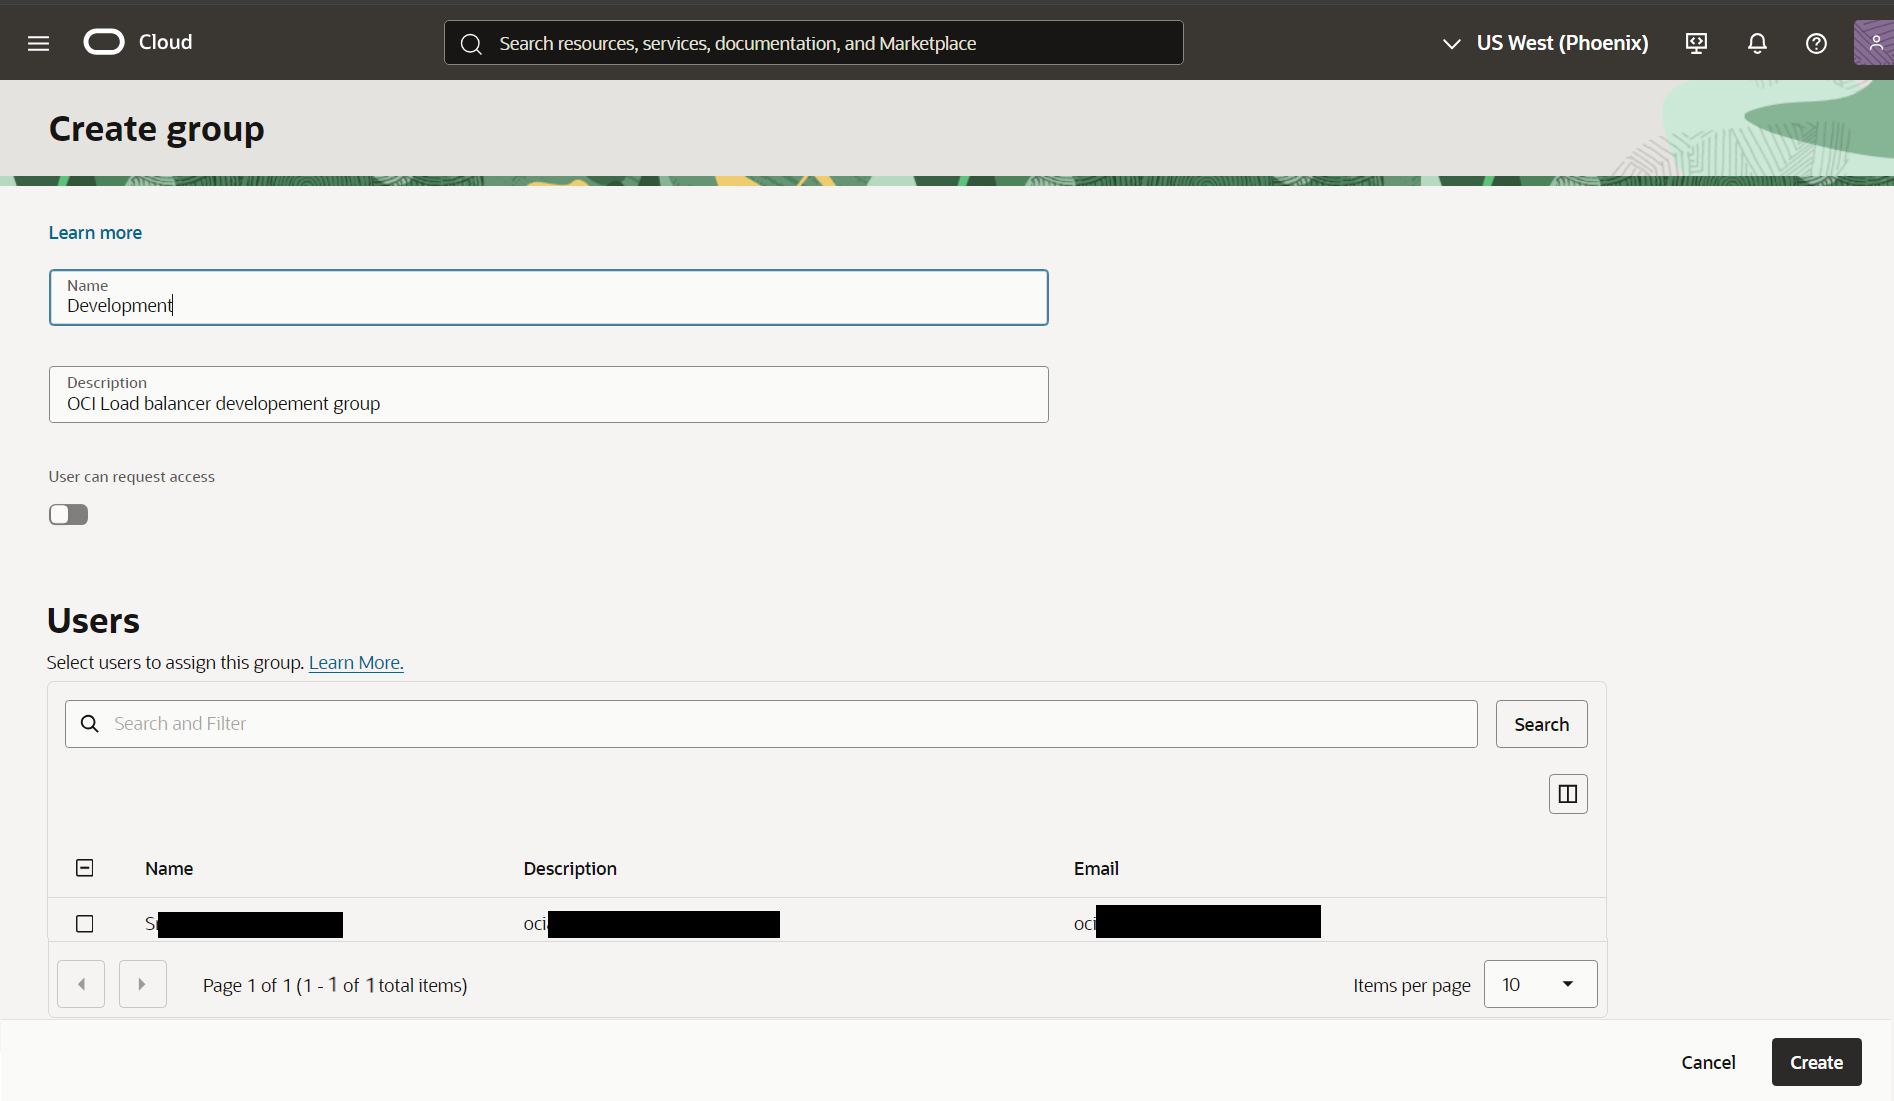
Figure 8 : Creating a New Group
-
A new group Development is now created (see Figure 9).
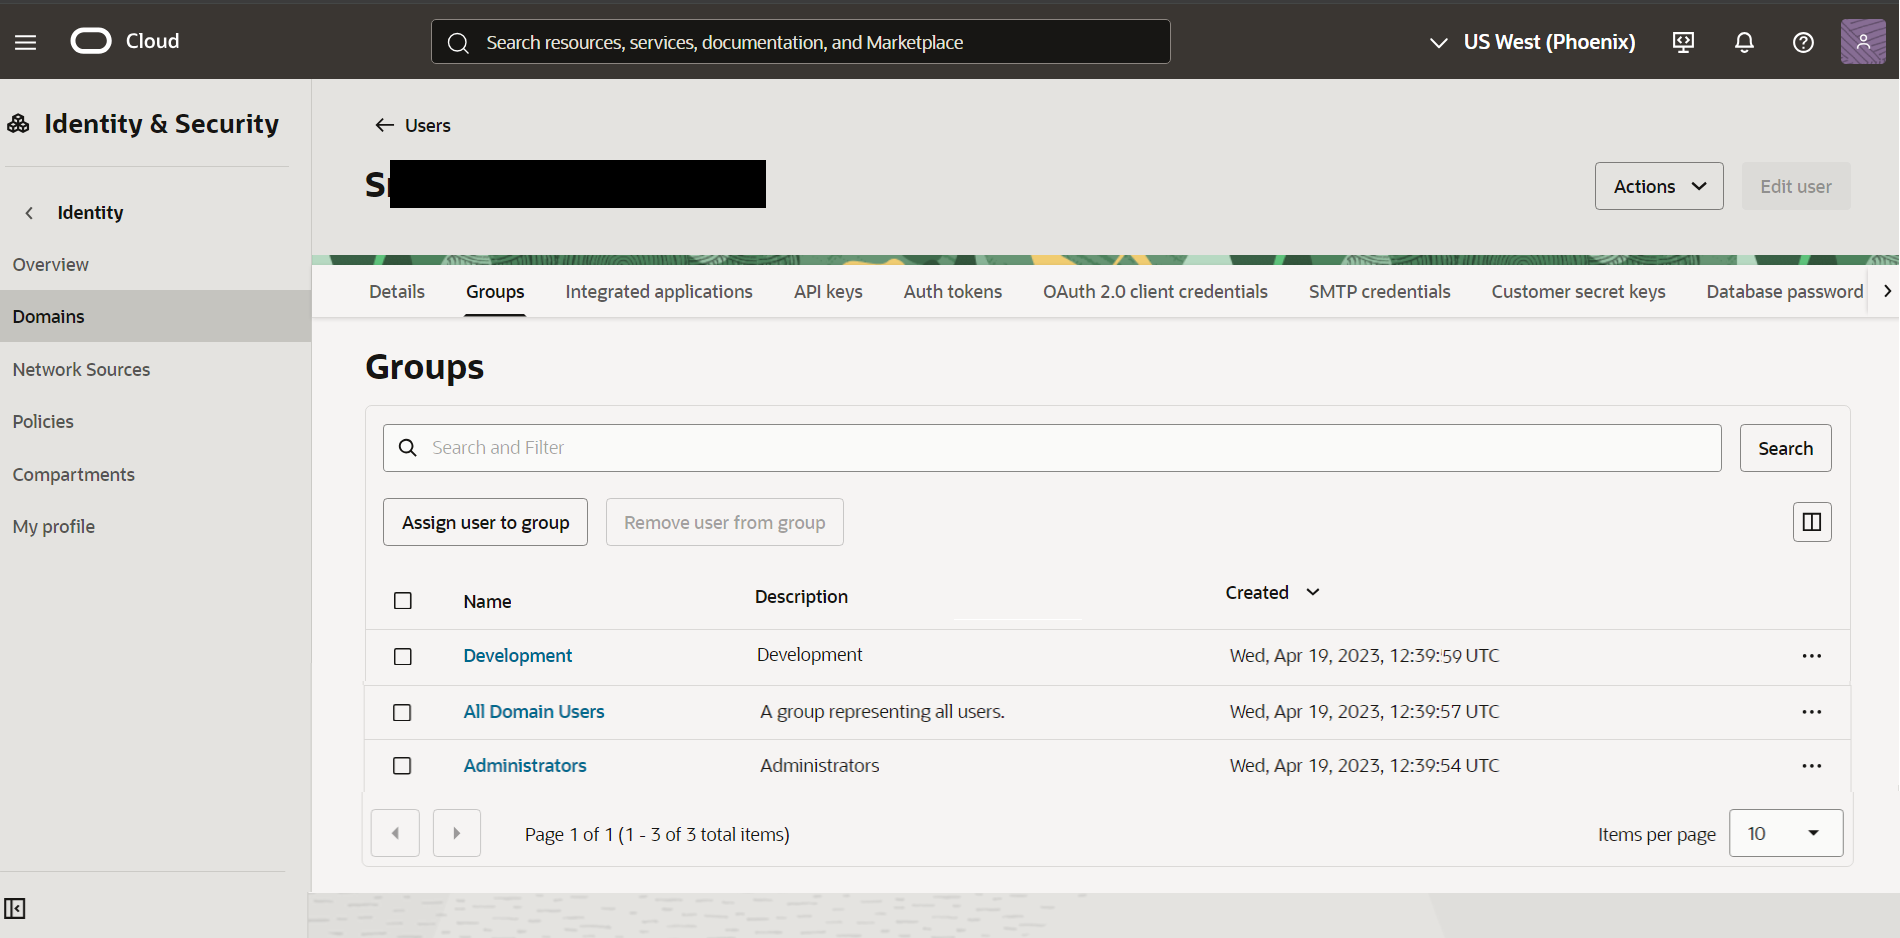
Figure 9 : Displaying the newly created group
Creating a New User
To create a user in the Oracle Cloud Infrastructure,
-
Click the User Management tab in Figure 6. Figure 10 then appears listing the pre-existing users in this domain. Here, click the Create button.
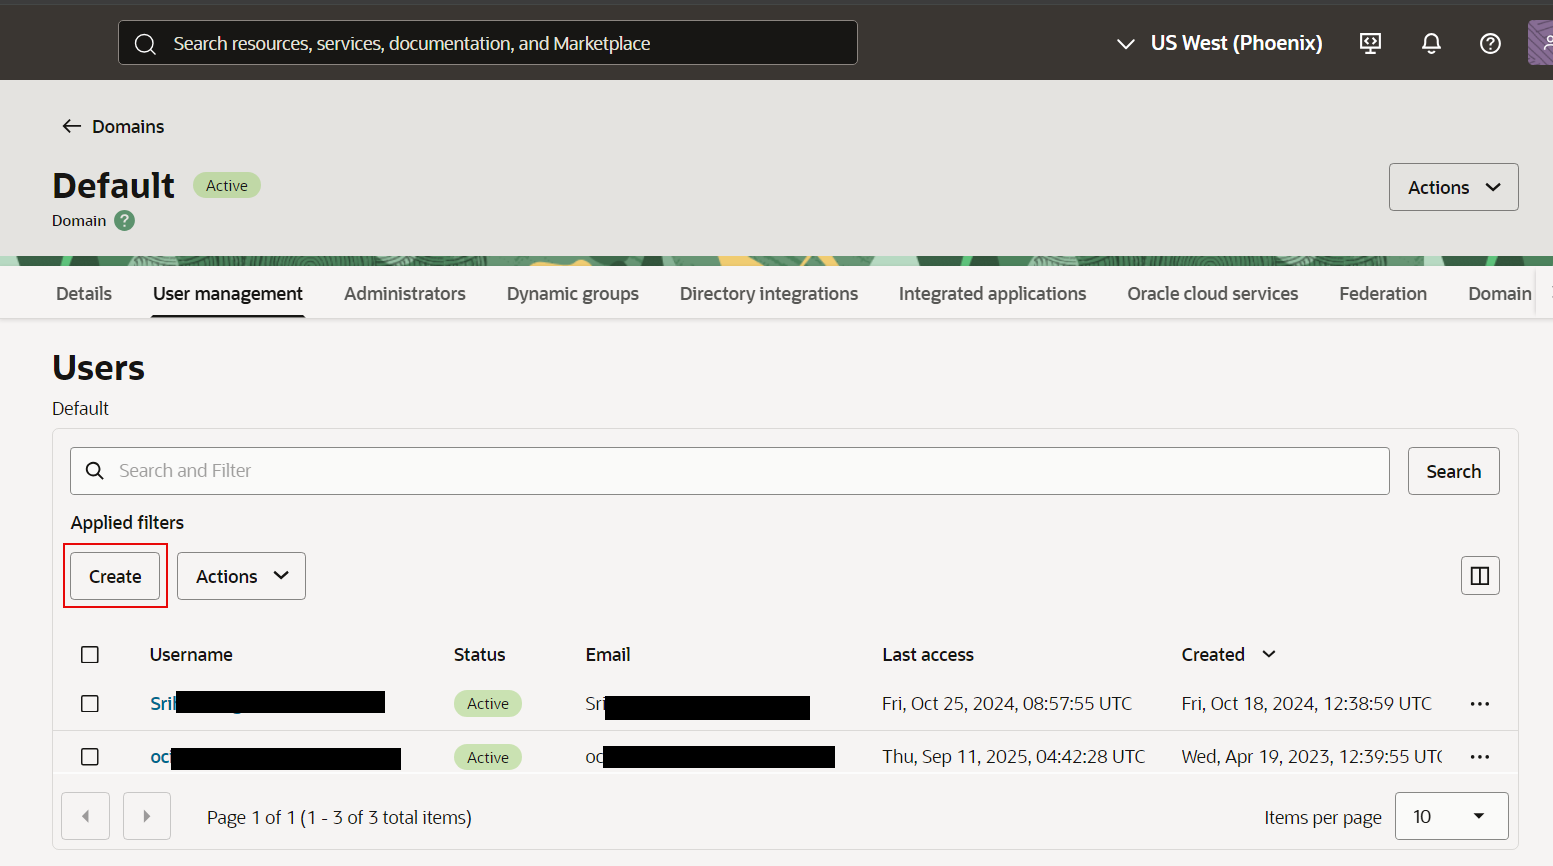
Figure 10 : List of Existing Users in the Domain
-
Figure 11 then appears. Enter the First name, Last name, Username/Email in the respective text boxes and select the group to which you wish to assign the user to by checking the check box preceding the group of your choice.
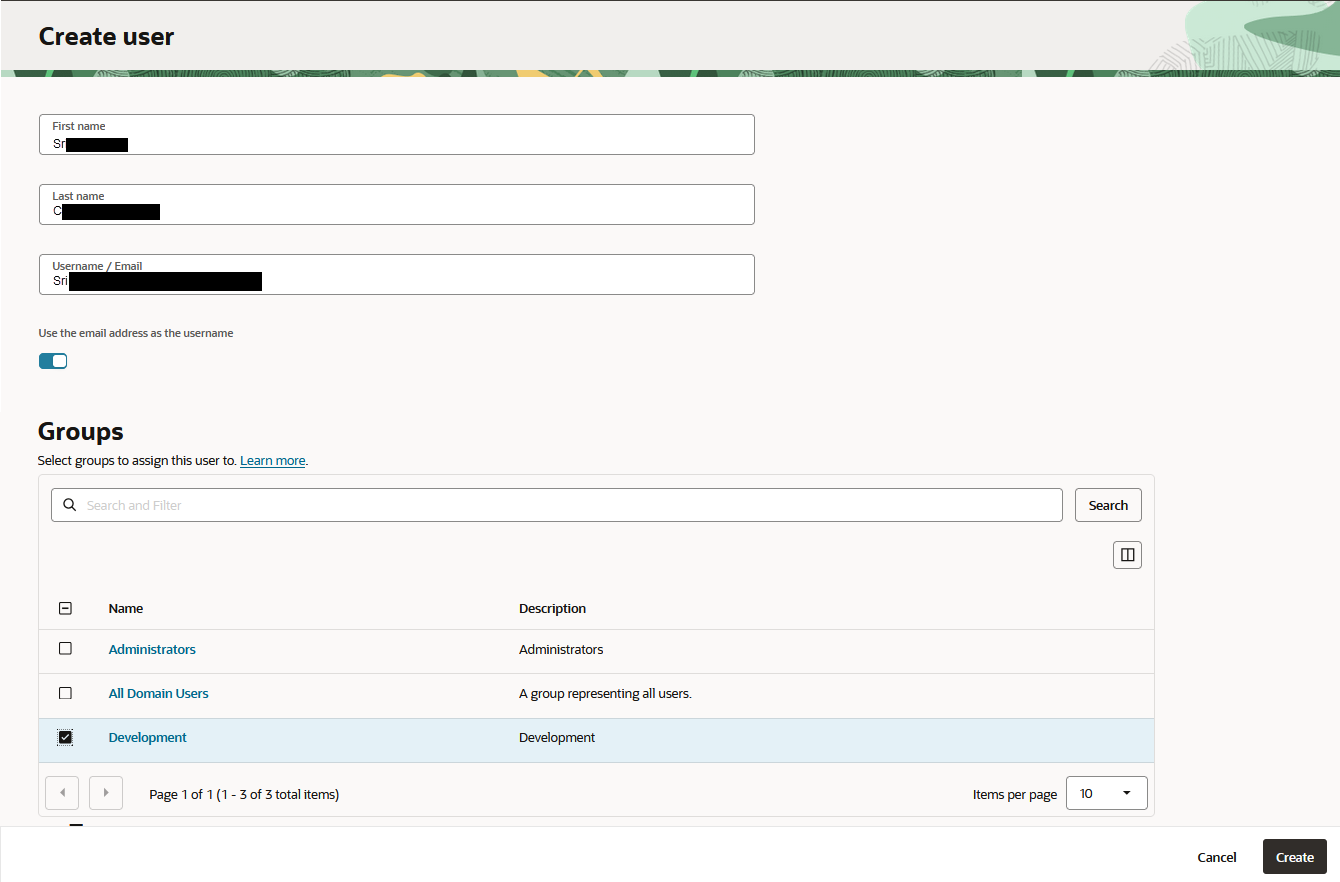
Figure 11 : Creating a New User
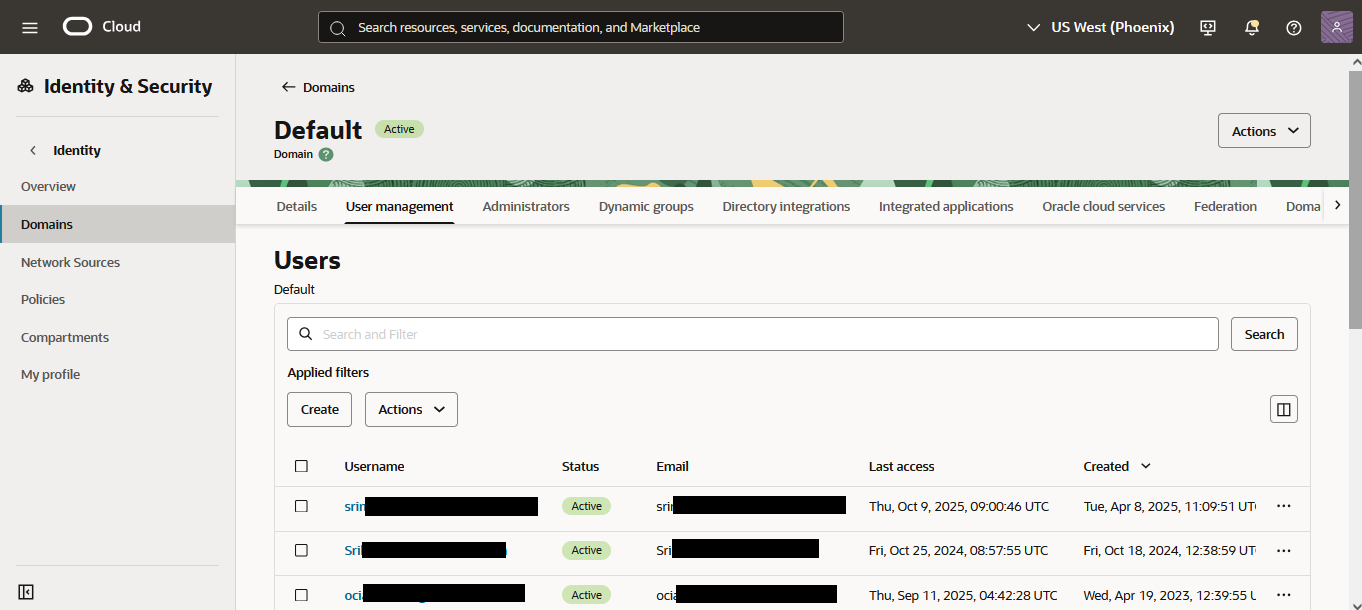
Figure 12 : Displaying the newly created user
Creating a Policy
Once a user is created, you should add the user to a policy which will ensure that monitoring access is granted to the user. To do so, a new policy should be created with read-only access.
-
To create a policy in the Oracle Cloud Infrastructure, go to Identity & Security -> Policies as shown in Figure 13.
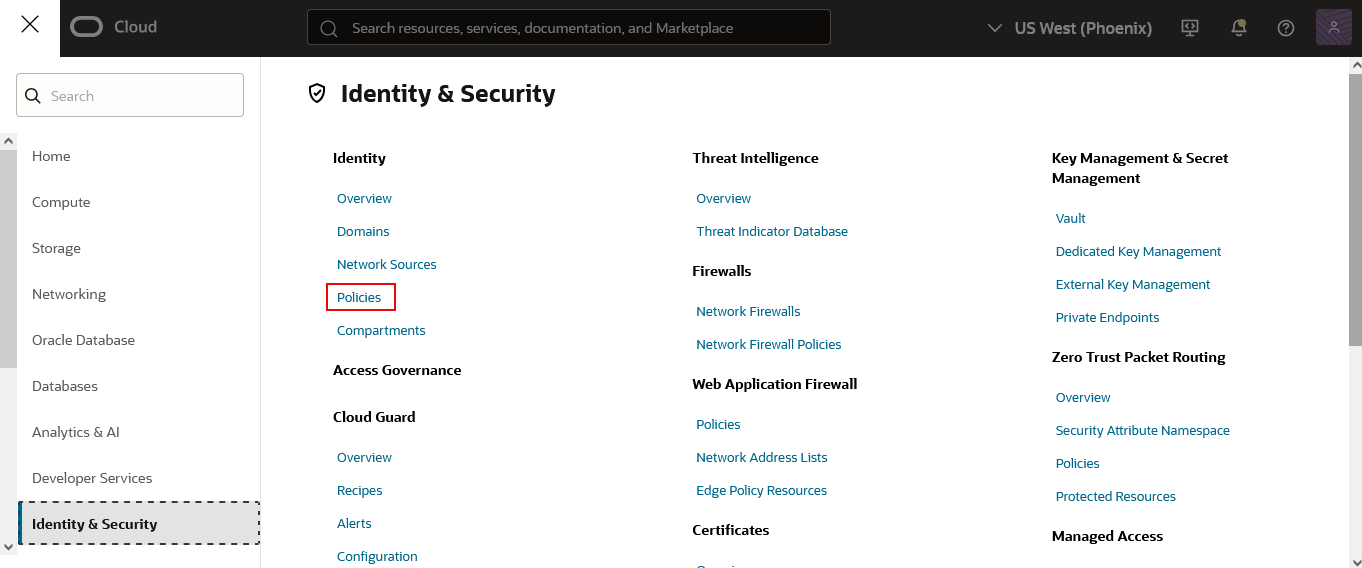
Figure 13 : Identity & Security Tab Page
-
In Figure 14 that appears, click the Create Policy button to create a new policy.
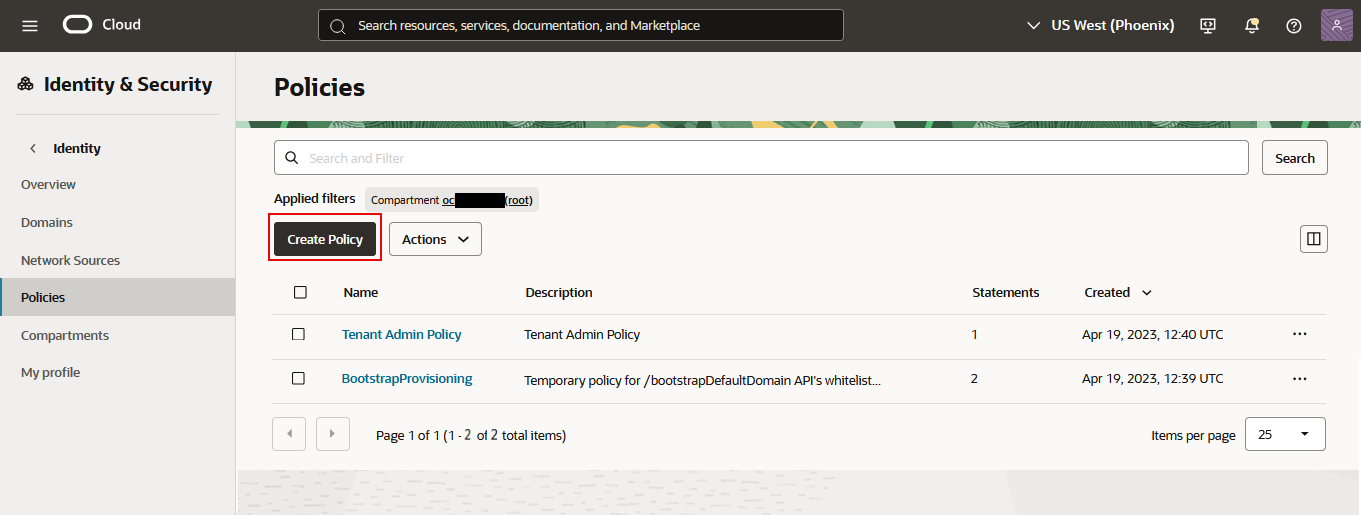
Figure 14 : List of Existing Policies
-
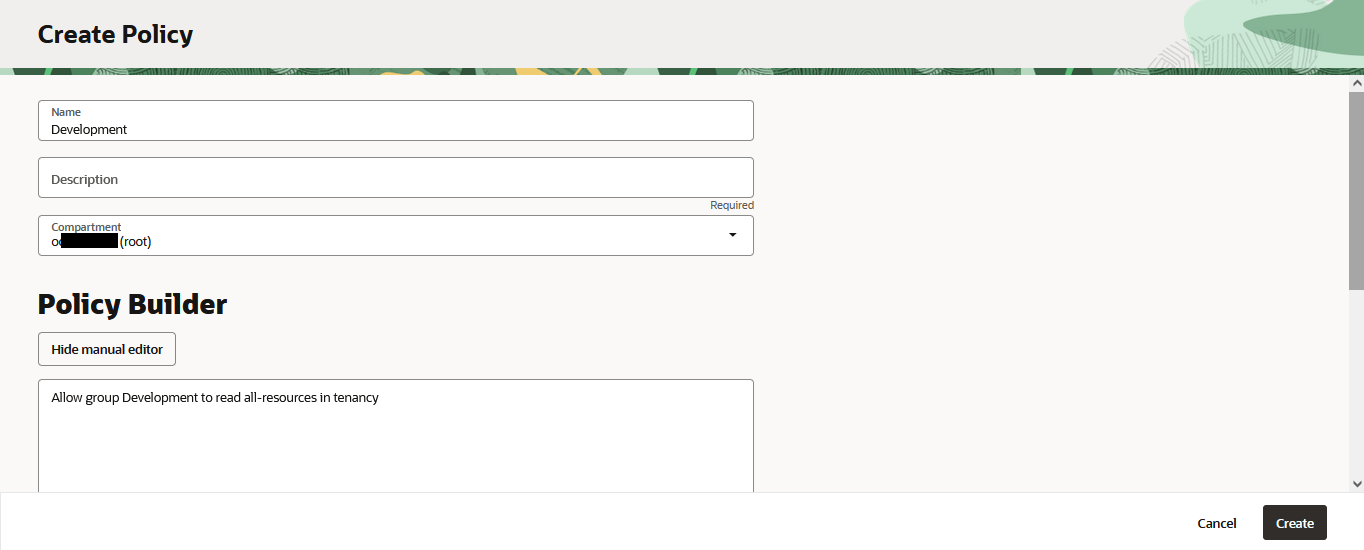
Figure 15 then appears. Enter the Name of the policy to be created, Description, and choose the Compartment from the drop-down list box (choose the compartment in which the policy itself is defined (usually the tenancy root or a higher-level compartment)). In the Policy Builder section, use the below syntax in the text box.
Allow group <group name> to read all-resources in tenancy
-
In this case, specify the name of the group that is created instead of <group name> i.e., Development. In our case, the syntax is:
Allow group Development to read all-resources in tenancy
-
Clicking the Create button in Figure 15 will ensure that a new policy is created and the user is vested with read-only access to the target environment. Figure 16 displays the newly created policy.
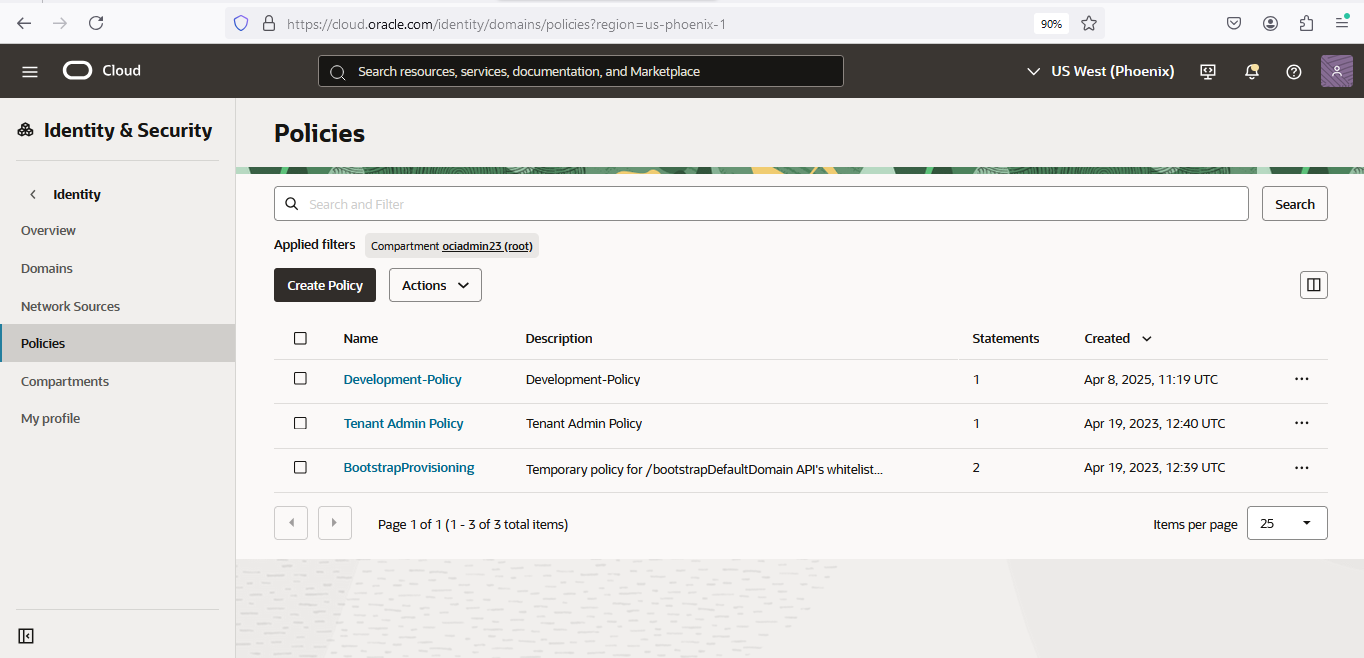
Figure 16 : Displaying the newly created Policy
Generating an API Key
Once a user is created, added to a group, and assigned to a policy, API keys need to be generated. When you use the OCI API, CLI, or SDKs to create or manage a load balancer, OCI needs to know who is making the request. An API key is tied to your user identity in OCI which authenticates your requests without requiring you to log in interactively. An API key allows non-interactive systems to authenticate and control OCI load balancers safely.
-
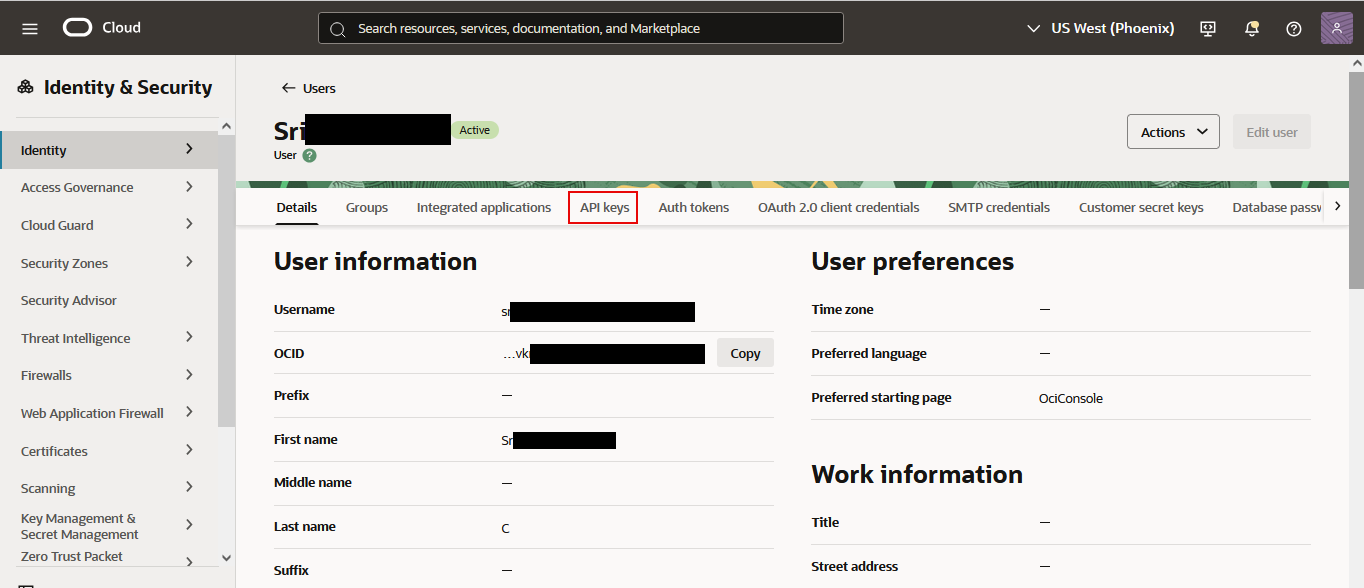
For this, go to Identity & Security -> Domains -> Default -> User Management. Figure 12 appears. Click the user for which you need to generate an API key. Figure 17 then appears. Select the API Keys tab.
-
Figure 18 appears. Click Add API Key button to create a new API key.
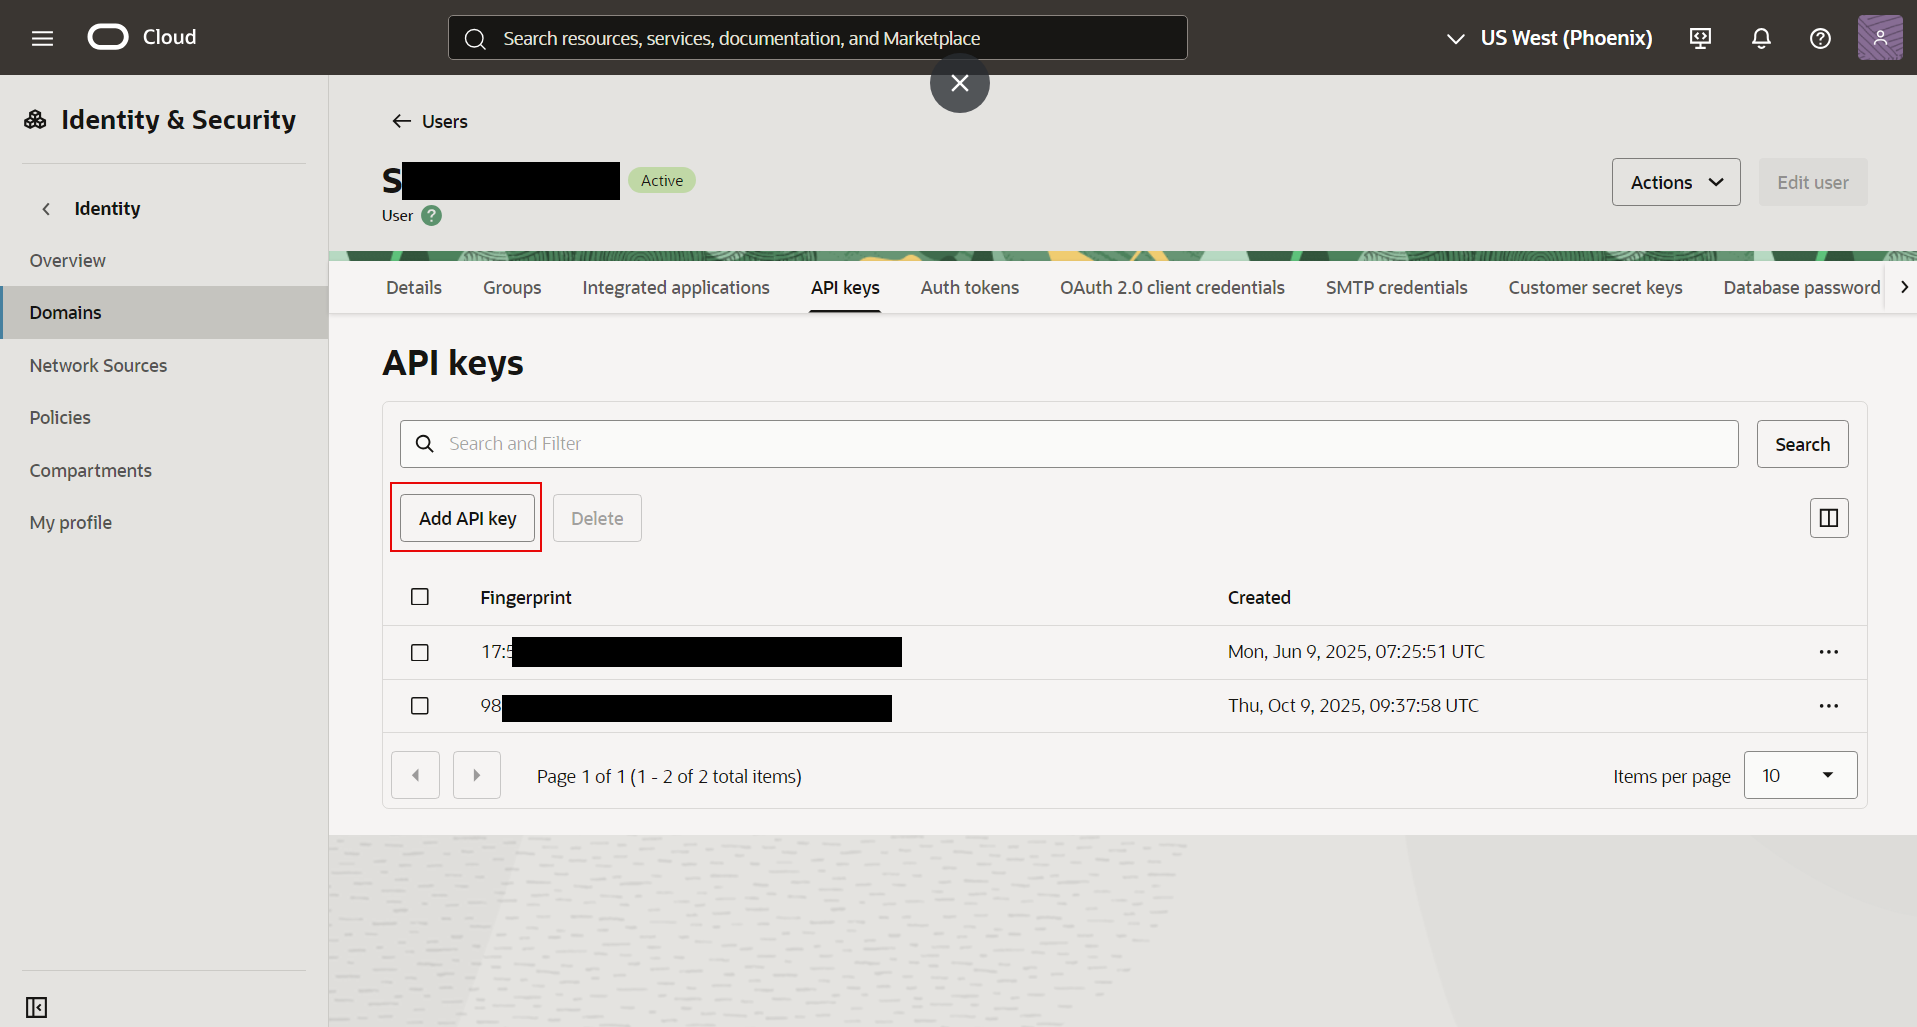
Figure 18 : List of existing API Keys
-
In the page that appears (see Figure 19), choose the Generate API Key Pair radio button and click the Download button against the Download Private Key and Download Public Key.
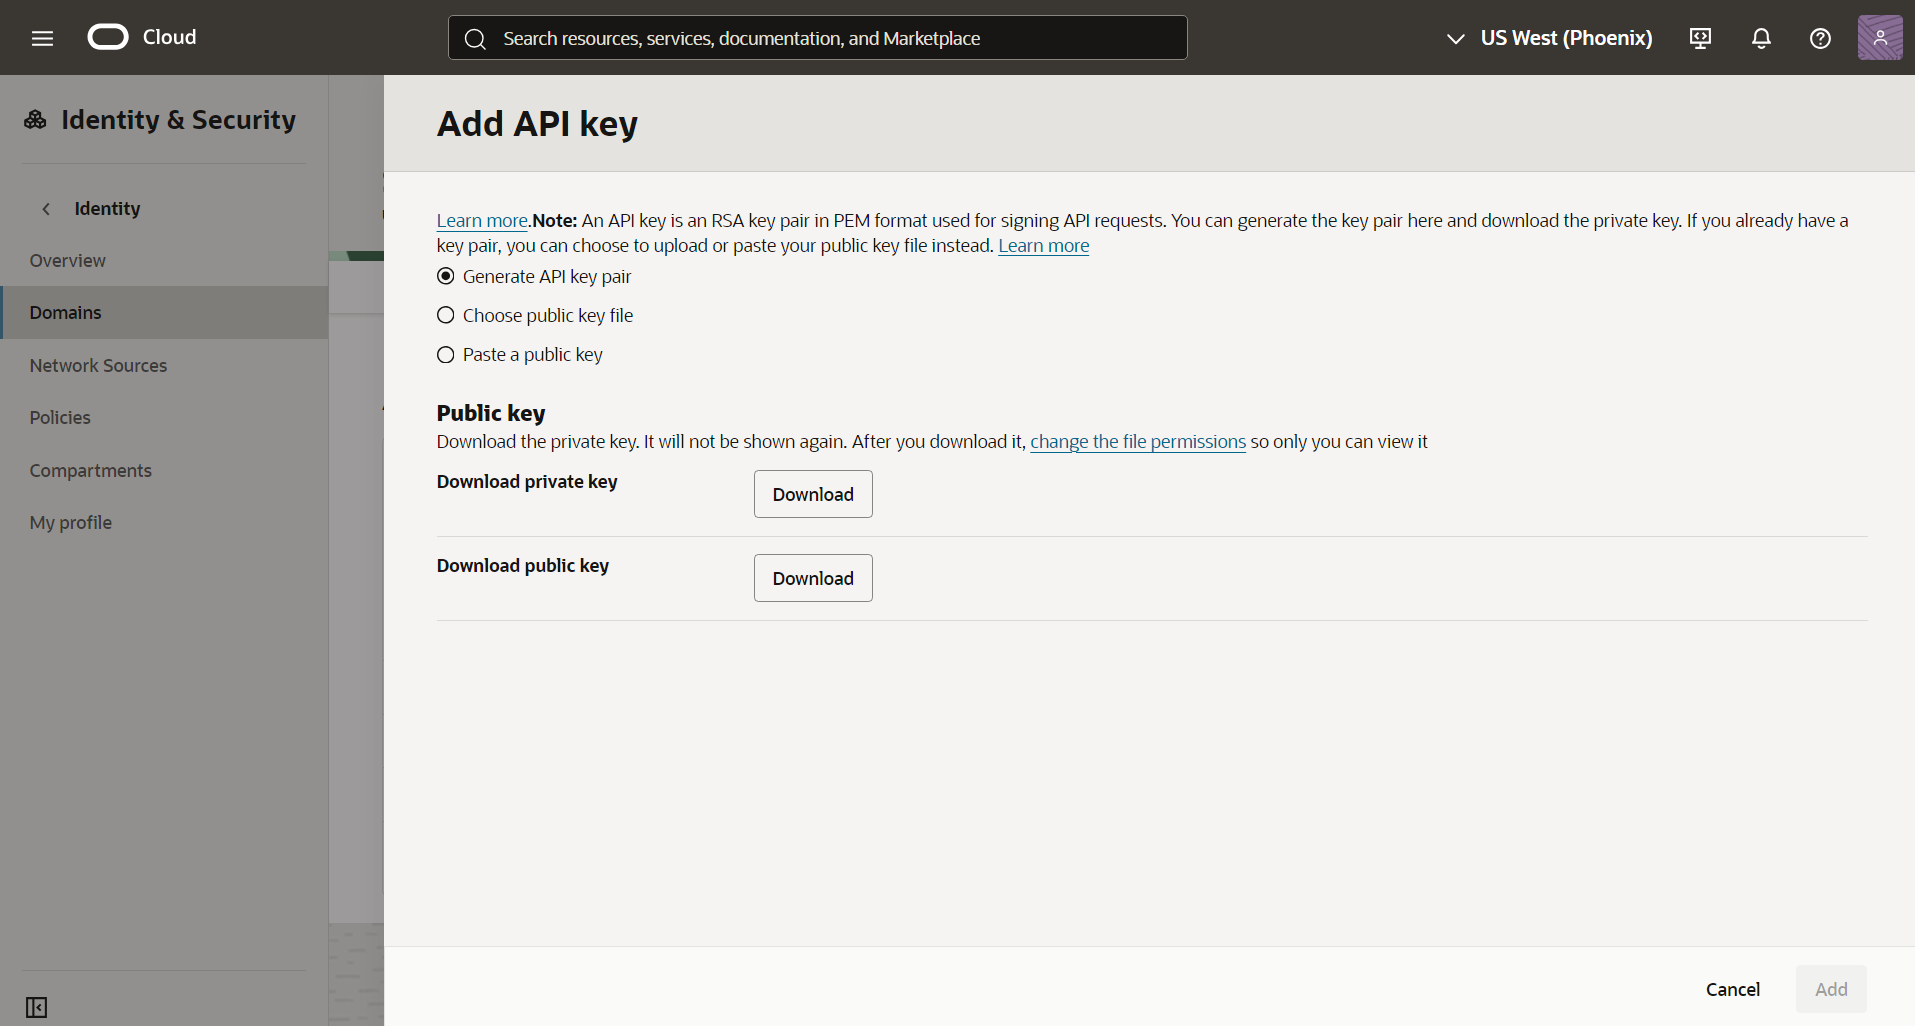
Figure 19 : Downloading Private and Public Keys
-
The private and public keys are downloaded as .pem file. The path of this downloaded private key should be specified at the time of test configuration. Once the private and public keys are downloaded, the Add button will be enabled. Click the Add button to generate a new API key (see Figure 20).
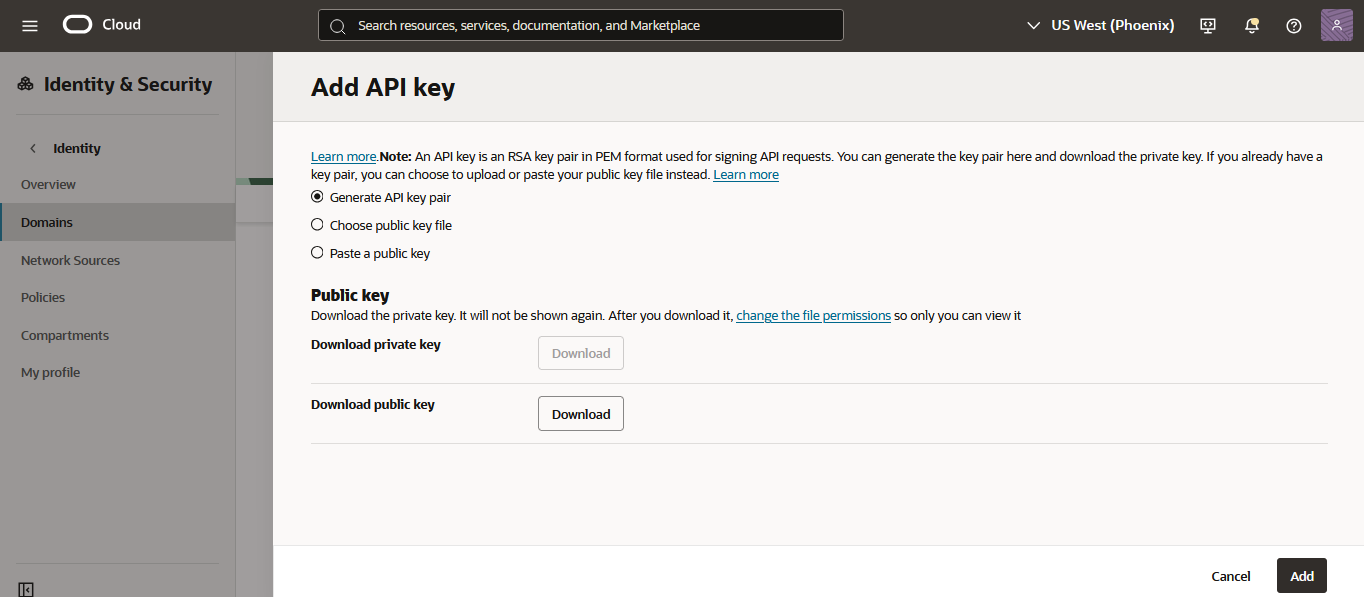
Figure 20 : Generating API Key
-
A new API key is generated (see Figure 21).
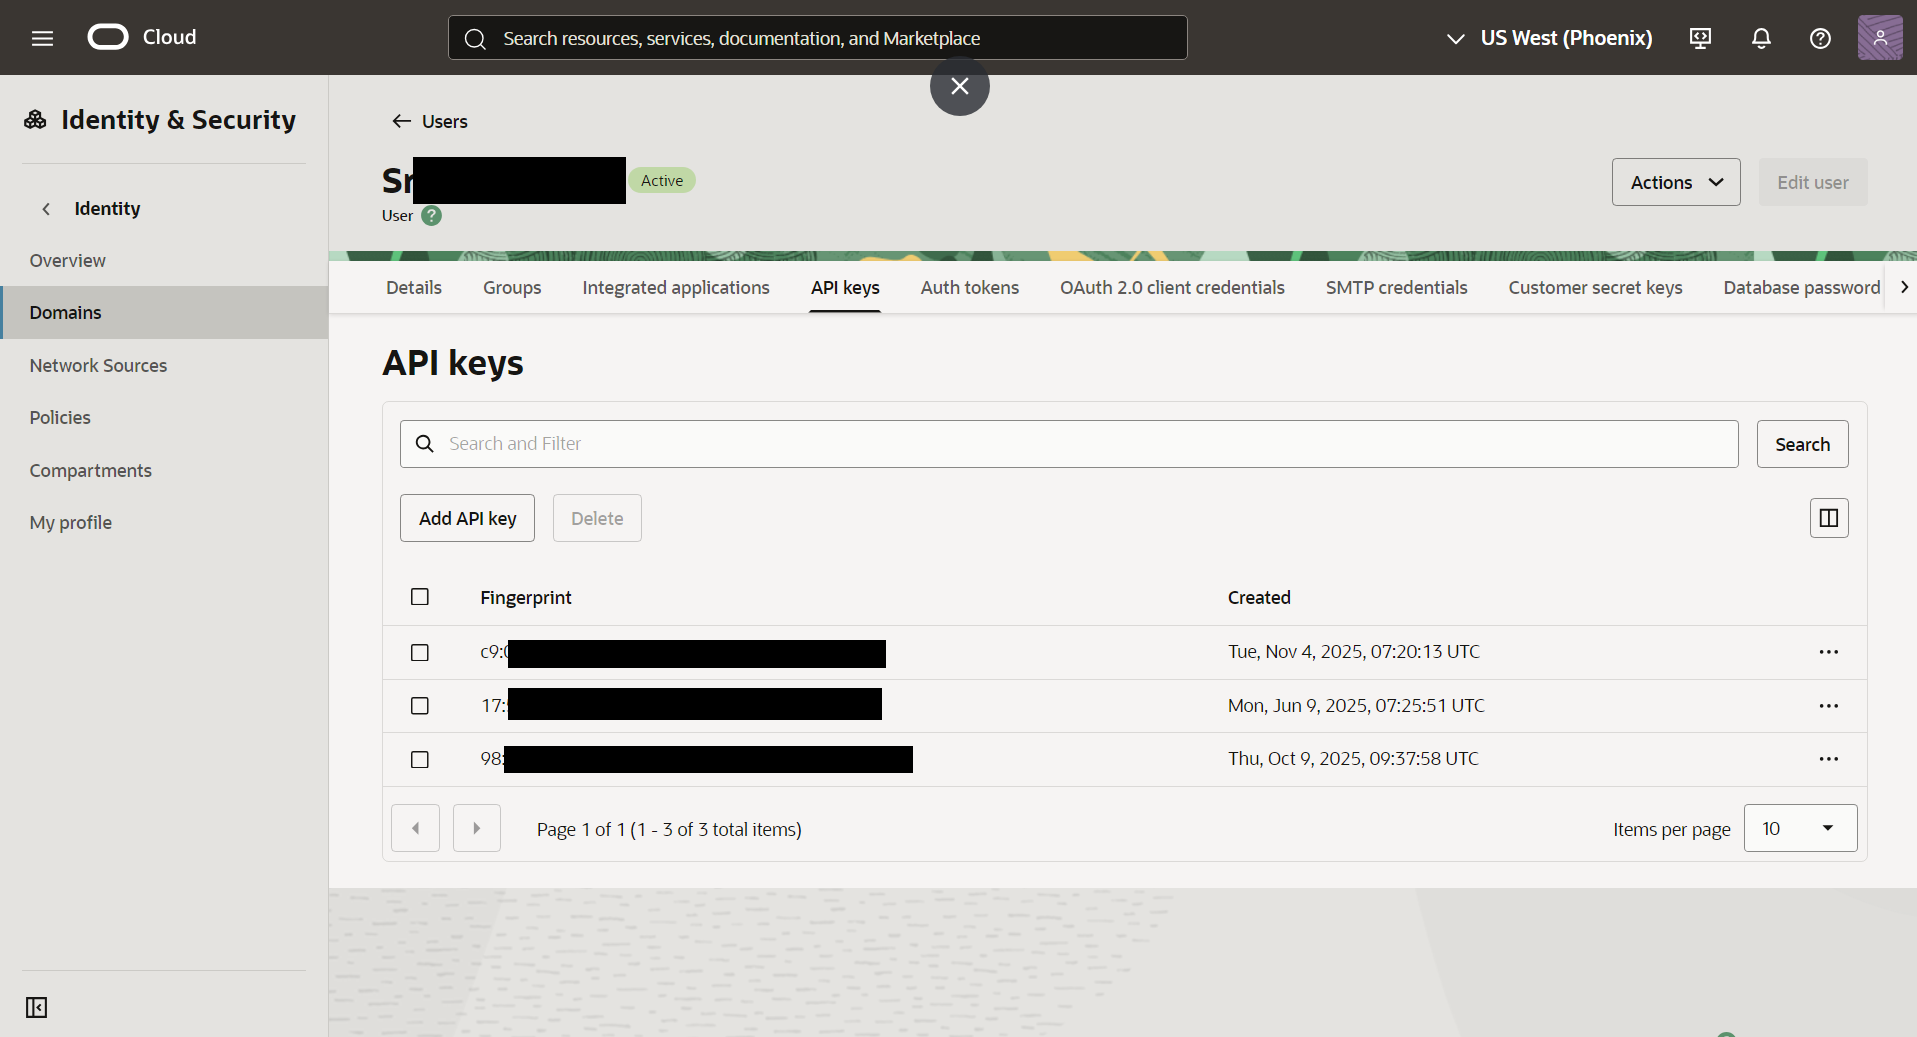
Figure 21 : Displaying the Newly Generated API Key
-
On clicking the newly generated API key, Figure 22 will appear displaying a few details such as the User ID, fingerprint, tenancy ID, region etc. Note down the specification mentioned against user, fingerprint, tenancy and region fields. These values should be specified against the User ID, Fingerprint, Tenancy ID and Region parameters in the test configuration page while configuring the tests of the target OCI Load Balancer.
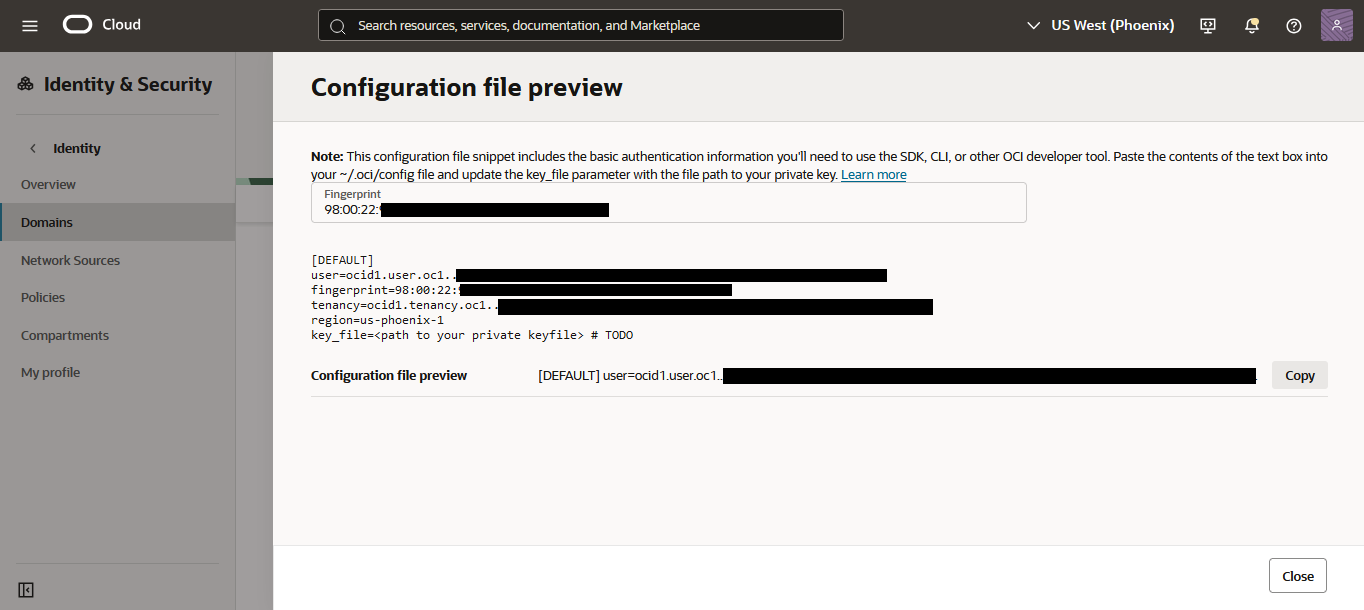
Figure 22 : Configuration File Snippet
Once the pre-requisites are fulfilled, manage the Oracle Cloud Infrastructure Load Balancer for monitoring using eG administrative interface. To know the steps for achieving this, refer to the Managing the Oracle Cloud Infrastructure Load Balancer