Managing PacketShaper Load Balancer S-Series
The PacketShaper Load Balancer S-Series device can be automatically discovered by eG Enterprise. Therefore, administrators can either auto-discover the load balancer in their environment or manually add the load balancer.
To manage the load balancers that are automatically discovered, follow the steps below:
- Login to the eG admin interface.
- If the component is yet to be discovered, then, run discovery (Infrastructure -> Components -> Discovery).
- To manage an already discovered component, follow the menu sequence: Infrastructure -> Components -> Manage/Unmanage/Delete.
-
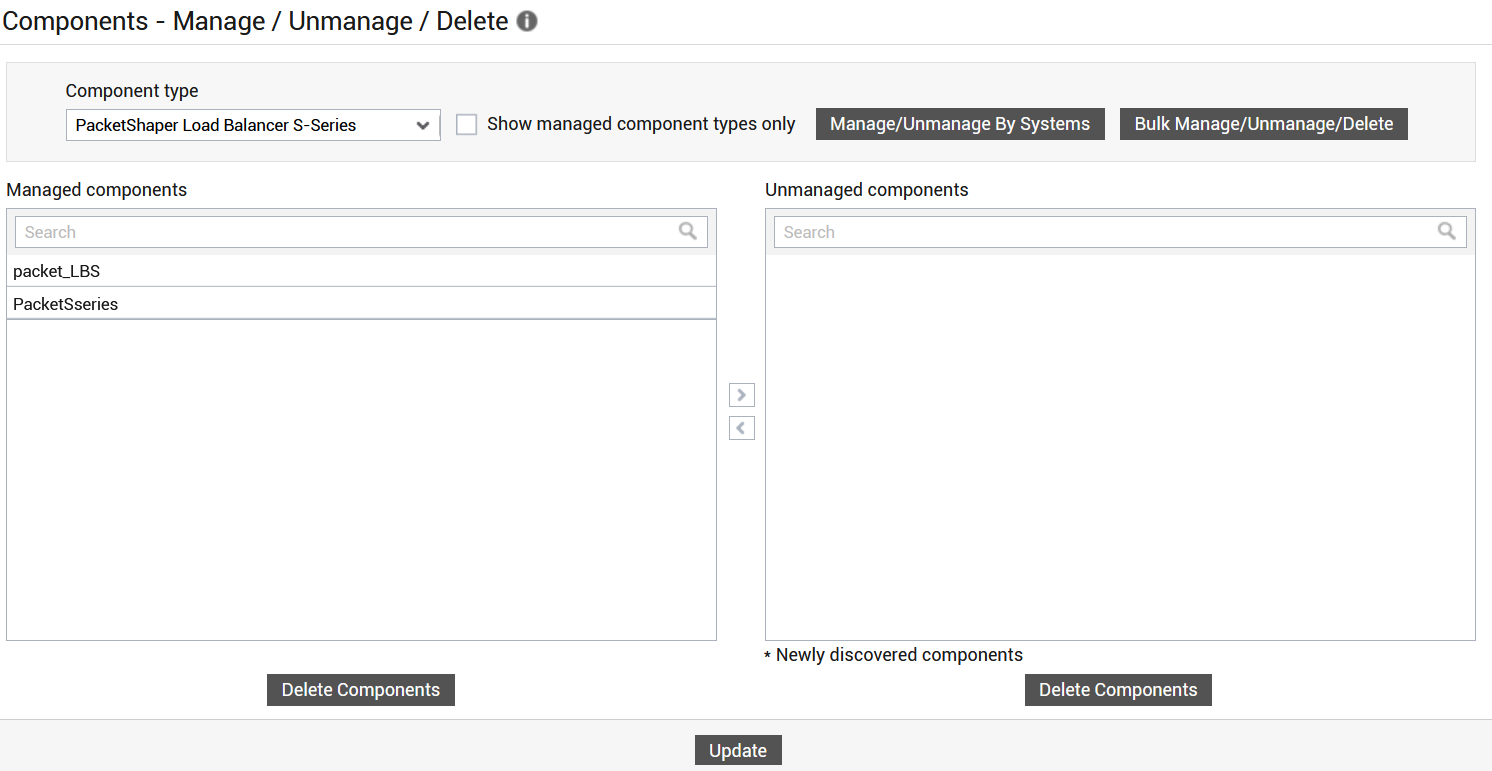
Figure 1 and Figure 2 clearly illustrate the process of managing a PacketShaper Load Balancer S-Series device.
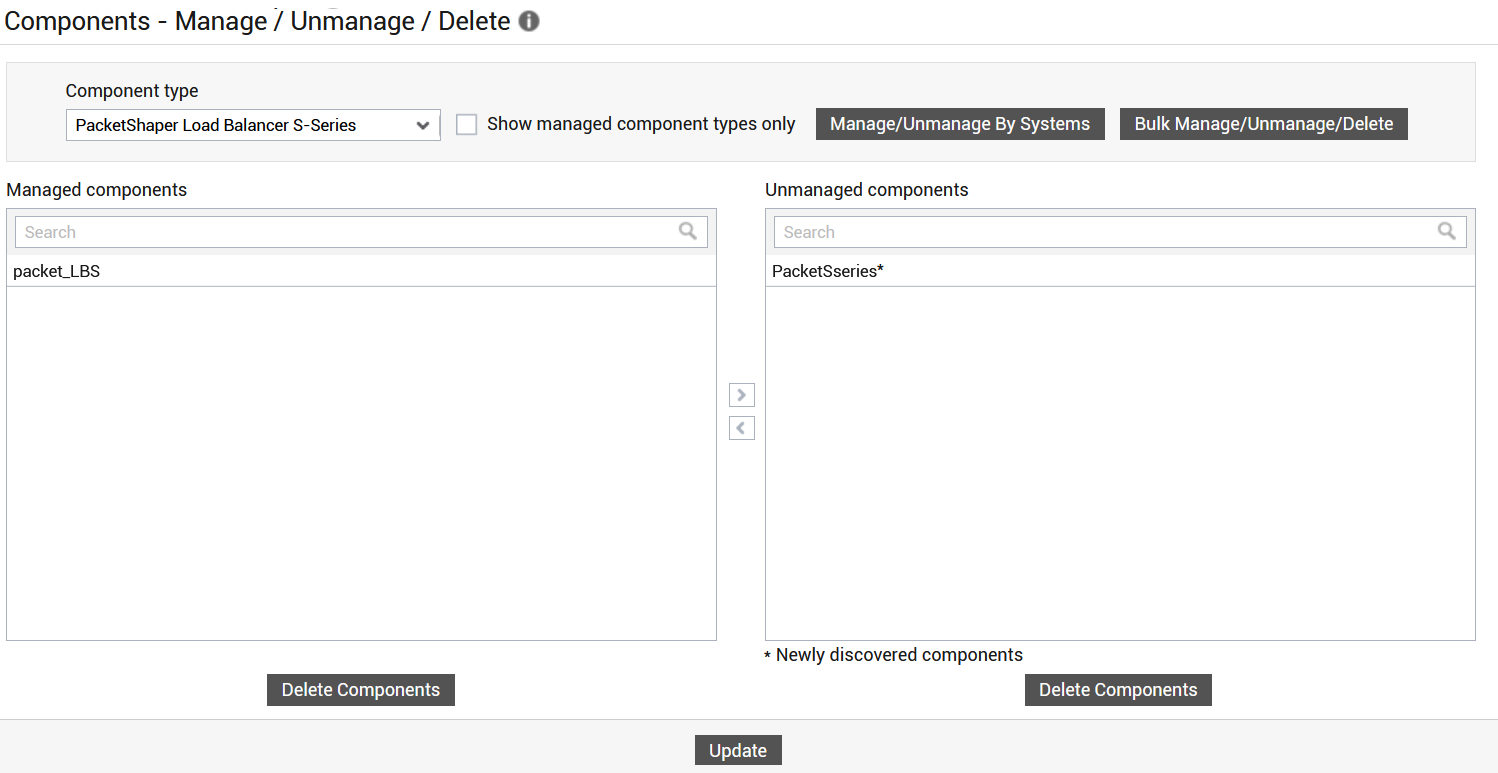
Figure 1 : Selecting the PacketShaper Load Balancer S-Series to be managed
-
Next, sign out of the eG administrative interface.
To add the load balancers manually to eG Enterprise, follow the steps below:
- Follow the Components -> Add/Modify menu sequence in the Infrastructure tile of the Admin menu.
- Next, select PacketShaper Load Balancer S- Series from the Component type drop-down and then click the Add New Component button.
-
When Figure 3 appears, provide the Host IP/Name of the PacketShaper Load Balancer S-Series device that you want to manage.
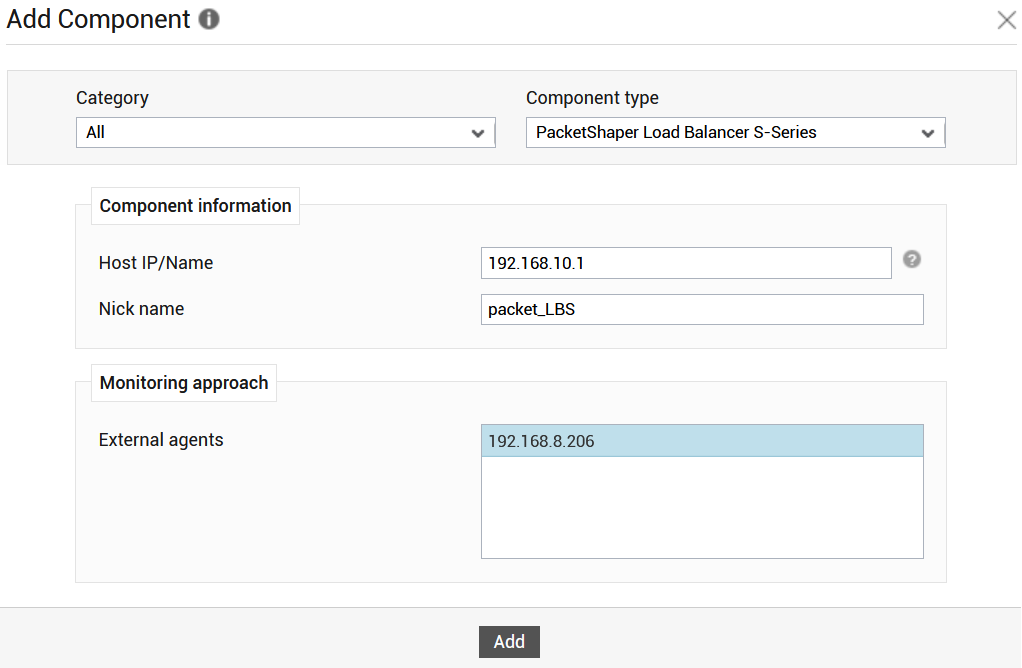
- Then, provide a Nick name for the component.
- Pick an external agent from the External agents list box and click the Add button to add the component for monitoring.
- Next, signout of the eG administrative interface.