Import/Export Script
Once you have recorded all the transactions, a script is generated and saved locally in the system where the Universal Simulation Recorder is running. You can export this script to the eG manager as well as import a previously exported script from the eG manager
Exporting the Script
To export the script to the eG manager, click the  icon as highlighted in Figure 1 or click the Export To eG Manager option that appears when you expand the File menu in the Universal Simulation Recorder.
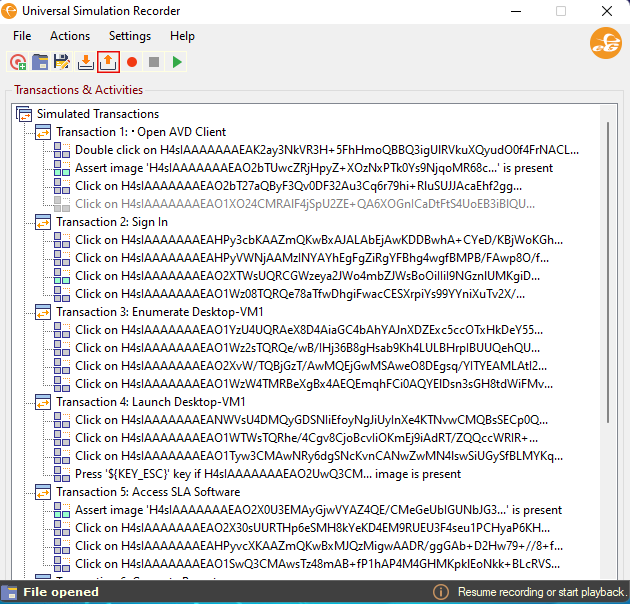
Figure 1 : Clicking the icon to export the script to eG manager
In Figure 2 that appears, specify the following:

Figure 2 : Specifying the credentials to export the script
- Specify the name of the script in the Script Name text box.
- Specify the IP address or the host name of the eG manager against the IP/Host Name text box.
- Against the User Name (Script Owner) and Password text boxes, specify the credentials of the user who is authorized to export the script and initiate the simulation process.
- If the eG manager is SSL-enabled, then set the Protocol flag to HTTPS. If the eG manager is not SSL-enabled, then set the flag to HTTP.
- Specify the port at which the eG manager listens to against the Port text box.
-
Alternately, if you wish to export the script via a proxy server to the eG manager, select the check box against the Proxy Settings.
- Specify the IP address or the host name of the proxy server against the IP/Host Name text box.
- Specify the port through which the communication to the proxy server is established against the Port text box.
-
If the proxy server requires to be authenticated by a user for connecting to the eG manager, then select the check box against the Proxy requires user authentication check box.
- Specify the credentials of the user who is authorized to access the proxy server against the User name and Password text boxes.
- If you wish to store the credentials that you have provided for future use, then select the Remember Me check box.
- Once you have provided all the required credentials, click the Export button.
- If you wish to abort the operation click the Cancel button.
- If you wish to reset the credentials that you have entered, then, click the Reset button.
Once the script is exported successfully, a message to that effect will appear as shown in Figure 3.
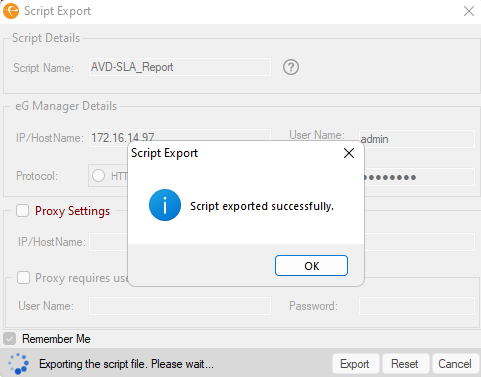
Figure 3 : Message that appears when the script is exported successfully
Importing the Script
If you want to add/modify/delete a transaction in the script that was previously exported to the eG manager, eG Enterprise provides an option to import the exported script. For this, click the  icon as highlighted in Figure 4 or click the Import from eG Manager option that is available in the File menu.
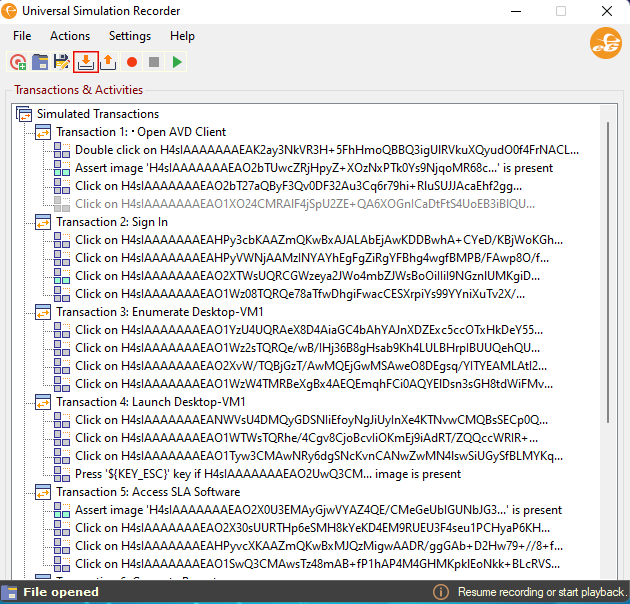
Figure 4 : Clicking the Import button to import a script
In Figure 5 that appears, specify the following:
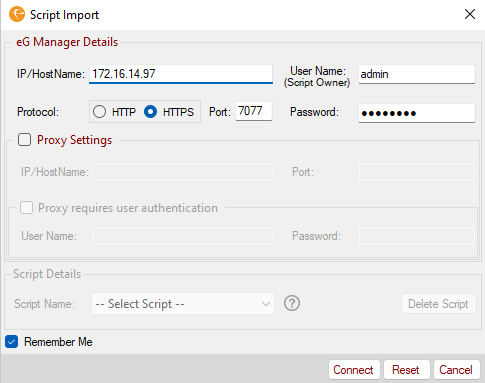
Figure 5 : Specifying the credentials to import the script from eG manager
- Specify the IP address or the host name of the eG manager against the IP/Host Name text box.
- Against the User Name (Script Owner) and Password text boxes, specify the credentials of the user who is authorized to export the script and initiate the simulation process.
- If the eG manager is SSL-enabled, then set the Protocol flag to HTTPS. If the eG manager is not SSL-enabled, then set the flag to HTTP.
- Specify the port at which the eG manager listens to against the Port text box.
-
Alternately, if you wish to import the script via a proxy server from the eG manager, select the check box against the Proxy Settings.
- Specify the IP address or the host name of the proxy server against the IP/Host Name text box.
- Specify the port through which the communication to the proxy server is established against the Port text box.
-
If the proxy server requires to be authenticated by a user for establishing a connection between the eG manager and the machine on which you wish to import the script, then, select the check box against the Proxy requires user authentication check box.
- Specify the credentials of the user who is authorized to access the proxy server against the User Name and Password text boxes.
- If you wish to save the credentials for future use, then select the Remember Me check box.
- Once you have provided the above-mentioned credentials, click the Connect button in .
-
Clicking the Connect button in Figure 5 will enable and populate the Script Name list as shown in Figure 6. Choose a script from this list and click the Import button.
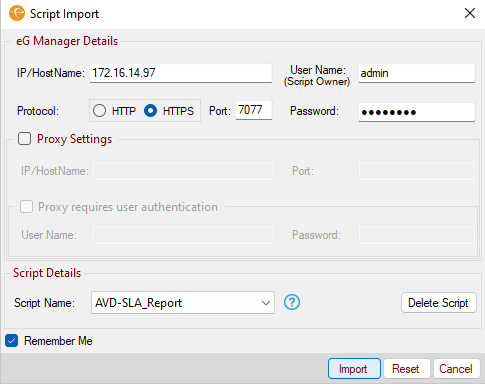
Figure 6 : Choosing the script that you wish to import from the eG manager
- If you wish to abort the operation click the Cancel button.
- If you wish to reset the credentials that you have entered, then, click the Reset button.
Deleting the Script
-
By default, the recorded scripts are stored in <eG_INSTALL_DIR>/manager/config/SyntheticScripts/_Universal/<user or script owner> folder. Sometimes, scripts occupy considerable amount of space and hence users may want to delete unused scripts. To enable users delete such unused scripts, you can select the script to be deleted from the Script Name list and click the Delete Script button in Figure 6. Figure 7 then appears displaying that the script was deleted successfully.

Figure 7 : Message that appears after a script is deleted
Note:
- In a redundant manager setup, note that the scripts can be deleted from the Primary manager only. The script will be automatically deleted from the Secondary manager once it is operational.
- Users are allowed to delete those scripts that are not used by any Universal Simulation component.
Once the import is successful, the script will automatically open in the Universal Simulation Recorder.
In case you have recorded only a partial script and wish to save the script in the local machine, then, you can click the Save As option available in the File menu of the Universal Simulation Recorder.
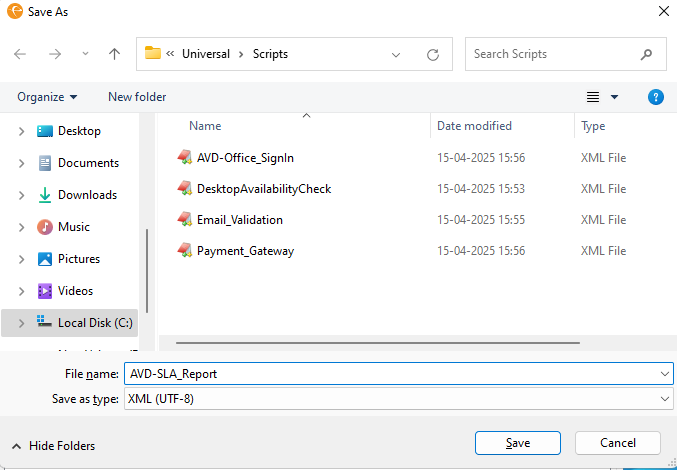
Figure 8 will then appear prompting you to locally save the script. By default, you will be prompted to save the script with a default File name. You can either carry on with that default file name or specify a new file name for the script. By default, the script will be saved in .xml format.