Integrating the eG Manager with AWS Simple Notification Service (SNS)
Amazon Simple Notification Service (Amazon SNS) is a web service that coordinates and manages the delivery or sending of messages to subscribing endpoints or clients.
In Amazon SNS, there are two types of clients—publishers and subscribers—also referred to as producers and consumers.
Publishers communicate asynchronously with subscribers by producing and sending a message to a topic, which is a logical access point and communication channel. Subscribers (web servers, email addresses, Amazon SQS queues, Lambda functions) consume or receive the message or notification over one of the supported protocols (Amazon SQS, HTTP/S, email, SMS, AWS Lambda) when they are subscribed to the topic.
eG Enterprise can integrate with AWS SNS for SMS alerting. The eG manager serves as the publisher that publishes eG alerts as messages to a topic that is exclusively configured for this purpose in SNS. Recipients of the SMS alerts should be configured as the topic subscriber. Once the eG manager is configured with the mobile numbers of these recipients, then every time the manager generates an alert, it publishes the alert information to the topic in SNS. The configured subscribers will then consume this alert information over the SMS protocol.
The broad steps for integrating the eG manager with AWS SNS is as follows:
-
Create a topic in SNS
-
Create a Sandbox containing the mobile numbers of the SMS recipients and have the numbers verified
-
Add the SMS alert recipients as the subscribers to this topic
-
Create an IAM user for the purpose of SMS alerting
-
Create an SNS policy and assign it to the IAM user
-
Create Access key and secret key for the above user
-
Configure the eG manager to send eG alerts to AWS SNS
Each of these steps is elaborately discussed in the sections below.
Creating a Topic in AWS SNS
To achieve the above, follow the steps below:
-
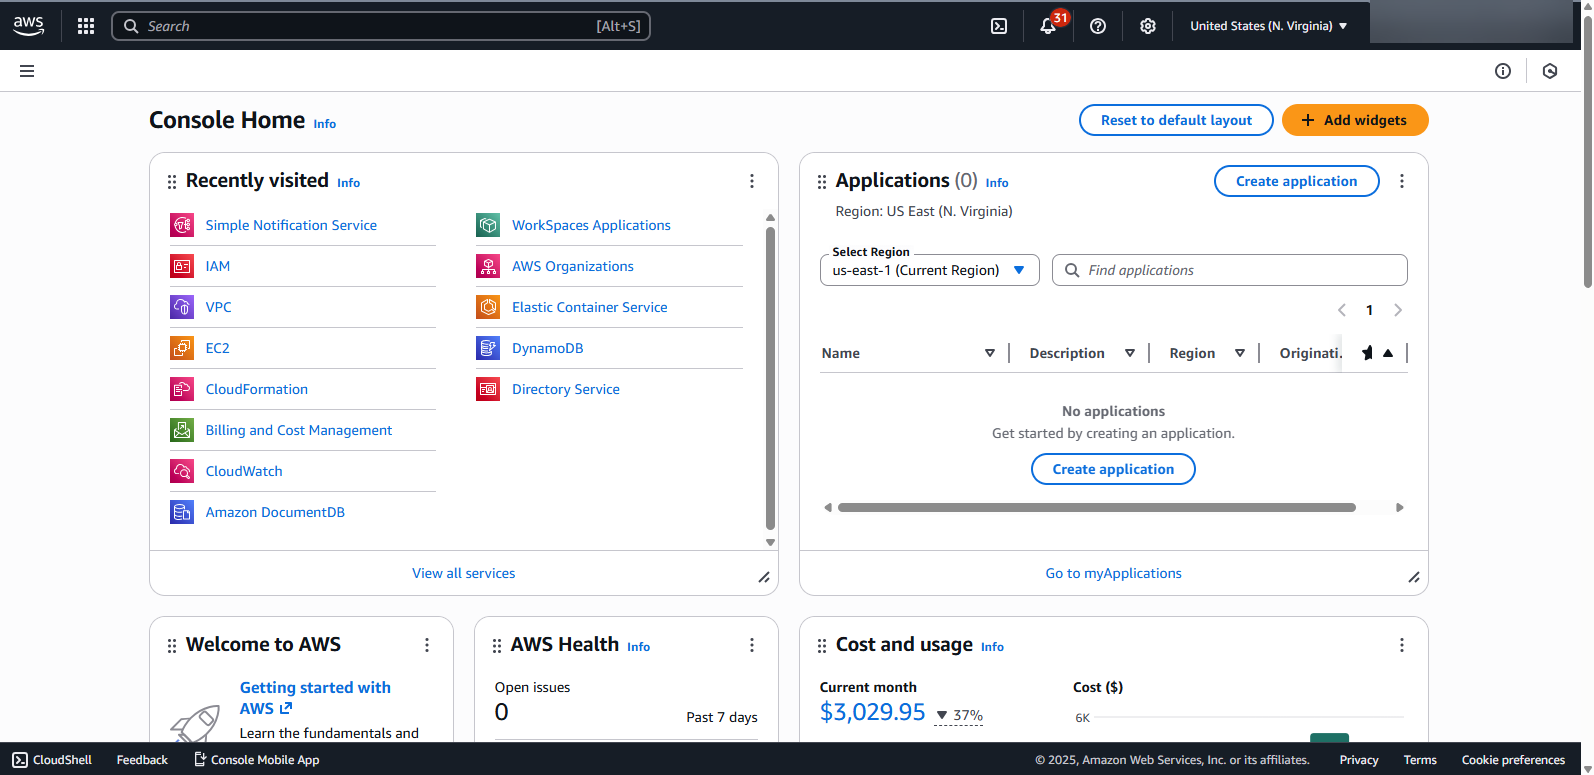
Login to the AWS console.
-
Figure 1 will then appear.
-
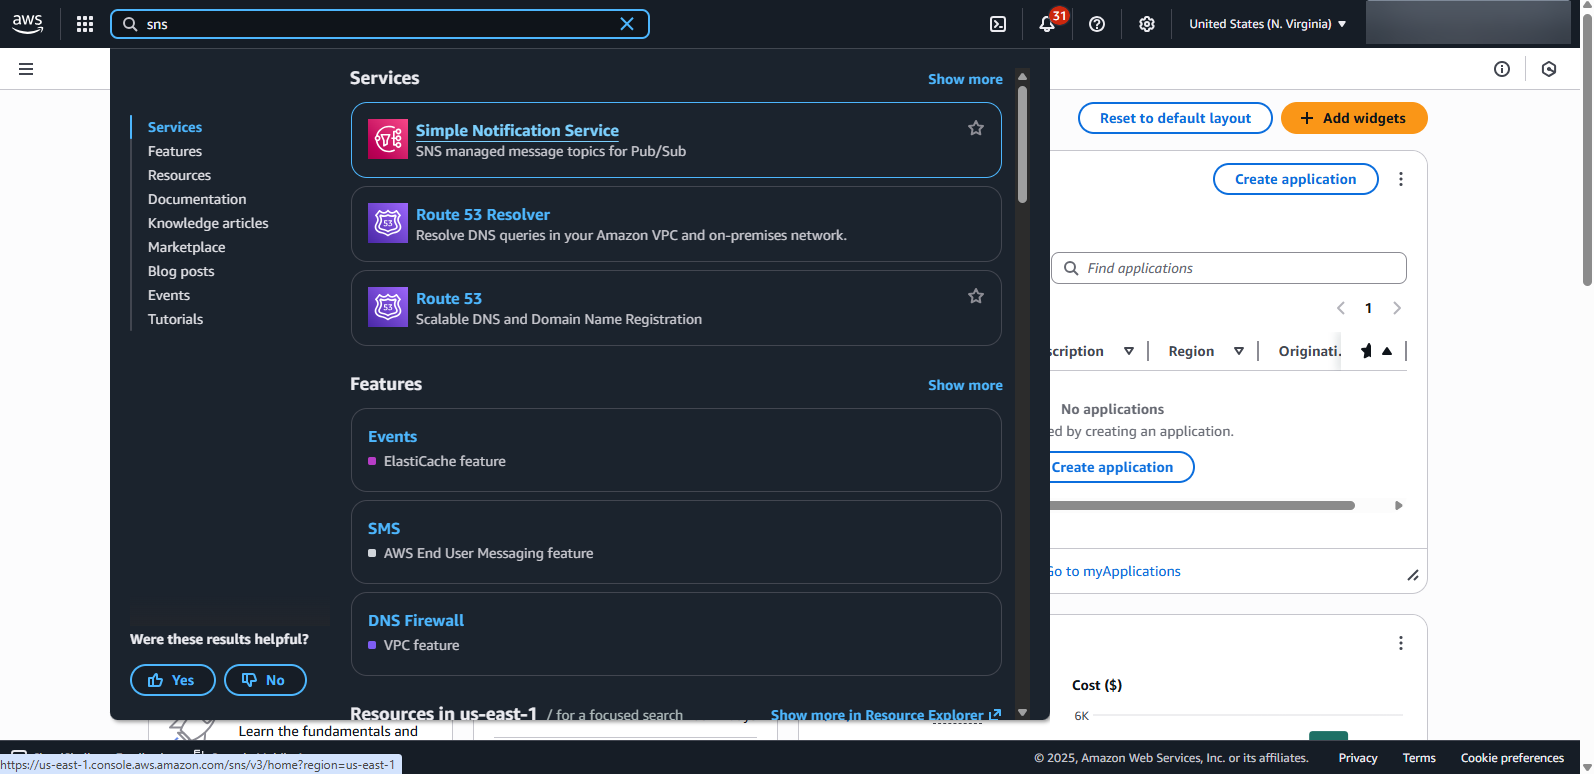
Use the Search function in Figure 1 to search for the text string 'SNS' (see Figure 2).
-
Once the Simple Notification Service appears in the search results, click on it. This will open Figure 3.
-
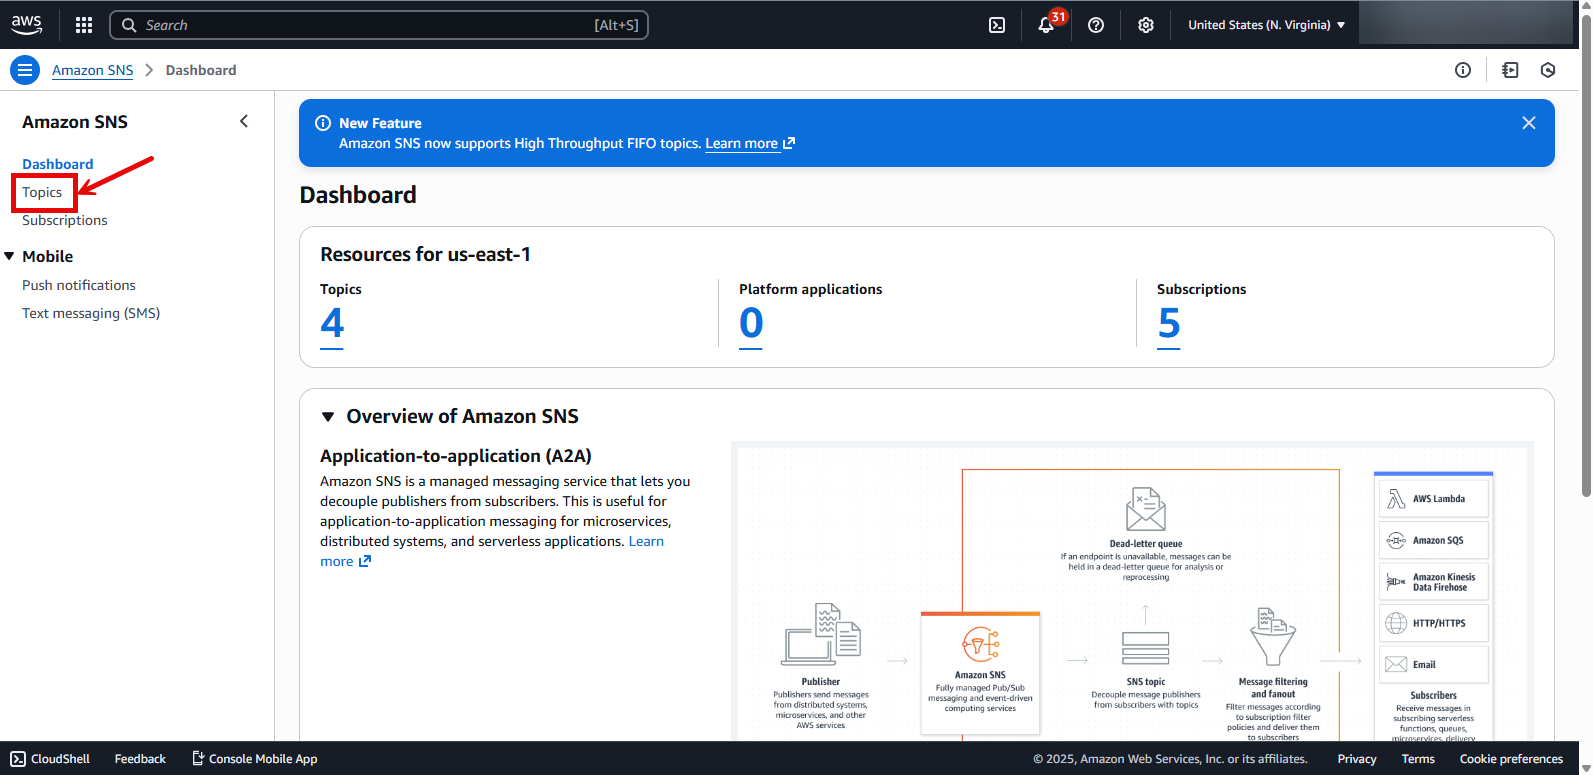
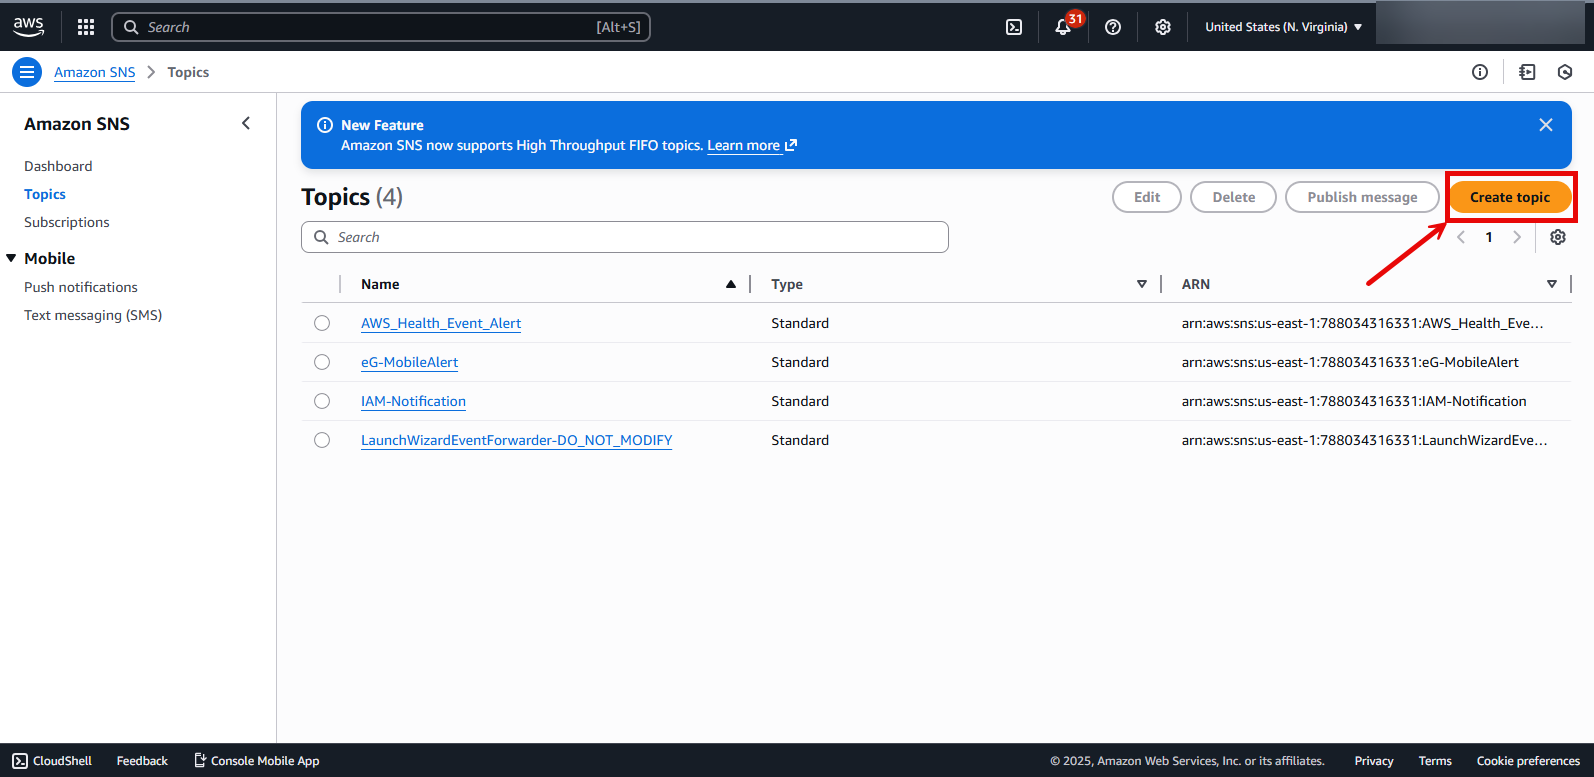
To create a new topic, first click on the Topics option in the left panel of Figure 3. Figure 4 will then appear. Now, click on the Create topic button in the right panel of Figure 4.
-
This will open Figure 5.
-
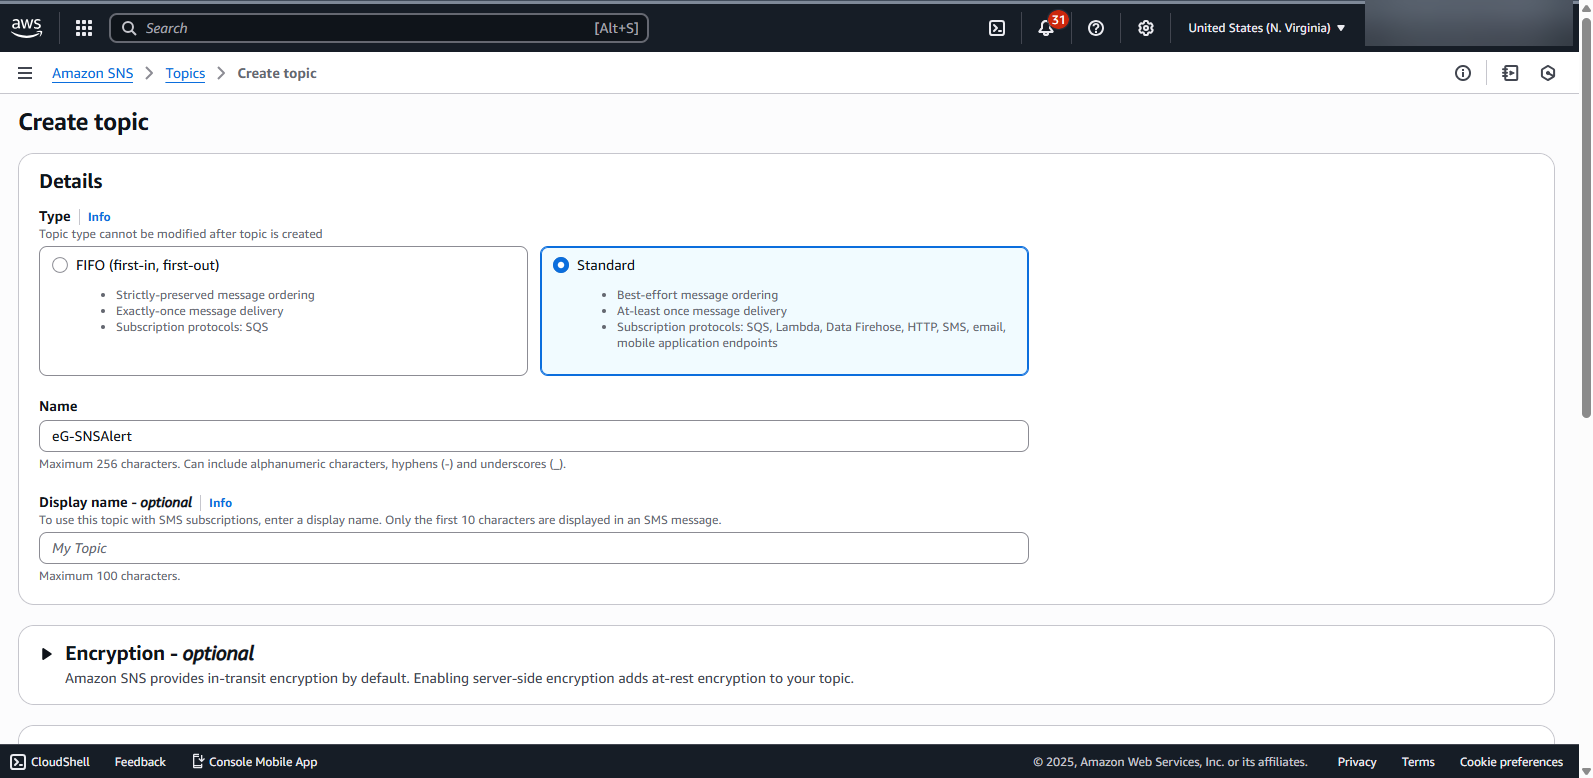
In Figure 5, set topic Type as Standard. Then, provide a topic Name. Scroll down the page (see Figure 6), and finally, click the Create topic button therein to create the new topic.
.png)
Figure 6 : Scrolling down and clicking on the Create topic button
-
Figure 7 will then appear, where the newly created topic will be displayed. For every topic that is created, AWS automatically generates and assigns an ARN - i.e., an Amazon Resource Number. This is a string that uniquely identifies an AWS resource, like a topic. Make a note of the topic's ARN by copying it to clipboard or a text editor.

Creating a Sandbox
The SMS sandbox protects your reputation as a sender. It guides you through the process of provisioning dedicated SMS origination numbers in your AWS account. New AWS accounts are placed in the SMS sandbox by default. While your account is in the SMS sandbox, you can send SMS messages to verified recipients, for development and testing purposes. The following quotas apply:
-
You can send a maximum of 20 SMS messages per second
-
You can only send SMS messages to verified destination phone numbers..
-
You can send SMS messages to a maximum of 10 verified destination phone numbers.
-
You can delete destination phone numbers only after a minimum of 24 hours have passed since verification, or the last verification attempt.
To create a Sandbox for SMS destination phone numbers and have those numbers verified, follow the steps below:
-
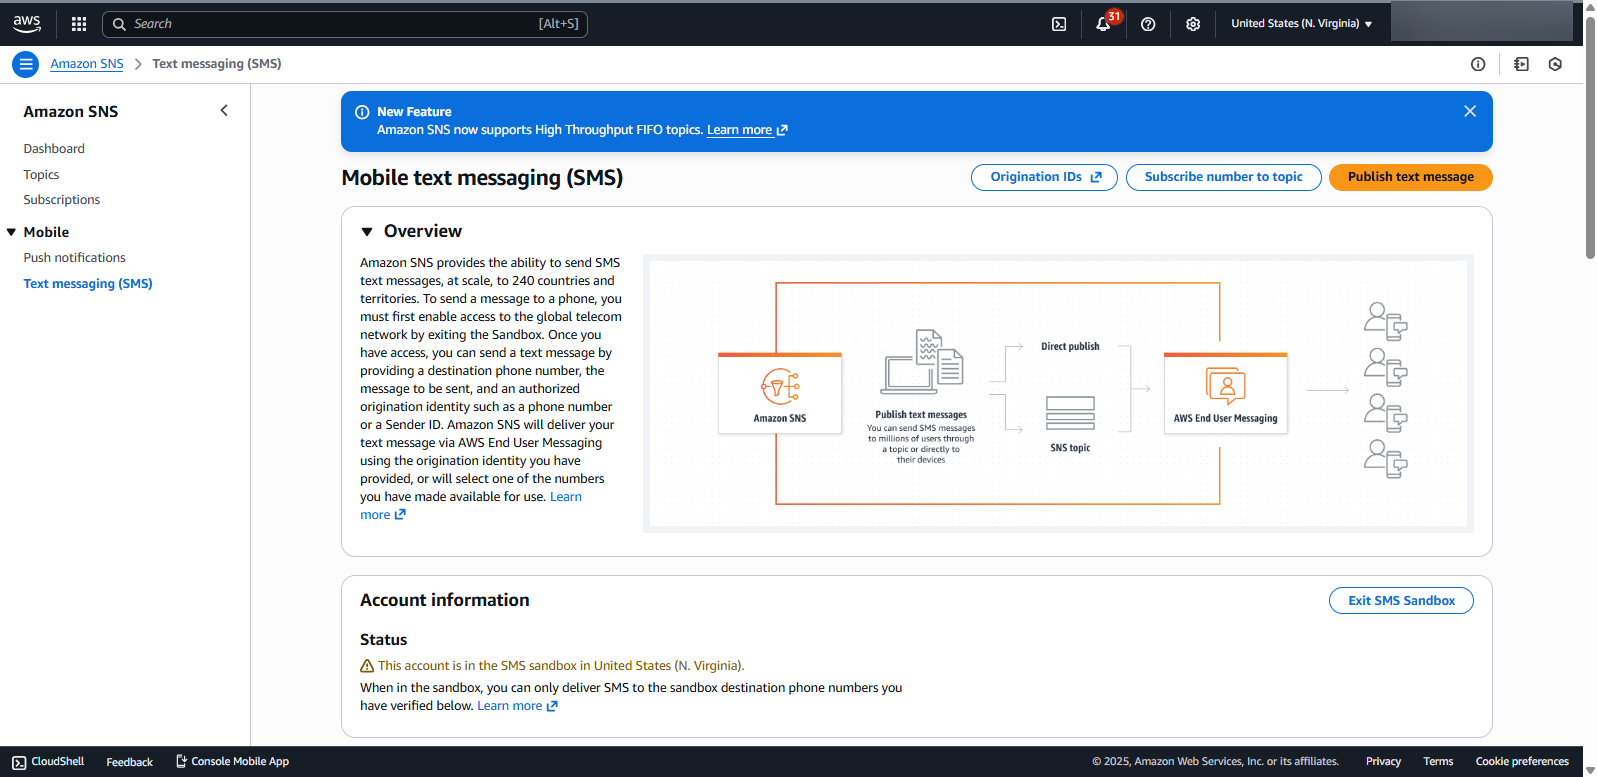
Click on the Text messaging (SMS) option in the left panel of Figure 7. This will invoke Figure 8.
-
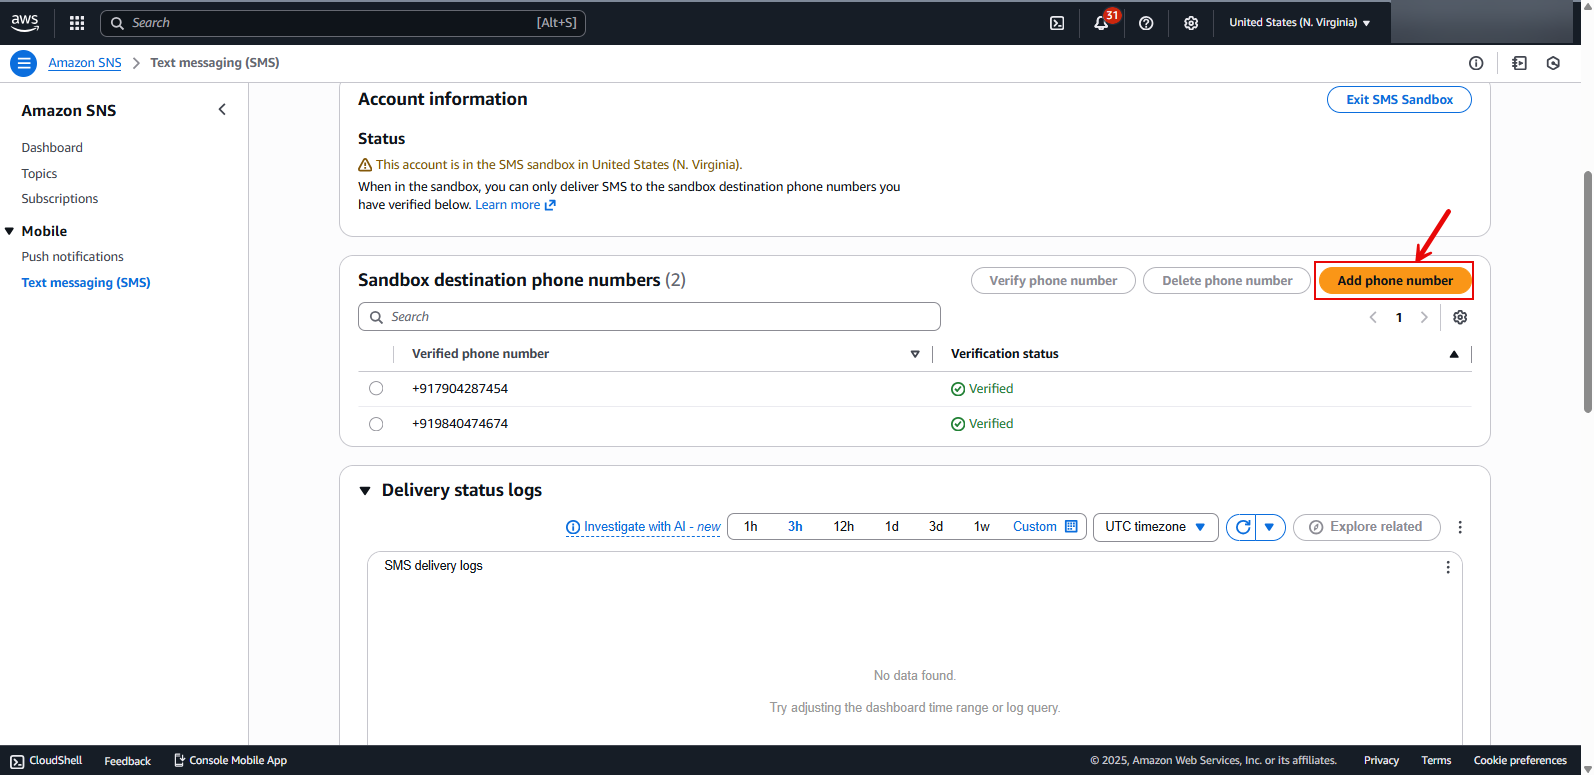
Keep scrolling down Figure 8 until the Sandbox destination phone numbers section becomes visible (see Figure 9). Then, click on the Add phone number button in that section.
-
This will open Figure 10. Here, specify the Phone number of an SMS alert recipient. Note that the phone number has to be entered along with valid country code. Then, click the Add phone number button in Figure 10.
.png)
-
Figure 11 will then appear. The newly added phone number will appear in the Sandbox destination phone number section, with its Status set as Pending.
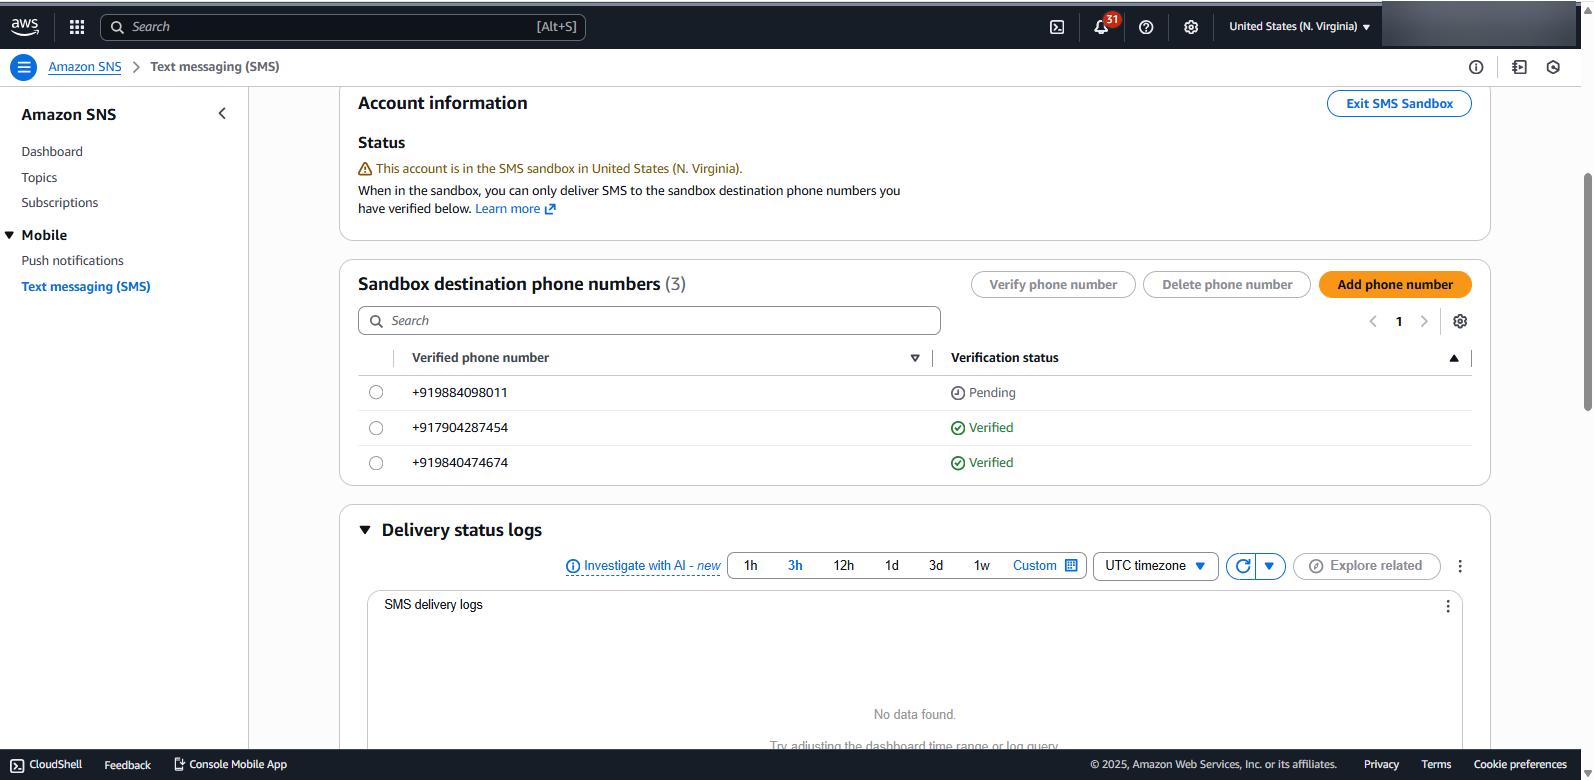
Figure 11 : The newly added phone number appearing in the Sandbox destination phone number section
-
The next step is to verify the authenticity of the new phone number. For that, select the new number specification displayed in Figure 11, and then click the Verify phone number button (see Figure 12).
.png)
Figure 12 : Selecting the 'unverified' phone number and clicking the Verify phone number button
-
Doing so will automatically trigger an SMS to the new phone number, carrying a verification code. Enter this Verification code in Figure 13 that appears next. Then, click the Verify phone number in Figure 13.
.png)
-
This will open Figure 14. If the verification code checks out, then the status of the new phone number will change to Verified from Pending (as highlighted by Figure 14).
.png)
-
Similarly, you have to add to the Sandbox all those mobile numbers to which you want SMS alerts to be delivered, and have them verified.
Add Subscribers to the Topic
The next step is to add the verified mobile numbers as Subscribers to the topic you created previously for monitoring purposes.
For that, follow the steps below:
-
Click on the Topics option in the left panel of Figure 14.
-
Figure 4 will appear displaying the topics that pre-exist. In this list, click on the topic you created (for monitoring purposes). Figure 15 will then appear displaying the details of the chosen topic. Below the topic details, you will find that the Subscriptions tab page is open by default. To create a new subscriber for the chosen topic, click on the Create subscription button in Figure 15.
.png)
Figure 15 : Clicking on the Create subscription button to create a new subscriber for the chosen topic
-
Figure 15 will then appear. Here, from the Topic ARN drop-down, select the ARN of the topic that you created earlier. Then, set the Protocol to SMS. Next, in the Endpoint text box, enter a mobile number to which SMS alerts are to be sent. Note that you should enter only a 'verified mobile number' that has been included in the Sandbox you created earlier. Finally, click on the Create subscription button (see Figure 16).
.png)
Figure 16 : Selecting the topic and protocol for new subscription
-
If the subscription is created successfully, then Figure 17 will appear displaying a message to that effect.
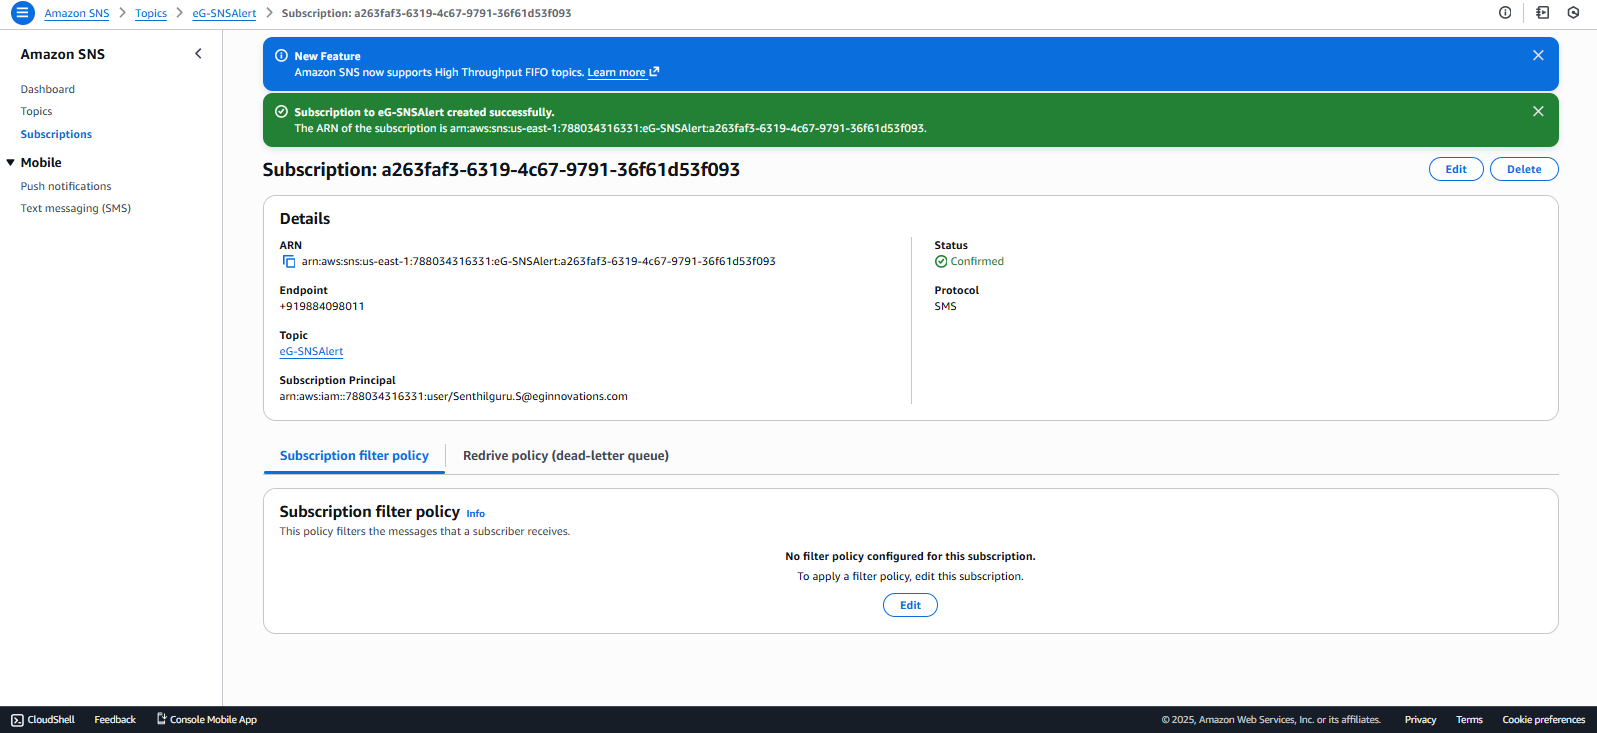
Figure 17 : A message confirming the successful creation of the subscription
-
Similarly, you will have to create a subscription for each of the verified mobile numbers included in the Sandbox.
Creating an IAM User
To achieve this, follow the steps below:
-
Use the Search box in the AWS console dashboard to search for the text string 'IAM' (see Figure 18). When IAM appears in the search results (as indicated by Figure 18), click on it.
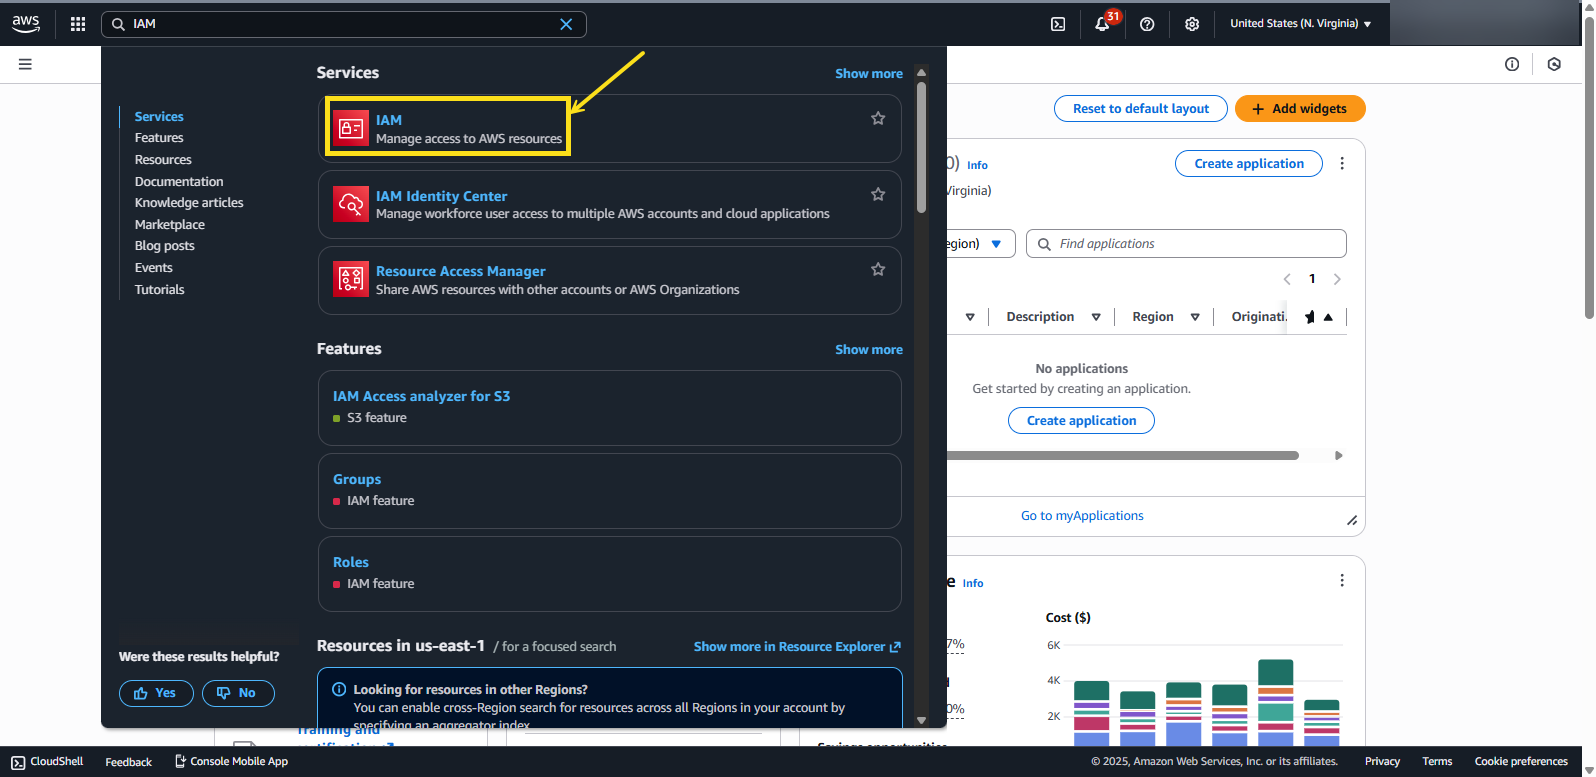
Figure 18 : Selecting the IAM option from the Search results
-
Figure 19 will then appear. Click on the Users option in the left panel of Figure 19. The right panel will then change to display the users who pre-exist. To create a new user, click the Create user button in the right panel of Figure 19.
.png)
Figure 19 : Clicking the Create user button in the Users page
-
Figure 20 will then appear. Provide the new User name here and click the Next button to proceed.
.png)
-
This will open Figure 21. Click the Next button in Figure 21 to move on to the subsequent step.
.png) q
q -
When Figure 22 appears, review the user details you provided and click the Create user button therein to complete the user creation process.
.png)
-
If the user is successfully created, then Figure 23 will then appear displaying a message to that effect.
.png)
Figure 23 : A message confirming the successful creation of the new user
-
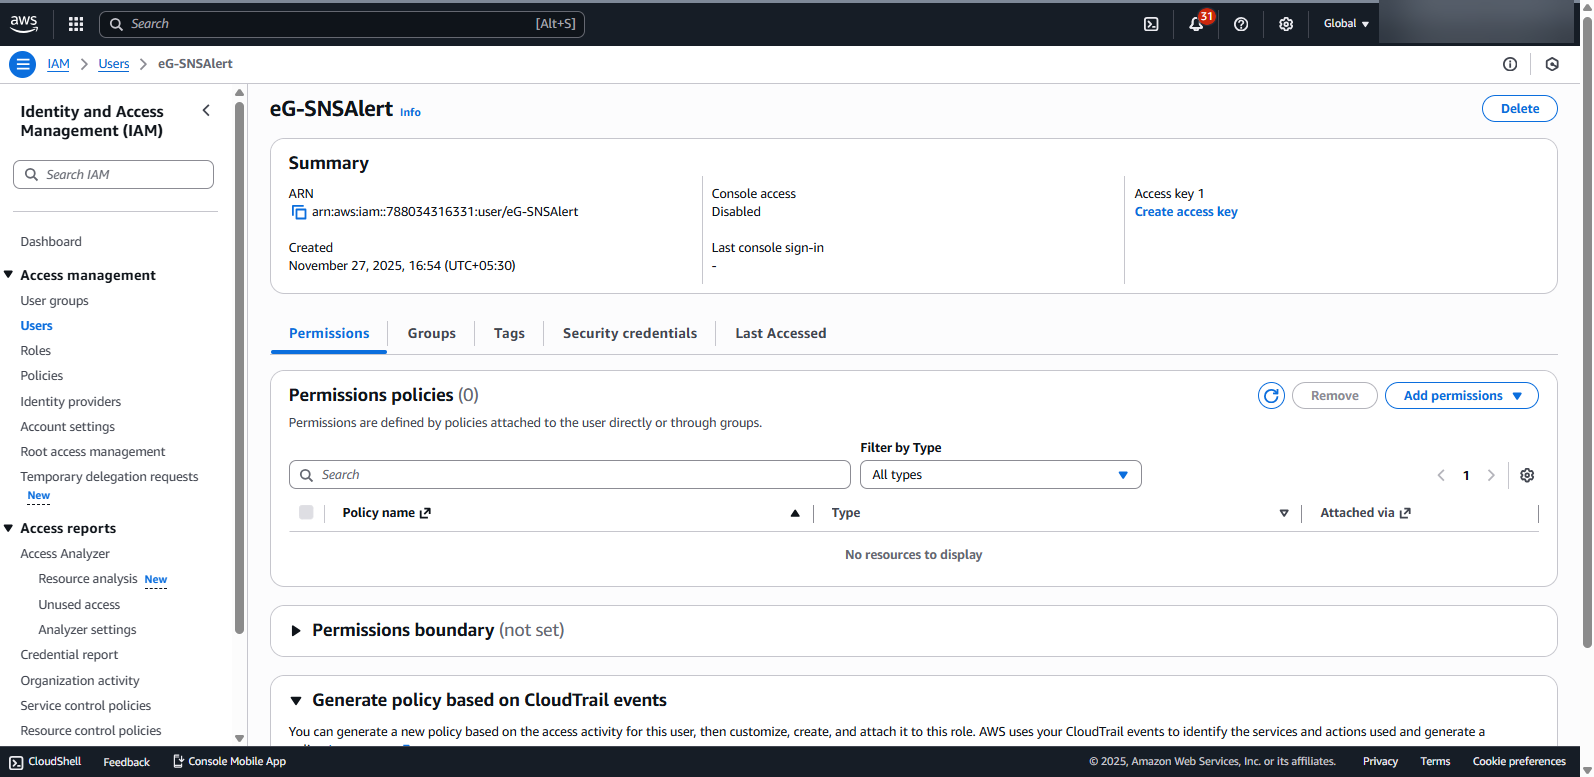
Click on the View user button in the message box of Figure 23. Figure 24 will then appear displaying a Summary section, showing the details of the new user. Also, you will find that the Permissions tab page is open by default under the Summary section.
-
Click on the 'arrow' icon adjacent to the Add permission button in the Permission policies section of the Permissions tab page. From the options that pop out, select the Create Inline policy option (see Figure 25).
.png)
-
This will open Figure 26. Click on the JSON option in Figure 26.
.png)
-
The JSON Policy editor will then appear (see Figure 27).
.png)
-
Copy the following JSON code block and paste it in the Policy editor of Figure 27.
Policy:
{
"Version": "2012-10-17",
"Statement": [
{
"Sid": "VisualEditor0",
"Effect": "Allow",
"Action": [
"sns:Publish"
],
"Resource": "*"
}
]
}
-
Replace the * (asterisk) in the entry highlighted in Bold in the code block above with the topic ARN that you made a note of at step 8 of the Creating a Topic in AWS SNS section. Given below is a sample JSON block with a topic ARN.
.png)
-
Then, click the Next button in Figure 28 to proceed. This will lead you to Figure 29. Review the policy details displayed in Figure 29 and if OK, click the Create policy to complete the policy creation process.
.png)
-
If the policy is successfully created, Figure 30 will appear displaying a message to that effect.
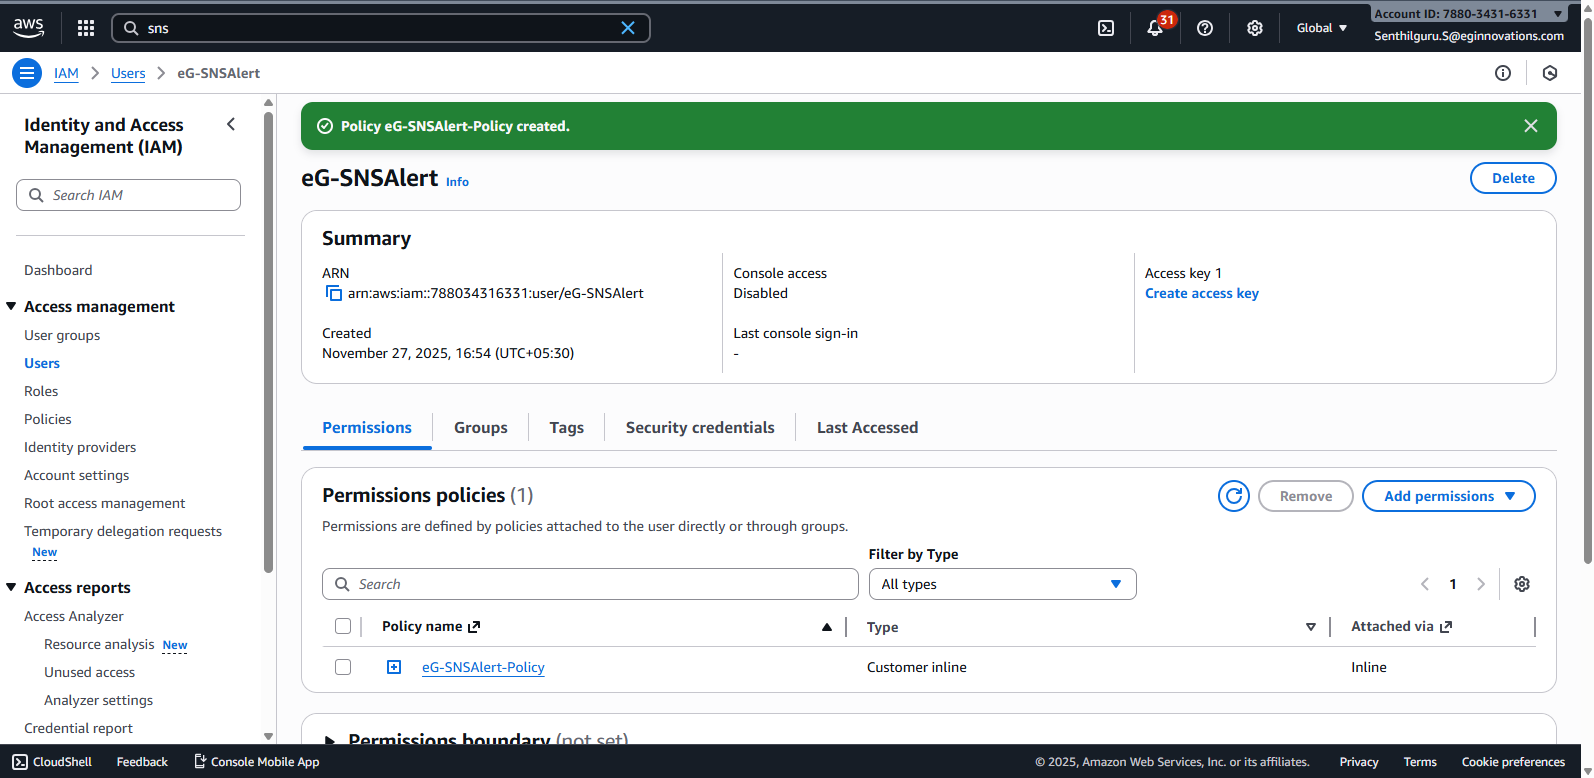
Figure 30 : A message box indicating the successful creation of the policy
Obtaining the Access Key and Secret Key
For this, follow the steps below:
-
Click on the Security credentials tab page in the right panel of Figure 30.
-
If you scroll down Figure 30, an Access keys section will become visible (see Figure 31). Click on the Create access key button in that section to create an access key for the user you created previously.
.png)
-
This will invoke Figure 32. Pick a Use case for your access key from the list displayed in Figure 32. For monitoring purposes, scroll down Figure 32 and pick the Other option (see Figure 33). Then, click the Next button in Figure 33 to move to the next step.
.png)
Figure 32 : Viewing the list of Use cases for the access key
.png)
Figure 33 : Picking the Other option from the list of Use cases
-
Figure 34 will then appear. Click on the Create access key button in Figure 34 to complete the access key creation process.
.png)
Figure 34 : Clicking the Create access key button in the Set description tag page
-
Figure 35 will then appear. The auto-generated Access key will be displayed therein. Make a note of the access key. The Secret access key on the other hand is encrypted and will not be displayed straight up. To view the secret access key, click on the Show link indicated by Figure 35. Once the secret access key becomes visible, copy it to a text editor or to the clipboard.
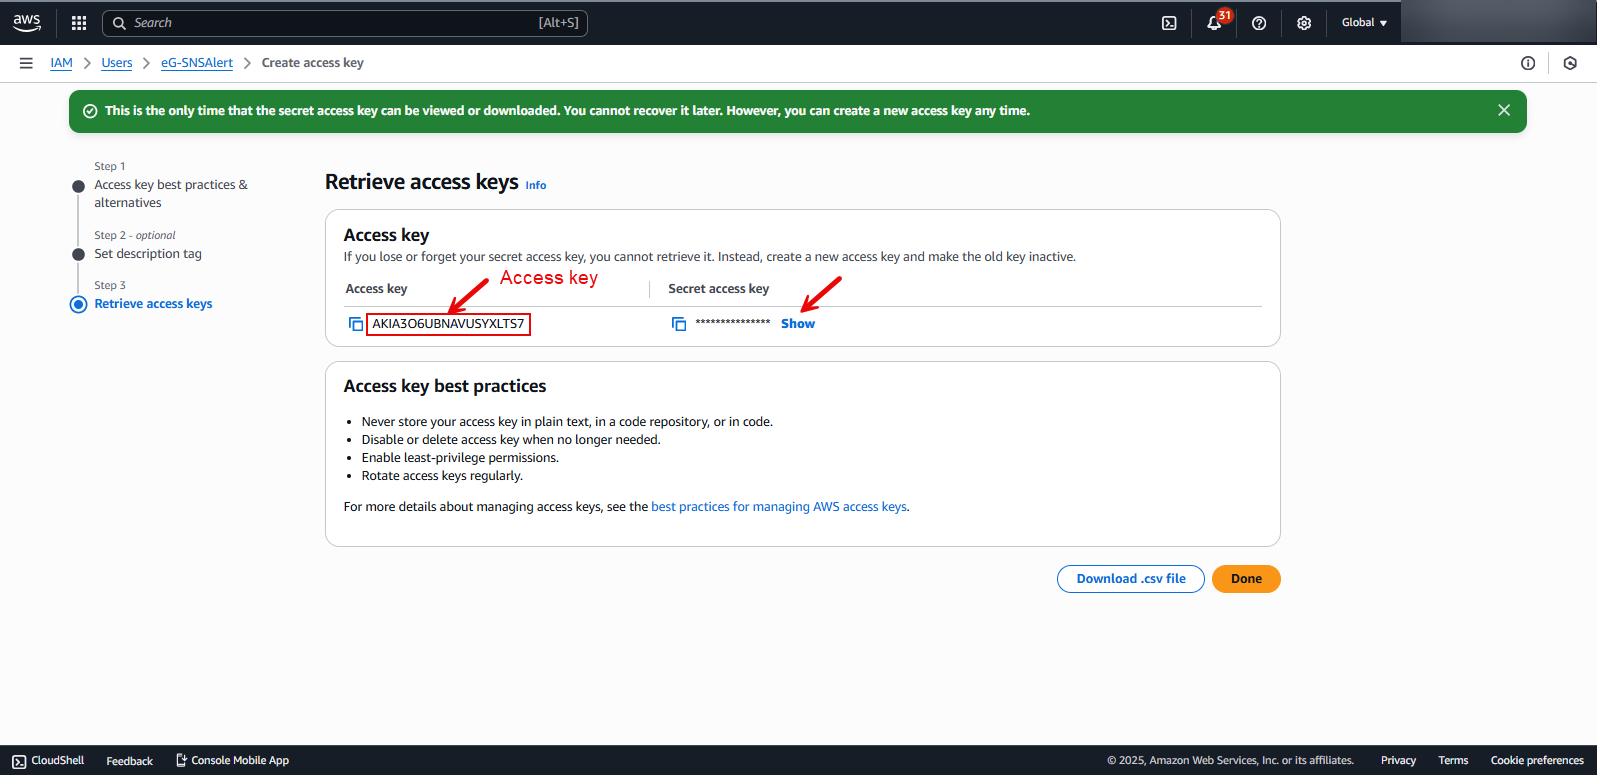
Figure 35 : Making a note of the Access key and the Secret access key that are displayed
Configuring the eG Manager to Send Problem Alerts to AWS SNS
For this, do the following:
-
Login to the administrative interface of the eG manager.
-
Follow the Alerts -> SMS Gateway Settings menu sequence in the Admin tile menu.
-
Figure 36 will then appear. From the SMS gateway drop-down in Figure 36, select the AWS SNS option.
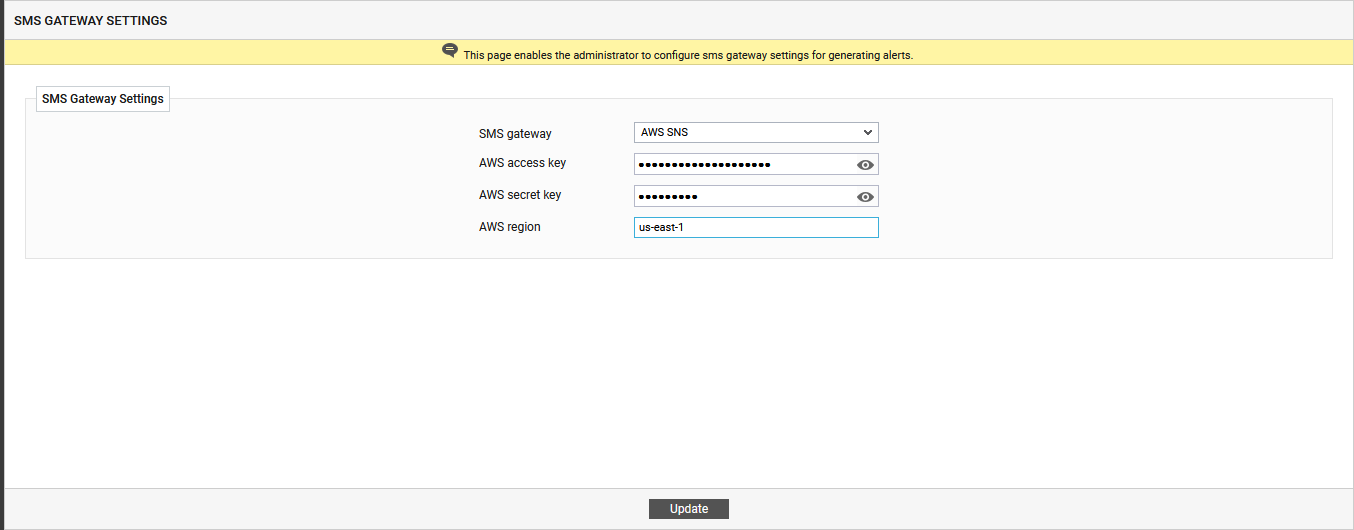
Figure 36 : Configuring the eG manager to integrate with AWS SNS
-
Then, you need to configure the eG manager to communicate with AWS SNS, so that the eG alerts can be sent to it. For that, you need to configure the eG manager with the AWS access key and the AWS secret key of the eG user you created previously for monitoring purposes (see Figure 36). To know how to obtain the access key and secret key of that user, refer to Obtaining the Access Key and Secret Key
-
By default, the AWS access key and AWS secret key will appear encrypted as you type. If you want to view them in clear text, use the 'eye' icon alongside.
-
Then, mention the name of the AWS region with which the eG manager will be integrating.
-
Finally, click the Update button.
Then, to complete the configuration, the mobile numbers that should receive the SMS alerts should be specified. For that, each user who wants to receive SMS alerts should edit their user profile in the eG Enterprise system, select one/more alarm priorities for email/SMS alerting (see Figure 37), and in the To text box under Mail ID/Mobile No, specify a comma-separated list of mobile numbers that should receive the SMS'. Every mobile number entered should be prefixed by its country code (see Figure 37). Finally, click the Submit button.
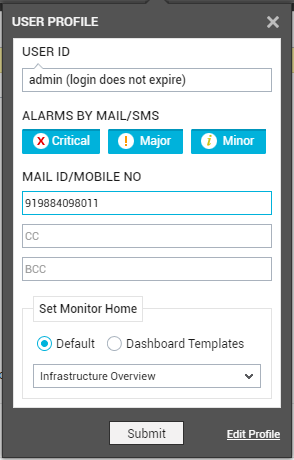
Figure 37 : User profile configured to receive SMS alerts
Note:
In Figure 37, specify only those mobile numbers that Subscribe to the Topic that you created in AWS SNS for monitoring purposes. To know how to create a topic, configure a Sandbox for the topic, and assign subscribers to the topic, refer to the Creating a Topic in AWS SNS, Creating a Sandbox, Add Subscribers to the Topic sections, respectively.