Deploying the ‘egurkha.war’ file on a WebLogic Portal server
To deploy the egurkha.war file on a WebLogic Portal server, do the following:
- Connect to the WebLogic portal server console using the URL: http://<WebLogicIP>:<WebLogicPort>.
-
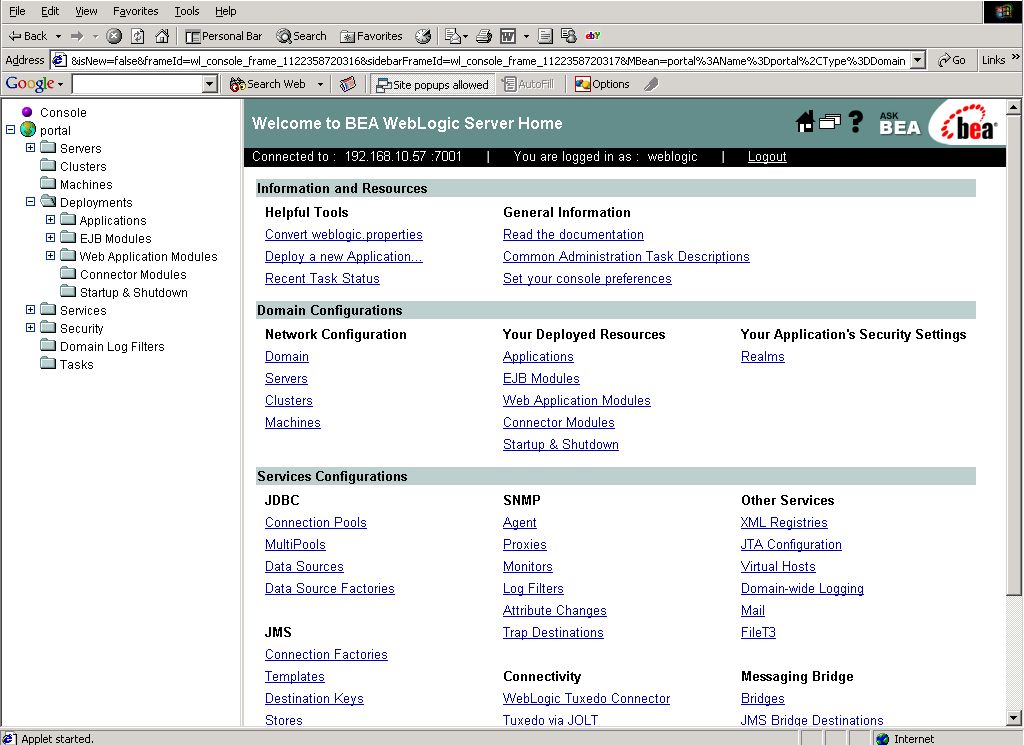
When prompted for a user name and password, provide the valid details and login to the console. Figure 1 then appears.
-
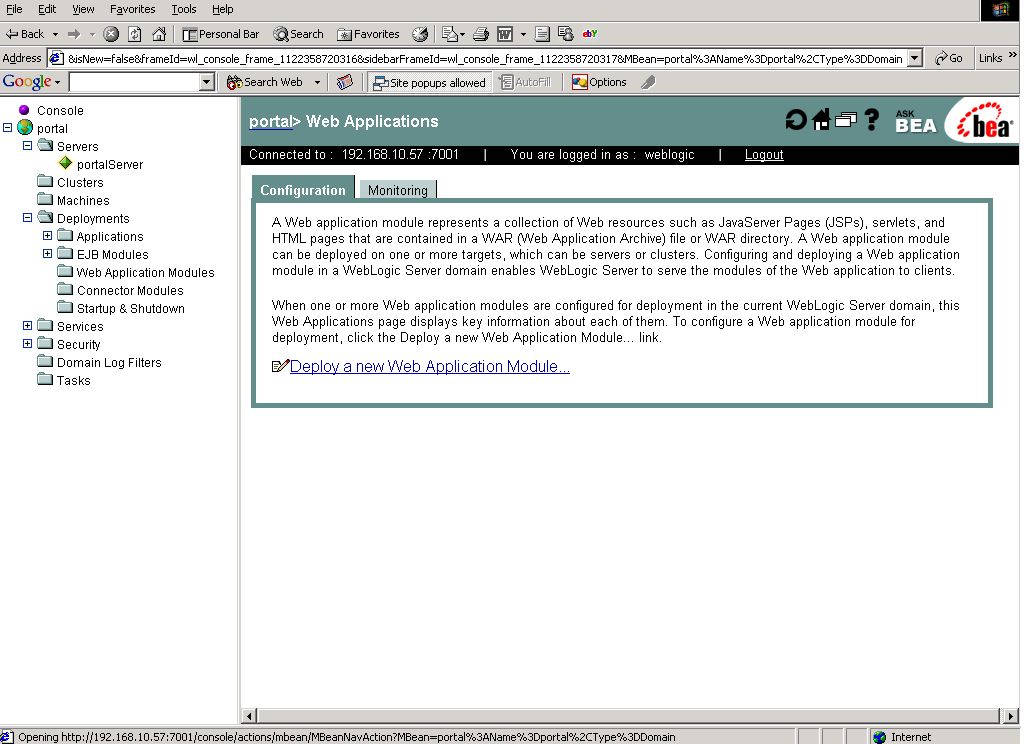
Expand the portal server node in the tree-structure in the left pane of Figure 1, and from within, click on the Deployments -> Web Application Modules node. Then, click on the Deploy a new Web Application Module hyperlink in the right pane of Figure 2.
-
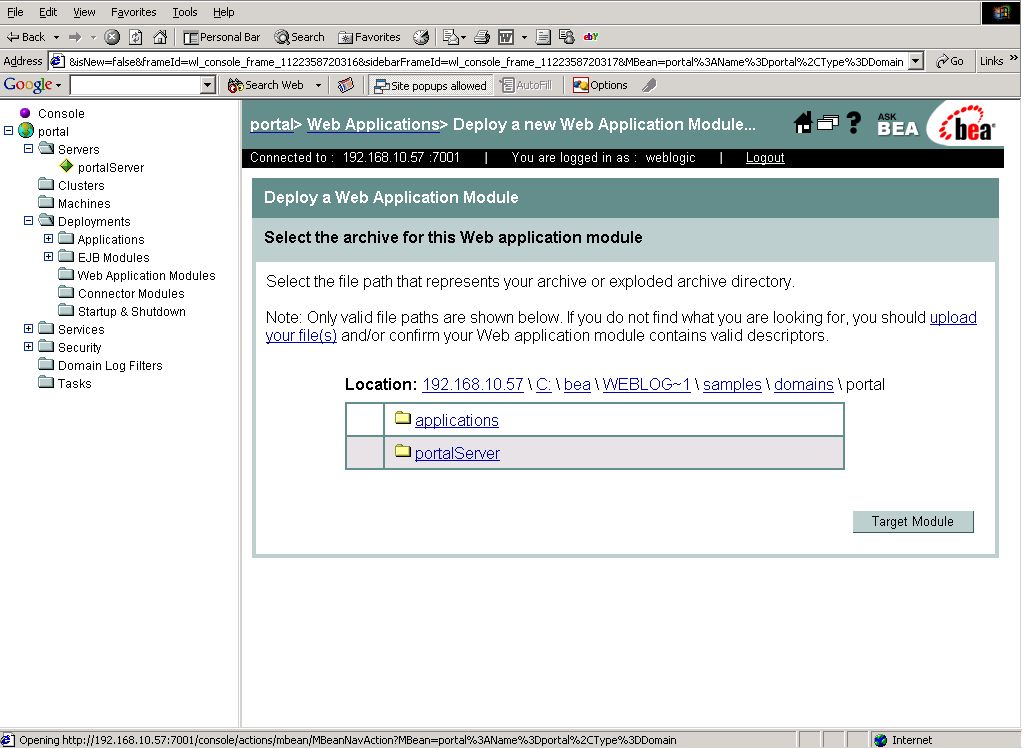
From the right pane of Figure 3 that appears, select the portal server on which egurkha application is to be deployed by clicking on it.
-
Figure 4 then appears. To upload the egurkha.war file, click on the upload your file(s) link therein.

-
Use the Browse button in Figure 5 to locate the egurkha.war file to be uploaded to the portal server. Once the path is specified, click on the Upload button in Figure 5 to upload the file.
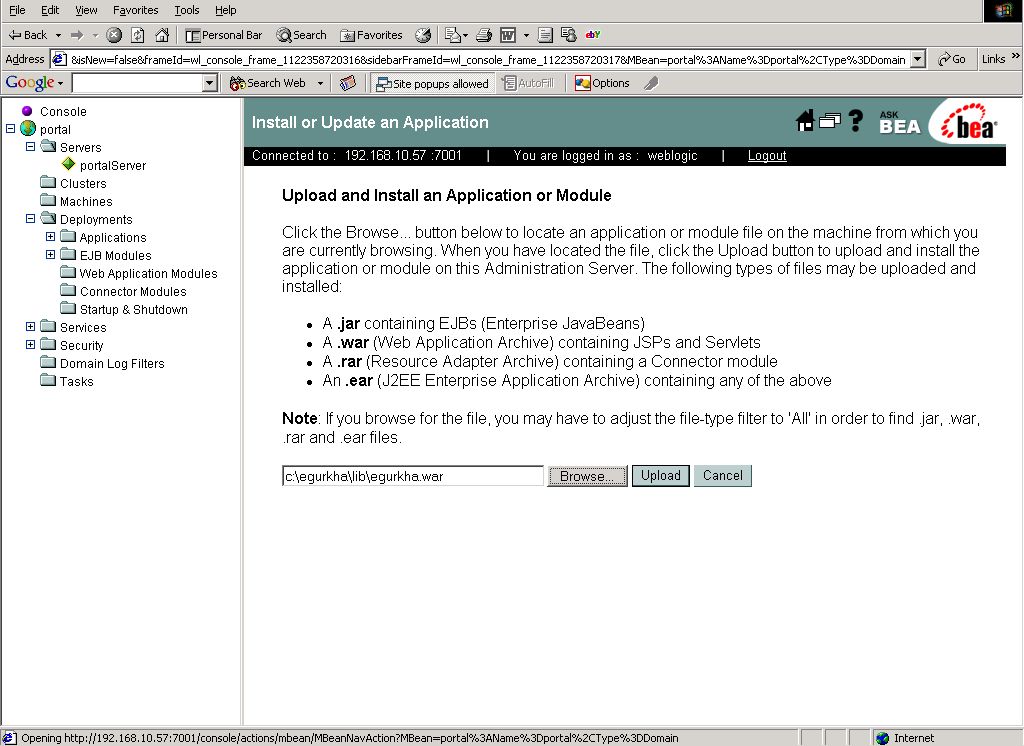
Figure 5 : Specifying the full path the war file to be uploaded
-
The uploaded file will then be assigned to the chosen portal server as shown by Figure 6. Click on the radio button against egurkha.war and click on the Target Module button in Figure 6.
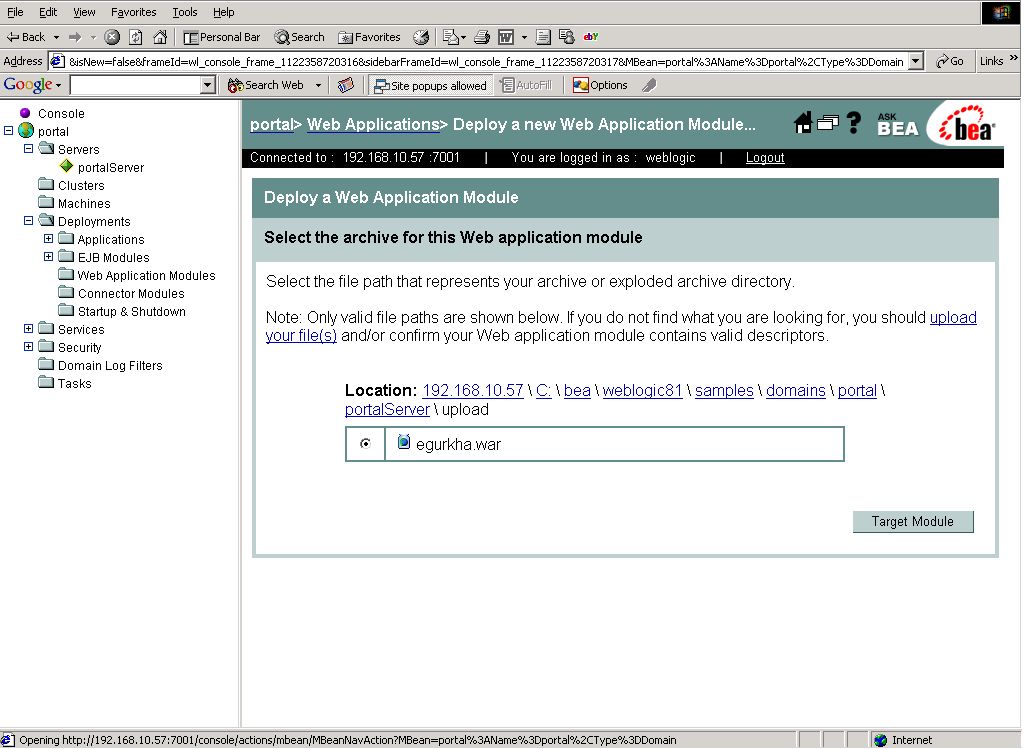
Figure 6 : Setting the ‘egurkha.war’ application as the target module
-
In Figure 7, the Name of the uploaded application (egurkha) will be displayed. Now, click on the Deploy button to deploy the displayed application on the chosen portal server.
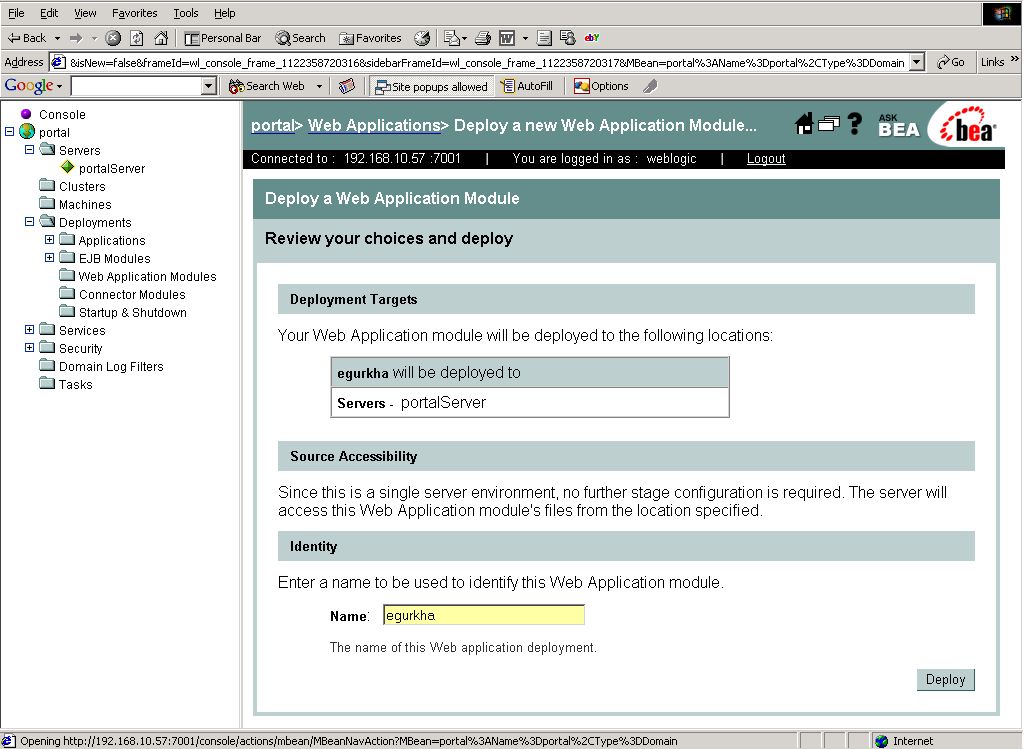
Figure 7 : Providing a name for the web application to be deployed
-
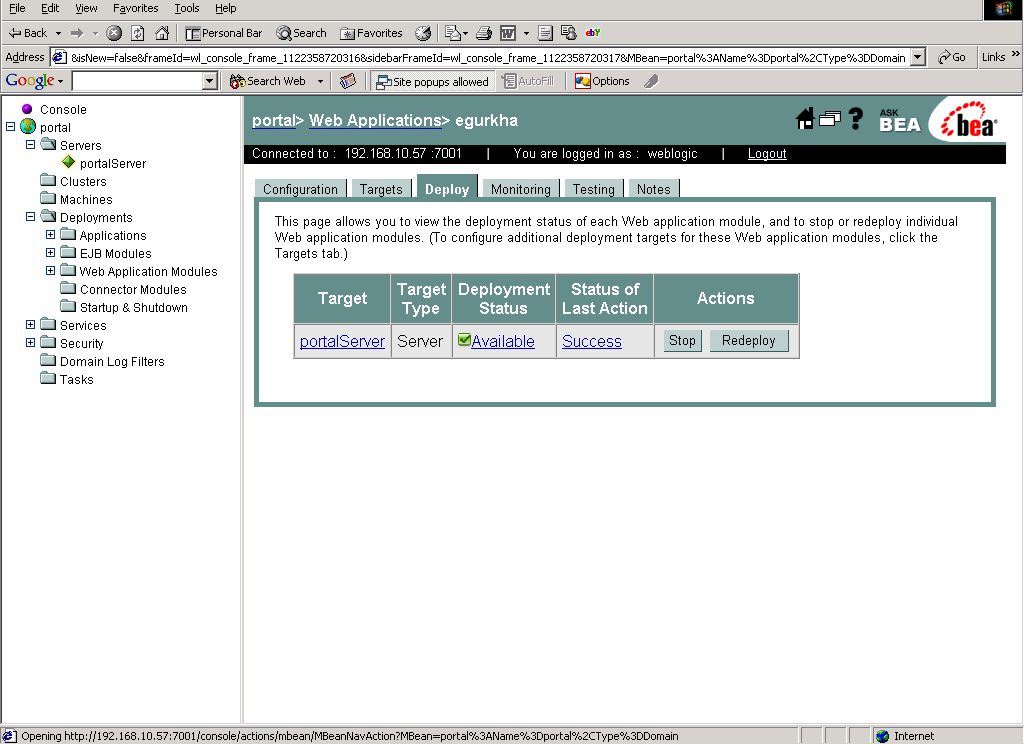
Upon successful deployment of the egurkha application on the portal server, Figure 8 will appear indicating the same.
-
For further confirmation of the successful deployment, expand the Web Application Modules node in the tree-structure in the left pane of Figure 9. A sub-node named egurkha will be available within.
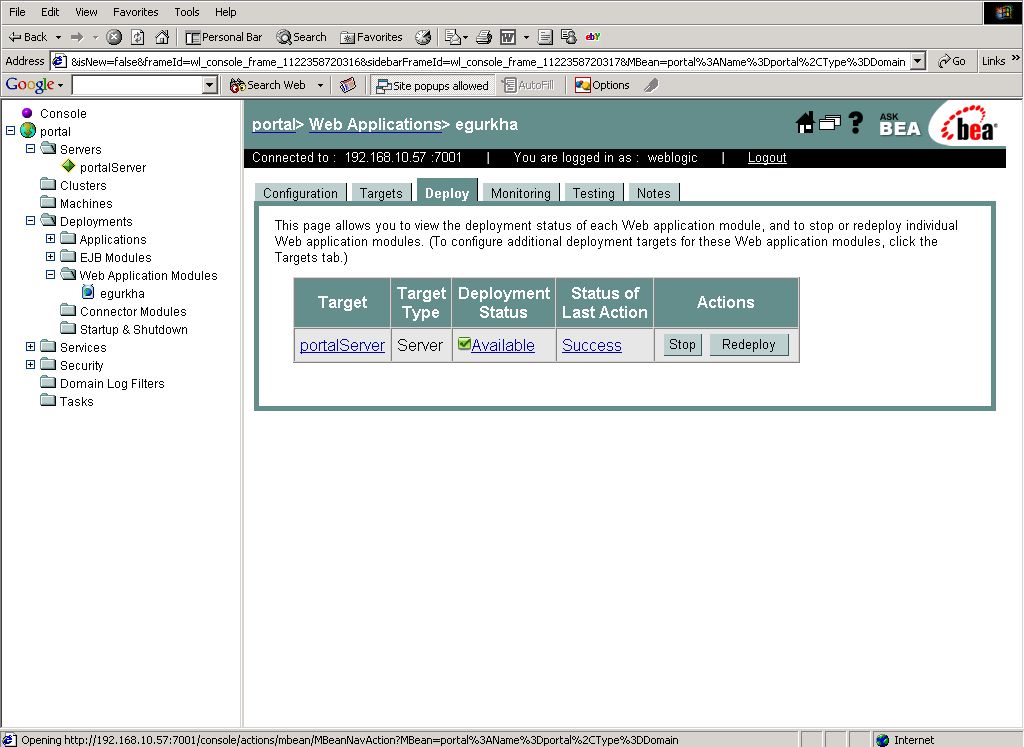
Figure 9 : The ‘egurkha’ sub-node appearing under the Web Application Modules node