REST API Client
To perform critical configuration tasks on the eG manager without logging into the eG manager, eG Enterprise offers both eG CLI and eG REST API capabilities. From any third-party REST Client, administrators can hit the URL of the eG manager using the HTTP POST method to connect to the manager and perform configuration tasks on it. However, to use the eG REST API capability, administrators had to install their desired REST Client in the target environment, painstakingly build the API commands with all the required parameters, import them into the REST Client and finally execute them. This process was time-consuming and sometimes, led to manual errors which were noticed only after executing the commands. To reduce the time and effort in building the API commands, avoid manual errors and dependencies to a third party REST client, eG Enterprise offers an inbuilt utility called REST API Client. Using this capability, with a few clicks after choosing the API, administrators can obtain the output of their desired REST API command.
To know how to use this inbuilt REST API Client, follow the steps given below:
- Login to the eG manager console as an admin user.
- Then, follow the menu sequence: Admin -> Miscellaneous -> REST API Client
-
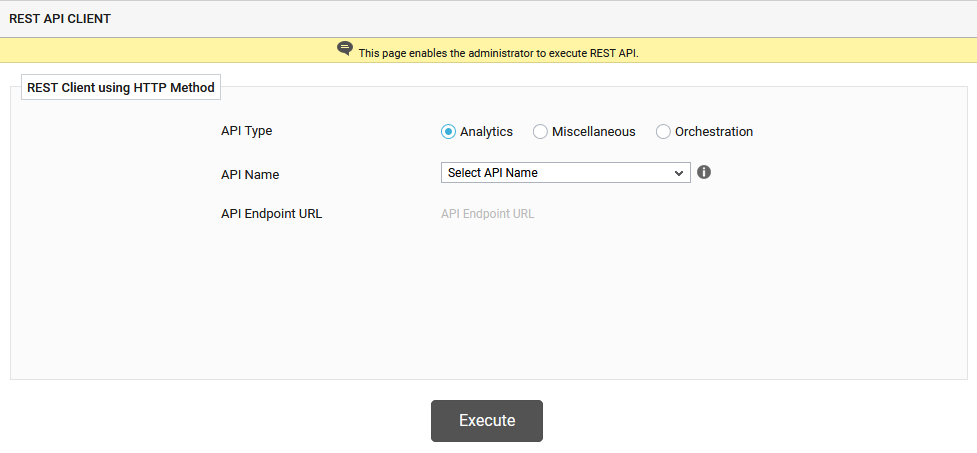
Figure 1 will then appear.
-
Using eG REST API, you can perform a wide range of administrative tasks (for e.g., adding the components to be monitored), retrieve analytical data (for e.g., history of alarms) and configuration data. Choose an API Type (see Figure 1) based on the task that you wish to perform. The APIs offered by eG Enterprise are grouped as follows:
-
Analytics - Select this API type to retrieve analytical data such as alarms, detailed diagnosis data of a measure, health of the components, etc.
-
Miscellaneous - Choose this API type to figure out additional information with respect to the infrastructure configured in the eG manager.
-
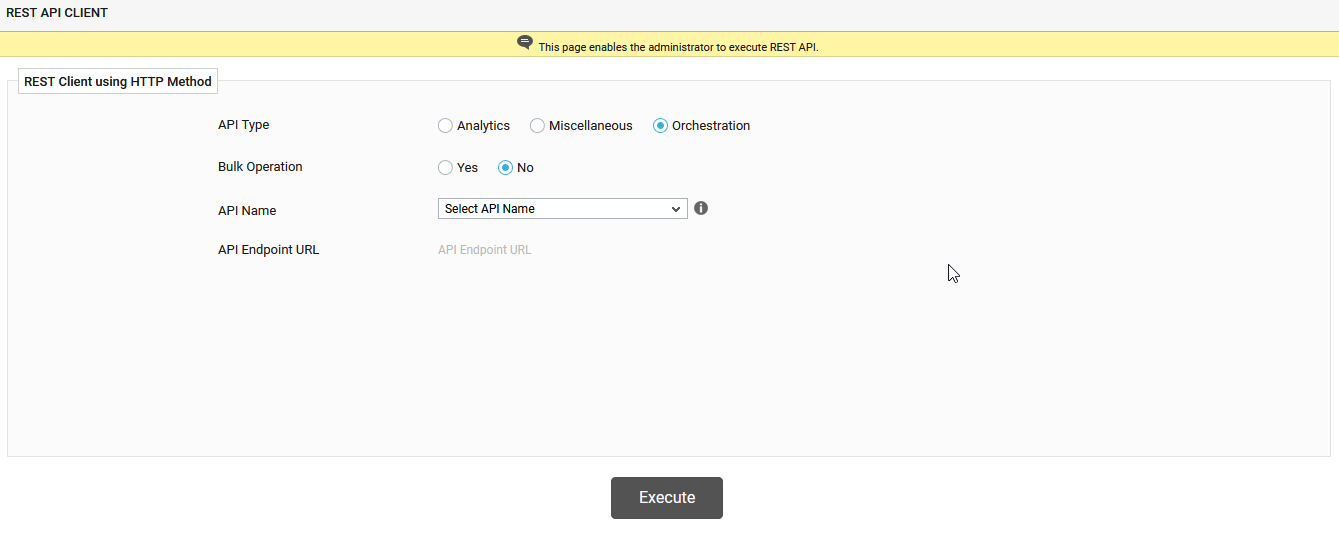
Orchestration - By choosing this API type, you can perform various administrative activities such as adding a single component or multiple components at a time, adding agents/users/zones, modifying users/components/maintenance policies, etc. If you wish to choose this type, then, an additional Bulk Operation flag will appear. By default, this flag is set to No indicating that you are not performing bulk administrative operations on the target eG manager. However, if you wish to perform bulk operations, then, set this flag to Yes (see Figure 2).
-
-
Then, select the API of your choice from the API Name drop-down list as shown in Figure 3.

-
Once you choose an API from the API Name list, the API Endpoint URL will be automatically populated. For example, if you have chosen getAlarmsHistory from the API list after selecting Analytics as the API Type, then, the API Endpoint URL will be populated in the following format:
http://<IP address of the manager:port>/api/eg/analytics/getAlarmsHistory
-
To execute the chosen API successfully, a few additional parameters are required by default. To this effect, the Body Params list will be automatically populated with all the parameters that are applicable for the chosen API.
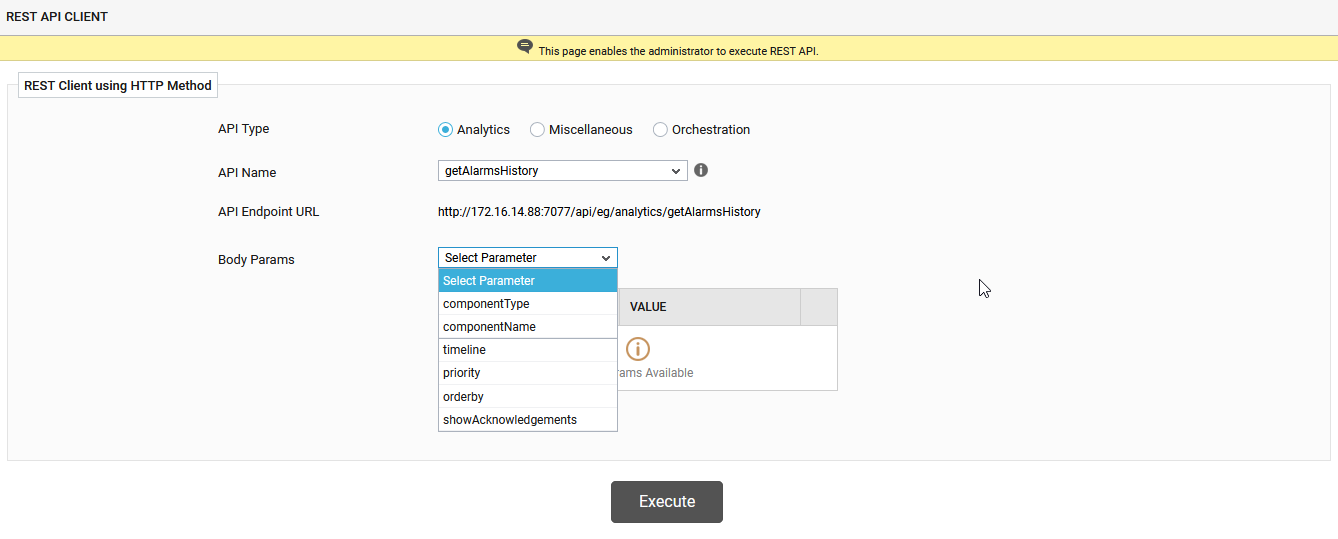
Figure 4 : Choosing the Body parameters
Select the parameter of your choice from the Body Params drop-down list. For example, if you choose hostIp from this list, then, you should specify the IP address of the component in the Param Value text box. If you have chosen Analytics as the API Type, then, another list box will appear with the values relevant to the Body Param that you have chosen. You need to choose the values from this list too. Clicking the
 icon adds the chosen parameter and the value to a table. The Body Param chosen will be populated in the NAME column of the table and the value that you specified explicitly or the value that you have chosen from the adjacent list box will be populated in the VALUE column. Repeat this procedure until you include all the parameters of your choice. To delete a NAME:VALUE pair, click the
  icon available in that row.
Figure 5 : The table populated with NAME:VALUE pair of body parameters
-
Upon choosing each parameter from the Body Param list, the Body (Raw JSON) text box will be auto-populated with the parameters in RAW JSON format (see Figure 6). You are even allowed to copy this RAW JSON block and use it for execution from a third-party REST API Client.

Figure 6 : The chosen parameters displayed in RAW JSON format
-
If you have set the Bulk Operation flag to Yes after choosing the Orchestration API Type, then, file option will be populated in the text box against the Body Params. Typically, you need to enter the details relevant to the operation that is to be performed in bulk in a CSV file. This file should then be uploaded to the eG manager, so that the details configured in the CSV file is uploaded in the eG Enterprise system at one shot. For example, if you are adding components in bulk, then specify the details of all the components you want to add in the CSV file. To help you build this CSV file quickly, eG Enterprise provides you with a ready-to-use template. Click on the Download Sample CSV link in Figure 7 to download this CSV sample/template to the local host.

Figure 7 : Choosing to download the sample CSV file
Next, proceed to edit the downloaded CSV sample/template. The template is pre-configured with columns to capture information relevant to the API operation that you have chosen. A single row in the CSV file will contain all the details required for performing the operation on the eG Enterprise system. To perform multiple operations, for example, to add multiple components, you need to add multiple rows of data in the CSV file.
Note:
You can add rows of relevant information to the CSV file, but you should not add new columns to it. Nor can you change the labels of the existing columns.
Once the CSV file is filled in and is ready to be uploaded, save the file. When saving, you can change the name and/or location of the file, if you so want.
Note:
Make sure that you do not change the file type (.csv) when saving the file.
Then, click the
 icon in Figure 7 to browse for the location of the CSV file. Once the location is specified (see Figure 8), click the Open button to upload the file to the eG manager.
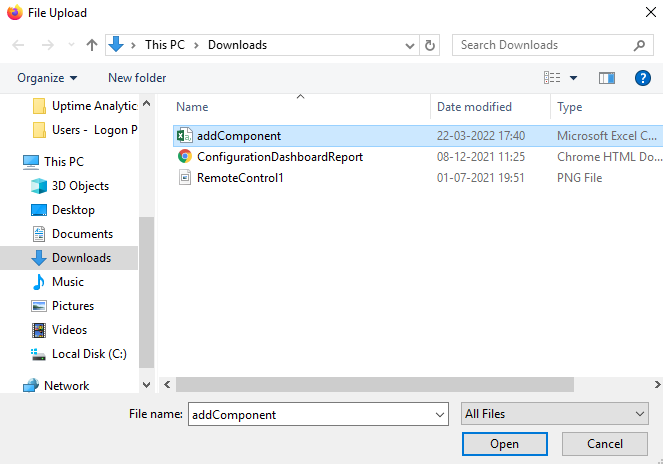
-
Once you have configured all the parameters/uploaded the CSV file for performing bulk operation, click the Execute button (see Figure 7). The response for the chosen API will then be displayed (see Figure 9) in a separate window. Using the
 icon, you can copy the response for further analysis.
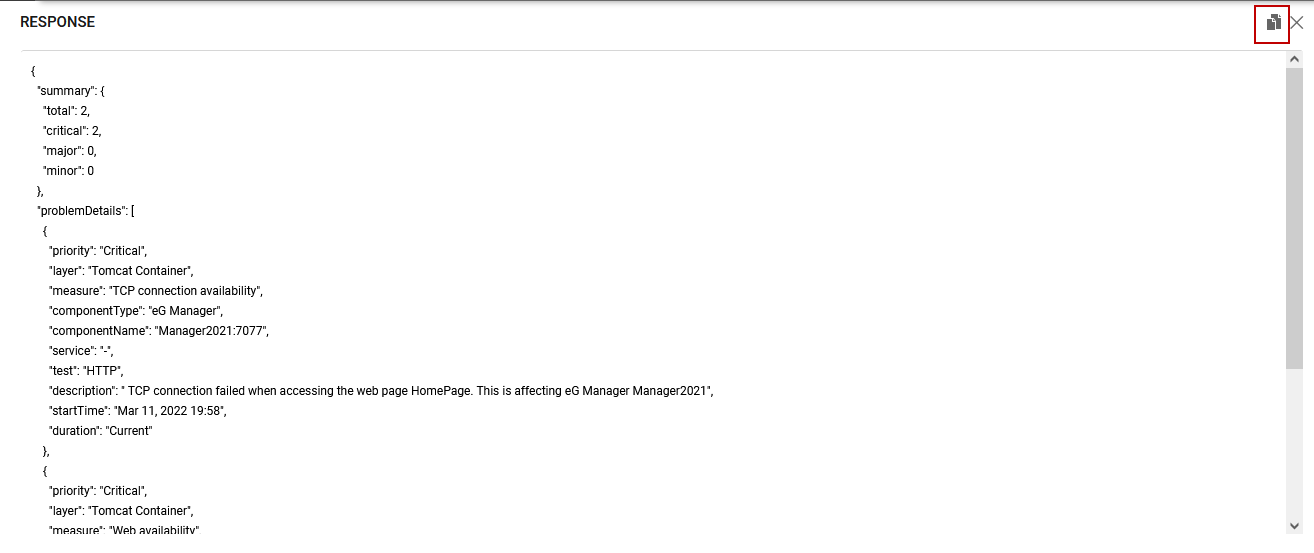
-
If the data that you wish to retrieve is not available in the eG manager, then a relevant response message will be displayed.(see Figure 10).

Figure 10 : The response message showing unavailability of data
-
To execute a few API commands of Analytics and Miscellaneous API Type, you are not required to configure the body parameters. In this case, the Body Params list box will not appear. For instance, if you wish to retrieve the number of current alarms raised in the target environment, you can simply choose the corresponding API and execute the API (see Figure 11).
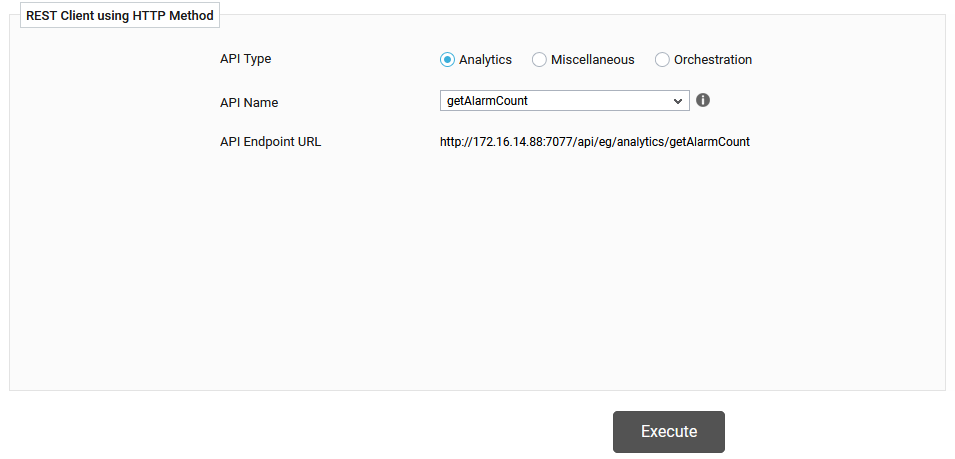
Figure 11 : Executing the API to retrieve the count of current alarms